This tutorial will show you an easy way to maintain an online version of your archived newsletter, while making it easy to create each email newsletter. The difference is creating an online version of your newsletter that you'll use to create each email newsletter; Instead of creating an email newsletter, then having to create the online version. In order to do this you'll need email newsletter software (such as GroupMail or Constant Contact), a WordPress install and the Single Post Template plugin.
Step One Download Single Post Template Plugin
In order to use WordPress as a way to produce and archive email newsletters you'll need a WordPress plugin called Single Post Template. This plugin allows theme authors to include single post templates, much like a theme author can use page template files. Notice we'll be making a post template, not a page template, because this is how we'll automatically display the online version of the archived newsletters for the posts that are in the category "Newsletter", instead of manually putting in each hyperlink on a page.
Step Two Creating the Category
Let's begin with creating the category "Newsletter".
In your WordPress admin settings under posts (version 3.3.1) click categories. The name will be "Newsletter", which is how it shows on the site and the slug will be "newsletter", which is the URL-friendly version of the name. Parent will be "none" unless you plan to have multiple newsletters. For example, if you have multiple email newsletters like technology, science and sports or daily, weekly and monthly then you'll want to organize differently. By organize I mean make a category "Newsletter" and under that have your children categories Technology, Science and Sports or Daily, Weekly and Monthly.
Step Three Building the Post Template
Download the newsletter post template provided with this tutorial and open it in your favorite editor.
Inside the code you'll see some PHP code, this is where the magic happens. Each PHP code serves as a different purpose to provide you with options to create a successful newsletter.
First PHP Code Snippet
<?php the_title(); ?>
This code displays the title of the post. So to make use of it you'll want to title your post to the according month or day. Meaning if you send out a newsletter everyday then you'll want to name it something like "April 7th, 2012 Newsletter", or if you send out a monthly newsletter then you'll want to name it something like "April Newsletter".
Second PHP Code Snippet
<?php the_post(); ?><?php the_content(); ?>
This code displays whatever content you type into the WYSIWYG editor. This would be the main content section to your newsletter. Instead of using basic text or styles from the kitchen sink I suggest to use HTML to spice up the design. Make "read more" buttons, distinguish a story's end and a story's beginning with a horizontal line. Use CSS to make the headline more noticeable, but remember when you use CSS you cannot link to an external CSS stylesheet file or have a style tag in your header, because it will not work for all email clients, so be sure to use inline styles.
Third PHP Code Snippet
<?php $my_query = new WP_Query('category_name=in_depth_local_news&showposts=3'); ?>
<?php while ($my_query->have_posts()) : $my_query->the_post(); ?>
	<a style="color:#ee2125; font-family: Cambria, serif;font-size: 15px;font-style: normal;font-weight: normal;text-transform: normal;letter-spacing: normal;" target="_blank" href="<?php the_permalink() ?>" title="<?php the_title(); ?>"><?php the_title(); ?></a>
	<p style="line-height:15px; padding: 0pt; font-family: 'Lucida Grande',Arial,sans-serif; font-size: 11px; font-weight: normal; color: rgb(49, 49, 49);"><?php truncate_post(15); ?></p>
<?php endwhile; ?>
<?php wp_reset_query(); ?>
-
showposts=3displays the most recent 3 posts. -
category_name=in_depth_local_newsdetermines what category to use to show the posts. -
<?php the_title(); ?>displays the headline of the post. -
<?php truncate_post(15); ?>displays the 15 character description.
Determine what category posts you'd like to display and simply change the category_name=. If you like to only show 1 post then change the PHP code to showposts=1.
If you're looking to make another section displaying posts from another category then copy the above code and paste it where you'd like it. <?php wp_reset_query(); ?> is important to have, because the code resets the query so it is possible to have multiple sections of category posts.
Fourth PHP Code Snippet
<?php echo get_post_meta($post->ID, 'contesttext', true); ?>
This code will display the text (value) that is in the contesttext (name) custom fields section. This gives you opportunity to put anything you'd like in the sidebar, like contests, ads, images, etc... In order for the above code to work the name of the custom field must be contesttext, so if you'd like to use it for ads, then change the id to ID, 'ads'.
Whatever you put in the value box is what will show up on the newsletter. What's nice is you can use HMTL.

Fifth PHP Code Snippet
<?php echo get_post_meta($post->ID, 'business-sponsors', true); ?>
This code will display the text (value) that is in the business-sponsors (name) custom fields section. Exactly the same as the above code, but uses a different id and shows up in the third column instead of the second column.
For those users that are wanting to unsubscribe there are two ways to handle this. What's coded in the above template, which will open up the users email client sending an email to [email protected] with the title "Unsubscribe Me". The other way is to link them to a page with an unsubscribe me form that they can fill out. If you're looking for a solution of a one click unsubscribe button this is available with newsletter software such as Constant Contact.
Final PHP Code Snippet
<?php the_permalink() ?>
This code is used to provide the URL to the online version of the newsletter. It is important to give your users an alternative incase the newsletter does not work properly in their email client.
Step Four Uploading the Newsletter Post Template
Now that you understand how the template works and have changed the code to fit your needs, upload the newsletter template to your theme folder using FTP software like Filezilla. It's named single-newsletter.php for a purpose and that is for organizational reasons. Since your FTP sorts your files in alphabetical order it will help you not confuse a post template with a page template.
Step Five Making a Post for the Newsletter
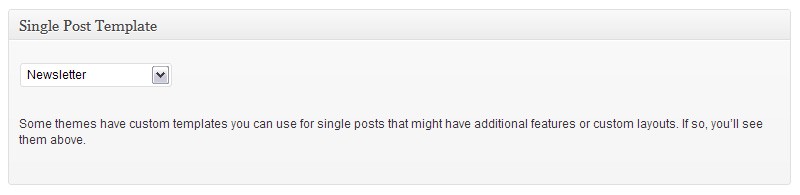
Make a new post in WordPress and remember to do everything that was in the prior instructions. Such as naming the headline to the according month or day, choosing the correct category, adding your newsletter content in the WYSIWYG editor, and adding your custom fields name and value. Most importantly select the newsletter template in the single post template drop down menu so it will show the newsletter template instead of the normal post template.
Step Six Sending Out the Newsletter
Now that you have finished your post and have published it online we can began the next step.
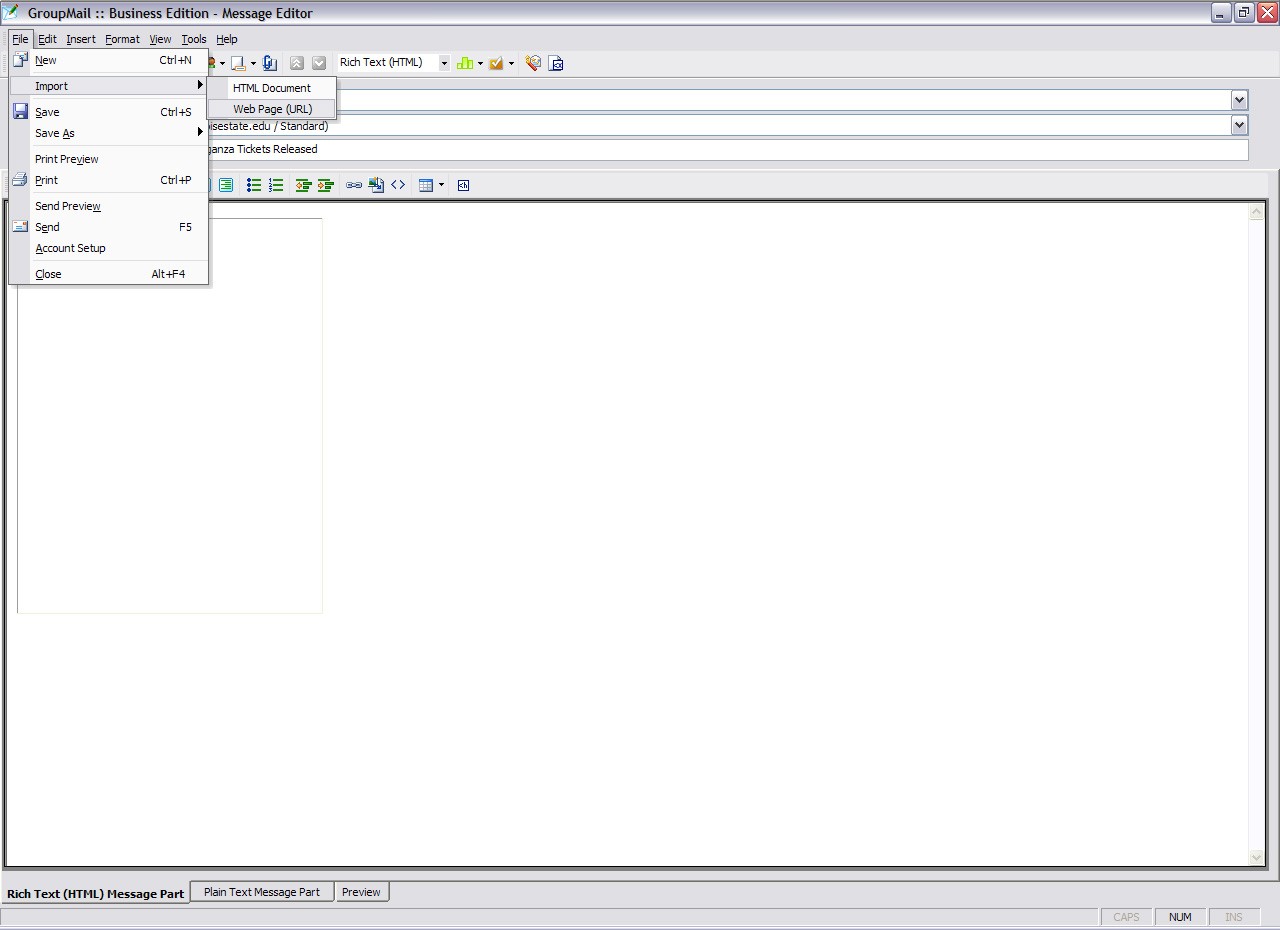
Open your email newsletter software; I'm using GroupMail, but you can use almost any newsletter software to complete this tutorial; all the software needs to provide is the import web URL option. Create a new message (newsletter) and instead of entering any code and/or content look for the option to important a web URL. The idea is to make use of the work you have already done, so when you import the URL to your online newsletter that you made in WordPress it will cut down the work load. Know that it may not import everything correctly, so you may need to make some tweaks. When it imports it will display the posts, customs field, permalink to your online version and everything else. Now your newsletter will be archived online!

Comments