In this tutorial, we'll explore the concept of layouts in OpenCart. We'll start by exploring the core layouts available in OpenCart, and as we move on we'll take a look at how you can create new layouts. Further, we'll see the association of layouts with products, categories and modules.
I assume that you're using the latest version of OpenCart 2.0. Of course, layouts are also available in previous versions of OpenCart, but we'll stick with the latest version as the interface is not exactly the same as that of the OpenCart 1.x versions.
Conceptual Understanding of OpenCart Layouts
"Layouts" in OpenCart are the concept of organizing and providing templates for different kinds of pages in the front-end. What does it mean when you say a different "kind" of page? If you take a look at the different pages in OpenCart, you'll notice that the layout "structure" is not the same in every page. For example, the layout of the "product listing" page is not the same as that of the "product detail" page.
Further, the structure is varied in the different pages like "Account Pages", "Contact Page", "Checkout Page", etc. So this is where layout comes into the picture. You can say that layouts are the decorator templates which prepare the complete page by filling up the slots and modules available to that particular layout.
On the other hand, layouts are also useful in OpenCart to assign different modules to the page. For example, if you would like to display a "Banner" module on the product detail page, you can do that from the back-end as the "product" detail layout is already available in the core. OpenCart also allows you to create new layouts from the back-end so that you can override the default layouts assigned to the different pages of the front-end.
Explore the Core Layouts
Let's have a look at the built-in layouts available in OpenCart. Head over to the back-end of OpenCart. In the navigation, go to System > Design > Layouts, which will list out the core layouts.
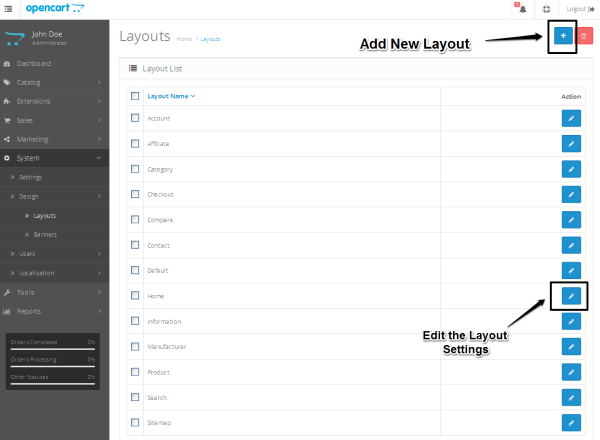
As you can see there's a quite a list of already existing layouts. Click on the Edit icon of the Home layout, as shown in the above screenshot, to configure the layout related settings.
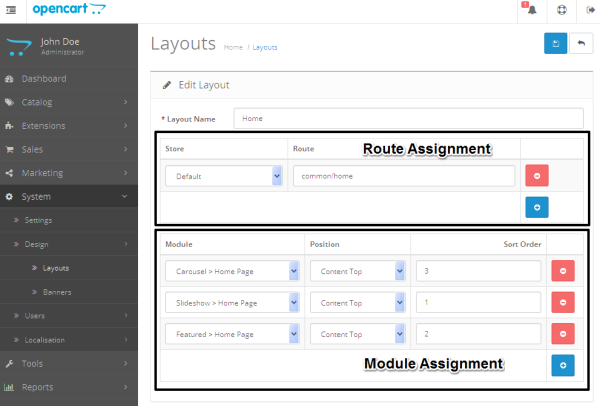
Let's understand what exactly each section of the configuration stands for.
Layout Name
It's just the name of the layout. It should be set to something sensible as it'll help us later on during the module assignment.
Route Assignment
The important thing here is the value of the "Route" column, which suggests to OpenCart that whenever there's a URL containing "common/home" in the front-end page, it should activate this layout-related setting. It means that it'll activate all the modules assigned to this layout during the home page request in the front-end.
Module Assignment
In this section, you can see that the modules are already configured to be displayed on the home page. There are three modules assigned to the "Content Top" position, although you can add more modules to display them in different positions on the home page. For example, you can add a "Banner" module in the "Content Bottom" position.
In the same way, you could configure the settings for the other layouts as well. OpenCart provides a really handy interface to assign modules to different positions of the layout.
In the next couple of sections, we'll see how you can create a new layout and use that layout to override the core layouts of OpenCart.
Add a New Layout From the Back-End
Head over to the System > Design > Layouts page. Click on the + sign to add the new layout. Fill in the required information as shown in the following screenshot and save it.
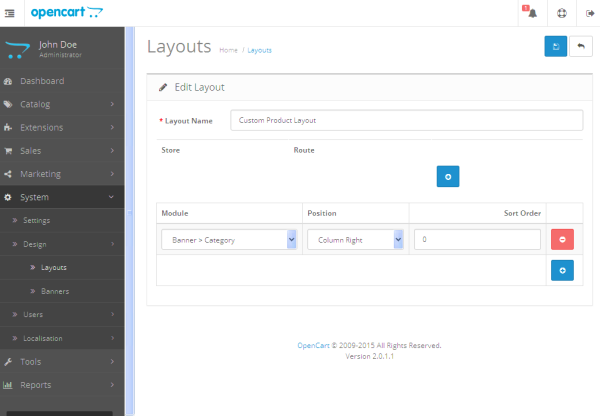
We've entered "Custom Product Layout" as the name of the layout. We've also assigned the "Banner > Category" module to the "Column Right" position. It means that whenever our layout is activated for any request in the front-end, it'll display the "Banner" module on the right sidebar.
There are two ways to activate the layout for any front-end request. We've already discussed the first one, the "Route" assignment in the layout configuration settings. The other is the "override" option available for certain pages of the front-end. We'll proceed with the second option for the course of this tutorial.
Associate Layouts With Products and Categories
Now that we've created the custom layout, let's go ahead and check how you could use the layout overriding feature in OpenCart. I'll use the example of default products available in OpenCart to make things easier.
Go to Catalog > Products, which will list all the products available in the store. Let's edit the product "iMac" under the "Desktops > Mac" category.
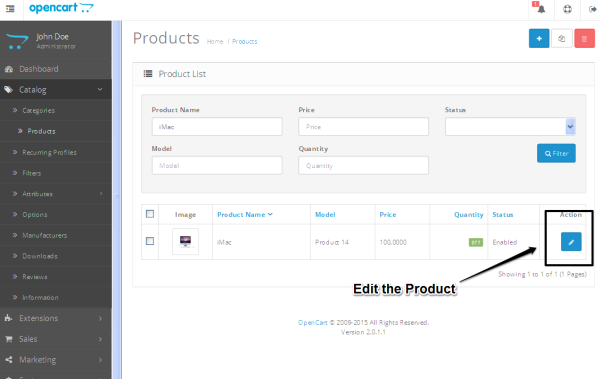
In the product editing interface, go to the Design tab, where you should see the Layout Override option for the default store. Select CustomLayout in the drop-down box and save the product.
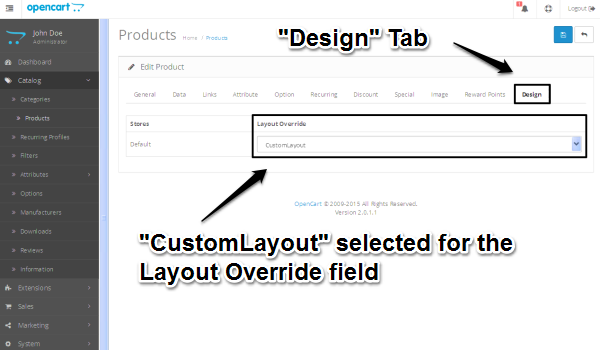
You've just overridden the default product layout of the "iMac" product with our "CustomLayout" layout! It means that whenever someone visits the "iMac" product detail page in the front-end, "CustomLayout" will be activated for that page. And as we discussed in the previous section, it'll display the "Banner" module in the "Column Right" position. Let's test it in the front-end!
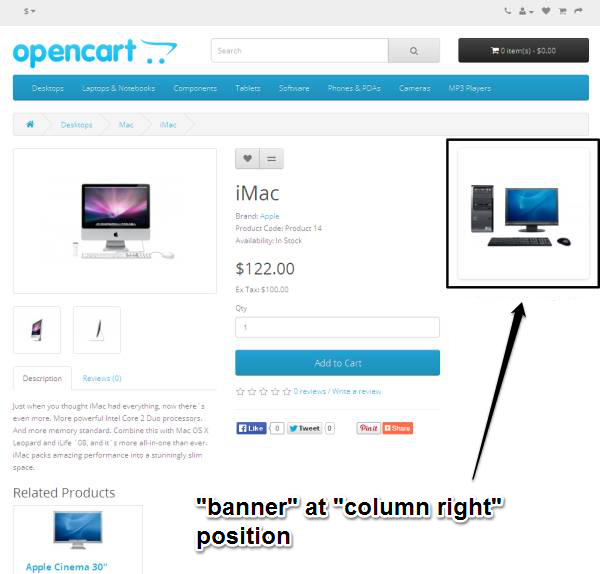
In the same way, you can override layouts for categories as well!
Conclusion
So I hope you should have a basic understanding of how layouts in OpenCart work. Layouts are really useful to override the default layouts and assign modules to different positions in OpenCart. Share your thoughts in the form of comments and queries using the feed below!


Comments