The subscription-based model is a useful and popular model which allows you to set up recurring payments in your e-commerce store. In this tutorial, we'll look into OpenCart's "Recurring Profiles" feature. It allows you to set up subscription-based products in which a customer places an order only once and is charged regularly based on the subscription frequency. We'll start with what exactly a recurring profile is, and as we move on we'll see how to set it up from the back-end.
For this tutorial, I assume that you're using the latest major version which is OpenCart 2.0.x. So, let's dive in straight away to understand the concept of a recurring profile.
What Is a Recurring Profile?
Recurring profiles allow you to set up recurring payments for your customers. Profiles are useful if you plan to sell products by subscription, if you are promoting a discount or member's club, or if you are simply breaking up payments into smaller portions. This feature gives the store owner more control over how customers are charged for products or services.
So as explained above, it's a really useful feature if you're planning to set up a service or product which requires payment at regular intervals. For example, you want to sell a paid newsletter service in which a customer could opt in to subscribe monthly, quarterly or yearly. To do this, you can set up different recurring profiles for each frequency from the back-end of OpenCart. After setting up the profiles, you can assign it to the products which you would like to make subscription-based.
On the other hand, it's also useful if you would like to provide a choice of certain installments instead of making a full payment at once. In fact, providing flexibility to the customer in terms of payment is an important marketing tactic to increase sales. So let's move on to the next section and see how to set up what we've discussed so far!
Set Up a Recurring Profile From the Back-End
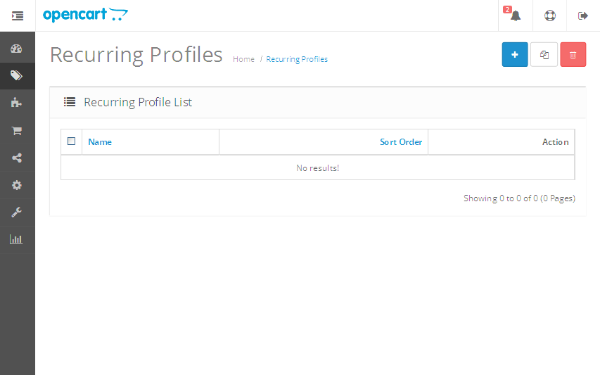
Head over to the back-end of OpenCart and navigate to Catalog > Recurring Profiles. It'll display the list of profiles you've set up so far, and will be empty if nothing is set up yet as shown in the following screenshot.

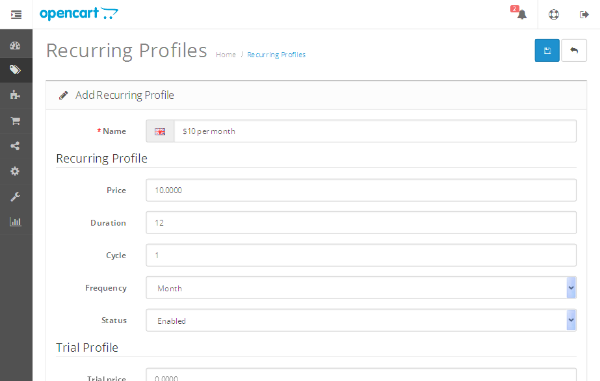
Now, let's go ahead and create a new recurring profile by clicking on the + sign at the top right, and you'll be presented with the recurring profile form as shown in the following screenshot.

To start with, in the Name field you would like to enter a useful title like $10 per month as it'll be listed in the drop-down box of payment profiles on the product detail page in front-end. In the case of multiple recurring profiles, the user should be able to easily choose the option most suited. Further, there are main two sections, Recurring Profile and Trial Profile. We'll go through the first section, as the latter has similar fields.
The Price field should be filled with the amount you would like to charge. Next, the Duration field indicates the number of times you would like to charge the customer. The Cycle field is used in combination with the Frequency field. Finally, the Status field allows you to enable/disable the profile.
Let's try to understand this through an example. In above screenshot, I've entered 12 in the Duration field, 1 in the Cycle field, and selected Month in the Frequency field. It means that the customer will be charged every month (Cycle and Frequency) for twelve times (Duration). If you change the Cycle field to 2, the customer will be charged every two months. If you want to charge the customer an unlimited number of times, set the Duration field to 0.
The next section, Trial Profile, has a similar set of fields as that of the Recurring Profile. It's useful if you would like to provide a free trial of the product or service for a certain duration. I've entered 1 in the Duration field, 1 in the Cycle field, and selected Month in the Frequency field. It means that customer won't be charged for the first month as the Trial Price is set to 0.
Fill in the form as you want and hit the Save button to apply the changes. Now, you've set up the profile, but it needs to be assigned to the product to make it count. That's exactly what we'll explore in our next section!
Assign a Recurring Profile to Products
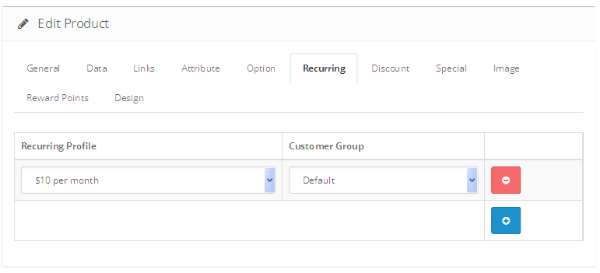
Navigate to Catalog > Products and edit the product to which you would like to attach the recurring profile. In the Recurring tab, click on the + sign to add a new recurring profile to the product as shown in the following screenshot.

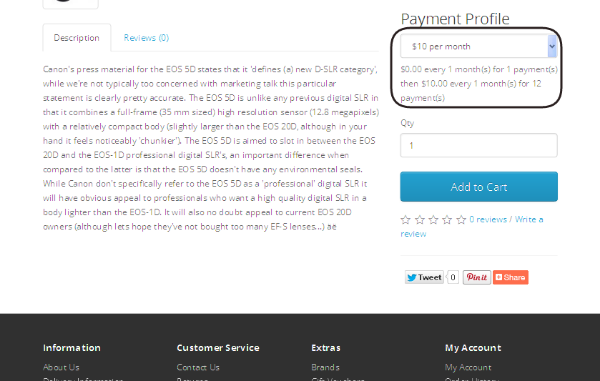
Select the proper values for the Recurring Profile and Customer Group fields and save the product. Now, you've done with setting up profiles with the product, so let's see how it looks like in the front-end. Go to the product detail page in the front-end.

As you can see in the above screenshot, there is a Payment Profile drop-down is displayed for the recurring product. When you select any profile value, it also displays a useful message of how many times you'll be charged corresponding to the profile selected.
Apart from this, an important thing to remember while setting up recurring profiles is that you must enable a payment method which supports recurring payments. If you don't have a payment method which supports recurring payments, the customer won't be able to check out and complete the order. So, just make sure that you take the required steps to set everything up!
Conclusion
Today, we discussed one of the important and underrated features of OpenCart, called "Recurring Profiles". We went through the corresponding back-end and front-end sections to demonstrate the usability of that feature, and I hope you've enjoyed that! Express yourself through queries and suggestions if you have any!
Furthermore, if you're interested in other OpenCart related software, be sure to check out our offering in the marketplace.


Comments