The web moves fast - so fast that our original EaselJS tutorial is already out of date! In this tutorial, you'll learn how to use the newest CreateJS suite by creating a simple Pong clone.
Final Result Preview
Let's take a look at the final result we will be working towards:

Click to play
This tutorial is based on Carlos Yanez's Create a Pong Game in HTML5 With EaselJS, which in turn built on his Getting Started With EaselJS guide. The graphics and sound effects are all taken from the former tutorial.
Step 1: Create index.html
This will be our main index.html file:
<!DOCTYPE html>
<html>
	<head>
		<title>Pong</title>

		<style>/* Removes Mobile Highlight */ *{-webkit-tap-highlight-color: rgba(0, 0, 0, 0);}</style>

		<script src="http://code.createjs.com/easeljs-0.4.2.min.js"></script>
		<script src="http://code.createjs.com/tweenjs-0.2.0.min.js"></script>
		<script src="http://code.createjs.com/soundjs-0.2.0.min.js"></script>
		<script src="http://code.createjs.com/preloadjs-0.1.0.min.js"></script>
		<script src="http://code.createjs.com/movieclip-0.4.1.min.js"></script>
		<script src="assets/soundjs.flashplugin-0.2.0.min.js"></script>
		<script src="Main.js"></script>

	</head>
	<body onload="Main();">
		<canvas id="PongStage" width="480" height="320"></canvas>
	</body>
</html>
As you can see, it’s pretty short and consists mainly of loading the CreateJS libraries.
Since the release of CreateJS (which basically bundles all the separate EaselJS libraries) we no longer have to download the JS files and host them on our website; the files are now placed in a CDN (Content Delivery Network) which allows us to load these files remotely as quickly as possible.
Let’s review the code:
<style>/* Removes Mobile Highlight */ *{-webkit-tap-highlight-color: rgba(0, 0, 0, 0);}</style>
This line removes the mobile highlight which may appear when you trying to play the game on mobile. (The mobile highlight causes the canvas object to get highlighted and thus ignore your finger movements.)
Next up, we have the loading of the CreateJS libraries:>
<script src="http://code.createjs.com/easeljs-0.4.2.min.js"></script>
		<script src="http://code.createjs.com/tweenjs-0.2.0.min.js"></script>
		<script src="http://code.createjs.com/soundjs-0.2.0.min.js"></script>
		<script src="http://code.createjs.com/preloadjs-0.1.0.min.js"></script>
		<script src="http://code.createjs.com/movieclip-0.4.1.min.js"></script>
This code loads the JS files from the CreateJS CDN and it basically allows us to use any of the CreateJS functions in our code
Next, we will load the SoundJS Flash plugin, which provides sound support for browsers that don’t support HTML5 Audio. This is done by using a SWF (a Flash object) to load the sounds.
<script src="assets/soundjs.flashplugin-0.2.0.min.js"></script>
In this case we will not use the CDN; instead, we’ll download the SoundJS library from http://createjs.com/#!/SoundJS/download and place the soundjs.flashplugin-0.2.0.min.js and FlashAudioPlugin.swf files in a local folder named assets.
Last among the JS files, we’ll load the Main.js file which will contain all the code to our game:
<script src="Main.js"></script>
Finally, let’s place a Canvas object on our stage.
<body onload="Main();">
		<canvas id="PongStage" width="480" height="320"></canvas>
	</body>
Now we can start working on the game code.
Step 2: The Variables
Our game code will be inside a file named Main.js, so create and save this now.
First of all, let’s define variables for all the graphic objects in the game:
var canvas; //Will be linked to the canvas in our index.html page
var stage; //Is the equivalent of stage in AS3; we'll add "children" to it

// Graphics
//[Background]

var bg; //The background graphic

//[Title View]


var main; //The Main Background
var startB; //The Start button in the main menu
var creditsB; //The credits button in the main menu

//[Credits]


var credits; //The Credits screen

//[Game View]


var player; //The player paddle graphic
var ball; //The ball graphic
var cpu; //The CPU paddle
var win; //The winning popup
var lose; //The losing popup
I’ve added a comment for each variable so that you’ll know what we’ll be loading in that variable
Next up, the scores:
//[Score]

var playerScore; //The main player score
var cpuScore; //The CPU score
var cpuSpeed=6; //The speed of the CPU paddle; the faster it is the harder the game is
We’ll, need variables for the speed of the ball:
// Variables

var xSpeed = 5;
var ySpeed = 5;
You can change these values to whatever you want, if you’d like to make the game easier or harder.
If you're a Flash developer, you know that Flash’s onEnterFrame is very useful when creating games, as there are things that need to happen in every given frame. (If you're not familiar with this idea, check out this article on the Game Loop.)
We have an equivalent for onEnterFrame in CreateJS, and that is the ticker object, which can run code every fraction of a second. Let’s create the variable that will link to it:
var tkr = new Object;
Next we have the preloader, which will use the new PreloadJS methods.
//preloader
var preloader;
var manifest;
var totalLoaded = 0;
-
preloader- will contain the PreloadJS object. -
manifest- will hold the list of files we need to load. -
totalLoaded- this variable will hold the number of files already loaded.
Last but not least in our list of variables, we have TitleView, which will hold several graphics within in order to display them together (like a Flash DisplayObjectContainer).
var TitleView = new Container();
Let’s move on to the Main function...
Step 3: The Main() Function
This function is the first function that runs after all the JS files from the index.html are loaded. But what's calling this function?
Well, remember this line from the index.html file?
<body onload="Main();">
This code snippet states that once the HTML (and JS libraries) are loaded, the Main function should run.
Let's review it:
function Main()
{
	/* Link Canvas */

	canvas = document.getElementById('PongStage');
  	stage = new Stage(canvas);

  	stage.mouseEventsEnabled = true;


	/* Set The Flash Plugin for browsers that don't support SoundJS */
  	SoundJS.FlashPlugin.BASE_PATH = "assets/";
    if (!SoundJS.checkPlugin(true)) {
      alert("Error!");
      return;
    }

  	manifest = [
				{src:"bg.png", id:"bg"},
				{src:"main.png", id:"main"},
				{src:"startB.png", id:"startB"},
				{src:"creditsB.png", id:"creditsB"},
				{src:"credits.png", id:"credits"},
				{src:"paddle.png", id:"cpu"},
				{src:"paddle.png", id:"player"},
				{src:"ball.png", id:"ball"},
				{src:"win.png", id:"win"},
				{src:"lose.png", id:"lose"},
				{src:"playerScore.mp3|playerScore.ogg", id:"playerScore"},
				{src:"enemyScore.mp3|enemyScore.ogg", id:"enemyScore"},
				{src:"hit.mp3|hit.ogg", id:"hit"},
				{src:"wall.mp3|wall.ogg", id:"wall"}
			];


  	preloader = new PreloadJS();
  	preloader.installPlugin(SoundJS);
    preloader.onProgress = handleProgress;
    preloader.onComplete = handleComplete;
    preloader.onFileLoad = handleFileLoad;
    preloader.loadManifest(manifest);

	/* Ticker */

	Ticker.setFPS(30);
	Ticker.addListener(stage);
}
Let’s break down each part:
  	canvas = document.getElementById('PongStage');
  	stage = new Stage(canvas);

  	stage.mouseEventsEnabled = true;
Here we link the PongStage Canvas object from the index.html file to the canvas variable, and then create a Stage object from that canvas. (The stage will allow us to place objects on it.)
mouseEventsEnabled enables us to use mouse events, so we can detect mouse movements and clicks.
/* Set The Flash Plugin for browsers that don't support SoundJS */
  	SoundJS.FlashPlugin.BASE_PATH = "assets/";
    if (!SoundJS.checkPlugin(true)) {
      alert("Error!");
      return;
    }
Here we configure where the Flash sound plugin resides for those browsers in which HTML5 Audio is not supported
	manifest = [
				{src:"bg.png", id:"bg"},
				{src:"main.png", id:"main"},
				{src:"startB.png", id:"startB"},
				{src:"creditsB.png", id:"creditsB"},
				{src:"credits.png", id:"credits"},
				{src:"paddle.png", id:"cpu"},
				{src:"paddle.png", id:"player"},
				{src:"ball.png", id:"ball"},
				{src:"win.png", id:"win"},
				{src:"lose.png", id:"lose"},
				{src:"playerScore.mp3|playerScore.ogg", id:"playerScore"},
				{src:"enemyScore.mp3|enemyScore.ogg", id:"enemyScore"},
				{src:"hit.mp3|hit.ogg", id:"hit"},
				{src:"wall.mp3|wall.ogg", id:"wall"}
			];
In the manifest variable we place an array of files we want to load (and provide a unique ID for each one). Each sound has two formats - MP3 and OGG - because different browsers are (in)compatible with different formats.
  	preloader = new PreloadJS();
  	preloader.installPlugin(SoundJS);
    preloader.onProgress = handleProgress;
    preloader.onComplete = handleComplete;
    preloader.onFileLoad = handleFileLoad;
    preloader.loadManifest(manifest);
Here we configure the preloader object using PreloadJS. PreloadJS is a new addition to the CreateJS libraries and quite a useful one.
We create a new PreloadJS object and place it in the preloader variable, then assign a method to each event (onProgress, onComplete, onFileLoad). Finally we use the preloader to load the manifest we created earlier.
Ticker.setFPS(30);
	Ticker.addListener(stage);
Here we add the Ticker object to the stage and set the frame rate to 30 FPS; we’ll use it later in the game for the enterFrame functionality.
Step 4: Creating the Preloader Functions
function handleProgress(event)
{
	//use event.loaded to get the percentage of the loading
}

function handleComplete(event) {
         //triggered when all loading is complete
}

function handleFileLoad(event) {
         //triggered when an individual file completes loading

         switch(event.type)
         {
         	case PreloadJS.IMAGE:
         	//image loaded
         	 var img = new Image();
              img.src = event.src;
              img.onload = handleLoadComplete;
              window[event.id] = new Bitmap(img);
         	break;

         	case PreloadJS.SOUND:
         	//sound loaded
         	handleLoadComplete();
         	break;
         }
}
Let’s review the functions:
-
handleProgress- In this function you’ll be able to follow the percentage of the loading progress using this parameter:event.loaded. You could use this to create for example a progress bar. -
handleComplete- This function is called once all the files have been loaded (in case you want to place something there). -
handleFileLoad- Since we load two types of files - images and sounds - we have this function that will handle each one separately. If it’s an image, we create a bitmap image and place it in a variable (whose name is the same as the ID of the loaded image) and then call thehandleLoadCompletefunction (which we'll write next); if it’s a sound then we just call thehandleLoadCompleteimmediately.
Now let’s discuss the handleLoadComplete function I just mentioned:
 function handleLoadComplete(event)
 {

	totalLoaded++;

	if(manifest.length==totalLoaded)
	{
		addTitleView();
	}
 }
It’s a pretty straightforward function; we increase the totalLoaded variable (that holds the number of assets loaded so far) and then we check if the number of items in our manifest is the same as the number of loaded assets, and if so, go to the Main Menu screen.
Step 5: Creating the Main Menu
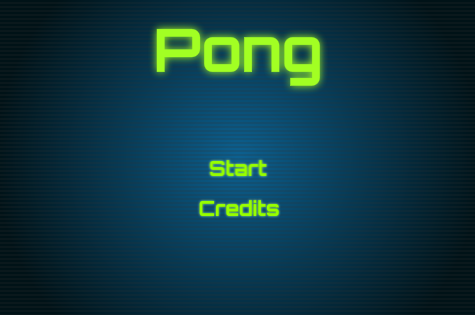
function addTitleView()
{
	//console.log("Add Title View");
	startB.x = 240 - 31.5;
	startB.y = 160;
	startB.name = 'startB';

	creditsB.x = 241 - 42;
	creditsB.y = 200;

	TitleView.addChild(main, startB, creditsB);
	stage.addChild(bg, TitleView);
	stage.update();

	// Button Listeners

	startB.onPress = tweenTitleView;
	creditsB.onPress = showCredits;
Nothing special here. We place the images of the Background, Start Button and Credits Button on the stage and link onPress event handlers to the Start and Credits buttons.
Here are the functions that display and remove the credits screen and the tweenTitleView which starts the game:
function showCredits()
{
	// Show Credits

	credits.x = 480;

	stage.addChild(credits);
	stage.update();
	Tween.get(credits).to({x:0}, 300);
	credits.onPress = hideCredits;
}

// Hide Credits

function hideCredits(e)
{
	Tween.get(credits).to({x:480}, 300).call(rmvCredits);
}

// Remove Credits

function rmvCredits()
{
	stage.removeChild(credits);
}

// Tween Title View

function tweenTitleView()
{
	// Start Game

	Tween.get(TitleView).to({y:-320}, 300).call(addGameView);
}
Step 6: The Game Code
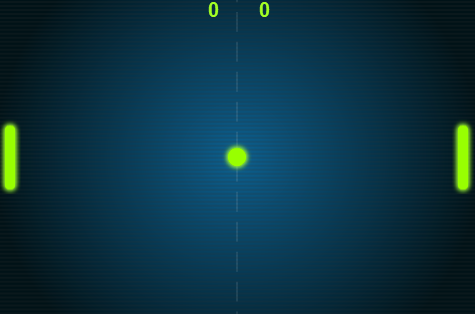
We’ve reached the main part of this tutorial which is the code of the game itself.
First of all, we need to add all the required assets to the stage, so we do that in the addGameView function:
function addGameView()
{
	// Destroy Menu & Credits screen

	stage.removeChild(TitleView);
	TitleView = null;
	credits = null;

	// Add Game View

	player.x = 2;
	player.y = 160 - 37.5;
	cpu.x = 480 - 25;
	cpu.y = 160 - 37.5;
	ball.x = 240 - 15;
	ball.y = 160 - 15;

	// Score

	playerScore = new Text('0', 'bold 20px Arial', '#A3FF24');
	playerScore.x = 211;
	playerScore.y = 20;

	cpuScore = new Text('0', 'bold 20px Arial', '#A3FF24');
	cpuScore.x = 262;
	cpuScore.y = 20;

	stage.addChild(playerScore, cpuScore, player, cpu, ball);
	stage.update();

	// Start Listener

	bg.onPress = startGame;
}
Again, a pretty straightforward function that places the objects on the screen and adds a mouseEvent to the background image, so that when the user clicks it the game will start (we will call the startGame function).
Let’s review the startGame function:
function startGame(e)
{
	bg.onPress = null;
	stage.onMouseMove = movePaddle;

	Ticker.addListener(tkr, false);
	tkr.tick = update;
}
Here, as you can see, in addition to adding an onMouseMove event that will move our paddle. We add the tick event, which will call the update function in each frame.
Let’s review the movePaddle and reset functions:
function movePaddle(e)
{
	// Mouse Movement
	player.y = e.stageY;
}

/* Reset */

function reset()
{
	ball.x = 240 - 15;
	ball.y = 160 - 15;
	player.y = 160 - 37.5;
	cpu.y = 160 - 37.5;

	stage.onMouseMove = null;
	Ticker.removeListener(tkr);
	bg.onPress = startGame;
}
In movePaddle, we basically place the user’s paddle at the mouse's y-coordinate.
In reset, we do something similar to addGameView, except here we don’t add any graphic elements since they are already on the screen.
Using the alert function we’ll display the winning and losing popup:
function alert(e)
{
	Ticker.removeListener(tkr);
	stage.onMouseMove = null;
	bg.onPress = null

	if(e == 'win')
	{
		win.x = 140;
		win.y = -90;

		stage.addChild(win);
		Tween.get(win).to({y: 115}, 300);
	}
	else
	{
		lose.x = 140;
		lose.y = -90;

		stage.addChild(lose);
		Tween.get(lose).to({y: 115}, 300);
	}
}
Step 7: The Game Loop
Now, for the last part of our tutorial we’ll work on the update function (which occurs in every frame of the game - similar to Flash’s onEnterFrame):
function update()
{
	// Ball Movement

	ball.x = ball.x + xSpeed;
	ball.y = ball.y + ySpeed;

	// Cpu Movement

	if(cpu.y < ball.y) {
		cpu.y = cpu.y + 4;
	}
	else if(cpu.y > ball.y) {
		cpu.y = cpu.y - 4;
	}

	// Wall Collision

	if((ball.y) < 0) { ySpeed = -ySpeed; SoundJS.play('wall'); };//Up
	if((ball.y + (30)) > 320) { ySpeed = -ySpeed; SoundJS.play('wall');};//down

	/* CPU Score */

	if((ball.x) < 0)
	{
		xSpeed = -xSpeed;
		cpuScore.text = parseInt(cpuScore.text + 1);
		reset();
		SoundJS.play('enemyScore');
	}

	/* Player Score */

	if((ball.x + (30)) > 480)
	{
		xSpeed = -xSpeed;
		playerScore.text = parseInt(playerScore.text + 1);
		reset();
		SoundJS.play('playerScore');
	}

	/* Cpu collision */

	if(ball.x + 30 > cpu.x && ball.x + 30 < cpu.x + 22 && ball.y >= cpu.y && ball.y < cpu.y + 75)
	{
		xSpeed *= -1;
		SoundJS.play('hit');
	}

	/* Player collision */

	if(ball.x <= player.x + 22 && ball.x > player.x && ball.y >= player.y && ball.y < player.y + 75)
	{
		xSpeed *= -1;
		SoundJS.play('hit');
	}

	/* Stop Paddle from going out of canvas */

	if(player.y >= 249)
	{
		player.y = 249;
	}

	/* Check for Win */

	if(playerScore.text == '10')
	{
		alert('win');
	}

	/* Check for Game Over */

	if(cpuScore.text == '10')
	{
		alert('lose');
	}
}
Looks scary, doesn’t it? Don’t worry, we’ll review each part and discuss it.
	// Ball Movement

	ball.x = ball.x + xSpeed;
	ball.y = ball.y + ySpeed;
In each frame, the ball will move according to its x and y speed values
// Cpu Movement

	if((cpu.y+32) < (ball.y-14)) {
		cpu.y = cpu.y + cpuSpeed;
	}
	else if((cpu.y+32) > (ball.y+14)) {
		cpu.y = cpu.y - cpuSpeed;
	}
Here we have the basic AI of the computer, in which the computer’s paddle simply follows the ball without any special logic. We just compare the location of the center of the paddle (which is why we add 32 pixels to the cpu Y value) to the location of the ball, with a small offset, and move the paddle up or down as necessary.
if((ball.y) < 0) { //top
	ySpeed = -ySpeed;
	SoundJS.play('wall');
};
if((ball.y + (30)) > 320) { //bottom
	ySpeed = -ySpeed;
	SoundJS.play('wall');
};
If the ball hits the top border or the bottom border of the screen, the ball changes direction and we play the Wall Hit sound.
 	/* CPU Score */
 	if((ball.x) < 0)
 	{
 		xSpeed = -xSpeed;
 		cpuScore.text = parseInt(cpuScore.text + 1);
 		reset();
 		SoundJS.play('enemyScore');
 	}
 	/* Player Score */
  	if((ball.x + (30)) > 480)
 	{
 		xSpeed = -xSpeed;
 		playerScore.text = parseInt(playerScore.text + 1);
 		reset();
 		SoundJS.play('playerScore');
 	}
The score login is simple: if the ball passes the left or right borders it increases the score of the player or CPU respectively, plays a sound, and resets the location of the objects using the reset function we’ve discussed earlier.
/* CPU collision */
if(ball.x + 30 > cpu.x && ball.x + 30 < cpu.x + 22 && ball.y >= cpu.y && ball.y < cpu.y + 75)
{
	xSpeed *= -1;
	SoundJS.play('hit');
}
/* Player collision */
if(ball.x <= player.x + 22 && ball.x > player.x && ball.y >= player.y && ball.y < player.y + 75)
{
 	xSpeed *= -1;
 	SoundJS.play('hit');
 }
Here we deal with collisions of the ball with the paddles; every time the ball hits one of the paddles, the ball changes direction and a sound is played
 	if(player.y >= 249)
 	{
 		player.y = 249;
 	}
If the player's paddle goes out of bounds, we place it back within the bounds.
 /* Check for Win */
 if(playerScore.text == '10')
 {
 	alert('win');
}
/* Check for Game Over */
if(cpuScore.text == '10')
{
 	alert('lose');
}
In this snippet, we check whether either of the players’ score has reached 10 points, and if so we display the winning or losing popup to the player (according to his winning status).
Conclusion
That’s it, you’ve created an entire pong game using CreateJS. Thank you for taking the time to read this tutorial.

Comments