Becoming a smart watch app developer is a great idea, but what if you are an HTML developer? Will you be able to realize your dream without switching to a completely different platform? Do you have to abandon all of your HTML skills and start all over again? Don't worry. Tizen comes to your rescue.
Tizen is an operating system of the Linux family, targeting a range of devices from smartphones to smart watches and a lot more. While Tizen is a project within the Linux Foundation, it is guided by the Tizen Association, whose members include Samsung, Intel, and other well known companies in the technology industry.
In this tutorial, I will show you how to install and configure the Tizen SDK for Wearable and develop a smart watch application with the IDE. Let's get started.
1. Installing & Configuring the SDK
Step 1: Tizen SDK or Tizen SDK for Wearable?
Currently, two types of SDKs are available, Tizen SDK and Tizen SDK for Wearable. Since this tutorial is about developing a standalone smart watch app, what you need is Tizen SDK for Wearable.
You can download it from the Tizen Developers website. You need to download an appropriate install manager that matches your operating system and version. If you prefer an offline installation to an online one, you need to download an SDK image too. If your operating system is Windows 8 or Windows 8.1, you can download the installation files categorized under Windows 7. They will work on Windows 8 and 8.1 just fine.
Step 2: Requirements
Refer to Tizen's detailed instructions to read about the hardware and software requirements your computer should meet.
You can install the SDK even if your computer doesn't meet these hardware requirements. However, if you do, the smart watch emulator will be slow, resulting in poor app testing. Visit the documentation for more details. It explains how to enable Virtualization Technology (VT) in your BIOS and Data Execution Prevention on Windows.
Step 3: Installing the SDK
- Run the install manager you downloaded earlier. This is an .exe file with a filename like tizen-wearable-sdk-2.2.159_windows64.exe, depending on your operating system and version.
- Click Advanced to go to the next screen.
- In that screen, check the SDK image radio button and navigate to the zip file containing the appropriate SDK Image. Note that I'm assuming that you prefer an offline installation and you have already downloaded the necessary SDK image to your development machine.
- Select the SDK image zip file and click Open in the dialog box.
- An Extracting SDK Image message will appear. Click OK after finishing the extraction.
- Click Next and the License Agreement window will appear.
- Agree to the license and click Next.
- The configuration window will appear next. I recommend leaving all the check boxes checked and clicking Next.
- Finally, when the install manager asks for a location for the installation, specify your choice by selecting a path and clicking Install.
- If you have already configured your BIOS correctly, Intel Hardware Accelerated Execution Manager (Intel HAXM) will also be automatically installed during this process. If not, quit the installation process and configure the BIOS so that it can allow Intel HAXM to be installed.
- Don't forget to enable Data Execution Prevention if your operating system is Windows. Resume the installation.
If you wish, you can install Intel HAXM separately. Once the installation is finished, restart your computer.
Step 4: Configuring the IDE
- Browse to the folder in which you have installed the SDK and navigate to the ide subfolder. Run the executable file named IDE.
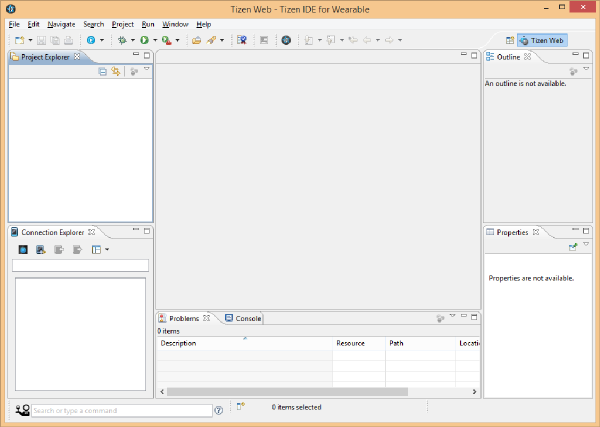
- After a few minutes, a window will appear, asking for a location for the workspace to save the apps you develop. Specify a path of your choice for the location and click OK. After the configuration, the IDE should appear.
Step 5: Features of the IDE
On the left pane of the IDE, there are two windows, Project Explorer and Connection Explorer. The Project Explorer shows the projects created by the user. The Connection Explorer lists the connected devices that are currently available, emulator instances or remote devices.
Step 6: Creating an Emulator Instance
- In the Connection Explorer, click on the Emulator Manager icon, the leftmost blue button.
- Click Yes in the User Account Control window that appears. This will bring up the Emulator Manager window.
- Click Add New and give the emulator instance a name.
- When you click Confirm, the new emulator instance will be created. Click the blue button with an arrow in the emulator icon to launch the emulator.
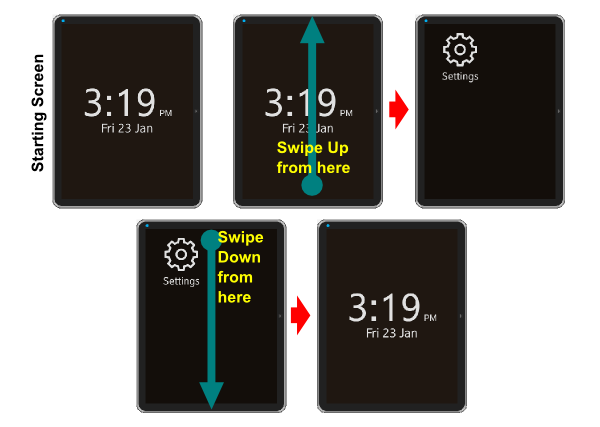
It will take some time to launch the emulator. You should see a window with a starting screen similar to the below screenshot when it is up and running. The emulator instance should appear as an entry in the Connection Explorer.
Swipe up from the bottom middle point of the starting screen to go to the screen that displays the installed apps on the device or emulator. Since you haven't installed any apps yet, only the Settings icon is displayed.
You can go back to the previous screen or quit an app by swiping down from the top middle of the screen.
2. Developing a Simple Comic App
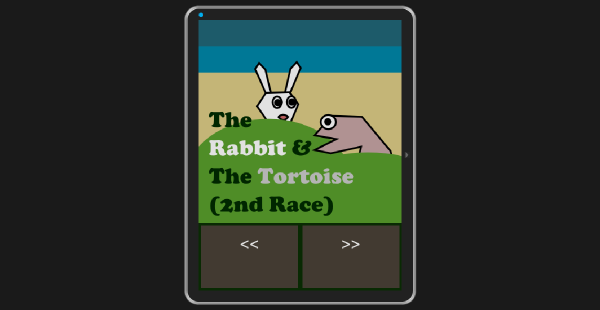
In this example, we're going to create a simple app to display a comic strip. Let's look at each step in turn.
Step 1: Creating a New Project
Let's create a new project in the IDE.
- Go to File > New > Tizen Wearable Web Project.
- In the window that appears, select Basic > Basic application and set the Project name to myapp.
- Tick the Use default location check box or browse to a different location of your choice, and click Finish.
- Your new project, myapp, should appear in the Project Explorer.
- Click the small arrow on the left of myapp to expand the project structure.
- You should see an index.html file, a css subfolder, a js subfolder, and a few other files and folders.

HTML, CSS, and JavaScript form the basis for programming on the Tizen platform. If you're an HTML wizard, then you don't have to learn a new programming language to write applications for the Tizen platform. You can use your existing HTML, CSS, and JavaScript skills.
Step 2: Adding Files, Assets, and Resources
We first need to add two subfolders to the myapp project, comic and images. To do this, right-click the myapp project folder in the IDE and select New > Folder. The subfolders should appear in the expanded myapp folder in the IDE.
Download the source files for this project from GitHub and navigate to the images subfolder, which contains a number of png files. Copy the png files to the images subfolder you created a moment ago.
You can paste files to the images subfolder in the Project Explorer window by right-clicking the subfolder and selecting Paste from the popup menu.
Next, create nine HTML files with the following file names in the comic subfolder by right-clicking the comic subfolder and selecting New > File. Make sure to include the .html extension for the files.
- page1.html
- page2.html
- ...
- page9.html
You should now have nine HTML files in the comic subfolder.
Step 3: Adding Code
Let's now edit the code in index.html. This file is the entry point of your application. Double-click index.html to open the file in the IDE. Change the contents of the <title> tag to <title>2nd Race</title>. Next, change the contents of the <body> tag with the following:
<body>
<div>
<div><img src="images/coverpage.png" alt="Cover Page" /></div>
<div><a href="#" class="btn" ><<</a><a href="comic/page1.html"
class="btn" >>></a></div>
</div>
</body>
All we did, is add an image to the page and two buttons to navigate to the other pages since our comic will have ten pages. Once you have made these changes, save the file by selecting File > Save from the menu.
If you are new to HTML and CSS, Tuts+ has a huge collection of excellent tutorials that will help you get up to speed with the basics of web development.
Next, double-click style.css in the css subfolder and change its contents as shown below.
* {
    font-family: Verdana, Lucida Sans, Arial, Helvetica, sans-serif;
}

body {
    margin: 0px auto;
    background-color:#0a3003;
}

img {
  margin: 0;
  padding: 0;
  border: 0;
  width: 100%;
  height: auto;
  display: block;
  float: left;
}

.btn {
  display: inline-block;
  padding: 15px 4% 15px 4%;
  margin-left: 1%;
  margin-right: 1%;
  margin-top: 5px;
  margin-bottom: 5px;
  font-size: 30px;
  text-align: center;
  vertical-align: middle;
  border: 0;
  color: #ffffff;
  background-color: #4b4237;
  width: 40%;
  height: 80px;
  text-decoration: none;
}
We've added some styling for body, images, and the navigation menus. Once you have made the changes, save the file.
Similarly, add code to all the other HTML files you have created. The style.css file in the css subfolder must be externally linked to all of these HTML files. If you're note sure about this step, then download the source files from GitHub and examine the source for clarification.
Step 4: Testing the App
To test your app, select the myapp project folder and, from the menu, choose Project > Build Project to build the project. Make sure the emulator instance is up and running.
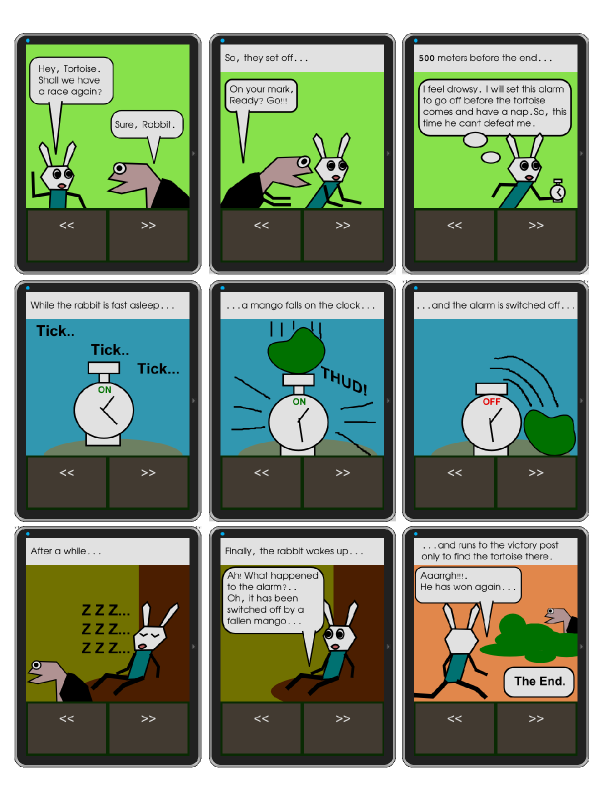
Right-click the myapp folder and select Run As > Tizen Wearable Web Application to run the project in the emulator. Use the arrow buttons in the user interface to navigate to the next or previous page. Swipe down from the top of the screen to quit the app.
Conclusion
In this tutorial, we built a simple comic app with the Tizen SDK for Wearable and ran it on the smart watch emulator that comes bundled with the IDE. The real fun begins when you are ready to install and run it on a physical device.
You can find a lot of additional information on the Samsung and Tizen Developers websites. What are you waiting for?

Comments