We recently pushed out some big changes to the Tuts+ Translation Project, making the process easier and quicker for everyone involved. Read on to find out how you can take part and exactly how the new translation tools work!
1. Find Something to Translate
What do you want to translate? Perhaps one of your favorite tutorials on Tuts+, or one which has been recommended by a friend or colleague? Maybe somebody you know would enjoy a particular tutorial in a different language?
Alternatively, if you subscribe to the translation project newsletter we regularly suggest tutorials which might interest you. However you decide, make sure it’s something you think you’ll enjoy translating.
2. Click the “Volunteer” Link
In the sidebar of every post on Tuts+ you’ll find a translation section. There may already be translations listed, but if your language isn’t among them, hit the Translate this post button to volunteer!
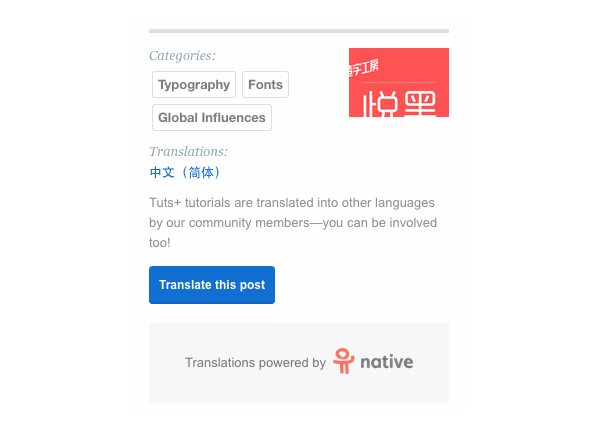
Having clicked the button, you’ll be redirected to a form.
3. Enter Your Details
At this point we need to know a few things:
- your name
- your email address
- a password for your account
- and, very importantly, the language you want to translate into:

Hit the Sign up button.
4. Welcome to Native!
You’ve just signed into Native, an online translation platform. The Native team have developed a whole process to make translating Tuts+ tutorials easier. Any future translations will take you straight here–there’s no need to fill out your details again.
The content of the tutorial you chose will be automatically pulled into a new project, so you can begin translating straight away! There are a number of details you’ll notice—for example, a percentage counter to track your progress:

You’ll also see that your profile is shown at the top right of the screen, including a dropdown menu where you can update your details, settings and so on. The avatar with the orange ring and star icon shows that you’re the “owner” of this project; it’s possible for others to join in and collaborate if you want:

5. Begin Translating
The editor screen is split into two columns. On the left you have the original (English), and on the right, slightly faded, you’ll see your translation. When you hover over a section on either side, it will be highlighted along with its counterpart:
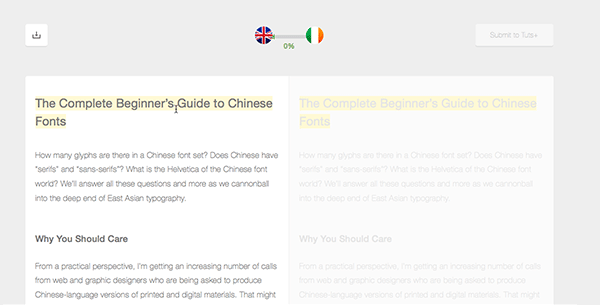
Begin translating by clicking on the title. This will bring up an inline editor, like so:
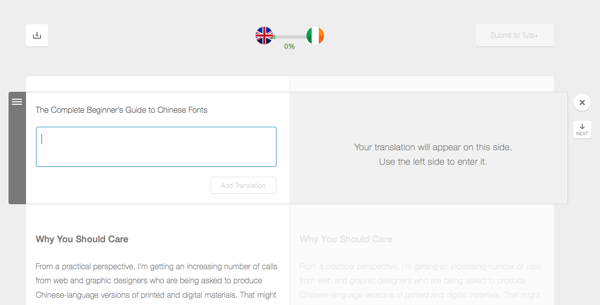
Tip: the editor can be moved up and down by dragging the tab on its left. This is useful if you need to see what’s underneath.
Now, enter the translated text and hit the Add Translation button. You’ll see your translation appear on the right half of the screen—plus you can edit and save it again whenever you please.
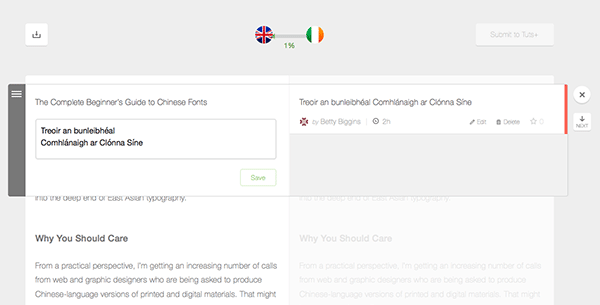
Moving On
With that done, hit the Next button to skip to the next chunk of text, or click on a specific section if you’d prefer. There are also keyboard shortcuts (Alt-Up/Alt-Down) to skip through the sections at lightning speed.
6. Formatting Text
You’ll often come across formatted text within Tuts+ tutorials; bold, italic, code and links. When that happens you’ll be given tools to add them to your translation. In this example, we need to translate a section which contains some italics and a link:
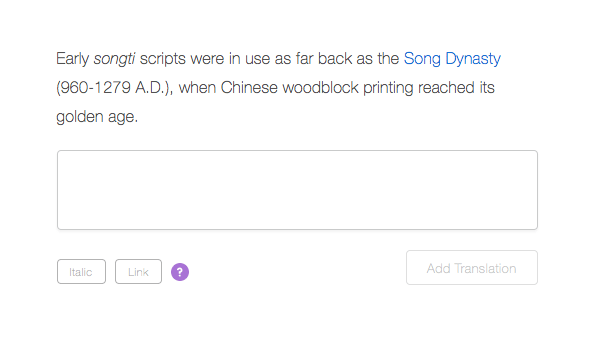
You see those buttons at the bottom? They’re going allow us to add the extras—if you hover over them you’ll see which bit of formatted text each one refers to:
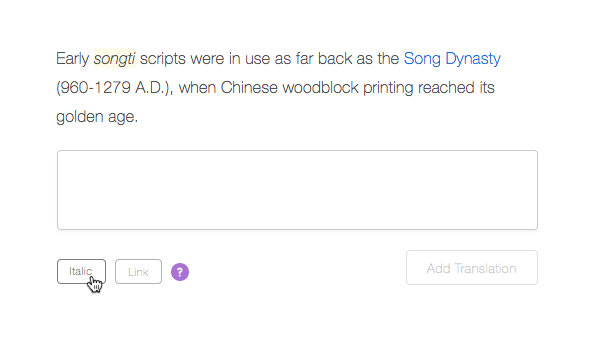
Add your translation, and then select the text you need to format and click the corresponding button. You can only apply each one once, but it’s not necessary to use all of them if your translation doesn’t warrant it.
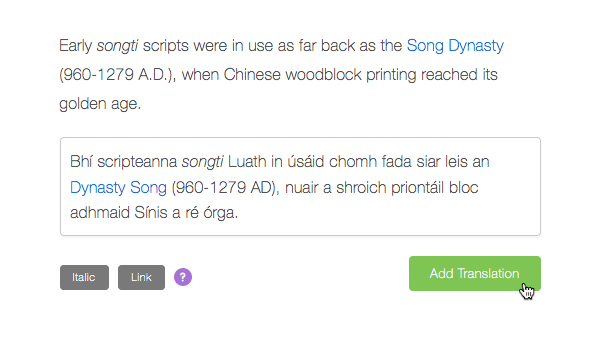
Again, once done, hit the Add Translation button and move on!
7. Take Your Time
Native projects are continually saved, so you can close down your browser and come back to finish another time. Your translations are all listed on the homepage, so you can access them whenever you wish, even once they’re complete and have been submitted.

8. Submitting Completed Translations
At any point during the process you can click the download button to save a copy of the translation to your computer:

That shouldn’t be necessary, though, because once the translation reaches a certain level of completion, the Submit to Tuts+ button will become active:

Note: Sometimes it’s not crucial to reach 100%. There may be names and other bits of text which you’d prefer to stay English, in which case you needn’t touch them.
If you’re confident you’ve finished the translation, click Submit to Tuts+ and a dialog will appear:

Hit Submit and your translation will be automatically sent over to Tuts+!
9. Publishing
Okay, this is where we come in. Your translation, along with your details, will land on the Tuts+ editorial desk, ready for publication. Once we’ve done that, you’ll receive a confirmation email with the URL of your translation.
You’ll also be sent a link to the Tuts+ CMS so you can log in and update your profile.
On the translation page you’ll be listed as the translator, with your name linking to your profile page where people can find your other translations, bio, social links and so on.

A Note About Google Translate
The sharp-eyed among you will notice that the Irish translation I’ve used as an example here isn’t brilliant. I used Google Translate—a fantastic tool to help out whenever a word or phrase escapes you, but not to be relied on for whole translations!
10. Future Edits
It’s quite possible that, once you see your translation live, you'll notice some mistakes or areas which could be improved. If that’s the case, go back to the project in Native, make the changes and resubmit the finished piece. We’ll ensure the published version gets updated.
Thank You!
We hope you enjoy using Native’s online tools and we’d like to say a huge thank you to all the volunteers who take part in the Tuts+ translation project!


Comments