Git has come a long way since its introduction, and has become significantly easier to work with in a Windows environment. In this tutorial, we are going to get setup with Git on Windows.
This article was written with the GUI in mind. I will NOT go over the command line usage, because there are many resources that already teach that aspect of Git. I made this for the true Windows users, the GUI ninjas. If you are like me and prefer a GUI over the command line, then this is the tutorial for you!
Step 1: Install Git
The first thing we need to do is install Git on Windows; you can do so with the following steps:
- Download and install the latest version of Git for Windows
- Use the default options for each step in the installation
- Remove Git Bash Desktop Icon
- Go to Start > All Programs > Git > Git GUI and make a Desktop Shortcut
Strangely, the last step seemed a bit confusing if you don't have Windows Search enabled. You can also pin Git GUI to the taskbar and/or the Start Menu.
It is important that you use all the default settings because they are supported by all major repository vendors such as Github, Bitbucket, and Beanstalk.
Step 2: Setup SSH Keys
Compared to Git Bash, setting up a SSH Key for your computer is relatively easy. Simply open Git GUI.
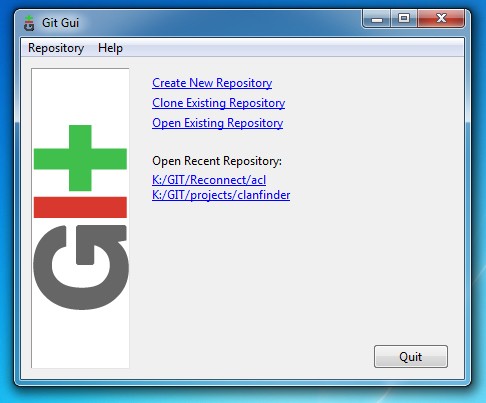
Now click on Show SSH Key under the Help Menu.
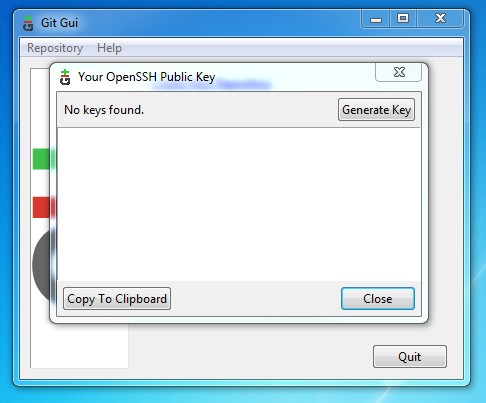
It's possible that there is already a SSH key on your system; it's best to remove or backup the key if you do not know where it came from. To do so, simply remove all files within: C:\Users\<username>\.ssh. Be sure to replace <username> with your Windows username.
You can generate a SSH key by clicking on the Generate Key button. When you do so, you will need to supply a passphrase for security purposes. Remember this passphrase; you will need to use it later.
Setup SSH Key with Hosted Git Repository
Github is not the only hosted Git repository available. It is, however, the most popular solution, and we'll use it as an example.
The SSH key you created allows you to push your changes to a hosted repository. So, in order to push changes from your computer, Github needs to know your public SSH key. That is easily accessible; simply click the "Copy to Clipboard" button.
Next, you need to provide your hosted repo service with your public SSH key. Similar to Github, most of these sites usually have a tab, called "SSH Keys". Click the tab and add your SSH key to the website.
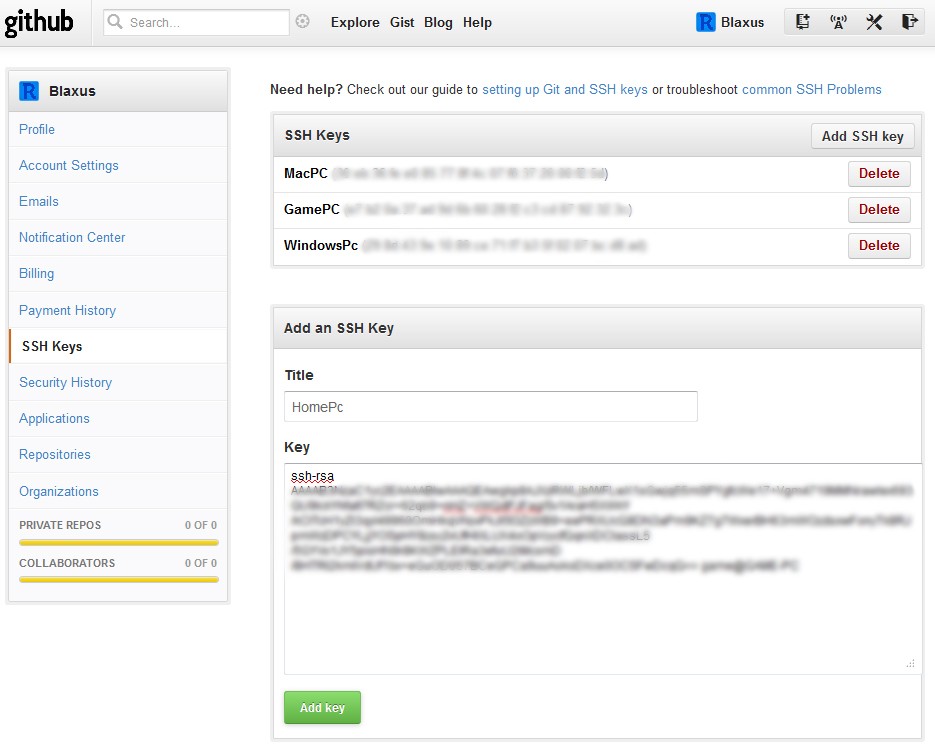
The Title field is just a label to identify the SSH key; it is for your purposes only. For example, "WindowsPc", "Macbook", "Linux". Just make sure it accurately describes what device the SSH key is assigned to.
Step 3: Getting Started with Git
Next, we need a Git repository, and we’ll create a new remote repository on Github.
Create a Remote Repository
When creating a remote repo, Github offers to initialize the repository for you. This is a nice option, but for the purpose of learning how to setup for alternative websites, we will not check the initialize box.

Create a Local Repository
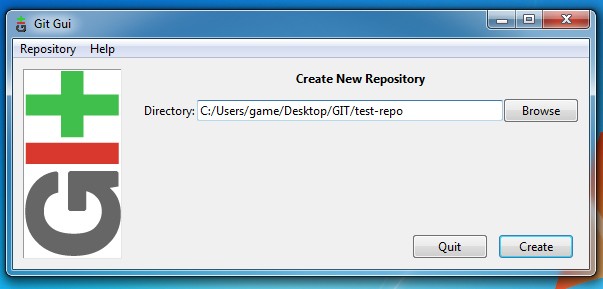
Now, we’ll create a local repository. In our Git GUI, click on "Create New Repository".

Select the location you wish to store your repository in. It is important to note that the selected repository location MUST NOT exist. So select the location you wish, and append the name of the folder you want the repository to be in, like this:
In order for this new repository to be initialized, you must first create a file, any file, in your local repo. Then, you must Commit and Push to the remote Git repository location. We'll review committing and pushing in Step 4; I recommend you skip ahead if you do not wish to clone a repository. Your remote Git location should look like similar to this: [email protected]:Username/repository-name.git.
Clone a Remote Repository to a Local Repository
As I noted before, Github can provide you with an already initialized repository, and you can get started a lot faster than you normally would. In order to clone a repository, click on the "Clone Existing Repository" link in the Git GUI window. An existing repository is one that is already initialized and/or has commits pushed to it.
In the Source Location field, fill in the Git remote repository location. The Target Directory field works much like how I showed you how to create a repository earlier. Short version: select the location and append the folder you want the files to be in. Git will attempt to create it, and it will fail if it already exists.
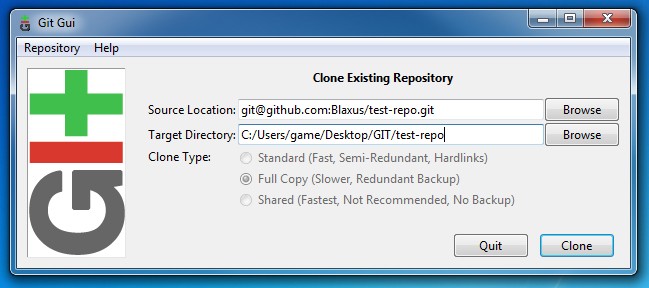
There you go; now you should be all set to work locally.
Step 4: Working with the GUI Client
The Git GUI makes it easier to perform Git-related tasks, such as staging changes, commits, and pushes.
Stage Changed
When you move files to a Git directory, you will see all the files in the "Unstaged Changes" window. This basically means that new files have been added, removed, updated, etc. You can click on the "Rescan" button in order to see any new changes that may have occurred.
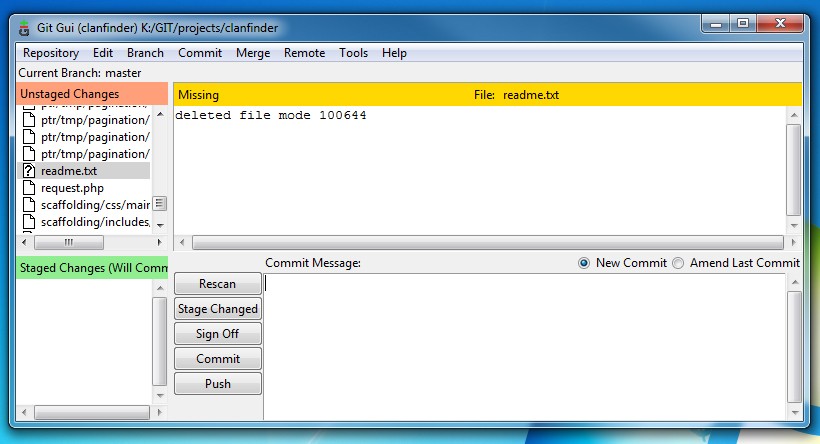
When you click the "Stage Changed" button, it will attempt to add all the new files to the Git index.
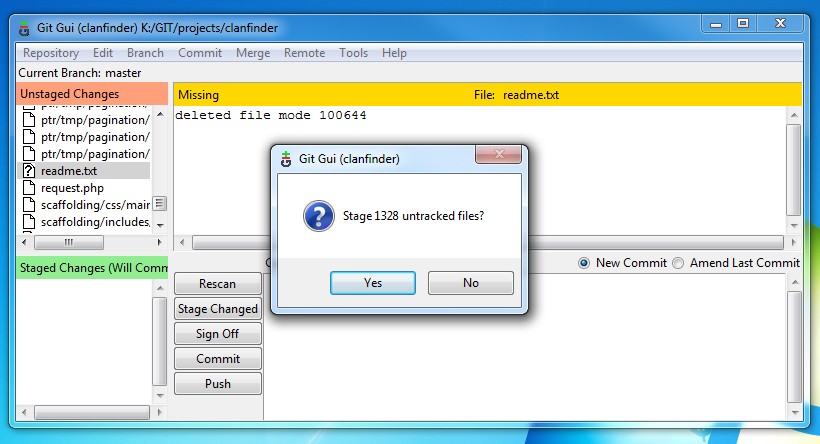
Commits:
After you've staged your changes, you then need to commit them to your local repository. Type a Commit Message that makes sense to the changes that were made. When you are done, press the Commit button.
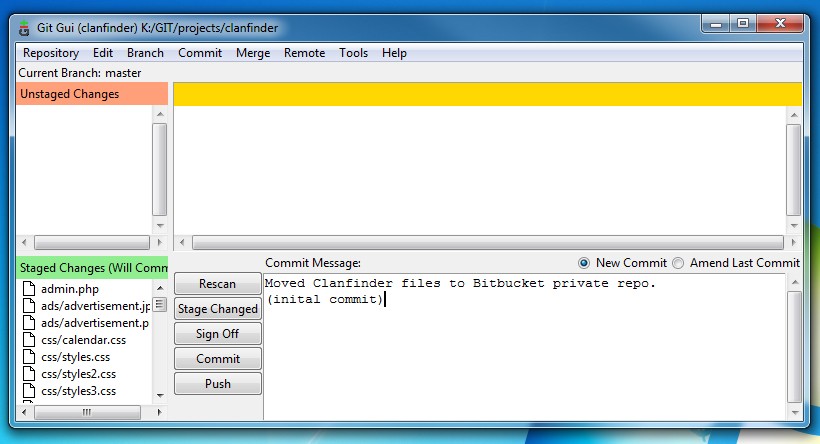
Pushing
Before others can access our new code, we need to push these changes to our hosted repository. Without pushing the changes, others would not be able to access the code.
Before we can proceed to push, we need set up a location to push to. Most folks refer to this location as "origin". If you wish, you can select an option in the "Further Actions" area, but in my experience, doing nothing will benefit you the most. You can always clone or push later.
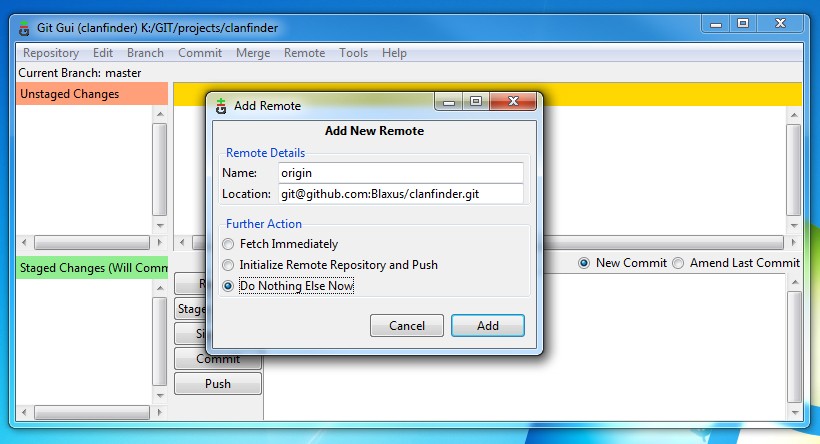
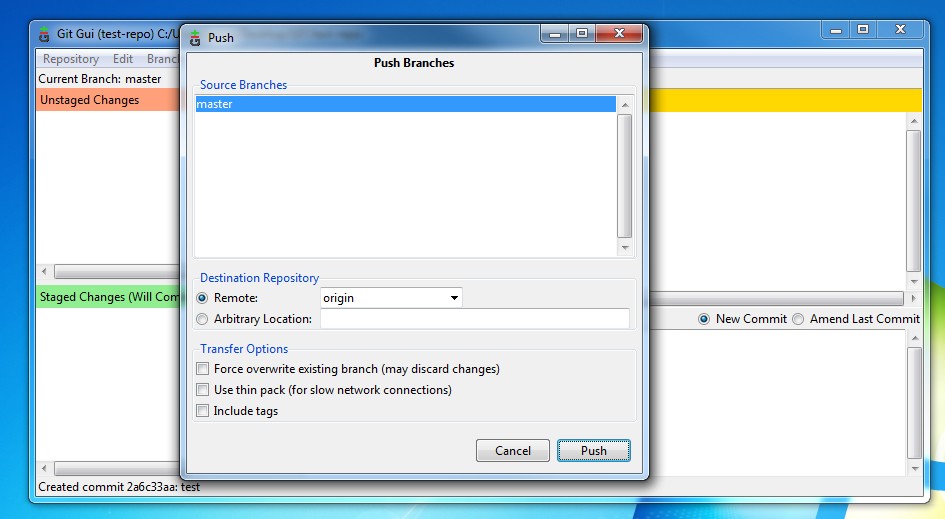
After adding the remote origin, you can simply press the Push button. It will ask you where you want to push to; most likely "origin" will be pre-selected (and it may be your only option). So simply click on the Push button again.
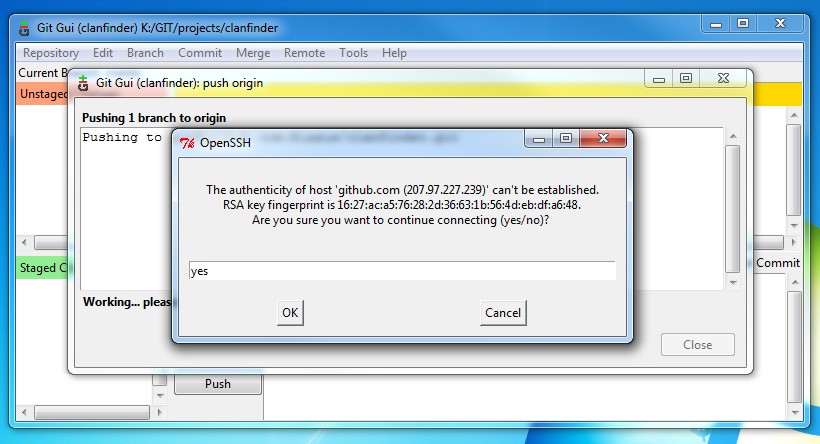
Next, you will be bombarded with window after window. But don't worry, this only happens the first time. Simply follow the instructions given to you.
Git will ask you the passphrase of your SSH Key.
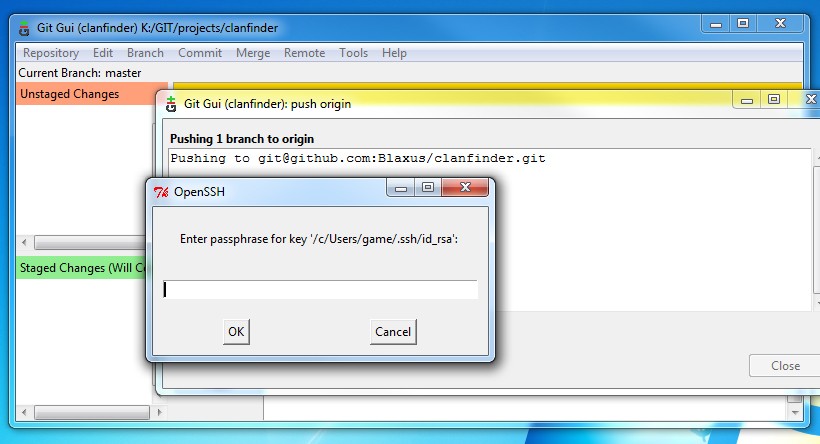
Don't panic if you see more then one request of your passphrase. It is completely normal! You don't have to worry as long as you are not told the passphrase was incorrect. Seeing multiple requests for your passphrase usually only occurs once per SSH key.
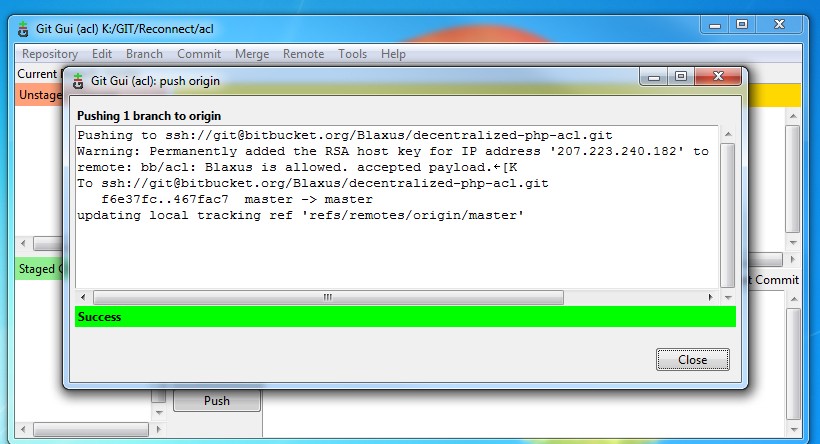
In the event that your push was complete, you should be greeted with a window similar to this:
A Small Guide to Git and Deployment
Before I let you go, here's a list of fantastic resources for continuing your Git learning.
- Git Essentials (Tuts+ Premium Course)
- Github - Unlimited Free Public Repositories
- Bitbucket - Unlimited Free Public and Private Repositories
- Beanstalk - Private Git with Great FTP Deployments
- DeployHq - Deploy any Git repo over FTP
- Easy Version-Control With Git
- Terminal, Git, and GitHub for the Rest of Us


Comments