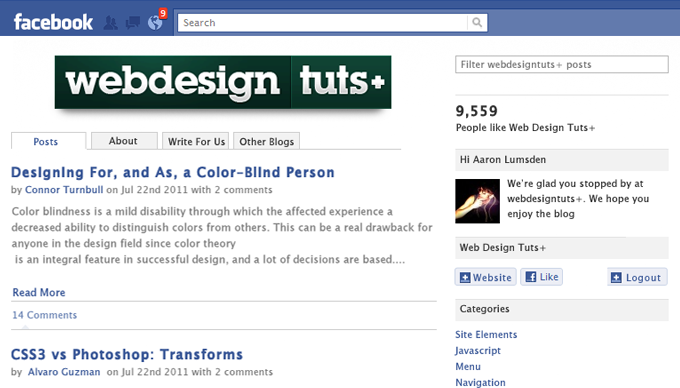
Welcome to part three of "Design and Code an Integrated Facebook App." At this point, I'm assuming that you have created the HTML and CSS for your app. If not, then refer to the first entry in this series. In this part, we're going to take our app to the next level!
Catch Up
- Design and Code an Integrated Facebook App: Theory
- Design and Code an Integrated Facebook App: HTML + CSS
Overview
In this lesson, we'll take care of:
- adding a few cool effects using the awesome jQuery library
- setting up our app in the new Facebook app configuration panel as well as setting up Facebook's PHP SDK.
- Bringing in our data from Feedburner using Yahoos YQL api
- Pulling data in from Facebooks graph api.
So stick with me, make yourself a cup of tea, and happy coding!
Step 1 - jQuery
Before we begin with converting our HTML to PHP, we need to make a few of our HTML objects functional. We can do this quite easily using the jQuery library. If you haven't started using the jQuery library yet, then now is definitely an excellent time to start. It's a great introduction to Javascript and truthfully isn't too difficult to use. In fact, you can create some great effects with only a few lines of code. In our blog app, we're going to use jQuery for two things. Firstly, we're going to use it for our live filter search, and secondly, for our page tabs to allow our users to have a smooth experience as they transition from page to page.
If you remember from the previous tutorial, we included a JavaScript file into our HTML document header. Now it's time to create that file. So jump into your favourite code editor, and call the file 'myjava.js'. We begin by creating the document ready. This tells jQuery to load everything inside it once the DOM is ready to be manipulated.
The Tabs

When the DOM is ready, we hide all the tabs. We then fade each page in when the corresponding tab is clicked on or made 'active.' We also remove the active class from the tabs and hide all of the other pages content.
	var tabContent = $('.tab_content'), //Define the tab as a variable
     	tabs = $('ul.tabs li');		//Define the tabs li as a variable

		tabContent.hide(); //On page load hide all the contents of all tabs
		tabs.eq(0).addClass("active").show(); //Default to the first tab
		tabContent.eq(0).show(); //Show the default tabs content

	//When the user clicks on the tab
	tabs.click(function(e) {
		var li = $(this), //define this li as a variable
			  activeTab = li.find('a'); //Get the href's attribute value (class) and fade in the corresponding tabs content

		tabs.removeClass("active"); //Remove the active class
		li.addClass("active"); //Add the active tab to the selected tab
		tabContent.hide(); //Hide all other tab content

		activeTab.fadeIn(); //Fade the tab in

		e.preventDefault();
	});
Filter Search
The next item we will use jQuery for is our filter search. This will allow our users to filter their search results in real time as they type. This is done by taking the live value of the form field and filtering it with anything that matches within our 'posts' divs. The filter will then show the 'posts' div that contain the value and hide any that don't.
	//Filter Search

	$(".search").keyup(function () {
		var $this = $(this),
			  filter = $this.val(),
			  count = 0;

		$(".post").each(function () {
			var $this = $(this);

			if ($this.text().search(new RegExp(filter, "i")) < 0) {
			   $this.hide();
			} else {
			 $this.show();
			}
		});

		$("#filter-count").text(count);
	});
Step 2 - PHP
Now it's time to bring this static file to life and begin pulling in data from Facebook and Feedburner. Now is probably a good time to rename your file from index.html to index.php and download the PHP SDK. You can download the latest copy of Facebook's PHP SDK from:
Step 3 - Setting Up our Application Within Facebook
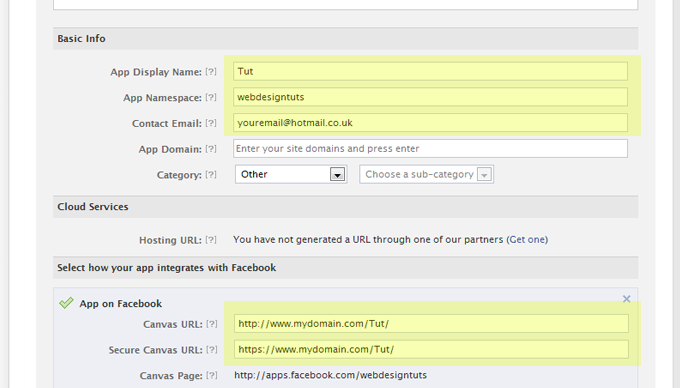
Now we now need to setup our Facebook app canvas page. Although this has been covered before, Facebook has recently updated its app setup page; so it's important to go through the new setup. Firstly, upload the index.php to your own web hosting account. Ive uploaded mine to a subfolder eg. www.yourdomain.com/tut When finished, you can setup your app by visiting https://developers.facebook.com/apps.
At this point, click on the 'create new app' button in the top right corner. Enter the name of your app and you will then be taken to the setup page. Facebook allows you to create many variations of apps - from desktop to mobile. In our case, we need to choose the 'App on Facebook'. There are five essential fields that you need to fill in in order for your app to work. They are highlighted in the image above. Once this has been done, if you go to apps.facebook.com, followed by whatever you entered into the 'app namespace.' In my case, this was 'webdesigntuts' so my app domain is: http://apps.facebook.com/webdesigntuts/
When you go to your url, you should see your index file within the canvas space on Facebook.
Step 4 - Facebook PHP SDK Configuration and Setup
After bringing the app into Facebook, it's now time to pull in data from the Facebook graph API and allow people to login in and out of our app.
In the directory for our app, add a new folder and call it 'fb' Open the SDK folder that you downloaded from GitHub. In it, you should find a couple of examples: the src and some tests. Take the contents from the src folder and drag it into your fb folder. This is the bit we need in order to connect to Facebook. In our index.php file, add the code below starting with including the Facebook SDK from our 'fb' folder, and add your unique app id and secret key. In the code below, you can see how this should be setup. We're essentially connecting to Facebook and retrieving the user id of the person who is using our app. If the user has been authenticated, then we are generating a variable for the logout url or if they haven't, we are generating one for the login url.
<?php

require 'fb/facebook.php';

$fbconfig['appUrl'] = "The full url of your app on Facebook goes here";

// Create An instance of our Facebook Application.
$facebook = new Facebook(array(
  'appId'  => 'Your App ID',
  'secret' => 'Your App Secret',
  'cookies' => 'true',
));

// Get the app User ID
$user = $facebook->getUser();

if ($user) {
	  try {
		// If the user has been authenticated then proceed
		$user_profile = $facebook->api('/me');
	  } catch (FacebookApiException $e) {
		error_log($e);
		$user = null;
	  }
}

// If the user is authenticated then generate the variable for the logout URL
if ($user) {
  $logoutUrl = $facebook->getLogoutUrl();

?>

<!-- Insert Logged in HTML here -->

<?php
} else {
  $loginUrl = $facebook->getLoginUrl();
}
?>
Step 5 - Logging In and Out
In between the if and else statement, we want to close and start the PHP tags so that we can insert our html that we created earlier into the PHP page. Now if you upload your page to your web space and refresh the Facebook app canvas, you should now be able to see the app. If you are logged in you will see it; otherwise, you will see a login url like in the image below

<a href="<?php echo $logoutUrl; ?>">Logout</a>
We've setup our app within Facebook and have created a login and out for our users. All that's left is to replace our dummy data with real live data.
Step 6 - Pulling Data in from YQL using JSON
The first bit of data we're going to pull into our app is the blog posts. This is pulled in from our Feedburner RSS feed. We collect it using YQL. If you haven't used YQL before, then you should definitely try it out. It's super simple to use and the flexibility that it offers is awesome. If you're not familiar with it you can learn more about it here and here.
What we're basically doing is sending a request to YQL using similar syntax that might be used in MYSQL. We then decode the data that is returned into a JSON readable format, and store that in a variable so that we can retrieve specific parts of the array within our blog posts.
We need to make three requests to YQL. They are as follows:
- webdesigntuts-summary feed - this contains the majority of the data that we need for our blog posts. It contains the title, url, author, publish date and summary of the article.
- webdesigntutsplus feed - the only information that we need from this is the comments count. We need to call this one as this data isn't contained within the webdesigntuts-summary feed.
- webdesigntuts-summary feed (again) - this time, instead of collecting all the data, we are only collecting the categories for use in the sidebar.
This needs to be inserted before the closing PHP tag before our HTML starts. You can see this demonstrated in the code below:
// The YQL query to get the Webdesigntuts+ summary posts from FeedBurner

$yqlurl = "http://query.yahooapis.com/v1/public/yql?q=";
$yqlurl .= urlencode("select * from feed where url='http://feeds.feedburner.com/webdesigntuts-summary' LIMIT 10");
$yqlurl .= "&format=json";

$yqlfeed = file_get_contents($yqlurl, true);
$yqlfeed = json_decode($yqlfeed);

// The YQL query to get the webdesigntuts+ posts from feedburner - We need this for the comments count only
$yqlurl2 = "http://query.yahooapis.com/v1/public/yql?q=";
$yqlurl2 .= urlencode("select * from feed where url='http://feeds.feedburner.com/webdesigntutsplus' LIMIT 10");
$yqlurl2 .= "&format=json";

$yqlfeed2 = file_get_contents($yqlurl2, true);
$yqlfeed2 = json_decode($yqlfeed2);


// The YQL query to get the webdesigntuts+ categories.
$yqlurl3 = "http://query.yahooapis.com/v1/public/yql?q=";
$yqlurl3 .= urlencode("SELECT category FROM feed WHERE url='http://feeds.feedburner.com/webdesigntuts-summary' LIMIT 10");
$yqlurl3 .= "&format=json";

$yqlfeed3 = file_get_contents($yqlurl3, true);
$yqlfeed3 = json_decode($yqlfeed3);
Step 7 - Getting the Number of Likes from a Facebook Page
At this stage, we're going to make a call to the Facebook graph API. It is similar to how we made the calls to YQL, however, there are a few slight variations between the two. This is really simple to do and should definitely be a section of code that you keep in your snippets folder as I'm sure it will come in handy. We set a variable of likes to = '0', make the call and then say; if the array that is returned contains 'likes' then set our likes variable to the number of likes that was returned.
//Make a call to the facebook graph api and decode the json to collect the number of likes from the webdesigntuts+ facebook page

$json_url ='https://graph.facebook.com/webdesigntutsplus';
$json = file_get_contents($json_url);
$json_output = json_decode($json);
$likes = 0;
if($json_output->likes){
$likes = $json_output->likes;
}
Step 8 - Displaying the Dynamic Data

Now that we have all our data stored in PHP variables, we need to take that data and display it on our page. For our blog post, we do this by creating a simple for each loop and using $feed as the value. We can then echo out individual values from our JSON array by using the name of the part that we wish to echo. The YQL console should help you find these sections by using the tree mode.
  <?php

//Create a variable that we can use to auto increment
$i=0;

//Loop out our yql feedburner feed

foreach ($yqlfeed->query->results->item as $item ) { ?>
	 <div class="post">
             <h3><a  href="<?php echo $item->link;?>" target="_blank"><?php echo $item->title;?></a></h3>
            <span class="postInfo">by <a href="#"><?php echo $item->creator;?></a> on <?php echo substr($item->pubDate,0,-9);?></span>
            <p><?php echo $item->description;?></p>
            <a class="more" href="<?php echo $item->link;?>" target="_blank">Read More</a>
            <span class="line"></span>

             <span class="blue"><?php echo $yqlfeed2->query->results->item[$i++]->comments[1]; ?> Comments </span>

             <span class="line"></span>
        </div><!--End Blog Post-->

	<?php }?>
In the above block of code, note that we have echoed out the number of comments from '$yqlfeed2'. The comments section has two parts: comment url, and comment number. The comment url is the first part(0), and the number of comments is the second, part[1]. We only require the number of comments. We also auto increment the item by setting '$i = 0,' and then using 'item[$i++]' By doing this, the item number will increment each time the post is looped out and will return the number of comments for each individual post.
Another point to note is that we have used a built in PHP function, subtr - substr($item->pubDate,0,-9). The reason why we have done this is due to some strange looking characters at the end of our date and time. This simply removes the last nine characters (-9), and leaves our date and time appearing as expected.
Step 9 - Displaying the Username, Image and Number of Likes
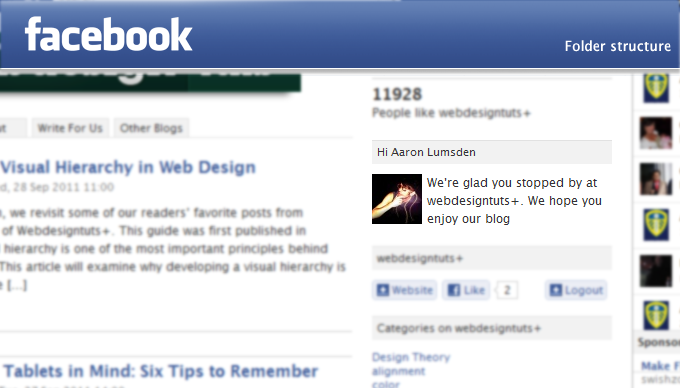
Echoing the number of likes is simple; we created the variable, '$likes' earlier, so we simply need to echo it. The Facebook PHP SDK also automatically creates some variables for us; again it's a simple case of echoing out. All we need to do is replace our dummy data with the dynamic data.
 <span class="likesCount"><?php echo $likes;?></span>
<p>People like webdesigntuts+</p>

<div class="tabHeader">Hi <?php echo $user_profile['name']; ?></div>

<img class="profileimage" name="" src="https://graph.facebook.com/<?php echo $user; ?>/picture" width="50" height="50" alt="">

<p>We're glad you stopped by at webdesigntuts+. We hope you enjoy our blog</p>
Step 9 - Displaying the Categories
  <div class="tabHeader">Categories on webdesigntuts+</div>

<ul>
   <?php  foreach($yqlfeed3->query->results->item as $item) { ?>
   <li><a href="http://webdesign.tutsplus.com/tag/<?php echo str_replace(' ','+',$item->category);?>" target="_blank"><?php echo $item->category;?></a></li>
    <?php }?>
</ul>
In the above code, we simply loop through our YQL query contained in '$yqlfeed3'. We also use another built in PHP function, str_replace. We use this to replace any spaces in our categories with a '+' sign. This is so that we won't have broken links when we attempt to redirect the user to the categories on Webdesigntuts+.
Step 10 - Final Tips and Tricks for Facebook Apps
Automatically Resizing the Facebook App Canvas Space
The first trick I'd like to show you helps us get around a bug in the Facebook canvas iframe. In your Facebook app settings, you can set it so that the iframe automatically resizes to fit your content; however, it also puts a horrible scrollbar next to your app to the right of Facebook's sidebar. This doesn't look too great, so we can solve this with a simple bit of JavaScript that can be placed just after our opening body tag. This will resize our canvas to fit the content, and the sidebar will be to the far right of Facebook as opposed to our app.
<!--Resize Iframe-->
<script src="http://connect.facebook.net/en_US/all.js"></script>
<script>

 FB.Canvas.setAutoResize(7);

 </script>
 <!-- End Resize Iframe-->
Facebook App Login Popup
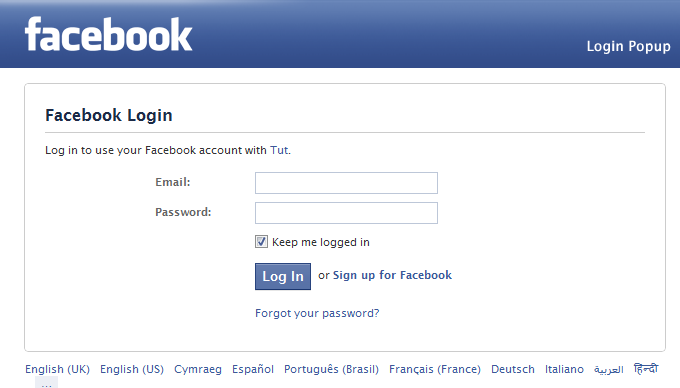
The next trick I'd like to show you is, when a user first visits your app, they will be asked to login/authorize. Rather than simply displaying a link, we can have a Facebook popup authorization. You know the ones I'm talking about, I'm sure you've seen them a million times. This can be accomplished by adding another bit of JavaScript after our closing PHP else statement.
$loginUrl = $facebook->getLoginUrl(array('redirect_uri' => $fbconfig['appUrl']));
print ">script>top.location.href = '$loginUrl';</script>"; >
Conclusion
So that's it folks! This brings our 'Design and Code an Integrated Facebook App' series to a close. I hope you've had as much fun creating it as I've had writing about it.
This September, at the annual F8 Conference, Facebook announced that they had just surpassed 800 million annual users. Way to go Facebook! As you can see, this is a great platform to promote yourself, your brand, or your product. What better way to utilise this than by creating your own native look and feel Facebook app. Facebook also announced, on the same day, the reinvention of user profiles, called Timeline. With Timeline comes a whole new additional way for apps to be integrated into a users profile/timeline.
"The movies you quote. The songs you have on repeat. The activities you love. Now there's a new class of social apps that let you express who you are through all the things you do."
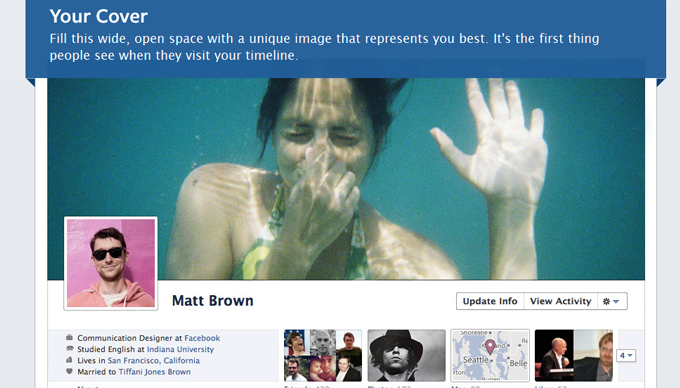
This is an exciting time for us app developers! If you have yet jumped in, what are you waiting for? Don't merely think about building the next app, get off your butt and build it. I'll look forward to seeing what you come up with and how you can take what you've learned, and put your own spin on it. Feel free to leave links to your apps and creations in the comments below.
Until next time, happy designing and coding!


Comments