Options are the most important data in WordPress, they store various configuration settings (see more). They're also contained in the database like other important data such as posts, pages, etc. Day by day, these options can be changed by WordPress itself or users. So how to configure them back to a previous state without memorizing each exact value?
In this tutorial, I'm going to show you how to create a simple backup/restore feature for your WordPress blog. With this feature, you can backup all options to another place, that you can restore them from at any time without configuring them again.
Before We Start
In general, our feature will have two sections, one is an Export section for backing up data and an Import section for restoring data. So I will demonstrate these by creating a simple plugin.
Step 1 Plugin Header
First of all, I must write a few lines to tell WordPress about our plugin.
/*
Plugin Name: I/E Option
Plugin URI: http://wp.tutsplus.com/
Description: This is a sample plugin with backup and restore options feature.
Author: Lee Pham
Version: 1.0
Author URI: http://twitter.com/leephamj
*/
And here is our result:

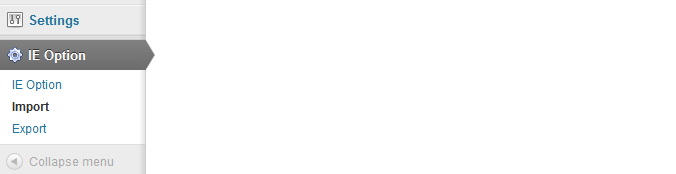
Step 2 Create a Page Admin
Now we need a place to put our plugin interface, it shows two key features that were mentioned above (including Import and Export features). So I generate a page in the admin section:
function register_ie_option() {
	add_menu_page('IE Option Page', 'IE Option', 'activate_plugins', 'ie-option', 'ie_option_page', '', 76);
	add_submenu_page('ie-option', 'Import', 'Import', 'activate_plugins', 'ie-import-option', 'ie_import_option_page');
	add_submenu_page('ie-option', 'Export', 'Export', 'activate_plugins', 'ie-export-option', 'ie_export_option_page');
}

function ie_option_page() {
	// Our stuff here
}

function ie_import_option_page() {
	// Content Import Feature
}

function ie_export_option_page() {
	// Content Export Feature
}
add_action('admin_menu', 'register_ie_option');
Here are some points:
- We use
add_menu_pageas a built-in WordPress function to add a new top level menu section in the admin menu sidebar and where theie_option_pageparameter is the callback function for outputting the page content. - In order to separate two main features into different sections, we use
add_submenu_pageto add them to the top level menu we just created above. As you see, each function also has a callback function to display output content like theadd_menu_pagefunction does. It does not matters if you merge these into one place, I just try to keep it clear. - Then we hook
register_ie_optionon to theadmin_menuaction in order to trigger our goal everytime this action is called.
Step 3 Create Export Feature
I plan to create an Export page like this:
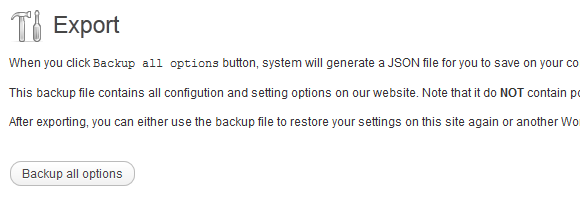
Create Export Page Skeleton
function ie_export_option_page() {
	if (!isset($_POST['export'])) {
		?>
		<div class="wrap">
			<div id="icon-tools" class="icon32"><br /></div>
			<h2>Export</h2>
			<p>When you click <tt>Backup all options</tt> button, system will generate a JSON file for you to save on your computer.</p>
			<p>This backup file contains all configution and setting options on our website. Note that it do <b>NOT</b> contain posts, pages, or any relevant data, just your all options.</p>
			<p>After exporting, you can either use the backup file to restore your settings on this site again or another WordPress site.</p>
			<form method='post'>
				<p class="submit">
					<?php wp_nonce_field('ie-export'); ?>
					<input type='submit' name='export' value='Backup all options'/>
				</p>
			</form>
		</div>
		<?php
	}
	elseif (check_admin_referer('ie-export')) {
		// Do something if Backup all options button clicked
	}
}
We just create a form with a button and check if the button is being clicked or not. Additionally, we add some instruction text using some available WordPress CSS class. For doing a security check, I use a wp_nonce_field() and the check_admin_referer() function, read more about WordPress Nonces.
Naming the Filename to Be Generated
$blogname = str_replace(" ", "", get_option('blogname'));
$date = date("m-d-Y");
$json_name = $blogname."-".$date;
Just name the file so you can easily see where and when it was exported.
Get Backup Options and Encode Into JSON Data
$options = get_alloptions();

foreach ($options as $key => $value) {
	$value = maybe_unserialize($value);
	$need_options[$key] = $value;
}

$json_file = json_encode($need_options);
Here is the important step, let's pay attention:
-
get_alloptions()is a function that gets all options on your site and returns them as an array,$optionsin this case. - By retrieving all the options, the value of options may be serialized data, so we have to unserialize it first.
- Our intention is to generate JSON to store the backup data. JSON is a light-weight and powerful way to store text information. So what we need to do is convert our data to JSON syntax,
json_encodehelps us to achieve this goal.
ob_clean();
echo $json_file;
header("Content-Type: text/json; charset=" . get_option( 'blog_charset'));
header("Content-Disposition: attachment; filename=$json_name.json");
exit();
Then we wrap content of our JSON data within two important functions, ob_clean() and exit() to ensure our generated JSON file only contains JSON data that json_file holds without any other data. By the way, we send a header request to the client that displays a download dialog. To make this work properly we should put the ob_start() function at the top of our plugin code, this prevents header errors from occurring, maybe there are some extra whitespace or lines somewhere in WordPress code that could cause that.
"JSON (JavaScript Object Notation) is a lightweight data-interchange format. It is easy for humans to read and write. It is easy for machines to parse and generate."
So here is the entire Export function code:
function ie_export_option_page() {
	if (!isset($_POST['export'])) {
		?>
		<div class="wrap">
			<div id="icon-tools" class="icon32"><br /></div>
			<h2>Export</h2>
			<p>When you click <tt>Backup all options</tt> button, system will generate a JSON file for you to save on your computer.</p>
			<p>This backup file contains all configution and setting options on our website. Note that it do <b>NOT</b> contain posts, pages, or any relevant data, just your all options.</p>
			<p>After exporting, you can either use the backup file to restore your settings on this site again or another WordPress site.</p>
			<form method='post'>
				<p class="submit">
					<?php wp_nonce_field('ie-export'); ?>
					<input type='submit' name='export' value='Backup all options'/>
				</p>
			</form>
		</div>
		<?php
	}
	elseif (check_admin_referer('ie-export')) {

		$blogname = str_replace(" ", "", get_option('blogname'));
		$date = date("m-d-Y");
		$json_name = $blogname."-".$date; // Namming the filename will be generated.

		$options = get_alloptions(); // Get all options data, return array

		foreach ($options as $key => $value) {
			$value = maybe_unserialize($value);
			$need_options[$key] = $value;
		}

		$json_file = json_encode($need_options); // Encode data into json data

		ob_clean();
		echo $json_file;
		header("Content-Type: text/json; charset=" . get_option( 'blog_charset'));
		header("Content-Disposition: attachment; filename=$json_name.json");
		exit();
	}
}
Step 4 Create Import Feature
This page's task is quite simple, it displays an upload form and parses data from the JSON file to backup our options.
Create Import Page Skeleton
function ie_import_option_page() {
	?>
	<div class="wrap">
		<div id="icon-tools" class="icon32"><br /></div>
		<h2>Import</h2>
		<?php
			if (isset($_FILES['import'])) {
				// Do something if a file was uploaded
			}
		?>
		<p>Click Browse button and choose a json file that you backup before.</p>
		<p>Press Restore button, WordPress do the rest for you.</p>
		<form method='post' enctype='multipart/form-data'>
			<p class="submit">
				<?php wp_nonce_field('ie-import'); ?>
				<input type='file' name='import' />
				<input type='submit' name='submit' value='Restore'/>
			</p>
		</form>
	</div>
	<?php
}
Like the Export page we create a form, but this time, we add a Browse button so the user can choose the file they want and submit it.
Validation and Updating JSON File
if (isset($_FILES['import'])) {
	if ($_FILES['import']['error'] > 0) {
		wp_die("Error happens");
	}
	else {
		$file_name = $_FILES['import']['name'];
		$file_ext = strtolower(end(explode(".", $file_name)));
		$file_size = $_FILES['import']['size'];
		if (($file_ext == "json") && ($file_size < 500000)) {
			$encode_options = file_get_contents($_FILES['import']['tmp_name']);
			$options = json_decode($encode_options, true);
			foreach ($options as $key => $value) {
				update_option($key, $value);
			}
			echo "<div class='updated'><p>All options are restored successfully.</p></div>";
		}
		else {
			echo "<div class='error'><p>Invalid file or file size too big.</p></div>";
		}
	}
}
If the upload process gets errors, just return a die message "An error has occurred". If not, get the extension and size of the file, store them into variables and check them. We only accept files that have the ".json" extension and size of less than 500000 bytes. If the file is not an appropriate one, just display an error message "Invalid file or file size too big.". Note: You can modify this size as you need.
Then, the $encode_options variable will get all content of this file. As the file contains JSON data, before using it we must decode first. To do this, we use json_decode with a second parameter that has a true value so this function returns an array value. With an array value, we start to loop over it. On each iteration, we will update data with the same key and its value. In the end, all our options will be restored exactly as they were, and a successful message will be displayed.
And here is the entire Import function code:
function ie_import_option_page() {
	?>
	<div class="wrap">
		<div id="icon-tools" class="icon32"><br /></div>
		<h2>Import</h2>
		<?php
			if (isset($_FILES['import']) && check_admin_referer('ie-import')) {
				if ($_FILES['import']['error'] > 0) {
					wp_die("Error happens");
				}
				else {
					$file_name = $_FILES['import']['name']; // Get the name of file
					$file_ext = strtolower(end(explode(".", $file_name))); // Get extension of file
					$file_size = $_FILES['import']['size']; // Get size of file
					/* Ensure uploaded file is JSON file type and the size not over 500000 bytes
 					 * You can modify the size you want
					 */
					if (($file_ext == "json") && ($file_size < 500000)) {
						$encode_options = file_get_contents($_FILES['import']['tmp_name']);
						$options = json_decode($encode_options, true);
						foreach ($options as $key => $value) {
							update_option($key, $value);
						}
						echo "<div class='updated'><p>All options are restored successfully.</p></div>";
					}
					else {
						echo "<div class='error'><p>Invalid file or file size too big.</p></div>";
					}
				}
			}
		?>
		<p>Click Browse button and choose a json file that you backup before.</p>
		<p>Press Restore button, WordPress do the rest for you.</p>
		<form method='post' enctype='multipart/form-data'>
			<p class="submit">
				<?php wp_nonce_field('ie-import'); ?>
				<input type='file' name='import' />
				<input type='submit' name='submit' value='Restore'/>
			</p>
		</form>
	</div>
	<?php
}
Create Your Own Backup Feature for Your Templates or Plugins
In the sample plugin, I backed up all of the site options by using the get_alloptions WordPress function. If you want to apply this to your own specific options, just do it like this:
$options = array('your_option1_name' => get_option('your_option1_name'), 'your_option2_name' => get_option('your_option2_name');
$json_file = json_encode($options);
And go on to the next step as above. You freely choose what options you want to backup!
Conclusion
In this tutorial, we take a look at an overview of creating a simple backup/restore feature. You should notice that my plugin is just a simple sample not an official one. My goal is not write a perfect plugin, but to show you the basic principle of this feature. By understanding it, you can create your own feature on your templates or plugins, you also can make it as flexible as you want. Therefore you can make this feature isolated for your templates/plugins.
I hope this tutorial is useful for you, let me know what you think. Your ideas make it better, or even show me my mistakes, your feedback will really help a lot. Thanks for reading!

Comments