In this tutorial we will be working with the HTML5 canvas and Javascript to create a dynamic tile swapping game. The result will be a puzzle that works with any given image, and has flexible difficulty levels that are easily adjusted.
The Complete HTML5 Canvas Puzzle
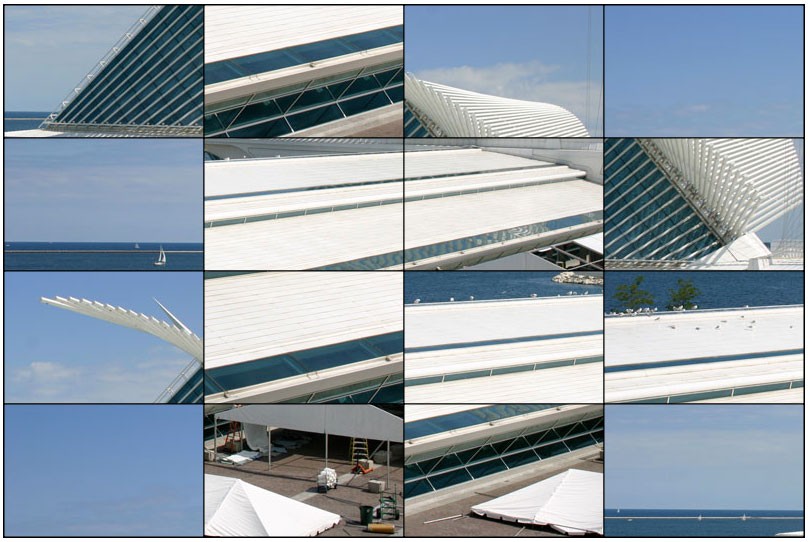
Here is a quick shot of the puzzle we will be building:

Click to play
A couple of notes:
-
Cross-browser compatibility: This puzzle was tested and works in all versions of Safari, Firefox, and Chrome that support the
canvaselement. - Mobile: The code provide here works in the above-mentioned desktop browser and is not optimised for mobile. The puzzle will load and render just fine, but because of the touch and drag behaviors in mobile browsers, optimization is required for it to function correctly. Optimizing this puzzle for mobile will be covered in a future tutorial.
-
Adjustable Difficulty: The code contains a constant,
PUZZLE_DIFFICULTY, that determines the number of pieces. In the demo above, this is set to4, giving a 4x4 puzzle. We can easily change this - for example, this version has aPUZZLE_DIFFICULTYof10.
Getting Started
To get started, create a directory for the project. Place an image in the directory that you want to use as your puzzle. Any web friendly image will do, and it can be any size your heart desires - just make sure it fits within the fold of your browser's window.
Step 1: Creating the HTML Template
Open a new file using your favorite text editor and save it inside your project directory, next to your image. Next, fill out this basic HTML template.
<!DOCTYPE html>
<html>
<head>
    <title>HTML5 Puzzle</title>
    <script>

    </script>
</head>

<body onload="init();">
    <canvas id="canvas"></canvas>
</body>

</html>
All we need to do here is create a standard HTML5 template containing one canvas tag with the id of “canvas”. We’ll write an onload listener in the body tag which will call our init() function when fired.
Now start by placing your cursor inside the script tag. From here on out it's all javascript. With the exception of the initial variables, I'll be organising the sections by function. First showing you the code and then explaining the logic.
Ready? Let's get right to it!
Step 2: Setting Up Our Variables
Let’s set up our variables and take a look at each one.
const PUZZLE_DIFFICULTY = 4;
const PUZZLE_HOVER_TINT = '#009900';

var _canvas;
var _stage;

var _img;
var _pieces;
var _puzzleWidth;
var _puzzleHeight;
var _pieceWidth;
var _pieceHeight;
var _currentPiece;
var _currentDropPiece;

var _mouse;
First we have a couple of constants: PUZZLE_DIFFICULTY and PUZZLE_HOVER_TINT. The PUZZLE_DIFFICULTY constant holds the number of pieces in our puzzle. In this application, the rows and columns always match, so by setting PUZZLE_DIFFICULTY to 4, we get 16 puzzle pieces in total. Increasing this increases the difficulty of the puzzle.
Next is a series of variables:
-
_canvasand_stagewill hold a reference to the canvas and to its drawing context, respectively. We do this so we don’t have to write out the entire query each time we use them. And we’ll be using them a lot! -
_imgwill be a reference to the loaded image, which we will be copying pixels from throughout the application. -
_puzzleWidth,_puzzleHeight,_pieceWidth, and_pieceHeightwill be used to store the dimensions of both the entire puzzle and each individual puzzle piece. We set these once to prevent calculating them over and over again each time we need them. -
_currentPieceholds a reference to the piece currently being dragged. -
_currentDropPieceholds a reference to the piece currently in position to be dropped on. (In the demo, this piece is highlighted green.) -
_mouseis a reference that will hold the mouse's currentxandyposition. This gets updated when the puzzle is clicked to determine which piece is touched, and when a piece is being dragged to determine what piece it's hovering over.
Now, on to our functions.
Step 3: The init() Function
function init(){
    _img = new Image();
    _img.addEventListener('load',onImage,false);
    _img.src = "mke.jpg";
}
The first thing we want to do in our application is to load the image for the puzzle. The image object is first instantiated and set to our _img variable. Next, we listen for the load event which will then fire our onImage() function when the image has finished loading. Lastly we set the source of the image, which triggers the load.
Step 4: The onImage() Function
function onImage(e){
    _pieceWidth = Math.floor(_img.width / PUZZLE_DIFFICULTY)
    _pieceHeight = Math.floor(_img.height / PUZZLE_DIFFICULTY)
    _puzzleWidth = _pieceWidth * PUZZLE_DIFFICULTY;
    _puzzleHeight = _pieceHeight * PUZZLE_DIFFICULTY;
    setCanvas();
    initPuzzle();
}
Now that the image is successfully loaded, we can set the majority of the variables declared earlier. We do this here because we now have information about the image and can set our values appropriately.
The first thing we do is calculate the size of each puzzle piece. We do this by dividing the PUZZLE_DIFFICULTY value by the width and height of the loaded image. We also trim the fat off of the edges to give us some nice even numbers to work with and assure that each piece can appropriately swap ‘slots’ with others.
Next we use our new puzzle piece values to determine the total size of the puzzle and set these values to _puzzleWidth and _puzzleHeight.
Lastly, we call off a few functions - setCanvas() and initPuzzle().
Step 5: The setCanvas() Function
function setCanvas(){
    _canvas = document.getElementById('canvas');
    _stage = _canvas.getContext('2d');
    _canvas.width = _puzzleWidth;
    _canvas.height = _puzzleHeight;
    _canvas.style.border = "1px solid black";
}
Now that our puzzle values are complete, we want to set up our canvas element. First we set our _canvas variable to reference our canvas element, and _stage to reference its context.
Now we set the width and height of our canvas to match the size of our trimmed image, followed by applying some simple styles to create a black border around our canvas to display the bounds of our puzzle.
Step 6: The initPuzzle() Function
function initPuzzle(){
    _pieces = [];
    _mouse = {x:0,y:0};
    _currentPiece = null;
    _currentDropPiece = null;
    _stage.drawImage(_img, 0, 0, _puzzleWidth, _puzzleHeight, 0, 0, _puzzleWidth, _puzzleHeight);
    createTitle("Click to Start Puzzle");
    buildPieces();
}
Here we initialize the puzzle. We set this function up in such a way that we can call it again later when we want to replay the puzzle. Anything else that needed to be set prior to playing will not need to be set again.
First we set _pieces as an empty array and create the _mouse object, which will hold our mouse position throughout the application. Next we set the _currentPiece and _currentPieceDrop to null. (On the first play these values would already be null, but we want to make sure they get reset when replaying the puzzle.)
Finally, it’s time to draw! First we draw the entire image to display to the player what they will be creating. After that we create some simple instructions by calling our createTitle() function.
Step 7: The createTitle() Function
function createTitle(msg){
    _stage.fillStyle = "#000000";
    _stage.globalAlpha = .4;
    _stage.fillRect(100,_puzzleHeight - 40,_puzzleWidth - 200,40);
    _stage.fillStyle = "#FFFFFF";
    _stage.globalAlpha = 1;
    _stage.textAlign = "center";
    _stage.textBaseline = "middle";
    _stage.font = "20px Arial";
    _stage.fillText(msg,_puzzleWidth / 2,_puzzleHeight - 20);
}
Here we create a fairly simple message that instructs the user to click the puzzle to begin.
Our message will be a semi-transparent rectangle that will serve as the background of our text. This allows the user to see the image behind it and also assures our white text will be legible on any image
We simply set fillStyle to black and globalAlpha to .4, before filling in a short black rectangle at the bottom of the image.
Since globalAlpha affects the entire canvas, we need to set it back to 1 (opaque) before drawing the text. To set up our title, we set the textAlign to 'center' and the textBaseline to 'middle'. We can also apply some font properties.
To draw the text, we use the fillText() method. We pass in the msg variable and place it at the horizontal center of the canvas, and the vertical center of the rectangle.
Step 8: The buildPieces() Function
function buildPieces(){
    var i;
    var piece;
    var xPos = 0;
    var yPos = 0;
    for(i = 0;i < PUZZLE_DIFFICULTY * PUZZLE_DIFFICULTY;i++){
        piece = {};
        piece.sx = xPos;
        piece.sy = yPos;
        _pieces.push(piece);
        xPos += _pieceWidth;
        if(xPos >= _puzzleWidth){
            xPos = 0;
            yPos += _pieceHeight;
        }
    }
    document.onmousedown = shufflePuzzle;
}
Finally it's time to build the puzzle!
We do this by building an object for each piece. These objects will not be responsible for rendering to the canvas, but rather to merely hold references on what to draw and where. That being said, let’s get to it.
First off, let’s declare a few variables that we’ll be reusing through the loop. We want to set up the loop to iterate through the number of puzzle pieces we need. We get this value by multiplying PUZZLE_DIFFICULTY by itself - so in this case we get 16.
In the loop:
    for(i = 0;i < PUZZLE_DIFFICULTY * PUZZLE_DIFFICULTY;i++){
        piece = {};
        piece.sx = xPos;
        piece.sy = yPos;
        _pieces.push(piece);
        xPos += _pieceWidth;
        if(xPos >= _puzzleWidth){
            xPos = 0;
            yPos += _pieceHeight;
        }
    }
Start by creating an empty piece object. Next add the sx and sy properties to the object. In the first iteration, these values are 0 and represent the point in our image where we will begin to draw from. Now push it to the _pieces[] array. This object will also contain the properties xPos and yPos, which will tell us the current position in the puzzle where the piece should be drawn. We’ll be shuffling the objects before its playable so these values don’t need to be set quite yet.
The last thing we do in each loop is increase the local variable xPos by _pieceWidth. Before continuing on with the loop, we determine if we need to step down to the next row of pieces by checking whether xPos is beyond the width of the puzzle. If so, we reset xPos back to 0 and increase yPos by _pieceHeight.
Now we have our puzzle pieces all stored away nicely in our _pieces array. At this point the code finally stops executing and waits for the user to interact. We set a click listener to the document to fire the shufflePuzzle() function when triggered, which will begin the game.
Step 9: The shufflePuzzle() Function
function shufflePuzzle(){
    _pieces = shuffleArray(_pieces);
    _stage.clearRect(0,0,_puzzleWidth,_puzzleHeight);
    var i;
    var piece;
    var xPos = 0;
    var yPos = 0;
    for(i = 0;i < _pieces.length;i++){
        piece = _pieces[i];
        piece.xPos = xPos;
        piece.yPos = yPos;
        _stage.drawImage(_img, piece.sx, piece.sy, _pieceWidth, _pieceHeight, xPos, yPos, _pieceWidth, _pieceHeight);
        _stage.strokeRect(xPos, yPos, _pieceWidth,_pieceHeight);
        xPos += _pieceWidth;
        if(xPos >= _puzzleWidth){
            xPos = 0;
            yPos += _pieceHeight;
        }
    }
    document.onmousedown = onPuzzleClick;
}
function shuffleArray(o){
    for(var j, x, i = o.length; i; j = parseInt(Math.random() * i), x = o[--i], o[i] = o[j], o[j] = x);
    return o;
}
First things first: shuffle the _pieces[] array. I’m using a nice utility function here that will shuffle the indices of the array passed into it. The explanation of this function is beyond the topic of this tutorial so we’ll move on, knowing that we have successfully shuffled our pieces. (For a basic introduction to shuffling, take a look at this tutorial.)
Let’s first clear all graphics drawn to the canvas to make way for drawing our pieces. Next, set up the array similar to how we did when first creating our piece objects.
In the loop:
    for(i = 0;i < _pieces.length;i++){
        piece = _pieces[i];
        piece.xPos = xPos;
        piece.yPos = yPos;
        _stage.drawImage(_img, piece.sx, piece.sy, _pieceWidth, _pieceHeight, xPos, yPos, _pieceWidth, _pieceHeight);
        _stage.strokeRect(xPos, yPos, _pieceWidth,_pieceHeight);
        xPos += _pieceWidth;
        if(xPos >= _puzzleWidth){
            xPos = 0;
            yPos += _pieceHeight;
        }
    }
First of all, use the i variable to set up our reference to the current piece object in the loop. Now we populate the xPos and yPos properties I mentioned earlier, which will be 0 in our first iteration.
Now, at long last, we draw our pieces.
The first parameter of drawImage() assigns the source of the image we want to draw from. Then use the piece objects sx and sy properties, along with _pieceWidth and _pieceHeight, to populate the parameters that declare the area of the image in which to draw from. The last four parameters set the area of the canvas where we want to draw. We use the xPos and yPos values that we are both building in the loop and assigning to the object.
Immediately after this we draw a quick stroke around the piece to give it a border, which will separate it nicely from the other pieces.
Now we wait for the user to grab a piece by setting another click listener. This time it will fire an onPuzzleClick() function.
Step 10: The onPuzzleClick() Function
function onPuzzleClick(e){
    if(e.layerX || e.layerX == 0){
        _mouse.x = e.layerX - _canvas.offsetLeft;
        _mouse.y = e.layerY - _canvas.offsetTop;
    }
    else if(e.offsetX || e.offsetX == 0){
        _mouse.x = e.offsetX - _canvas.offsetLeft;
        _mouse.y = e.offsetY - _canvas.offsetTop;
    }
    _currentPiece = checkPieceClicked();
    if(_currentPiece != null){
        _stage.clearRect(_currentPiece.xPos,_currentPiece.yPos,_pieceWidth,_pieceHeight);
        _stage.save();
        _stage.globalAlpha = .9;
        _stage.drawImage(_img, _currentPiece.sx, _currentPiece.sy, _pieceWidth, _pieceHeight, _mouse.x - (_pieceWidth / 2), _mouse.y - (_pieceHeight / 2), _pieceWidth, _pieceHeight);
        _stage.restore();
        document.onmousemove = updatePuzzle;
        document.onmouseup = pieceDropped;
    }
}
We know that the puzzle was clicked; now we need to determine what piece was clicked on. This simple conditional will get us our mouse position on all modern desktop browsers that support canvas, using either e.layerX and e.layerY or e.offsetX and e.offsetY. Use these values to update our _mouse object by assigning it an x and a y property to hold the current mouse position - in this case, the position where it was clicked.
In line 112 we then immediately set _currentPiece to the returned value from our checkPieceClicked() function. We separate this code because we want to use it later when dragging the puzzle piece. I’ll explain this function in the next step.
If the value returned was null, we simply do nothing, as this implies that the user didn’t actually click on a puzzle piece. However, if we do retrieve a puzzle piece, we want to attach it to the mouse and fade it out a bit to reveal the pieces underneath. So how do we do this?
First we clear the canvas area where the piece sat before we clicked it. We use clearRect() once again, but in this case we pass in only the area obtained from the _currentPiece object. Before we redraw it, we want to save() the context of the canvas before proceeding. This will assure that anything we draw after saving will not simply draw over anything in its way. We do this because we’ll be slightly fading the dragged piece and want to see the pieces under it. If we didn’t call save(), we’d just draw over any graphics in the way - faded or not.
Now we draw the image so its center is positioned at the mouse pointer. The first 5 parameters of drawImage will always be the same throughout the application. When clicking, the next two parameters will be updated to center itself to the pointer of the mouse. The last two parameters, the width and height to draw, will also never change.
Lastly we call the restore() method. This essentially means we are done using the new alpha value and want to restore all properties back to where they were. To wrap up this function we add two more listeners. One for when we move the mouse (dragging the puzzle piece), and one for when we let go (drop the puzzle piece).
Step 11: The checkPieceClicked() Function
function checkPieceClicked(){
    var i;
    var piece;
    for(i = 0;i < _pieces.length;i++){
        piece = _pieces[i];
        if(_mouse.x < piece.xPos || _mouse.x > (piece.xPos + _pieceWidth) || _mouse.y < piece.yPos || _mouse.y > (piece.yPos + _pieceHeight)){
            //PIECE NOT HIT
        }
        else{
            return piece;
        }
    }
    return null;
}
Now we need to backtrack a bit. We were able to determine what piece was clicked, but how did we do it? It’s pretty simple actually. What we need to do is loop through all of the puzzle pieces and determine if the click was within the bounds of any of our objects. If we find one, we return the matched object and end the function. If we find nothing, we return null.
Step 12: The updatePuzzle() Function
function updatePuzzle(e){
    _currentDropPiece = null;
    if(e.layerX || e.layerX == 0){
        _mouse.x = e.layerX - _canvas.offsetLeft;
        _mouse.y = e.layerY - _canvas.offsetTop;
    }
    else if(e.offsetX || e.offsetX == 0){
        _mouse.x = e.offsetX - _canvas.offsetLeft;
        _mouse.y = e.offsetY - _canvas.offsetTop;
    }
    _stage.clearRect(0,0,_puzzleWidth,_puzzleHeight);
    var i;
    var piece;
    for(i = 0;i < _pieces.length;i++){
        piece = _pieces[i];
        if(piece == _currentPiece){
            continue;
        }
        _stage.drawImage(_img, piece.sx, piece.sy, _pieceWidth, _pieceHeight, piece.xPos, piece.yPos, _pieceWidth, _pieceHeight);
        _stage.strokeRect(piece.xPos, piece.yPos, _pieceWidth,_pieceHeight);
        if(_currentDropPiece == null){
            if(_mouse.x < piece.xPos || _mouse.x > (piece.xPos + _pieceWidth) || _mouse.y < piece.yPos || _mouse.y > (piece.yPos + _pieceHeight)){
                //NOT OVER
            }
            else{
                _currentDropPiece = piece;
                _stage.save();
                _stage.globalAlpha = .4;
                _stage.fillStyle = PUZZLE_HOVER_TINT;
                _stage.fillRect(_currentDropPiece.xPos,_currentDropPiece.yPos,_pieceWidth, _pieceHeight);
                _stage.restore();
            }
        }
    }
    _stage.save();
    _stage.globalAlpha = .6;
    _stage.drawImage(_img, _currentPiece.sx, _currentPiece.sy, _pieceWidth, _pieceHeight, _mouse.x - (_pieceWidth / 2), _mouse.y - (_pieceHeight / 2), _pieceWidth, _pieceHeight);
    _stage.restore();
    _stage.strokeRect( _mouse.x - (_pieceWidth / 2), _mouse.y - (_pieceHeight / 2), _pieceWidth,_pieceHeight);
}
Now back to the dragging. We call this function when the user moves the mouse. This is the biggest function of the application as it’s doing several things. Let’s begin. I'll break it down as we go.
    _currentDropPiece = null;
    if(e.layerX || e.layerX == 0){
        _mouse.x = e.layerX - _canvas.offsetLeft;
        _mouse.y = e.layerY - _canvas.offsetTop;
    }
    else if(e.offsetX || e.offsetX == 0){
        _mouse.x = e.offsetX - _canvas.offsetLeft;
        _mouse.y = e.offsetY - _canvas.offsetTop;
    }
Start by setting _currentDropPiece to null. We need to reset this back to null on update because of the chance that our piece was dragged back to its home. We don’t want the previous _currentDropPiece value hanging around. Next we set the _mouse object the same way we did on click.
_stage.clearRect(0,0,_puzzleWidth,_puzzleHeight);
Here we need to do clear all graphics on the canvas. We essentially need to redraw the puzzle pieces because the object being dragged on top will effect their appearance. If we didn't do this, we’d see some very strange results following the path of our dragged puzzle piece.
    var i;
    var piece;
    for(i = 0;i < _pieces.length;i++){
Begin by setting up our usual pieces loop.
In the Loop:
        piece = _pieces[i];
        if(piece == _currentPiece){
            continue;
        }
Create our piece reference as usual. Next check if the piece we are currently referencing is the same as piece we are dragging. If so, continue the loop. This will keep the dragged piece's home slot empty.
        _stage.drawImage(_img, piece.sx, piece.sy, _pieceWidth, _pieceHeight, piece.xPos, piece.yPos, _pieceWidth, _pieceHeight);
        _stage.strokeRect(piece.xPos, piece.yPos, _pieceWidth,_pieceHeight);
Moving on, redraw the puzzle piece using its properties exactly the same way we did when first drew them. You’ll need to draw the border as well.
        if(_currentDropPiece == null){
            if(_mouse.x < piece.xPos || _mouse.x > (piece.xPos + _pieceWidth) || _mouse.y < piece.yPos || _mouse.y > (piece.yPos + _pieceHeight)){
                //NOT OVER
            }
            else{
                _currentDropPiece = piece;
                _stage.save();
                _stage.globalAlpha = .4;
                _stage.fillStyle = PUZZLE_HOVER_TINT;
                _stage.fillRect(_currentDropPiece.xPos,_currentDropPiece.yPos,_pieceWidth, _pieceHeight);
                _stage.restore();
            }
        }
Since we have a reference to each object in the loop, we can also use this opportunity to check if the dragged piece is on top of it. We do this because we want to give the user feedback on what piece it can be dropped on. Let’s dig into that code now.
First we want to see if this loop has already produced a drop target. If so, we don’t need to bother since only one drop target can be possible and any given mouse move. If not, _currentDropPiece will be null and we can proceed into the logic. Since our mouse is in the middle of the dragged piece, all we really need to do is determine what other piece our mouse is over.
Next, use our handy checkPieceClicked() function to determine whether the mouse is hovering over the current piece object in the loop. If so, we set the _currentDropPiece variable and draw a tinted box over the puzzle piece, indicating that it is now the drop target.
Remember to save() and restore(). Otherwise you’d get the tinted box and not the image underneath.
Out of the Loop:
    _stage.save();
    _stage.globalAlpha = .6;
    _stage.drawImage(_img, _currentPiece.sx, _currentPiece.sy, _pieceWidth, _pieceHeight, _mouse.x - (_pieceWidth / 2), _mouse.y - (_pieceHeight / 2), _pieceWidth, _pieceHeight);
    _stage.restore();
    _stage.strokeRect( _mouse.x - (_pieceWidth / 2), _mouse.y - (_pieceHeight / 2), _pieceWidth,_pieceHeight);
Last but not least we need to redraw the dragged piece. The code is the same as when we first clicked it, but the mouse has moved so its position will be updated.
Step 13: The pieceDropped() Function
function pieceDropped(e){
    document.onmousemove = null;
    document.onmouseup = null;
    if(_currentDropPiece != null){
        var tmp = {xPos:_currentPiece.xPos,yPos:_currentPiece.yPos};
        _currentPiece.xPos = _currentDropPiece.xPos;
        _currentPiece.yPos = _currentDropPiece.yPos;
        _currentDropPiece.xPos = tmp.xPos;
        _currentDropPiece.yPos = tmp.yPos;
    }
    resetPuzzleAndCheckWin();
}
OK, the worst is behind us. We are now successfully dragging a puzzle piece and even getting visual feedback on where it will be dropped. Now all that is left is to drop the piece. Let’s first remove the listeners right away since nothing is being dragged.
Next, check that _currentDropPiece is not null. If it is, this means that we dragged it back to the piece's home area and not over another slot. If it’s not null, we continue with the function.
What we do now is simply swap the xPos and yPos of each piece. We make a quick temp object as a buffer to hold one of the object's values in the swapping process. At this point, the two pieces both have new xPos and yPos values, and will snap into their new homes on the next draw. That’s what we’ll do now, simultaneously checking whether the game has been won.
Step 14: The resetPuzzleAndCheckWin() Function
function resetPuzzleAndCheckWin(){
    _stage.clearRect(0,0,_puzzleWidth,_puzzleHeight);
    var gameWin = true;
    var i;
    var piece;
    for(i = 0;i < _pieces.length;i++){
        piece = _pieces[i];
        _stage.drawImage(_img, piece.sx, piece.sy, _pieceWidth, _pieceHeight, piece.xPos, piece.yPos, _pieceWidth, _pieceHeight);
        _stage.strokeRect(piece.xPos, piece.yPos, _pieceWidth,_pieceHeight);
        if(piece.xPos != piece.sx || piece.yPos != piece.sy){
            gameWin = false;
        }
    }
    if(gameWin){
        setTimeout(gameOver,500);
    }
}
Once again, clear the canvas and set up a gameWin variable, setting it to true by default. Now proceed with our all-too-familiar pieces loop.
The code here should look familiar so we won’t go over it. It simply draws the pieces back into their original or new slots. Within this loop, we want to see if each piece is being drawn in its winning position. This is simple: we check to see if our sx and sy properties match up with xPos and yPos. If not, we know we couldn't possibly win the puzzle and set gameWin to false. If we made it through the loop with everyone in their winning places, we set up a quick timeout to call our gameOver() method. (We set a timeout so the screen doesn’t change so drastically upon dropping the puzzle piece.)
Step 15: The gameOver() Function
function gameOver(){
    document.onmousedown = null;
    document.onmousemove = null;
    document.onmouseup = null;
    initPuzzle();
}
This is our last function! Here we just remove all listeners and call initPuzzle(), which resets all necessary values and waits for the user to play again.
Conclusion
Click here to see the final result.
As you can see, you can do a lot of new creative things in HTML5 using selected bitmap areas of loaded images and drawing. You can easily extend this application by adding scoring and perhaps even a timer to give it more gameplay. Another idea would be to increase the difficulty and select a different image in the gameOver() function, giving the game levels.

Comments