The cronTab, or "Cron Table", is a Linux system process / daemon which facilitates the scheduling of repetitive tasks thereby easing up our day to day routine.
In this tutorial, we'll create a dynamic PHP class that, using a secure connection, provides us with a means to manipulate the cronTab!
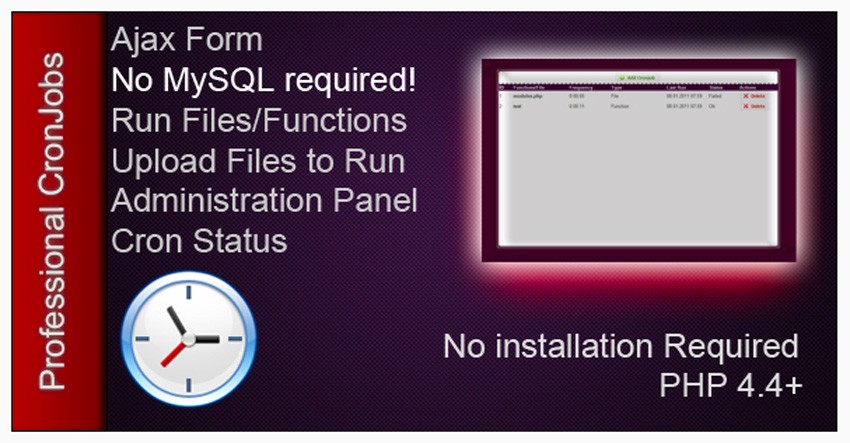
Premium Options
You can find a huge selection of PHP scripts on Envato Market, many of which can help in situations like this. For example, have a look at Professional PHP Cronjobs, a script that allows webmasters to repeat files/functions at a given interval of time.
Or you could hire a PHP developer on Envato Studio to create something specially for you. Whether it's a quick fix or creating an app from scratch, one of the experts there will be able to help you.

Background - An Overview of the Crontab
Let's face it, having the ability to schedule tasks to run in the background is just great! From backing up an SQL database, fetching / sending emails to running clean up tasks, analyzing performance, or even grabbing RSS feeds, cron jobs are fantastic!
Although the syntax of scheduling a new job may seem daunting at first glance, it's actually relatively simple to understand once you break it down. A cron job will always have five columns each of which represent a chronological 'operator' followed by the full path and command to execute:
* * * * * home/path/to/command/the_command.sh
Each of the chronological columns has a specific relevance to the schedule of the task. They are as follows:
- Minutes represents the minutes of a given hour, 0-59 respectively.
- Hours represents the hours of a given day, 0-23 respectively.
- Days represents the days of a given month, 1-31 respectively.
- Months represents the months of a given year, 1-12 respectively.
- Day of the Week represents the day of the week, Sunday through Saturday, numerically, as 0-6 respectively.
	Minutes [0-59]
	|	Hours [0-23]
	|	|	Days [1-31]
	|	|	|	Months [1-12]
	|	|	|	|	Days of the Week [Numeric, 0-6]
	|	|	|	|	|
	*	*	*	*	* home/path/to/command/the_command.sh
So, for example, if one wanted to schedule a task for 12am on the first day of every month it would look something like this:
0 0 1 * * home/path/to/command/the_command.sh
If we wanted to schedule a task to run every Saturday at 8:30am we'd write it as follows:
30 8 * * 6 home/path/to/command/the_command.sh
There are also a number of operators which can be used to customize the schedule even further:
- Commas is used to create a comma separated list of values for any of the cron columns.
- Dashes is used to specify a range of values.
- Asterisksis used to specify 'all' or 'every' value.
The cronTab, by default, will send an email notification whenever a scheduled task is executed.
The cronTab, by default, will send an email notification whenever a scheduled task is executed. In many circumstances, though, this just isn't needed. We can easily suppress this functionality, though, by redirecting the standard output of this command to the 'black hole' or /dev/null device. Essentially, this is a file that will discard everything written to it. Output redirection is done via the > operator. Let's take a look at how we can redirect standard output to the black hole using our sample cron job which runs a scheduled task every Saturday at 8:30am:
30 8 * * 6 home/path/to/command/the_command.sh >/dev/null
Additionally, if we're redirecting the standard output to a the null device, we'll probably want to redirect the standard errors as well. We can do this by simply redirecting standard errors to where the standard output is already redirected, the null device!
30 8 * * 6 home/path/to/command/the_command.sh >/dev/null 2>&1
Step 1 - The Blueprint
In order to manage the cronTab with PHP, we'll need the ability to execute commands, on the remote server, as the user whose cronTab we're editing. Fortunately, PHP provides us with a simple way to do this via the SSH2 library. You may or may not have this library installed so if you don't, you'll want to get it installed:
PHP libssh2 Installation / Configuration
We'll start our class off by declaring four properties, all of which will be private:
- $connection represents our connection / resource.
- $path will represent the path for that file.
- $handle will represent the name of our temporary cron file.
- $cron_file represents the full path and name of the temporary cron file.
Our class must be able to connect and authenticate, as an appropriate user, in order to execute commands and have access the that user's cronTab. Thus, we'll establish an SSH2 connection and authenticate it within the constructor itself.
With an authenticated connection in place, we'll then need a method to handle the execution of the various commands we'll be running. We'll name this method exec(). Generally, we'll call this method from within the other methods of our class when we need to execute a command on the remote server.
Next, we'll need the ability to write the cronTab to a file so that we have tangible access to it. We'll also need a way to delete this file when we're finished with it. Let's define the method that handles outputting the cronTab to a file as write_to_file() and the method for removing this file as remove_file().
Of course, we'll also need a way to create and remove cron jobs. So we'll define an append_cronjob() and remove_cronjob() method, respectively.
In the case that we've removed the only / last cronjob we'll want the ability to remove the entire cronTab rather than trying to create an empty cronTab. We'll use the method remove_crontab() to handle this.
Lastly, we'll create two helper methods for our class. The first of these methods, which will return a boolean value, will simply check for the existence of the temporary cron file. The latter will be used for displaying error messages should an error occur. We'll name this methods crontab_file_exists() and error_message(), respectively.
	<?php

	Class Ssh2_crontab_manager {

		private $connection;
		private $path;
		private $handle;
		private $cron_file;

		function __construct() {...}

		public function exec() {...}

		public function write_to_file() {...}

		public function remove_file() {...}

		public function append_cronjob() {...}

		public function remove_cronjob() {...}

		public function remove_crontab() {...}

		private function crontab_file_exists() {...}

		private function error_message() {...}

	}
Step 2 - The Constructor!
The class constructor will primarily be responsible for establishing and authenticating the SSH2 connection. It will take four arguments, each of which will have a default value of NULL:
- $host: represents the ip address of the remote server we want to connect to.
- $port: is the port to be used for the SSH2 connection.
- $username: will represent the user's log in name for the server.
- $password:represents the user's password for the server.
function __construct($host=NULL, $port=NULL, $username=NULL, $password=NULL) {...}
Within the constructor itself, the first property we'll define is $this->path which will represent a 'default directory' for our temporary cron files.
Ideally, we'd simply use PHP's magic constant __DIR__ to define this prop as the current working directory. There are, however, occasions where this constant may not be defined. As such, we'll check to see if __DIR__ is defined.
If it's not, we'll have to get the current working directory manually. We'll do so by using a combination of the strrpos() and substr() functions in conjunction with the __FILE__ constant which represents the full path and name of the current file.
We'll use strrpos(), which returns the position of the last occurrence of a substring, to find the position of the last forward slash in the __FILE__ string. This value, which we'll store as the var $path_length, will give us the number of characters up to but not including the last forward slash.
The substr() function will sort of 'splice' a string in that it returns a specific portion of a string based on the start position of the splice and the number of characters we want returned.
We'll pass three arguments to the substr() function
- the string we're working with
- the start location of the splice, in this case
0 - the end location of the splice which is represented by the
$path_lengthvariable.
We'll then concatenate a forward slash to the end of this string which will give us the current working directory.
	function __construct($host=NULL, $port=NULL, $username=NULL, $password=NULL)
	{
		$path_length = strrpos(__FILE__, "/");
		$this->path  = substr(__FILE__, 0, $path_length) . '/';
	}
Now, we'll define a default filename for the temporary cron file as $this->handle and then concatenate the path and handle props together as $this->cron_file. This prop will represent the full default path and filename for the temporary cron file.
	function __construct($host=NULL, $port=NULL, $username=NULL, $password=NULL)
	{
		$path_length     = strrpos(__FILE__, "/");
		$this->path      = substr(__FILE__, 0, $path_length) . '/';
		$this->handle    = 'crontab.txt';
		$this->cron_file = "{$this->path}{$this->handle}";
	}
With these properties defined, we'll now work on making a connection to the server and authenticating it. We'll add some basic error handling to our class be wrapping the following code in a try / catch block. In this manner, we can catch errors and throw exceptions so as to provide the user with very specific feedback.
Within the try block, we'll first check to see that all of the arguments have been defined by using the is_null() function which will return true or false. If any of these arguments are NULL, we'll throw a new exception with an appropriate message.
	function __construct($host=NULL, $port=NULL, $username=NULL, $password=NULL)
	{
		$path_length     = strrpos(__FILE__, "/");
		$this->path      = substr(__FILE__, 0, $path_length) . '/';
		$this->handle    = 'crontab.txt';
		$this->cron_file = "{$this->path}{$this->handle}";

		try
		{
			if (is_null($host) || is_null($port) || is_null($username) || is_null($password)) throw new Exception("Please specify the host, port, username and password!");
		}
		catch
		{

		}
	}
Next, we'll define $this->connection by passing the $host and $port arguments to the ssh2_connect() function which will establish a remote connection and return that resource or FALSE if the connection fails.
Since we're using our own error handling, we'll also use the error control operator @ which will suppress any error messages for this function. If the connection is not successful, we'll throw a new exception with an appropriate message accordingly.
	function __construct($host=NULL, $port=NULL, $username=NULL, $password=NULL)
	{
		$path_length     = strrpos(__FILE__, "/");
		$this->path      = substr(__FILE__, 0, $path_length) . '/';
		$this->handle    = 'crontab.txt';
		$this->cron_file = "{$this->path}{$this->handle}";

		try
		{
			if (is_null($host) || is_null($port) || is_null($username) || is_null($password)) throw new Exception("Please specify the host, port, username and password!");

			$this->connection = @ssh2_connect($host, $port);
			if ( ! $this->connection) throw new Exception("The SSH2 connection could not be established.");
		}
		catch
		{

		}
	}
We'll now attempt to authenticate / log in using the ssh2_auth_password() function passing in the resource returned from our connection as well as the username and the password of the user we're logging in. ssh2_auth_password() will return a boolean that represents the status of the authentication using which we can throw a new exception if the authentication fails.
	function __construct($host=NULL, $port=NULL, $username=NULL, $password=NULL)
	{
		$path_length     = strrpos(__FILE__, "/");
		$this->path      = substr(__FILE__, 0, $path_length) . '/';
		$this->handle    = 'crontab.txt';
		$this->cron_file = "{$this->path}{$this->handle}";

		try
		{
			if (is_null($host) || is_null($port) || is_null($username) || is_null($password)) throw new Exception("Please specify the host, port, username and password!");

			$this->connection = @ssh2_connect($host, $port);
			if ( ! $this->connection) throw new Exception("The SSH2 connection could not be established.");

			$authentication = @ssh2_auth_password($this->connection, $username, $password);
			if ( ! $authentication) throw new Exception("Could not authenticate '{$username}' using password: '{$password}'.");
		}
		catch
		{

		}
	}
PHP will try to find a matching catch block, for each exception which was thrown, and then create / pass an exception object, which contains a number of useful properties, to this block.
So, in the catch block, we'll use the exception object's getMessage() method to access and display the message defined in the exception.
You'll notice that we'll be displaying the message by calling the error_message() method of our class. Although this method is not defined yet, it will simply display error messages in a tidy manner.
	function __construct($host=NULL, $port=NULL, $username=NULL, $password=NULL)
	{
		$path_length     = strrpos(__FILE__, "/");
		$this->path      = substr(__FILE__, 0, $path_length) . '/';
		$this->handle    = 'crontab.txt';
		$this->cron_file = "{$this->path}{$this->handle}";

		try
		{
			if (is_null($host) || is_null($port) || is_null($username) || is_null($password)) throw new Exception("Please specify the host, port, username and password!");

			$this->connection = @ssh2_connect($host, $port);
			if ( ! $this->connection) throw new Exception("The SSH2 connection could not be established.");

			$authentication = @ssh2_auth_password($this->connection, $username, $password);
			if ( ! $authentication) throw new Exception("Could not authenticate '{$username}' using password: '{$password}'.");
		}
		catch (Exception $e)
		{
			$this->error_message($e->getMessage());
		}
	}
Step 3 - Executing Multiple Commands
This method will be responsible for executing commands on the remote server. It's comparable to manually entering commands into a shell like, say, PuTTY. To allow for greater flexibility, we'll make this method public so that users can actually execute any other commands they may need to run. We'll also allow for any number of arguments so long as at least one is specified. These arguments will represent the commands we want to run using the ssh2_exec() function.
So, the first thing we'll do in this method is define a variable representing a count of the total number of arguments passed. We'll use PHP's func_num_args() function to get this count.
	public function exec()
	{
		$argument_count = func_num_args();
	}
Now, within a try block, we'll check whether or not any arguments we're passed to this method. If the argument count is 0, we'll throw a new exception with an appropriate message.
	public function exec()
	{
		$argument_count = func_num_args();

		try
		{
			if ( ! $argument_count) throw new Exception("There is nothing to execute, no arguments specified.");
		}
		catch
		{

		}
	}
Next, using the func_get_args() function we'll create an array of all the arguments which were passed to this method.
Using a ternary operator, we'll then define a new variable, $command_string, as a single line string representation of the actual Linux commands we'll be executing.
If we do have multiple commands to execute, we'll use PHP's implode() function to parse the arguments array into a string. We'll pass two arguments to implode(), the glue, or separator, which is basically just a string that will be inserted between the array elements, and the array itself. We'll separate each element with the Linux operator, && which will allow us to execute multiple commands, sequentially, on one line!
Conversely, if there is only one command, we'll define the command string as $arguments[0] which represents the first and only argument / command.
	public function exec()
	{
		$argument_count = func_num_args();

		try
		{
			if ( ! $argument_count) throw new Exception("There is nothing to execute, no arguments specified.");

			$arguments = func_get_args();

			$command_string = ($argument_count > 1) ? implode(" && ", $arguments) : $arguments[0];

		}
		catch
		{

		}
	}
With our commands ready and parsed as a string, we can now try to execute them using the ssh2_exec() function. We'll pass the connection link id, $this->connection, as well as our $command_string to this function which will return a stream on success or false on failure.
Streams are defined as a resource object which exhibits streamable behavior... which can be read from or written to in a linear fashion.
We'll use the error control operator @ here, again, to suppress any error messages as we'll be throwing our own exception, with an appropriate message, should an error occur.
	public function exec()
	{
		$argument_count = func_num_args();

		try
		{
			if ( ! $argument_count) throw new Exception("There is nothing to execute, no arguments specified.");

			$arguments = func_get_args();

			$command_string = ($argument_count > 1) ? implode(" && ", $arguments) : $arguments[0];

			$stream = @ssh2_exec($this->connection, $command_string);
			if ( ! $stream) throw new Exception("Unable to execute the specified commands: <br />{$command_string}");

		}
		catch
		{

		}
	}
That's it for the try block! Within the catch block, we'll simply call the error_message() method in order to display any error messages to our user. With the try and catch blocks now complete, we'll return $this at the end of the exec() method which will make this method chainable!
	public function exec()
	{
		$argument_count = func_num_args();

		try
		{
			if ( ! $argument_count) throw new Exception("There is nothing to execute, no arguments specified.");

			$arguments = func_get_args();

			$command_string = ($argument_count > 1) ? implode(" && ", $arguments) : $arguments[0];

			$stream = @ssh2_exec($this->connection, $command_string);
			if ( ! $stream) throw new Exception("Unable to execute the specified commands: <br />{$command_string}");

		}
		catch
		{
			$this->error_message($e->getMessage());
		}

		return $this;
	}
Step 4 - Writing the CronTab to a File
The next method, write_to_file(), will be responsible for writing the existing cronTab to a temporary file or creating a blank temp. file should no cron jobs exist. It will take two arguments
- the path for the temporary file we'll be creating
- the name we should use when creating it.
Continuing with the logic of our constructor and exec methods, we'll set default values for these arguments as NULL.
	public function write_to_file($path=NULL, $handle=NULL)
	{

	}
The first thing we'll do here is check to see if the cron file already exists by using the boolean crontab_file_exists() method, which we'll create shortly. If the file does exist, there's no need to proceed. If it doesn't, we'll use a ternary operator to check the $path and $handle props to determine whether or not they're NULL. If either of them are NULL, we'll use the predefined fallbacks from our constructor to define them.
Then, we'll concatenate these properties together into a new property which will represent the full path and file name for the temporary cron file.
	public function write_to_file($path=NULL, $handle=NULL)
	{
		if ( ! $this->crontab_file_exists())
		{
			$this->handle = (is_null($handle)) ? $this->handle : $handle;
			$this->path   = (is_null($path))   ? $this->path   : $path;

			$this->cron_file = "{$this->path}{$this->handle}";
		}
	}
Next, we'll use the Linux command crontab, with the -l argument set, to display the users cronTab as standard output. Then, using Linux's > operator, we'll redirect standard output, or STDOUT, to our temporary cron file instead by concatenating $this->cron_file into the command string! Redirecting output to a file, using the > operator, will always create that file if it doesn't exist.
	public function write_to_file($path=NULL, $handle=NULL)
	{
		if ( ! $this->crontab_file_exists())
		{
			$this->handle = (is_null($handle)) ? $this->handle : $handle;
			$this->path   = (is_null($path))   ? $this->path   : $path;

			$this->cron_file = "{$this->path}{$this->handle}";

			$init_cron = "crontab -l > {$this->cron_file}";
		}
	}
This works very well but only if there are already jobs scheduled within the cronTab. If there are no cron jobs, however, this file will never be created! Using the && operator though, we can append additional commands / expressions to this string. So, let's append a conditional expression to check that the cron file exists. If the file doesn't exist, this expression will evaluate to false. As such, we can then use the || or "or" operator after this conditional to create a new blank file if needed!
Commands placed after "or" will execute if the condition / conditions evaluate to false. Now, by using the > operator again, this time without preceding it by a specific command, we can create a new blank file! So, essentially, this string of commands will output the cronTab to a file, then check if that file exists, which would indicate that there are entries in the cronTab and then create a new blank file if it doesn't already exist!
	public function write_to_file($path=NULL, $handle=NULL)
	{
		if ( ! $this->crontab_file_exists())
		{
			$this->handle = (is_null($handle)) ? $this->handle : $handle;
			$this->path   = (is_null($path))   ? $this->path   : $path;

			$this->cron_file = "{$this->path}{$this->handle}";

			$init_cron = "crontab -l > {$this->cron_file} && [ -f {$this->cron_file} ] || > {$this->cron_file}";
		}
	}
Lastly, we'll call the exec() method and pass the command string to it as the only argument. Then, in order to make this method chainable as well, we'll return $this.
	public function write_to_file($path=NULL, $handle=NULL)
	{
		if ( ! $this->crontab_file_exists())
		{
			$this->handle = (is_null($handle)) ? $this->handle : $handle;
			$this->path   = (is_null($path))   ? $this->path   : $path;

			$this->cron_file = "{$this->path}{$this->handle}";

			$init_cron = "crontab -l > {$this->cron_file} && [ -f {$this->cron_file} ] || > {$this->cron_file}";

			$this->exec($init_cron);
		}

		return $this;
	}
Step 5 - Removing the Temporary Cron File
This method, remove_file() is as easy as easy could be! We'll use our helper method, crontab_file_exists(), to check for the existence of the temporary cron file and then execute the Linux command rm to delete it if it does. As usual, we'll also return $this in order to maintain chainability.
	public function remove_file()
	{
		if ($this->crontab_file_exists()) $this->exec("rm {$this->cron_file}");

		return $this;
	}
Step 6 - Creating New Cron Jobs
This method will create new cron jobs by way of adding new jobs / lines to the temporary cron file and then executing the crontab command on that file which will install all of those jobs as a new cronTab. As such, append_cronjob() will take one argument, $cron_jobs, which will either be a string or an array of strings representing the cron jobs to append.
We'll start this method off by determining if the $cron_jobs argument is NULL. If it is, we'll call the error_message() method in order to halt any further execution and display an error message to the user.
	public function append_cronjob($cron_jobs=NULL)
	{
		if (is_null($cron_jobs)) $this->error_message("Nothing to append!  Please specify a cron job or an array of cron jobs.");

	}
Essentially, we can just echo our task into the cron file by redirecting standard output into the file again.
Next, we'll define a new variable, $append_cronfile, as a string, with the text "echo" followed by a space and one single quote at the end. We'll be populating this string with the various cron jobs we're adding as well as the closing quote, momentarily. We'll be building this string using the string concatenation operator .=.
Using a ternary operator, we'll determine if $cron_jobs is an array or not. If it is, we'll implode that array with new lines, \n, so that each cron job is written on it's own line within the cron file. If the $cron_jobs argument is not an array, we'll simply concatenate that job onto the $append_cron string without any special processing. In this manner, we'll have a properly formatted string regardless of whether or not we're working with an array.
Essentially, we can just echo our task into the cron file by redirecting standard output into the file again. So, using the string concatenation operator, we'll append the closing single quote to the command string as well as the Linux operator >> followed by the full path and file name for the cron file. The >> operator, unlike the > operator which always overwrites a file, appends output to the end of a file. So by using this operator, we won't overwrite any existing cron jobs.
	public function append_cronjob($cron_jobs=NULL)
	{
		if (is_null($cron_jobs)) $this->error_message("Nothing to append!  Please specify a cron job or an array of cron jobs.");

		$append_cronfile = "echo '";

		$append_cronfile .= (is_array($cron_jobs)) ? implode("\n", $cron_jobs) : $cron_jobs;

		$append_cronfile .= "'  >> {$this->cron_file}";

	}
We'll now define a variable, as a string, with the command we're going to use to install the new cron file which we're about to create! This is as simple as calling the crontab command followed by the path and filename of the the cron file.
Before executing these commands via the exec() method, though, we'll first call the write_to_file() method in order to create the temporary cron file. Then, within a chain, we'll execute these commands and call the remove_file() method to delete the temporary file. Lastly, we'll return $this so that the append_cronjob() method is chainable.
	public function append_cronjob($cron_jobs=NULL)
	{
		if (is_null($cron_jobs)) $this->error_message("Nothing to append!  Please specify a cron job or an array of cron jobs.");

		$append_cronfile = "echo '";

		$append_cronfile .= (is_array($cron_jobs)) ? implode("\n", $cron_jobs) : $cron_jobs;

		$append_cronfile .= "'  >> {$this->cron_file}";

		$install_cron = "crontab {$this->cron_file}";

		$this->write_to_file()->exec($append_cronfile, $install_cron)->remove_file();

		return $this;
	}
Step 7 - Removing Existing Cron Jobs
Now that we can create new cron jobs, it's only logical that we have the ability to remove them as well! The remove_cronjob() method will take one argument which will be a (simple) regular expression. This regEx will be used to find matching jobs within the cronTab and remove them accordingly. As with the append_cronjob() method, the first thing we'll do is check to see if the $cron_jobs argument is NULL and halt execution if it is. If not, we'll call the create_file() method in order write the cron tab to a file.
	public function remove_cronjob($cron_jobs=NULL)
	{
		if (is_null($cron_jobs)) $this->error_message("Nothing to remove!  Please specify a cron job or an array of cron jobs.");

		$this->write_to_file();

	}
With the cron file created, we'll now read it into an array using PHP's file() function. This function will parse a given file into array with each line as an array element. We'll pass our cron file to this function as the first argument and then set a special flag, FILE_IGNORE_NEW_LINES, which will force file() to ignore all new lines. Thus, we'll have an array with only the cron jobs themselves!
Should there be no cron jobs scheduled, this array will be empty. Subsequently, there will be no reason to continue. Thus, we'll check to see if the $cron_array is empty and halt execution if it is.
If the cronTab is not empty, we'll then count the elements in the $cron_array using PHP's count() function. We'll store this value as $original_count. We'll use it, shortly, to determine if we've removed any cron jobs from the $cron_array.
	public function remove_cronjob($cron_jobs=NULL)
	{
		if (is_null($cron_jobs)) $this->error_message("Nothing to remove!  Please specify a cron job or an array of cron jobs.");

		$this->write_to_file();

		$cron_array = file($this->cron_file, FILE_IGNORE_NEW_LINES);

		if (empty($cron_array)) $this->error_message("Nothing to remove!  The cronTab is already empty.");

		$original_count = count($cron_array);

	}
Now, we'll determine if the $cron_jobs argument is an array or not. If it is an array, we'll iterate through it with a foreach loop. Within that loop we'll only execute one function, preg_grep(). This nifty function, not unlike preg_match(), will return an array of all the array elements that match the regular expression specified. In this case, however, we want the array elements that don't match. In other words, we need an array of all the cron jobs that we're going to keep so that we can initialize the cronTab with just these jobs. As such, we'll set a special flag here, PREG_GREP_INVERT, which will cause preg_grep() to return an array of all the elements which don't match the regular expression. Thus, we'll have an array of all the cron jobs we want to keep!
	public function remove_cronjob($cron_jobs=NULL)
	{
		if (is_null($cron_jobs)) $this->error_message("Nothing to remove!  Please specify a cron job or an array of cron jobs.");

		$this->write_to_file();

		$cron_array = file($this->cron_file, FILE_IGNORE_NEW_LINES);

		if (empty($cron_array)) $this->error_message("Nothing to remove!  The cronTab is already empty.");

		$original_count = count($cron_array);

		if (is_array($cron_jobs))
		{
			foreach ($cron_jobs as $cron_regex) $cron_array = preg_grep($cron_regex, $cron_array, PREG_GREP_INVERT);
		}
		else
		{

		}
	}
If the $cron_jobs argument is not an array, we'll proceed in much the same manner but without any iteration. Again, we'll redefine $cron_array as the resulting array from preg_grep() function with the PREG_GREP_INVERT flag set.
	public function remove_cronjob($cron_jobs=NULL)
	{
		if (is_null($cron_jobs)) $this->error_message("Nothing to remove!  Please specify a cron job or an array of cron jobs.");

		$this->write_to_file();

		$cron_array = file($this->cron_file, FILE_IGNORE_NEW_LINES);

		if (empty($cron_array)) $this->error_message("Nothing to remove!  The cronTab is already empty.");

		$original_count = count($cron_array);

		if (is_array($cron_jobs))
		{
			foreach ($cron_jobs as $cron_regex) $cron_array = preg_grep($cron_regex, $cron_array, PREG_GREP_INVERT);
		}
		else
		{
			$cron_array = preg_grep($cron_jobs, $cron_array, PREG_GREP_INVERT);
		}
	}
With our $cron_array set, now, we'll compare the current length of this array with it's original length which we cached in the variable $original_count. If the lengths are identical, we'll simply return the remove_file() method to delete the temporary cron file. If they don't match, we'll remove the existing cronTab and then install the new one!
The remove_file(), remove_crontab() and append_cronjob() methods all return $this so by returning these methods we're still preserving this methods chainability.
	public function remove_cronjob($cron_jobs=NULL)
	{
		if (is_null($cron_jobs)) $this->error_message("Nothing to remove!  Please specify a cron job or an array of cron jobs.");

		$this->write_to_file();

		$cron_array = file($this->cron_file, FILE_IGNORE_NEW_LINES);

		if (empty($cron_array)) $this->error_message("Nothing to remove!  The cronTab is already empty.");

		$original_count = count($cron_array);

		if (is_array($cron_jobs))
		{
			foreach ($cron_jobs as $cron_regex) $cron_array = preg_grep($cron_regex, $cron_array, PREG_GREP_INVERT);
		}
		else
		{
			$cron_array = preg_grep($cron_jobs, $cron_array, PREG_GREP_INVERT);
		}

		return ($original_count === count($cron_array)) ? $this->remove_file() : $this->remove_crontab()->append_cronjob($cron_array);
	}
Step 8 - Removing the Entire Crontab
Removing the entire cronTab is relatively simple to do. Essentially, we'll just execute the crontab command with the -r flag set which removes the entire cronTab for a given user. Since the crontab has been removed we might as well remove the temporary cron file as well, should it exist. Then we'll return $this in order to preserve chainability.
	public function remove_crontab()
	{
		$this->exec("crontab -r")->remove_file();

		return $this;
	}
Step 9 - A Few Helpful Methods
With the brunt of our cron management class written, we'll now take a look at the two small but useful methods we've used throughout our class, crontab_file_exists() and error_message().
-
$this->crontab_file_exists()
This method will simply return the result of PHP's
file_exists()method, true or false, depending on whether or not the temporary cron file exists.
	private function crontab_file_exists()
	{
		return file_exists($this->cron_file);
	}
-
$this->error_message($error)
This method will take one argument, a string, representing the error message we want to display. We'll then call PHP's
die()method in order to halt execution and display this message. The string it self, will be concatenated into a<pre>element with some simple style applied to it.
	private function error_message($error)
	{
		die("<pre style='color:#EE2711'>ERROR: {$error}</pre>");
	}
Step 10 - Putting it all together!
Now that we've completed our cron management class, let's take a look at a few examples of how to use it!
-
Instantiating the class and establishing an authenticated connection:
First, let's create a new instance of our class. Remember, we'll need to pass the ip address, port, username and password to the class constructor.
$crontab = new Ssh2_crontab_manager('11.11.111.111', '22', 'my_username', 'my_password');
-
Appending a single cron job:
With an authenticated connection in place, let's have a look at how we can create a new, single, cron job.
		$crontab = new Ssh2_crontab_manager('11.11.111.111', '22', 'my_username', 'my_password');
		$crontab->append_cronjob('30 8 * * 6 home/path/to/command/the_command.sh >/dev/null 2>&1');
-
Appending an array of cron jobs:
Appending multiple cron jobs is just as easy as appending a single cron job. We'll simply passing an array to the
append_cronjob()method.
		$crontab = new Ssh2_crontab_manager('11.11.111.111', '22', 'my_username', 'my_password');

		$new_cronjobs = array(
			'0 0 1 * * home/path/to/command/the_command.sh',
			'30 8 * * 6 home/path/to/command/the_command.sh >/dev/null 2>&1'
		);

		$crontab->append_cronjob($new_cronjobs);
-
Removing a single cron job:
In like manner to how we created a single cron job, we'll now remove one. This time, however, we'll use a regular expression to find the appropriate task. This regEx can be as simple or as complex as you need it to be. In fact, there are a number of ways to regex for the task you're looking for. For example, if the task you need to remove is unique in that the command being run is not used anywhere else in the cronTab, you could simple specify the command name as you're regEx. Furthermore, if you wanted to remove all the tasks for a certain month, you could simply write a regular expression to find a match for all the jobs of a given month!
		$crontab = new Ssh2_crontab_manager('11.11.111.111', '22', 'my_username', 'my_password');

		$cron_regex = '/home\/path\/to\/command\/the_command\.sh\/';

		$crontab->remove_cronjob($cron_regex);
-
Removing an array of cron jobs:
Removing multiple cronjobs is handled in the same manner as removing a single cronJob with a single exception, we'll pass an array of cron job regular expressions to the
remove_cronjob()method.
		$crontab = new Ssh2_crontab_manager('11.11.111.111', '22', 'my_username', 'my_password');

		$cron_regex = array(
			'/0 0 1 \* \*/',
			'/home\/path\/to\/command\/the_command\.sh\/'
		);

		$crontab->remove_cronjob($cron_regex);
Conclusion
That's all folks! I hope you've enjoyed reading this article as much as I've enjoyed writing it and that you've gained new insights into the cronTab and managing it with PHP. Thank you so much for reading!

Comments