Today we'll be looking at the WP-Cron functions, one of the lesser known tricks that you can use for some fun! The primary purpose is for setting up scheduling or other time-sensitive tasks. We'll examine some tricks for using it, and we'll also identify some potential problems with it and how to work around them.
WordPress is a powerful piece of software. Its simplicity can often give the wrong impression to non-technical users about its inner workings though. This might have served in the best interest of WordPress, as something that feels simple and easier to use is generally adopted by the masses. However, it's important to remember that behind the scenes is a powerful piece of software that's capable of doing quite a bit more than simple blogging.
One of the features in WordPress that is written less about has to be WP-Cron (check out the codex page on WP-Cron here). Now those of you who have dealt with general Cron on a Linux server know the power of this function.
What is Cron?
Cron is a UNIX command for scheduling jobs to be executed sometime in the future. A cron is normally used to schedule a job that is executed periodically. For example, you might use a cron function to send out a notice every morning. It is also a daemon process, meaning that it runs continuously, waiting for specific events to occur.
The Way It Works
As WordPress is installed on so many different setups, to make things run properly, WordPress developers implemented a pseudo cron that includes the WP-Cron functions that helps run scheduling jobs such as:
- Checking for theme & plugin updates
- Publish scheduled posts
- Sending pingbacks
- and more!
Unlike regular cron jobs, which run at specific time based on the server settings, the WP-Cron function runs every time someone visits the WordPress powered website. This makes a WordPress site run properly on different kinds of server setups because it eliminates a lot of server-specific requirements. On every page load, WordPress checks if there is a need for WP-Cron to run. If there is a need, then it tries to make a request over HTTP to the wp-cron.php file.
The reason to call wp-cron.php is because some jobs might take more time and the user requesting the WordPress page cannot be made to wait. Calling the wp-cron.php helps keep the WP-Cron function running as a separate process in the background without delaying the page load time for the user. Once the WP-Cron function starts, it continues to run until all the required jobs are completed or until it reaches an execution time as set in the server configuration.
Based on the setup of your web host, WP-Cron can fail to complete its jobs or it might not work at all. High traffic websites face another set of issues like multiple WP-Cron processes running in loops. Mostly people blame WordPress for it, but it’s not necessarily an issue with WordPress. Every situation is different and based on it we can tweak WordPress to run in the best possible way. Below, you would find some of the common issues people face and how to fix them.
Some Issues with WP-Cron
Issue: Multiple running WP-Cron process on high traffic websites
If you are a server administrator or manage your own server with a firewall, you might have received emails from your firewall about a file "wp-cron.php" running for a long period of time. This happens when the script execution time set on your server is more than 60 seconds. As the process is not terminated, and since new processes are started, multiple instances of the WP-Cron process run on the server.
This does not happen on a low traffic website, but if your WordPress powered website has simultaneous users at any given moment and the maximum script execution time is set high, then there will be many instances of this WP-Cron function running. Until a recent version of WordPress, there was always an issue of multiple cron processes looping over the same events.
NOTE: WordPress 3.3 gives us even better cron locking. This article was written just as WordPress 3.3 was being released, which features better cron locking and avoiding multiple WP-Cron processes looping over the same events.
Issue: Scheduled posts missed
Another widely reported issue with some hosting providers & some very low traffic websites is scheduled posts not getting published. As the WP-Cron function only runs when there is a page request, if there are no requests then the scheduled jobs are not run.
Note: There is not a problem with WordPress. Also since version 3.x this has been reported much less. However there are many plugins to take care of this issue.
Issue: WP-Cron does not run at all
Again this is a problem with the server setup. Due to improper settings, firewall blocks that stop scripts from calling themselves so the WP-Cron function does not work.
Possible Solution to Most WP-Cron Problems
To avoid multiple instances of WP-Cron running on your server for a single website, I have tried to use the default way of setting up cron jobs on a Linux server (Apache with cPanel as the control panel). The benefit of this method is:
- More control on when the WP-Cron function runs.
- Avoid multiple loops.
- If you own a server with lot of WordPress websites hosted, then this can reduce the server load.
Before you get into this, make sure that your web host allows you to setup default Linux cron jobs. The way this is setup would be different based on the control panel offered by your host, but in this article I will provide a guide to setup a cron job using the cPanel control panel that is common on Linux servers nowadays.
The steps I followed were:
- Disable internal WP-Cron to execute on page load.
- Setup a cron function that makes a get request to the wp-cron.php file at regular intervals based on your preference.
Yes, it’s that simple. Just two steps to make things run smoother.
NOTE: Before you follow this method, please note that disabling internal WP-Cron can also result in the website not running properly based on your setup or the plugins used.
1. Disable internal WP-Cron function
Open the wp-config.php file in NotePad or the editor of your choice and add the below two lines at the top.
//Disable internal Wp-Cron function
define('DISABLE_WP_CRON', true);
This will now stop the internal WP-Cron function from executing and will not call the wp-cron.php file.
2. Setup a real cron function from your host's control panel
If you are allowed to setup cron jobs, you would have to setup a cron as below:
wget http://www.server.com/wp-cron.php?doing_wp_cron=1 > /dev/null 2>&1
Below are the steps to do this from a cPanel based host.
1. Access your account's cPanel
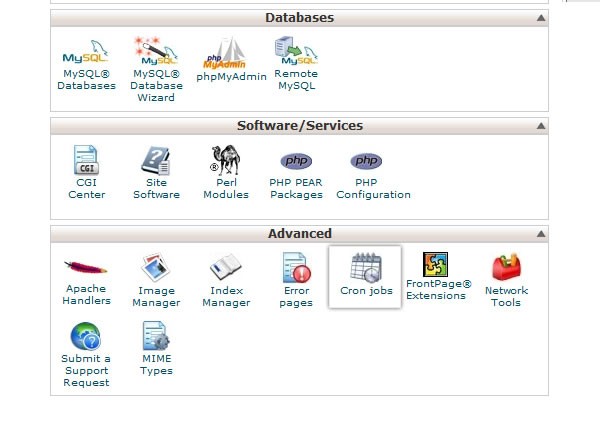
Usually the link is http://yourwebsite.com/cpanel or http://yourwebsite.com:2082. Once your enter your user id and password and enter the control panel, scroll down to the "Advanced section".
2. Go to Cron Settings Page
Click on the "Cron Jobs" icon in the advanced section.
3. Setup a Cron Job
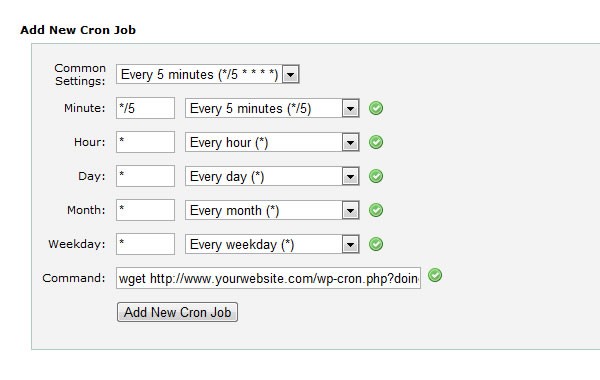
On the new page you would find an "Add New Cron Job" section like the one in the above image. From the Common Settings drop down field, select "Every 5 minutes...". Once you select this, the rest of the fields will be automatically filled with the necessary information. In the next step I will explain my intention of setting up a 5 minute interval to run the script.
In the command field, add the below line. Remember to add the correct website address.
wget http://www.yourwebsite.com/wp-cron.php?doing_wp_cron=1 > /dev/null 2>&1
Finally, click on the "Add New Cron Job" button.
From now on the server will make a request for the wp-cron.php file every 5 minutes. Now the reason I have set this as 5 minutes, is because I mostly set the script execution time to 4 minutes instead of 60 seconds. This is done to be able to load large image files, backup processes, etc. However you may also change the settings and choose other options to run the cron every 1 minute.
NOTE: This runs well for general WordPress websites. For those using a WordPress network, there might be additional things required so please do not use the above steps if you run WordPress Multi-site version.
Conclusion
If you face any issues or have other ideas please feel free to share your comments below!

Comments