
This is the second of a two-part series on using social media to locate eyewitnesses to important events. In part one, I showed you how to use the Instagram API to find eyewitnesses to a live video shoot of Macklemore's in Seattle. In this part, we'll use the Twitter API to find attendees of President Obama's speech in Selma at the Edmund Pettus Bridge.
You can download code for both episodes by using the GitHub repository link in the sidebar. You may also be interested in my Tuts+ series, Building With the Twitter API.
Twitter's geosearch capabilities are more limited and therefore require a bit more detailed code to use. Geotagged posts on Twitter can only be found from the last seven days. And they are only searchable by date (not time), so you have to filter the API results for precision.
I do participate in the discussions below. If you have a question or topic suggestion, please post a comment below. You can also reach me on Twitter @reifman or email me directly.
What We Covered in Part One
The phones we carry in our pockets record our every move, sharing it with cell providers and often third-party software companies whose motivations generally focus on profit.
Many people don't realize that they've left geotagging on their social media apps, fully publicizing their location with every social media post. This included GOP Congressman Aaron Schock. The AP used his Instagram account's geotags to expose his use of taxpayer funds for extravagant private flights and other luxurious activities.

So, geotagging can be used for good. In this series, we're exploring how journalists or law enforcement might locate potential eyewitnesses to important events such as a crime or accident scene using social media.
However, geotagging can also be used abusively. Berkeley computer scientists and educators built the Ready or Not? app to showcase how geotagging in Twitter and Instagram record our every move.
Here's Apple co-founder Steve Wozniak's Twitter account in the app:
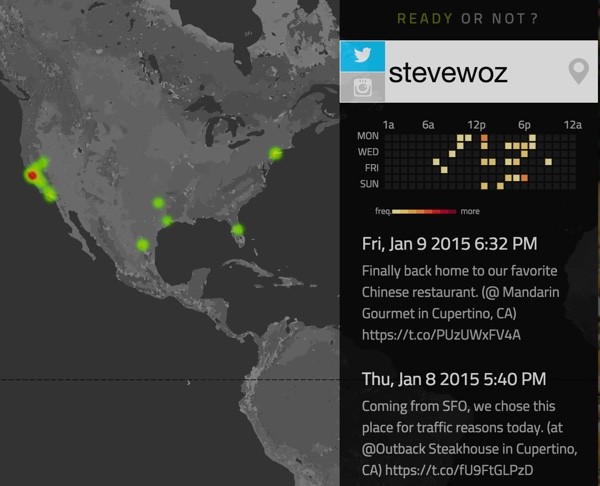
The geotagging on Instagram and Twitter is accurate enough to allow someone to easily determine your residence, place of work and travel routine.
In this episode, I'll guide you through using the Twitter API. I've provided a GitHub repository (the link is in the sidebar) for you to download to try out the code. My "Eyewitness app" is written in the Yii Framework for PHP, which you can learn more about in my Programming With Yii2 series for Tuts+.
If you don't wish to share your location for the public to see—or to leave a historical trail of your travels—the Ready or Not? app offers links and guides to turning these features off (look for the link on its home page). Frankly, I've turned mine off and I encourage you to do so too.
If you're a law enforcement agency or media entity that would like more information, please feel free to contact me directly. I would also be interested in any successful uses of this code (for good)—they'd make an interesting follow-up story.
What We Did With Instagram
Last episode, we used the Instagram API to find eyewitnesses to Mackelmore's live 2013 video shoot for White Cadillac. Quite easily, we managed to find Instagram member Joshua Lewis's photo of Macklemore stepping out of his vehicle (cool, huh?):

Now, let's get started using the Twitter API.
Using the Twitter API
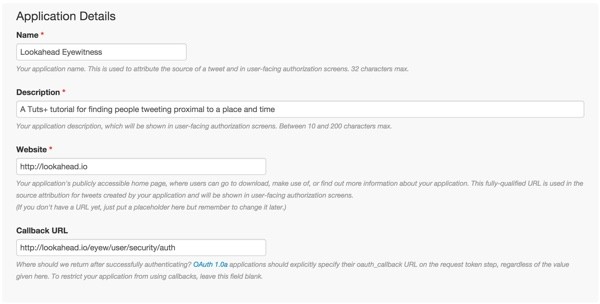
As with Instagram, you need to sign in to your Twitter account and register a developer application. You should register an app like this:
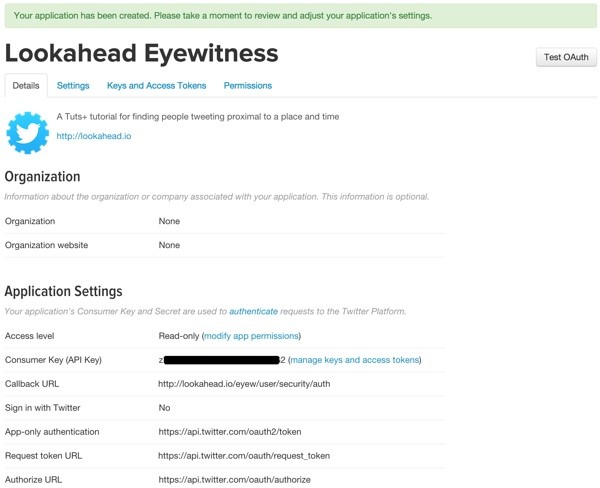
Twitter will show you your application details:
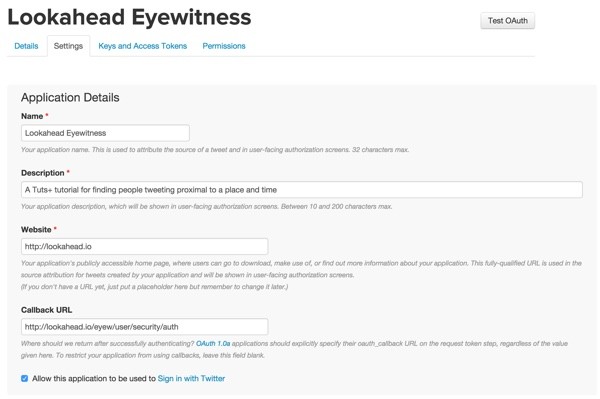
Here's the settings page:
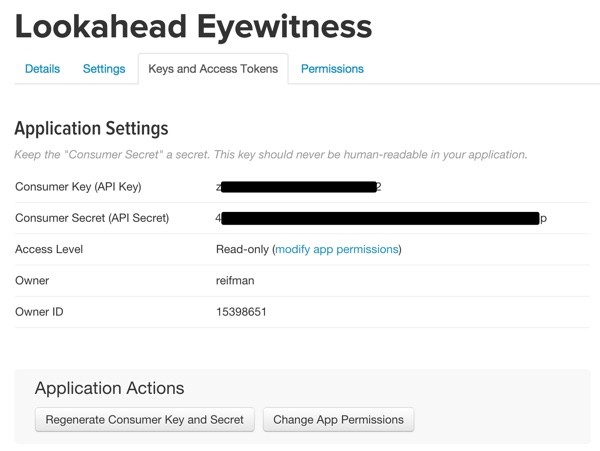
Here are the keys and access tokens for the application. Make note of these.
Then, scroll down and create access tokens for your account. Make note of these too.
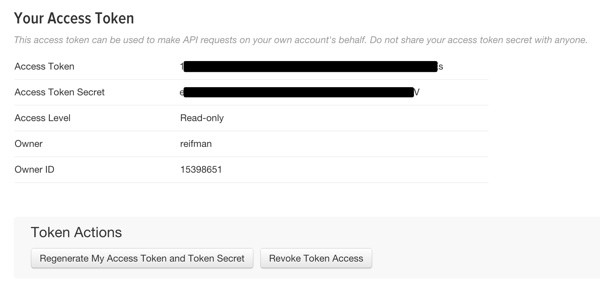
Add all four of these configuration keys and secrets to your /var/secure/eyew.ini file:
mysql_host="localhost"
mysql_db="eyew"
mysql_un="xxxxxxxxx"
mysql_pwd="xxxxxxxxxxxx"
instagram_client_id = "4xxxxxxxxxxxxxxxxxxxxxxxxxxxxxx7"
instagram_client_secret = "1xxxxxxxxxxxxxxxxxxxxxxxxxxxxxx4"
twitter_key = "zxxxxxxxxxxxxxxxxxxxx2"
twitter_secret ="4xxxxxxxxxxxxxxxxxxxxxxxxxxxxxxxxxxxxxxxxxxxxxxxxxxp"
twitter_oauth_token="1xxxxxxxxxxxxxxxxxxxxxxxxxxxxxxxxxxxxxxxxxxxxxxxxxxs"
twitter_oauth_secret="exxxxxxxxxxxxxxxxxxxxxxxxxxxxxxxxxxxxxxxxxxxxxxxxxxV"
Then, we'll create an Active Record migration to create our Twitter model. This will store the tweets we receive from the API calls.
<?php

use yii\db\Schema;
use yii\db\Migration;

class m150309_174014_create_twitter_table extends Migration
{
    public function up()
    {
          $tableOptions = null;
          if ($this->db->driverName === 'mysql') {
              $tableOptions = 'CHARACTER SET utf8 COLLATE utf8_unicode_ci ENGINE=InnoDB';
          }

          $this->createTable('{{%twitter}}', [
              'id' => Schema::TYPE_PK,
              'moment_id' => Schema::TYPE_INTEGER . ' NOT NULL',
              'tweet_id' => Schema::TYPE_BIGINT . ' NOT NULL',
              'twitter_id' => Schema::TYPE_BIGINT . ' NOT NULL',
              'screen_name' => Schema::TYPE_STRING . ' NOT NULL DEFAULT 0',
              'text' => Schema::TYPE_TEXT . ' NOT NULL ',
              'tweeted_at' => Schema::TYPE_INTEGER . ' NOT NULL',
              'created_at' => Schema::TYPE_INTEGER . ' NOT NULL',
              'updated_at' => Schema::TYPE_INTEGER . ' NOT NULL',
          ], $tableOptions);
      $this->addForeignKey('fk_twitter_moment', '{{%twitter}}', 'moment_id', '{{%moment}}', 'id', 'CASCADE', 'CASCADE');
    }


    public function down()
    {
      $this->dropForeignKey('fk_twitter_moment','{{%twitter}}');
      $this->dropTable('{{%twitter}}');
    }
}
Just as we did in part one, you need to run the migration:
./yii migrate/up
Yii Migration Tool (based on Yii v2.0.3)

Total 1 new migration to be applied:
    m150309_174014_create_twitter_table

Apply the above migration? (yes|no) [no]:yes
*** applying m150309_174014_create_twitter_table
    > create table {{%twitter}} ... done (time: 0.008s)
    > add foreign key fk_twitter_moment: {{%twitter}} (moment_id) references {{%moment}} (id) ... done (time: 0.007s)
*** applied m150309_174014_create_twitter_table (time: 0.019s)

Migrated up successfully.
Then, I used Yii2's code generator, Gii, to create the model and CRUD controllers for the Twitter model. If you get the latest GitHub repository code using the sidebar link on this tutorial, you'll have the code as well.
Create a New Moment
Because Twitter limits geolocation searches to the past week, I eventually chose President Obama's Selma 50th Anniversary speech at the Edmund Pettus Bridge.
I used Google Maps again to get the GPS coordinates for the bridge:

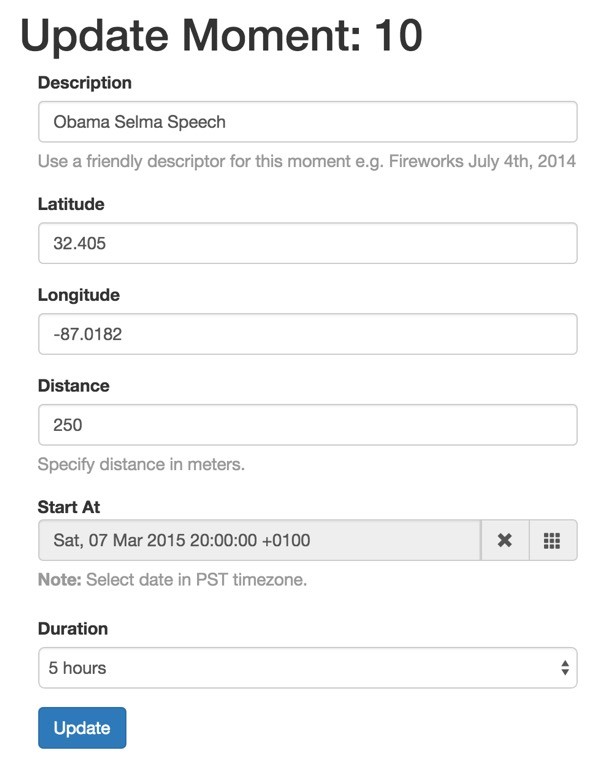
Then, I created a Moment for the speech to search. I updated it a few times to tweak the geographic radius of the search (it's a bridge) and the time range:
Search Using the Twitter API
The limitations of the Twitter API are that it only allows you to search by date, e.g. 2015-03-07, whereas Instagram is indexed by precise Unix timestamps. Therefore, we have to begin our Twitter search a full day ahead and search backwards.
Since we're likely to obtain a lot of tweets outside our desired time range, we have to make repeated calls to the Twitter API. Twitter returns up to 100 tweets per API request, and allows 180 requests per 15-minute window.
I'm using James Mallison's Twitter API Library for PHP. Here's how we set up the library to make calls:
<?php

namespace app\models;

use Yii;
use yii\db\ActiveRecord;
use app\models\Gram;
use Instagram;
use TwitterAPIExchange;

...

public function searchTwitter() {
   date_default_timezone_set('America/Los_Angeles');
   Yii::trace('start searchTwitter '.date('y-m-d h:m '));
   // Load your Twitter application keys
   $settings = array(
       'oauth_access_token' => \Yii::$app->params['twitter']['oauth_token'],
       'oauth_access_token_secret' => \Yii::$app->params['twitter']['oauth_secret'],
       'consumer_key' => \Yii::$app->params['twitter']['key'],
       'consumer_secret' => \Yii::$app->params['twitter']['secret'],
   );
   // Connect to Twitter
   $twitter = new TwitterAPIExchange($settings);
Initially, we request 100 results from Twitter at our GPS coordinates up to a specific date.
public function searchTwitter() {
   date_default_timezone_set('America/Los_Angeles');
   Yii::trace('start searchTwitter '.date('y-m-d h:m '));
   // Load your Twitter application keys
   $settings = array(
       'oauth_access_token' => \Yii::$app->params['twitter']['oauth_token'],
       'oauth_access_token_secret' => \Yii::$app->params['twitter']['oauth_secret'],
       'consumer_key' => \Yii::$app->params['twitter']['key'],
       'consumer_secret' => \Yii::$app->params['twitter']['secret'],
   );
   // Connect to Twitter
   $twitter = new TwitterAPIExchange($settings);
   // Query settings for search
   $url = 'https://api.twitter.com/1.1/search/tweets.json';
   $requestMethod = 'GET';
   // rate limit of 180 queries
   $limit = 180;
   $query_count=1;
   $count = 100;
   $result_type = 'recent';
   // calculate valid timestamp range
   $valid_start = $this->start_at;
   // $until_date and $valid_end = // start time + duration
   $valid_end = $this->start_at + ($this->duration*60);
   Yii::trace( 'Valid Range: '.$valid_start.' -> '.$valid_end);
   $until_date = date('Y-m-d',$valid_end+(24*3600)); // add one day
   $distance_km = $this->distance/1000; // distance in km
   // Unused: &since=$since_date
   // $since_date = '2015-03-05';
   // Perform first query with until_date
   $getfield ="?result_type=$result_type&geocode=".$this->latitude.",".$this->longitude.",".$distance_km."mi&include_entities=false&until=$until_date&count=$count";
We only record tweets within our precise time range, ignoring the other results. As we process these, we make note of the lowest tweet ID received.
       $tweets = json_decode($twitter->setGetfield($getfield)
                    ->buildOauth($url, $requestMethod)
                    ->performRequest());
        if (isset($tweets->errors)) {
          Yii::$app->session->setFlash('error', 'Twitter Rate Limit Reached.');
          Yii::error($tweets->errors[0]->message);
          return;
        }
       $max_id = 0;
       Yii::trace( 'Count Statuses: '.count($tweets->statuses));
       Yii::trace( 'Max Tweet Id: '.$max_id);
       foreach ($tweets->statuses as $t) {
         // check if tweet in valid time range
         $unix_created_at = strtotime($t->created_at);
         Yii::trace('Tweet @ '.$t->created_at.' '.$unix_created_at.':'.$t->user->screen_name.' '.(isset($t->text)?$t->text:''));
         if ($unix_created_at >= $valid_start && $unix_created_at <= $valid_end)
         {
           // print_r($t);
            $i = new Twitter();           $i->add($this->id,$t->id_str,$t->user->id_str,$t->user->screen_name,$unix_created_at,(isset($t->text)?$t->text:''));
         }
         if ($max_id ==0) {
           $max_id = intval($t->id_str);
         } else {
           $max_id = min($max_id, intval($t->id_str));
         }
       }
Then we loop, making repeated requests to Twitter (up to 179 more times), requesting additional records that are earlier than the previous batch's lowest tweet ID. In other words, on subsequent requests, instead of querying up to a specific date, we query to the max_id of the lowest tweet ID that we've received.
We stop when less than 100 records are returned or when returned tweets are earlier than our actual range.
If you need access to more than 18,000 tweets, you'll need to implement a background task to call the Twitter API, as we've done in our other Twitter API series.
As we process API results, we need to filter tweets, only recording those that fall within our actual start time and end time.
Note: The Twitter API has a lot of frustrating quirks which make paging more difficult than it should be. Quite frequently Twitter returns no results without an error code. Other times, I found it returning a small number of results, but that didn't mean that another request would not return more. There are no very clear ways to know when Twitter is done returning results to you. It's inconsistent. Thus, you may notice my code has a few interesting workarounds in it, e.g. examine $count_max_repeats.
       $count_repeat_max =0;
       // Perform all subsequent queries with addition of updated maximum_tweet_id
       while ($query_count<=$limit) {
         $prior_max_id = $max_id;
         $query_count+=1;
         Yii::trace( 'Request #: '.$query_count);

         // Perform subsequent query with max_id
         $getfield ="?result_type=$result_type&geocode=".$this->latitude.",".$this->longitude.",".$distance_km."mi&include_entities=false&max_id=$max_id&count=$count";

         $tweets = json_decode($twitter->setGetfield($getfield)
                      ->buildOauth($url, $requestMethod)
                      ->performRequest());

          if (isset($tweets->errors)) {
            Yii::$app->session->setFlash('error', 'Twitter Rate Limit Reached.');
            Yii::error($tweets->errors[0]->message);
            return;
          }
          // sometimes twitter api fails
          if (!isset($tweets->statuses)) continue;

          Yii::trace( 'Count Statuses: '.count($tweets->statuses));
          Yii::trace( 'Max Tweet Id: '.$max_id);
         foreach ($tweets->statuses as $t) {
           // check if tweet in valid time range
           $unix_created_at = strtotime($t->created_at);
           if ($unix_created_at >= $valid_start && $unix_created_at <= $valid_end)
           {
              $i = new Twitter();           $i->add($this->id,$t->id_str,$t->user->id_str,$t->user->screen_name,$unix_created_at,(isset($t->text)?$t->text:''));
           } else if ($unix_created_at < $valid_start) {
             // stop querying when earlier than valid_start
             return;
           }
           $max_id = min($max_id,intval($t->id_str))-1;
         }
         if ($prior_max_id - $max_id <=1 OR count($tweets->statuses)<1) {
           $count_repeat_max+=1;
         }
         if ($count_repeat_max>5) {
           // when the api isn't returning more results
           break;
         }
       } // end while
One of the first results returned included the tweet below by Fred Davenport showing President Obama on stage:

Here's it is on Twitter:

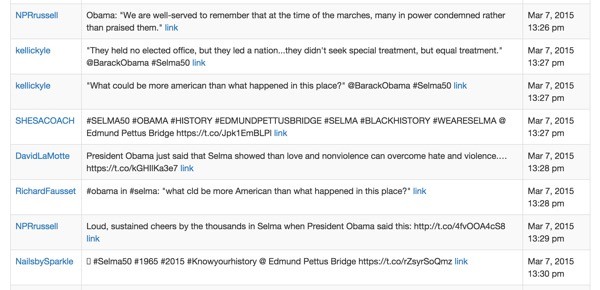
Then, as you browse the results further, you can find many more people present tweeting about Obama—including the media:
Now, let's do a more local search.
A Second, More Local Search
Key Arena is Seattle's large concert and sports arena. This past weekend they held the Pac-12 Women's Basketball Tournament:

Let's get our GPS coordinates for Key Arena from Google Maps:

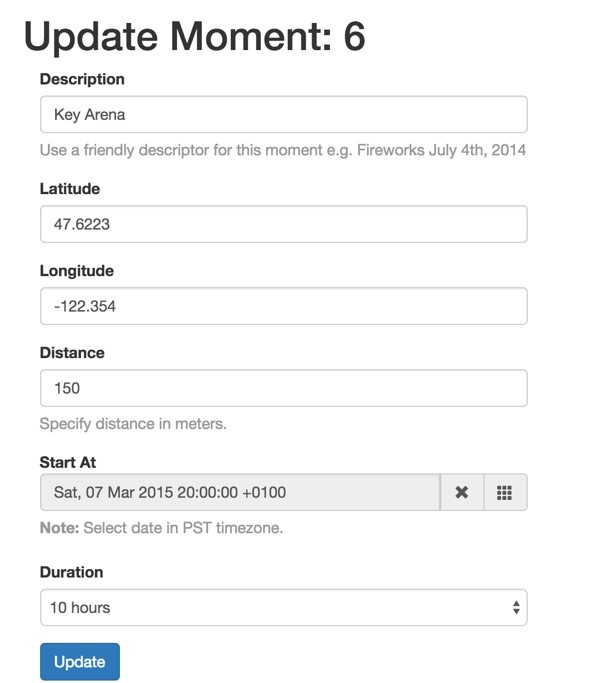
Then, I created and tweaked a moment to find a longer time range for the weekend of tweets:
And, here are some of the results. My favorite is:
"I wanna leave this basketball game. I hate basketball."
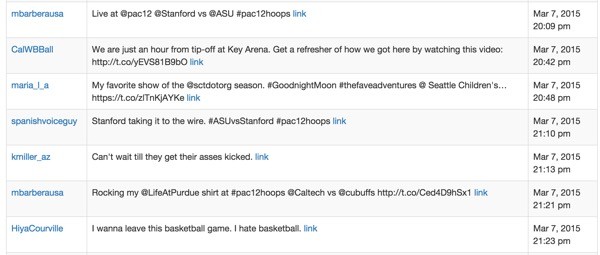
For the most part, it seems to me that Instagram's API is far more powerful than Twitter's and yields generally more intriguing results. However, it depends on the kind of person that you're looking for. If you just want to identify people who were there, either API works well.
What We've Learned
I hope you've enjoyed this series. I found it fascinating and was impressed by the results. And it highlights the concerns we should all have about our level of privacy in this interconnected digital age.
The APIs for Instagram and Twitter are both incredibly powerful services for finding social media users who were nearby certain places at certain times. This information can be used for good and it can be abused. You should probably consider turning off your geolocation posting—follow the links at the Ready or Not? app.
You may also want to check out my Building With the Twitter API series, also on Tuts+.
Please feel free to post your questions and comments below. You can also reach me on Twitter @reifman or email me directly. I'd especially appreciate hearing from journalists and law enforcement that make use of these examples.
You can also browse my Tuts+ instructor page to see other tutorials I've written.


Comments