In the last article in this series, we took a look at the PHP functions that are available for making remote requests.
Specifically, we reviewed:
file_get_contentscURL
And we also discussed the WordPress function wp_remote_get.
In this article, we're going to put the wp_remote_get to work. This function is part of the HTTP API - to practical use by using it to retrieve the following two things:
- The number of followers we have on Twitter
- Our most recent Tweet
The nice thing is that we won't need to use any OAuth or authentication mechanisms, and we'll only need to take advantage of Twitter responses and PHP's JSON functionality.
So in this article, we're going to take a practical look at how to do exactly this, then we'll end the series reviewing all of the information that wp_remote_get returns so that we'll know how to properly handle it in future work.
Prepare the Plugin Directory
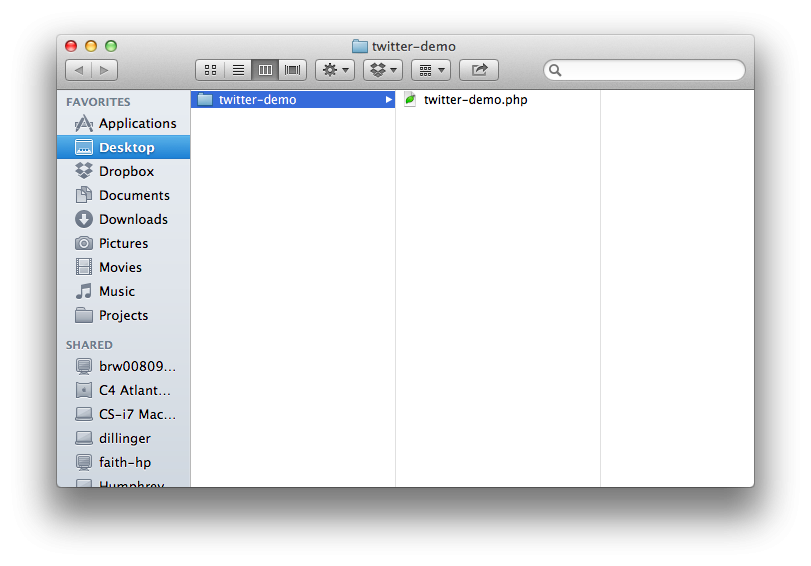
As with all plugins, the first thing that we need to do is to create a directory in our wp-content/plugins directory. For the purposes of this demo, we'll call our plugin Twitter Demo.
Thus, let's name the plugin directory twitter-demo and the associated plugin file twitter-demo.php.
Next, we need to go ahead and stub out the header of the plugin so that WordPress is able to detect the plugin file, so let's do that now.
Stubbing Out the Plugin
First, place the following code in the header of twitter-demo.php file:
<?php
/* Plugin Name: Twitter Demo
 * Plugin URI:  http://example.com/twitter-demo/
 * Description: Retrieves the number of followers and latest Tweet from your Twitter account.
 * Version:     1.0.0
 * Author:      Tom McFarlin
 * Author URI:  http://tommcfarlin.com/
 * License:     GPL-2.0+
 * License URI: http://www.gnu.org/licenses/gpl-2.0.txt
 */
Note that we are not going to be internationalizing this plugin. We've covered this topic in another post and it's something that's beyond the scope of what we're trying to do in this article.
At this point, you should be able to see the plugin displayed in your WordPress installation's plugin dashboard. You can activate it; however, it won't actually do anything.
At least, not yet.
Bringing the Plugin to Life
As with the rest of the demo plugins that I publish here, I think that it's important to first outline what it is the plugin is going to do before we get to coding.
As such, here's what we can expect:
- At the bottom of each post, we'll display a small notification that reads: I have X number of followers on Twitter. My last tweet was Y.
- We'll make sure to do this only on the single post page so that it doesn't display on the main index or archive pages.
Sure, it's a little obnoxious displaying this at the bottom of a post, but remember that the purpose of this plugin is to demonstrate how to use wp_remote_get, how to parse a response from Twitter, and how to display it.
We're far less concerned with where the content is displayed.
So, let's go ahead and stub out the class that will be providing this functionality.
1. Stub Out the Twitter Demo Class
Before doing anything, let's stub out the class that we'll be using to make the request to Twitter. I've included all of the code below along with documentation for each attribute and method.
<?php
/**
 * Plugin Name: Twitter Demo
 * Plugin URI:  http://tommcfarlin.com/twitter-demo/
 * Description: Retrieves the number of followers and latest Tweet from your Twitter account.
 * Version:     1.0.0
 * Author:      Tom McFarlin
 * Author URI:  http://tommcfarlin.com/
 * License:     GPL-2.0+
 * License URI: http://www.gnu.org/licenses/gpl-2.0.txt
 */

class Twitter_Demo {

	/**
	 * Instance of this class.
	 *
	 * @var      Twitter_Demo
	 */
	private static $instance;

	/**
	 * Initializes the plugin so that the Twitter information is appended to the end of a single post.
	 * Note that this constructor relies on the Singleton Pattern
	 *
	 * @access private
	 */
	private function __construct() {

	} // end constructor

	/**
	 * Creates an instance of this class
	 *
	 * @access public
	 * @return Twitter_Demo    An instance of this class
	 */
	public function get_instance() {

	} // end get_instance

	/**
	 * Appends a message to the bottom of a single post including the number of followers and the last Tweet.
	 *
	 * @access public
	 * @param  $content    The post content
	 * @return $content    The post content with the Twitter information appended to it.
	 */
	public function display_twitter_information( $content ) {

	} // end display_twitter_information

	/**
	 * Attempts to request the specified user's JSON feed from Twitter
	 *
	 * @access public
	 * @param  $username   The username for the JSON feed we're attempting to retrieve
	 * @return $json       The user's JSON feed or null of the request failed
	 */
	private function make_twitter_request( $username ) {

	} // end make_twitter_request

	/**
	 * Retrieves the number of followers from the JSON feed
	 *
	 * @access private
	 * @param  $json     The user's JSON feed
	 * @return           The number of followers for the user. -1 if the JSON data isn't properly set.
	 */
	private function get_follower_count( $json ) {

	} // end get_follower_count

	/**
	 * Retrieves the last tweet from the user's JSON feed
	 *
	 * @access private
	 * @param  $json     The user's JSON feed
	 * @return           The last tweet from the user's feed. '[ No tweet found. ]' if the data isn't properly set.
	 */
	private function get_last_tweet( $json ) {

	} // end get_last_tweet

} // end class

// Trigger the plugin
Twitter_Demo::get_instance();
Note that we'll be filling the rest of these methods as we go, and I'll also have the full source code of the plugin at the end of the article.
Before we go any further, I'd like to point out that we're going to be using the Singleton Pattern for this plugin. We've covered this design pattern in a previous article, and though it's advantages are outside the scope of this article, I recommend reading the associated article to make sure that you fully grok why we're setting up our plugin this way.
Next up, let's take a look at the functions that we've laid out so we know exactly where we're headed:
- The constructor is where we'll be adding an action for appending our Twitter information to a single post
-
display_twitter_informationwill be used to render the message at the bottom of the post -
make_twitter_requestwill actually request and return the data from Twitter (or null if the request fails) -
get_follower_countwill return the number of followers for the specified user (or -1 if there's a problem) -
get_last_tweetwill return the last tweet from the user or a message if the plugin fails
Clear enough? At this point, let's work on requesting information from Twitter so that we can process it.
2. Request Data From Twitter
First, let's populate the make_twitter_request function with the following code. Note that I'll explain it after the code:
private function make_twitter_request( $username ) {

	$response = wp_remote_get( 'https://twitter.com/users/' . $username . '.json' );
	try {

		// Note that we decode the body's response since it's the actual JSON feed
		$json = json_decode( $response['body'] );

	} catch ( Exception $ex ) {
		$json = null;
	} // end try/catch

	return $json;

}
In the first line of the code we're taking advantage of wp_remote_get to make our request. Note that we're using the $username parameter to retrieve the user's JSON feed. Notice how simple it is to make a request using the wp_remote_get function.
This username is passed in from a different function that we'll look at momentarily.
Next, notice that we wrap out code in a try/catch. This is because the request to Twitter could potentially fail. If it does not fail, then we'll use PHP's json_decode function to decode the body of the response; otherwise, we'll set the response equal to null.
This will make for an easy conditional in the calling function.
Before we go any further it's important to note that there's a subtle takeaway here: Notice that we're decoding the 'body' key of the $response array that is returned. For those of you who are more curious about this, we're going to take a detailed look at the response that comes when using wp_remote_get in the next article.
For now, simply note that the body index of the $response array is but one piece of information that we have available.
3. Call Into the Request Function
Now that we've defined the function that's responsible for making a request to Twitter, let's define the function that will request data from Twitter then display it below the post content.
Again, here's the code after which I'll be explaining exactly what it's doing:
public function display_twitter_information( $content ) {

	// If we're on a single post or page...
	if ( is_single() ) {

		// ...attempt to make a response to twitter. Note that you should replace your username here!
		if ( null == ( $json_response = $this->make_twitter_request( 'wptuts' ) ) ) {

			// ...display a message that the request failed
			$html = '
<div id="twitter-demo-content">';
 $html .= 'There was a problem communicating with the Twitter API..';
 $html .= '</div>
<!-- /#twitter-demo-content -->';

		// ...otherwise, read the information provided by Twitter
		} else {

			$html = '
<div id="twitter-demo-content">';
 $html .= 'I have ' . $this->get_follower_count( $json_response ) . ' followers and my last tweet was "' . $this->get_last_tweet( $json_response ) . '".';
 $html .= '</div>
<!-- /#twitter-demo-content -->';

		} // end if/else

		$content .= $html;

	} // end if/else

	return $content;

}
First, know that this is the longest function in the entire plugin. If you can sift through this, you're good to go.
Remember: This function is what will be called during the the_content action that will be defined in our constructor once the plugin is fully done.
As such, the function first checks to see if we're on a single post. If not, then it will simply return the content; otherwise, it does the following:
- Attempts to make a request to Twitter
- If the request fails, then it will display a message stating so
- Otherwise, if will print out a message displaying the number of followers and the last tweet the person left
- It will append the message to the post content
An important note: In this function, you specify the username for which you want to retrieve the information. For example, notice that I'm trying to retrieve information for @WPTuts by calling $this->make_twitter_request('wptuts').
4. Read the Information
At this point, we're ready to read the information and to concatenate the strings into our message to display to the user. We'll do this by using the get_follower_count method and the get_last_tweet.
Because these methods are so similar, we'll take a look at both of them and then I'll explain them after the code:
private function get_follower_count( $json ) {
	return ( -1 < $json->followers_count ) ? $json->followers_count : -1;
} // end get_follower_count

private function get_last_tweet( $json ) {
	return ( 0 < strlen( $json->status->text ) ) ? $json->status->text : '[ No tweet found. ]';
} // end get_last_tweet
Notice that the two functions are similar in that they both accept the $json data from earlier in the plugin. Next, they both use a ternary operator to determine if they should be returning the requested text or a default message.
In other words, if we're looking to display the followers_count and the value is greater than -1, then we know we have a value to display, so we'll return it; otherwise, we'll return -1 as an indicator that the value isn't properly set.
This allows us to defensively code against something that may go wrong when processing the data.
The Twitter Demo Plugin
As promised, here's the source code in full with documentation to match:
<?php
/**
 * Plugin Name: Twitter Demo
 * Plugin URI:  http://example.com/twitter-demo/
 * Description: Retrieves the number of followers and latest Tweet from your Twitter account.
 * Version:     1.0.0
 * Author:      Tom McFarlin
 * Author URI:  http://tommcfarlin.com/
 * License:     GPL-2.0+
 * License URI: http://www.gnu.org/licenses/gpl-2.0.txt
 */
class Twitter_Demo {
	/**
	 * Instance of this class.
	 *
	 * @var      Twitter_Demo
	 */
	private static $instance;

	/**
	 * Initializes the plugin so that the Twitter information is appended to the end of a single post.
	 * Note that this constructor relies on the Singleton Pattern
	 *
	 * @access private
	 */
	private function __construct() {
		add_action( 'the_content', array( $this, 'display_twitter_information' ) );
	} // end constructor

	/**
	 * Creates an instance of this class
	 *
	 * @access public
	 * @return Twitter_Demo    An instance of this class
	 */
	public function get_instance() {
		if ( null == self::$instance ) {
			self::$instance = new self;
		}
		return self::$instance;
	} // end get_instance

	/**
	 * Appends a message to the bottom of a single post including the number of followers and the last Tweet.
	 *
	 * @access public
	 * @param  $content    The post content
	 * @return $content    The post content with the Twitter information appended to it.
	 */
	public function display_twitter_information( $content ) {
		// If we're on a single post or page...
		if ( is_single() ) {
			// ...attempt to make a response to twitter. Note that you should replace your username here!
			if ( null == ( $json_response = $this--->make_twitter_request('wptuts') ) ) {

				// ...display a message that the request failed
				$html = '
<div id="twitter-demo-content">';
 $html .= 'There was a problem communicating with the Twitter API..';
 $html .= '</div>
<!-- /#twitter-demo-content -->';

				// ...otherwise, read the information provided by Twitter
			} else {

				$html = '
<div id="twitter-demo-content">';
 $html .= 'I have ' . $this->get_follower_count( $json_response ) . ' followers and my last tweet was "' . $this->get_last_tweet( $json_response ) . '".';
 $html .= '</div>
<!-- /#twitter-demo-content -->';

			} // end if/else

			$content .= $html;

		} // end if/else

		return $content;

	} // end display_twitter_information

	/**
	 * Attempts to request the specified user's JSON feed from Twitter
	 *
	 * @access public
	 * @param  $username   The username for the JSON feed we're attempting to retrieve
	 * @return $json       The user's JSON feed or null of the request failed
	 */
	private function make_twitter_request( $username ) {

		$response = wp_remote_get( 'https://twitter.com/users/' . $username . '.json' );
		try {

			// Note that we decode the body's response since it's the actual JSON feed
			$json = json_decode( $response['body'] );

		} catch ( Exception $ex ) {
			$json = null;
		} // end try/catch

		return $json;

	} // end make_twitter_request

	/**
	 * Retrieves the number of followers from the JSON feed
	 *
	 * @access private
	 * @param  $json     The user's JSON feed
	 * @return           The number of followers for the user. -1 if the JSON data isn't properly set.
	 */
	private function get_follower_count( $json ) {
		return ( -1 < $json->followers_count ) ? $json->followers_count : -1;
	} // end get_follower_count

	/**
	 * Retrieves the last tweet from the user's JSON feed
	 *
	 * @access private
	 * @param  $json     The user's JSON feed
	 * @return           The last tweet from the user's feed. '[ No tweet found. ]' if the data isn't properly set.
	 */
	private function get_last_tweet( $json ) {
		return ( 0 < strlen( $json->status->text ) ) ? $json->status->text : '[ No tweet found. ]';
	} // end get_last_tweet

} // end class

// Trigger the plugin
Twitter_Demo::get_instance();
It's actually relatively simple, right? In fact, there are about as many code comments as there are lines of actual code so the plugin itself is very small.
Conclusion
This demo goes to show just how easy it is to use wp_remote_get to interact with third party services, parse their response, and integrate it into a plugin. Granted, this is very bare bones, but it still proves the concept.
In the next article in this part of the series, we'll take a look at all of the information that we can pass to wp_remote_get to see just how flexible the method is. After that, we'll take a detailed look at the response data so that we're able to write more complicated requests and write more defensive code, more defensively.

Comments