When you are getting close to completing your WordPress plugin, it's time to start thinking about releasing it to the broader public. Getting ready for publishing a plugin requires a lot of polishing, testing and fine tuning, and it's easy to forget some steps in the process. This tutorial will guide you through publishing the plugin in the WordPress plugin directory and work as a check list to help you make sure your plugin will be ready for the prime time by the time you hit publish.
Some of the steps, such as setting up the project are done once in every plugin's lifetime, whereas many are important every time you release a new version of your plugin. That's why it can be a good idea to bookmark this tutorial and come back to it when it's time to do your next update.
Step 1. Introduction to the WordPress Plugin Directory
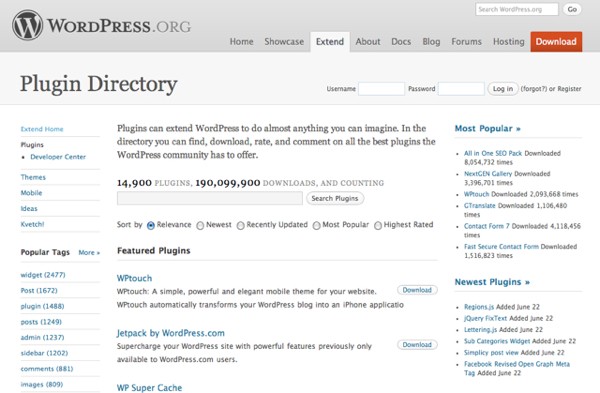
The plugin directory at WordPress.org is to WordPress what AppStore is for the iPhone: the easiest and fastest, built-in way to find plugins for WordPress. While it is possible to publish your plugin as a zip file downloaded from your own web site, with every release, the integration between WordPress and its plugin directory is getting tighter.
By releasing your plugin through the plugin directory, you make it easier for your potential users to find your plugin and keep it updated as you create new versions. They will be able to install the plugin without having to exit the WordPress admin dashboard, and naturally, most WordPress users are already well aware of the plugin directory and will browse it when looking for plugins to match their needs. You, on the other hand, will get download stats, feedback from the users through the plugin's page in the plugin directory, and a free subversion repository for storing your plugin's files and version history.
Is there a reason for not hosting your plugin in the plugin directory? If your plugin is commercial, you may want to host it elsewhere (your own site or a market place, such as Envato's Codecanyon) as the plugin directory is open and has no support for making money out of your plugins. Everything posted in the WordPress plugin directory is freely downloadable by everyone.
Here are the rules for plugins hosted in the directory, taken from the Plugin Directory's instructions:
There are only a few restrictions:
- Your plugin must be GPLv2 Compatible.
- The plugin most not do anything illegal, or be morally offensive (that's subjective, we know).
- You have to actually use the subversion repository we give you in order for your plugin to show up on this site. The WordPress Plugins Directory is a hosting site, not a listing site.
- The plugin must not embed external links on the public site (like a "powered by" link) without explicitly asking the user's permission.
- If you don't specify a v2-compatible license, what you check in is explicitly GPLv2.
Step 2. Add Your Plugin to the Plugin Directory
Once you have decided to host your plugin in the WordPress plugin directory, the first step is to create a WordPress.org user account. To get one, visit the plugin directory and click on the "Register" link on the top right side of the page, right next to the login prompt.

After registering your user account, you can request WordPress to add your plugin by following this link which leads to a page that looks like the screenshot below.
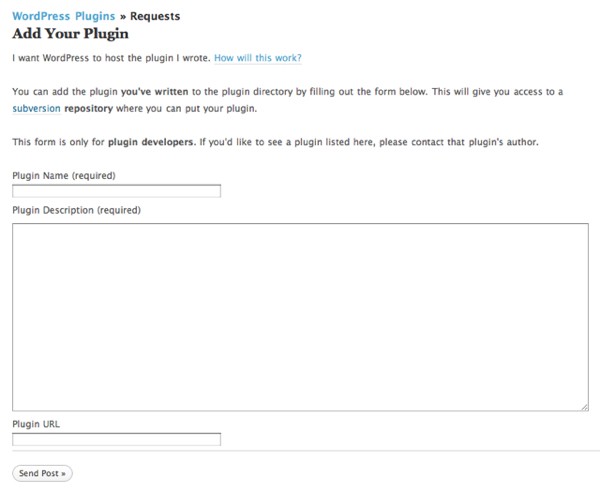
Fill in the form and explain briefly what your plugin is about. Be as specific you can while staying within a reasonable length. If your plugin already has a web site, enter the URL in the "Plugin URL" field.
Before your project is created, someone from the WordPress staff will read your request and approve it. While WordPress makes no promises about how long this might take, saying they will get back at you in "some vaguely defined amount of time," the time is calculated in hours or days rather than weeks -- most likely, you will have your plugin set up within 24 hours from submitting the request.
Once your plugin is approved, you will receive an email with your new project's web site and SVN url in it. Notice the repository URL, as we will be using it heavily in the next steps.
Step 3. Working With the SVN Repository
In the following steps, I will assume you are at least somewhat familiar with SVN, so if you have no idea of what SVN is, skim through a tutorial before continuing to the next step.
On Mac and most flavours (if not all) of Linux, a command line SVN client comes with the operating system. In windows, you can either install the command line client yourself, or go with a graphical client such as Tortoise SVN. On Mac, Versions is a very nice graphical client.
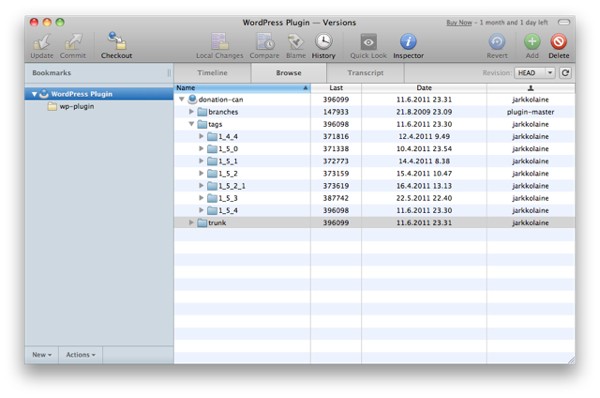
To get the most out of the SVN repository provided by WordPress, we'll set it up so that the plugin's development version is saved in <your plugin's SVN URL>/trunk and the released versions are copied as SVN tags to <your plugin's SVN URL>/tags, each version as its own tag. This way all of your previous versions can be downloaded through the plugin directory -- very useful when you release a buggy version: your users can downgrade back to the previous version while you work on a bug fix.
The plugin directory reads the tag from which your current stable release should be distributed by checking the readme.txt file in trunk. I will cover this in more detail in the next step as we go through the contents of the readme.txt file that should be included with the plugin.
First, however, let's go through the SVN commands you will be using most of the time. Don't worry if you don't like to write commands in the terminal, just go ahead and use your favorite graphical SVN client instead.
Let's start by checking out the project from SVN. Right now, the project is still empty, so nothing but an empty directory is added to your computer.
$ svn co http://[email protected]/your-plugin/trunk local-path
Copy or move your plugin code into that directory (local-path) created by the svn command, and add the files to SVN. Inside the directory, type:
$ svn add file-path
file-path can be a path to a specific file, or a wildcard such as *.php. This will mark the files to be added to the SVN repository in your next svn commit -- nothing is committed yet. If you are not sure which files you added already, you can check the SVN status of every file in the current working directory:
$ svn status
Finally, when everything is ready to be sent to the SVN repository, commit the files. Don't be afraid to commit often: as long as the "Stable tag" points to some other directory than trunk, your commits won't have an effect on the already published version. By doing this you are safe in case you lose your local copy of the code for some reason.
$ svn commit -m "A brief explanation of what was changed"
Before your project can be shown in the Plugin Directory, you will still need to add the readme.txt file. But before we go into that, it's time to test your plugin.
Step 4. Test Your Plugin
Even though your users are not paying to use your plugin, releasing a plugin without testing it first is never a good idea. In open source, people tolerate a few buggy releases every now and then if you fix your bugs quickly and are fast to respond to their bug reports, but if every single release goes out with serious bugs left in it, sooner or later, your users will move on to other similar plugins.
At the same time, we must keep in mind that as sole developers or small teams, our resources for testing are limited. If you are lucky, you can someone outside the team to test your plugin, but quite often, it's just you the developer doing the testing. This is why it's important to create a clear and simple, actionable testing plan.
To create one, go through the following advice, and pick the tips that work for you, and customize according to your own experience and the specifics of the plugin you are about to release.
Test for Your Weak Spots
I am the first to admit that I am not a perfect developer. Even though I know my weak spots, I tend to repeat my mistakes. That's why, in my test procedure, I try to keep an up-to-date list of the bug types that occur most often in my code and tests that I need to do before every release in order to catch my most common mistakes.
Don't Forget to Test Old Features
This is called regression testing, and it's one of the most important forms of testing: Usually, new features get tested pretty well as you develop them, but at the same time, you may be introducing bugs to other parts of the code that you already considered complete.
To catch these bugs, create a list of tests for checking the core functionality of your plugin, and go through the list before every release, even if your changes should not have touched them.
Test on Different WordPress Installations
Some of the bugs only appear to new users who are installing the plugin for the first time, whereas others only bother the users who are upgrading from a previous version. Some bugs only appear in a multi-user environment, and so on.
To make sure you catch as many issues as possible, it's a good idea to create different test environments, at least one with an existing version of your plugin and the other a clean WordPress installation.
Pay Special Attention to Changes in the Database Structure
When you know your next release creates new database tables or changes existing ones, test carefully to see that the change you expect to happen in fact does and the database gets to the correct final state. My test procedure says about database structure:
If DB structure has changed:
- Test database upgrade without deactivating the plugin
- Test database upgrade with deactivation / reactivation
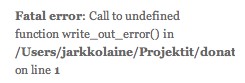
Remember to Test for the Blank Slates and Error Cases
These are states you don't notice if you just run the plugin the way it was intended, and therefore it can take a long time before you notice the errors unless you intentionally test for them.
This is not something you want to see in a piece of error handling code meant to handle the error case gracefully:
Always Test With the Latest WordPress Version
To make sure your plugin works with changes introduced in the latest WordPress version, it's good to always update your test environment to the latest version before doing the final round of testing.
Use the Testing Help You Get From Your Users
Go through user feedback and see if there are bugs that you haven't addressed yet. Ignore feature requests for now (but write them down so you can use them as input when planning your next release) as you can't do everything in one release anyway. Always believe your users when they say they have found a bug, but don't be afraid to ask for more information in order to figure it out.
Test on Different Web Browsers
If your plugin writes out any HTML or CSS, decide on a set of browsers you support and test your plugin on those browsers before every release.
Step 5. Double Check for Issues That Are Easy to Miss
Some potential problems are easier to find by looking at the code than through testing, so again just like in testing, it's a good idea to keep track of your weak spots, and write down a list of things to double check before publishing the plugin. As you release more versions, you gain more knowledge on what is important to test in this very project, so keep updating the list as you learn, taking some things out and adding others.
Here are some ideas to double check, collected from my own experience:
Parameter Validation
When you handle forms posted by the user, make sure you validate the attributes properly, in its simplest form by using the esc_attr method.
$user_name = esc_attr($_POST["username"]);
Function Naming
if your plugin is not written using objects, every one of your functions are in the same namespace with the rest of the code in WordPress and installed plugins. To prevent your function names from colliding with those from WordPress or other plugins, prefix them with a short name of the plugin.
function pluginname_print_error($message) {
	...
}

// is safer than:

function print_error($message) {
	...
}
TODO and FIXME comments
Go through all of your TODO or FIXME comments to see you haven't missed anything you planned to work on later.
Localization
If your plugin supports localization, before every release, go through all of the plugin's string to make sure they are all correctly marked for localization. It's easy to forget this when adding new strings to a plugin.
// use
$text = __("Hello, world", "my_plugin");

// instead of just
$text = "Hello, world"

// and
_e("Hello!", "my_plugin");

// instead of
echo "Hello!";
Follow Coding Standards
In the WordPress Codex, you can find a document that outlines the coding style that should be followed when developing plugins for the WordPress platform. While following this document is not mandatory, doing so will make it easier for other developers to help you out with the plugin.
Include the GPL license
Check that every file in your plugin contains the GPL header and that the GPL license's license.txt is included in your plugin's main folder.
/*
Copyright (c) 2011, Your Name.

This program is free software; you can redistribute it and/or
modify it under the terms of the GNU General Public License
as published by the Free Software Foundation; either version 2
of the License, or (at your option) any later version.

This program is distributed in the hope that it will be useful,
but WITHOUT ANY WARRANTY; without even the implied warranty of
MERCHANTABILITY or FITNESS FOR A PARTICULAR PURPOSE.  See the
GNU General Public License for more details.

You should have received a copy of the GNU General Public License
along with this program; if not, write to the Free Software
Foundation, Inc., 51 Franklin Street, Fifth Floor, Boston, MA  02110-1301, USA.
*/
Step 6. Document Your Plugin With readme.txt
Every plugin committed to the WordPress plugin directory needs to have a readme.txt file formatted according to rules defined by this template. It's important to follow the formatting as defined as, when you commit your plugin to the plugin directory, this file is automatically converted into the description of the plugin you see when browsing plugins in the plugin directory.
For example, see how this snippet from the beginning of the readme.txt template is converted into information presented to the plugin directory user:
=== Plugin Name ===
Contributors: markjaquith, mdawaffe (this should be a list of wordpress.org userid's)
Donate link: http://example.com/
Tags: comments, spam
Requires at least: 2.8
Tested up to: 3.1.3
Stable tag: 1_5_4
Copy the template to your plugin directory and start editing it with information specific to your plugin. Once you are happy with your readme.txt, test it using the readme.txt validator provided by WordPress before committing it to SVN.
When you see this at the top of the validator page, you are ready to commit:

Step 7. Make the Release by Updating the Version Number and Stable Tag
I mentioned the stable tag at the step where we talked about the right way to use SVN in plugin development. Now, it's time to start using it: you have tested your plugin, you have inspected your code, and you have written the documentation. There's nothing left except releasing the plugin:
Update the Plugin's Version Number
Look up your plugin's main PHP file and update the comment by entering your version number to the "Version:" field:
/*
Plugin Name: A Plugin
Version: 1.0
Plugin URI: http://wp.tutsplus.com
Description: My great plugin
Author: Jarkko Laine
Author URI: http://jarkkolaine.com
*/
Update Version History
In readme.txt, there are two sections devoted for documenting your version changes: "Changelog" and "Upgrade Notice." Add a section for your new version to Changelog, providing detailed information of what changes and bug fixes are included in this version. Upgrade notice is a shorter (at most 300 characters) summary of why it's worth updating to this version of the plugin.
Here's an example for a changelog row from my donation plugin:
= 1.5.2 =
* Bug fix: Fixed a bug database upgrade bug introduced in previous version
* Bug fix: Fixed a bug related to passing the selected currency to PayPal
Update Stable Tag
Still in readme.txt, look up the row (almost at the top of the file) that says "Stable tag:" and update the row with the name of the tag you will be using for your next version. My convention has been to name the tag the same as the version number with dots replaced by underscores (e.g. the tag for version 1.0 would be 1_0). This works pretty well, but even better is to just make it the same as the version number:
Stable tag: 1.0
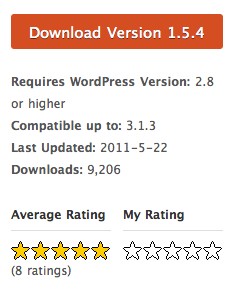
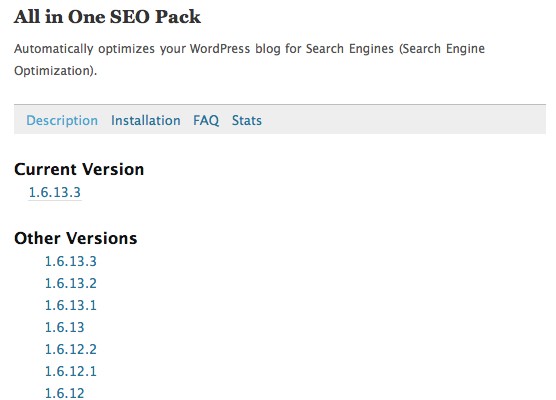
This way, when someone seeks for an older version of your plugin on the "Other versions" page, she will easily figure out which tag belongs to which version, like in this example from the most popular plugin in the plugin directory:
Create the Tag
Commit your changes to the plugin's main PHP file and readme.txt. Then create the tag you picked for your next "Stable tag":
$ svn copy http://[email protected]/your-plugin/trunk
http://[email protected]/your-plugin/tags/1.0 -m "Tagging a new version"
This is it: the readme.txt in trunk points to the correct tag and all you have to do is to wait until the automatic software in the plugin directory notices your changes and updates the directory. It will take about half an hour for the new version to be downloadable from the plugin directory and a couple of hours more before your WordPress blog notices that there is an update available for the plugin (if this was an update instead of the first commit).
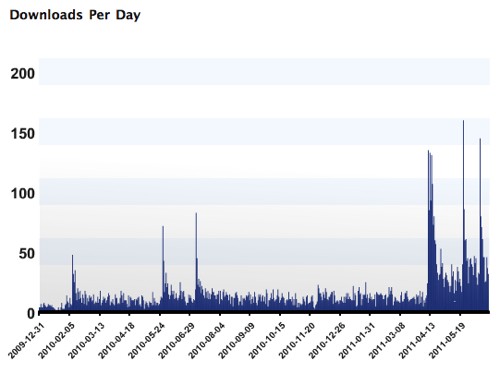
Once you notice the update in the plugin directory, download it and test once more just to be sure every change and fix got included correctly in the release correctly. Tell your friends and followers about the plugin, then wait for feedback to roll in and watch your download stats grow.
Once you start receiving feedback, or if you have ideas of your own for improving the plugin, it's good to keep rolling out new versions every few weeks or so. This will show your users that your plugin is still alive and in active development, and make them more likely to invest their time in it.

Comments