In this Quick Tip we are going to be using the ColorMatrixFilter and BlurFilter to create a Motion Trail effect.
We found this awesome author thanks to FlashGameLicense.com, the place to buy and sell Flash games.
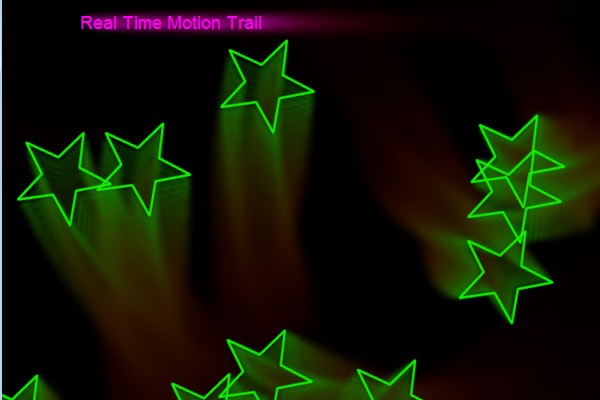
Final Result Preview
Let's take a look at the final result we will be working towards:
Step 1: Create Project and Set It Up
Create a new Project in FlashDevelop (or whichever editor you use), set the dimensions of the swf to 600x400 and the background to black (#000000).
Next, to set up the scene we are going to have two Sprites, one is for the main display to which we will add all the display objects and the other is for the Motion Trail effect that uses the main display as a reference.
private var _mainDisplay:Sprite = new Sprite();
private var _mtDisplay:Sprite = new Sprite();
And add the Sprites to the Stage.
//
// Set up Displays

// We have to add our two displays to the Stage
addChild(_mtDisplay);
addChild(_mainDisplay);
Now we are going to embed our star image for use, or if you want use your own image.
[Embed(source = '../../images/star.png')]
var star:Class;
The final thing we want to do for the setup is create a loop function. This is going to be updated every frame, for things like positioning and updating the Motion Trail. So make another function and an event listener to call it every frame.
Your Main.as class should look something like this.
package rtmTrail
{
	import flash.display.Sprite;
	import flash.events.Event;

	public class Main extends Sprite
	{
		public function Main():void
		{
			if (stage) init();
			else addEventListener(Event.ADDED_TO_STAGE, init);
		}

		private function init(e:Event = null):void
		{
			removeEventListener(Event.ADDED_TO_STAGE, init);

			//
			// Load Images

			[Embed(source = '../../images/star.png')]
			var star:Class;

			//
			// Set up Displays

			// We have to add our two displays to the stage
			addChild(_mtDisplay);
			addChild(_mainDisplay);

			// Add a new Event Listener for our loop function whenever we enter
			// the frame to move the sprites and update our MotionTrail Effect
			addEventListener(Event.ENTER_FRAME, loop);
		}

		private function loop(e:Event):void
		{

		}

		private var _mainDisplay:Sprite = new Sprite();
		private var _mtDisplay:Sprite = new Sprite();

	}
}
Step 2: Sprites & TextField
To test the Motion Trail we are going to create ten Sprites from the star image and position them in random places. Additionally we are going to create a Point that tells us the speed and direction they will move. The first thing to do is create two Arrays to store this information; one is for the Sprite and the other is for the Point.
private var _sprites:Array = new Array();
private var _spritesDir:Array = new Array();
private var _txt:TextField = new TextField();
Add this to the init function to randomly create and place ten stars.
// Draw some stars
var spr:Sprite;
var bmp:Bitmap;
for (var i:int = 0; i < 10; i++)
{
	spr = new Sprite();
	bmp = new star();
	spr.addChild(bmp);
	bmp.smoothing = true;
	spr.x = Math.random() * 240 + 80;
	spr.y = Math.random() * 240 + 80;

	// We are going to add the new sprite into the _sprites Array and a
	// Point that tells us where to move the sprite in the _spritesDir Array.
	_sprites.push(spr);
	_spritesDir.push(new Point(Math.random() * 6, Math.random() * 6));

	// Last thing to do is add it to our main Display
	_mainDisplay.addChild(spr);
}
Now to create the TextField add this.
	// Add a Text Field Too
	_txt.defaultTextFormat = new TextFormat("arial", 18, 0xFF00FF);
	_txt.text = "Real Time Motion Trail"
	_txt.x = 20;
	_txt.y = 10;
	_txt.width = 200;
	_mainDisplay.addChild(_txt);
Step 3: Control Sprite Movement
Now we have to move into our loop function for Sprite movement control. Fairly simple, use a for loop to go through each Sprite we have and if it hits the edge inverse the x or y of the Point so it goes in the other direction. We'll also have to move the sprite in the loop by the values in the Point and, to make it more interesting, slowly rotate it.
private function loop(e:Event):void
{
	// Update the Sprite Shapes
	for (var i:int = 0; i < _sprites.length; i++)
	{
		// Check to see if the shape is at or out of the
		// outer bounds so we can change direction
		if (_sprites[i].x <= 0 || _sprites[i].x >= 600) _spritesDir[i].x = -_spritesDir[i].x;
		if (_sprites[i].y <= 0 || _sprites[i].y >= 400) _spritesDir[i].y = -_spritesDir[i].y;

		// Move the Sprite Shape
		_sprites[i].x += _spritesDir[i].x;
		_sprites[i].y += _spritesDir[i].y;

		// Rotate Sprite Shape
		_sprites[i].rotation += 2;

	}
}
To move the TextField across the top to the left we just have to subtract from the x property every frame, and if it goes off screen set it back to the right side of the screen.
private function loop(e:Event):void
{
	// Update the Sprite Shapes
	for (var i:int = 0; i < _sprites.length; i++)
	{
		// Check to see if the shape is at or out of the
		// outer bounds so we can change direction
		if (_sprites[i].x <= 0 || _sprites[i].x >= 600) _spritesDir[i].x = -_spritesDir[i].x;
		if (_sprites[i].y <= 0 || _sprites[i].y >= 400) _spritesDir[i].y = -_spritesDir[i].y;

		// Move the Sprite Shape
		_sprites[i].x += _spritesDir[i].x;
		_sprites[i].y += _spritesDir[i].y;

		// Rotate Sprite Shape
		_sprites[i].rotation += 2;

	}

	// Move Text
	_txt.x -= 4
	if (_txt.x < -200) _txt.x = 600;
}
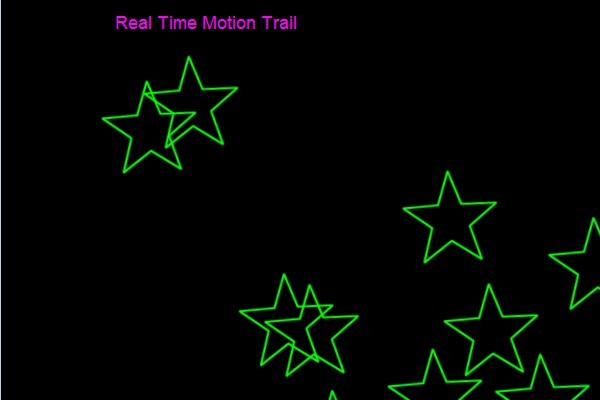
Having tested it, you should have seen something like this (with the stars and text moving around the screen of course).
Step 4: Create the MotionTrail Class
Now it is time to make our MotionTrail Class. What this class is going to do is take a DisplayObject which is drawn to its own display (a Sprite) and using a couple filters, faded and blurred.
So make your new MotionTrail.as Class and let it extend the Sprite Class.
For a little pre-setup for the steps to come we are going to create a few variables, first the _display to store a reference of the Main Display, a BitmapData to draw to, a Rectangle the size of the stage and a Point in the top-left corner for the filters. Last up is an Array for the ColorMatrixFilter.
package rtmTrail
{
	import flash.display.Bitmap;
	import flash.display.BitmapData;
	import flash.display.DisplayObject;
	import flash.display.Sprite;
	import flash.geom.Point;
	import flash.geom.Rectangle;

	public class MotionTrail extends Sprite
	{

		public function MotionTrail(display:DisplayObject)
		{
			// Reference to the display used for the motion trail
			_display = display;

			// Make a BitmapData Object to draw to
			// If you want to use this for your own project and the dimensions isn't 600x400
			// then you would have to change it here and the rectangle below
			_bitmapData = new BitmapData(600, 400, true, 0x000000);

			// Some Stuff that the filters need inputed for it to work
			_rect = new Rectangle(0, 0, 600, 400);
			_pnt = new Point(0, 0);
			_cMatrix = new Array();

			// Add a little transparency so it doesn't take attention away from the Main Display
			alpha = 0.6;

			addChild(new Bitmap(_bitmapData));
		}

		private var _display:DisplayObject;
		private var _bitmapData:BitmapData;
		private var _rect:Rectangle;
		private var _pnt:Point;
		private var _cMatrix:Array;

	}

}
Since we made this class we have to go back real quick to the _mtDisplay variable and change it from the Sprite Class to the MotionTrail Class, along with inputting the _mainDisplay variable.
private var _mainDisplay:Sprite = new Sprite();
private var _mtDisplay:MotionTrail = new MotionTrail(_mainDisplay);
Step 5: ColorMatrixFilter Array
To create our Matrix for the ColorMatrixFilter, the basic idea is to fade the colors away so we slowly reduce all the values back to zero. Add this to the constructor.
// Create Matrix for ColorMatrixFilter
_cMatrix = _cMatrix.concat([0.92, 0, 0, 0, 0]) // Red
_cMatrix = _cMatrix.concat([0, 0.92, 0, 0, 0]) // Green
_cMatrix = _cMatrix.concat([0, 0, 0.92, 0, 0]) // Blue
_cMatrix = _cMatrix.concat([0, 0, 0, 0.92, 0]) // Alpha
This will multiply each value of every pixel by 0.92 and as it does this each frame it will get smaller and smaller till it basically reaches its limit at 0. So the closer the values are to 1.0 the longer it takes to reach zero, which means a longer trail (and vice versa: the closer to 0.0 the shorter the trail).
Step 6: ColorMatrixFilter and BlurFilter
Now we create the ColorMatrixFilter and the BlurFilter.
The ColorMatrixFilter is going to use the Array we just made and we are going to create two BlurFilters. I found that using two BlurFilters gives a nice pulse effect and it doesn't blur too slow or too fast, but if you rather have one that's fine too.
Add the variables for the filters first.
private var _cFilter:ColorMatrixFilter;
private var _bFilter:BlurFilter;
private var _bFilter2:BlurFilter;
Create the Filters in the constructor
_cFilter = new ColorMatrixFilter(_cMatrix);
_bFilter = new BlurFilter(2, 2, 1);
_bFilter2 = new BlurFilter(8, 8, 1);
Step 7: Updating MotionTrails
Now it is time to create a function to update our Motion Trails. Make a function called update in the MotionTrail Class. To make the trail we have to draw the Main Display to the BitmapData each frame which makes the trail effect.
public function update():void
{
	// Draw Display onto BitmapData
	_bitmapData.draw(_display);
}
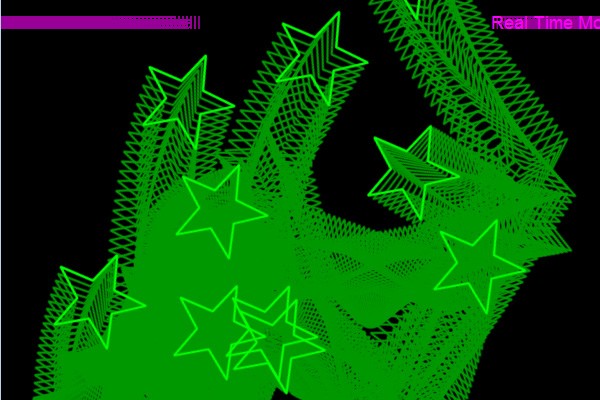
You should now have a trail if you run it, but of course Motion Trails fade away and we will make it fade away with the filters we made in the last step.
Step 8: Applying Filters
Now we can apply the filters to the BitmapData. We use the same BitmapData for the source, the _rect and _pnt variables for the sourceRect and destPoint respectively, and last is the filter we want to apply.
Since we have a few filters we don't want to apply all of them every frame because doing that would slow things down too much. Instead, we are going to switch the ColorMatrixFilter and BlurFilter to work in different frames and switch the BlurFilters the same way too.
To switch them around we are going to have a variable to keep track of the frame and use the module operator to check.
private var _count:Number = 0;
public function update():void
{
	// Draw Display onto BitmapData
	_bitmapData.draw(_display);

	// Apply Effects to BitmapData
	if (_count % 2 == 0)
		_bitmapData.applyFilter(_bitmapData, _rect, _pnt, _cFilter);
	else
		if (_count % 4 == 1)
			_bitmapData.applyFilter(_bitmapData, _rect, _pnt, _bFilter);
		else
			_bitmapData.applyFilter(_bitmapData, _rect, _pnt, _bFilter2);

	// Increase Count
	_count++;
}
Now that the update function is finished we add it to our loop function.
// Update Motion Blur
_mtDisplay.update();
Conclusion Testing and Extending
Awesome! We're finished with this Quick Tip and you can go ahead and test it out.
You should have gotten the same result as the sample swf and now you can try extending it. There are lots of different effects you can make, most of it if you understand the ColorMatrixFilter.
For example, you could fade the color of the trail to red by doing this:
// Offset Red Value by 30 each time
_cMatrix = _cMatrix.concat([0.92, 0, 0, 0, 30]) // Red
_cMatrix = _cMatrix.concat([0, 0.92, 0, 0, 0]) // Green
_cMatrix = _cMatrix.concat([0, 0, 0.92, 0, 0]) // Blue
_cMatrix = _cMatrix.concat([0, 0, 0, 0.92, 0]) // Alpha
Or you could also switch the colors making all the trails blue:
// Only Blue trails
_cMatrix = _cMatrix.concat([0, 0, 0, 0, 0]) // Red
_cMatrix = _cMatrix.concat([0, 0, 0, 0, 0]) // Green
_cMatrix = _cMatrix.concat([0.92, 0.92, 0.92, 0, 0]) // Blue
_cMatrix = _cMatrix.concat([0, 0, 0, 0.92, 0]) // Alpha

Thanks for reading. I hope you all learned something from this and it will prove useful in the future, possibly a cool new game using this effect.

Comments