In this tutorial I'll be showing you how to create a Blackjack game for the iPad using the Corona SDK. Let's get started!
Want to learn how this game was designed? This tutorial series is based on the work of Andrei Marius, who originally published an in-depth Illustrator tutorial demonstrating how to design the game on Vectortuts+.
1. New Project
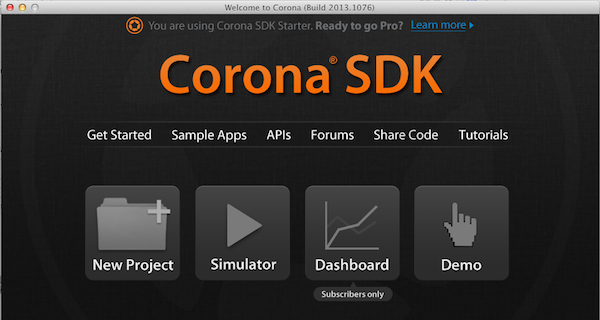
Open the Corona Simulator and choose "New Project".
On the screen that follows, choose the following settings.

Press the "Next" button, then choose open in editor. This will open "Main.lua" in your default text editor.
2. Project Configuration
Open "Config.lua" delete everything and change it to the following.
application = {
   content = {
     width = 768,
     height = 1024,
     scale = "letterBox",
     fps = 30,
   }
}
This sets the project's default width, height, scale, and FPS. The "letterBox" scale setting means the app will scale up in both directions as uniformly as possible, and if necessary show the game "Letter Boxed", like you see in some DVD movies.
3. Hiding the Status Bar
We don't want the status bar showing in our app, so enter the following in "Main.lua"
display.setStatusBar(display.HiddenStatusBar);
4. Local Variables
Add the following beneath the code you entered in the step above.
local cardTable = display.newImage("table.png",true);
local money10; -- The $10.00
local money25; --The $25.00 chip
local money50; --The $50.00 chip
local dealBtn; -- the deal buttons
local hitBtn; -- the hit button
local standBtn; -- the stand button
local instructionsText; -- Give Instructions and show winner
local suits = {"h","d","c","s"}; -- hearts = h,diamonds =d,clubs =c,spades=s
local deck; -- The deck of Cards
local coinContainer; -- a group that will hold the chips
local dealerGroup; -- we put the dealer cards in this group
local playerGroup; -- we put the player cards in this group
local dealTo = "player"; -- who is currently being dealt to
local playerHand ={}; -- a table to hold the players cards
local dealerHand ={}; -- a table to hold the dealers cards
local allCards = {} -- a table to hold all cards
local betAmount = 0; -- how much the player is betting Total
local money; -- how much money the player has
local blackJack = false; -- whether player or dealer has blackjack
local firstDealerCard = ""; -- a reference to the first card the dealer is dealt
local playerYields = false; -- whether or not the player has stood on his hand
local winner=""; -- who the winner of the round is
local bet=0; -- how much the player is adding to betAmount variable
local bankText; -- shows the players money
local betText; -- shows how much the player is betting
local dealerCardsY = 120; -- Y position of dealer cards
local playerCardsY = 810; -- Y position of player cards
These are all of the variables we'll be using in this game. Read the comments to understand what they're for.
5. Setup()
The setup function will be called when the app first loads. Enter the following beneath the code you entered in the step above.
function Setup()

end
Now call the setup function right below where you declared it.
Setup()
6. SetupCoins()
Add the following above where you are calling Setup() in the step above.
function setupCoins()
    money10 = display.newImage("money10.png",50,960);
    money10.betAmount = 10;
    money25 = display.newImage("money25.png",110,960);
    money25.betAmount = 25;
    money50 = display.newImage("money50.png",170,960);
    money50.betAmount = 50;
end
This sets up our money images and adds a betAmount key.
Now call this function inside Setup().
function Setup()
    setupCoins();
end
7. SetupButtons()
Add the following beneath the setupCoins() function you declared in the step above.
function setupButtons()
    dealBtn = display.newImage("deal_btn.png",250,960);
    dealBtn.isVisible = false;
    hitBtn = display.newImage("hit_btn.png",400,960);
    hitBtn.isVisible = false;
    standBtn = display.newImage("stand_btn.png",550,960);
    standBtn.isVisible = false;
end
This sets up our buttons and makes them all invisible.
Call this function inside Setup().
function Setup()
    setupCoins();
    setupButtons();
end
8. SetupTextFields()
Add the following beneath the setupButtons() function you entered in the step above.
function setupTextFields()
    instructionsText = display.newText( "Place Your Bet", 300, 300, native.systemFont, 30 );
    instructionsText:setTextColor( 0,0,0)
    bankText = display.newText("Your Bank:$ ",10,905,native.systemFont, 30 );
    bankText:setTextColor(0,0,0)
    betText = display.newText("",650,906,native.systemFont,30);
    betText:setTextColor(0,0,0);
end
This sets up the TextFields and sets the text color to black.
Add this to the Setup() function.
function Setup()
    setupCoins();
    setupButtons();
    setupTextFields()
end
9. SetupGroups()
Add the following beneath the setupTextFields() function.
function setupGroups()
    coinContainer = display.newGroup()
    coinContainer.x = 250;
    coinContainer.y = 600;
    dealerGroup = display.newGroup();
    playerGroup = display.newGroup();
end
This sets up the groups that will be used to hold the cards and the money the player bets
Add this to the Setup() function just like you've been doing in the previous steps.
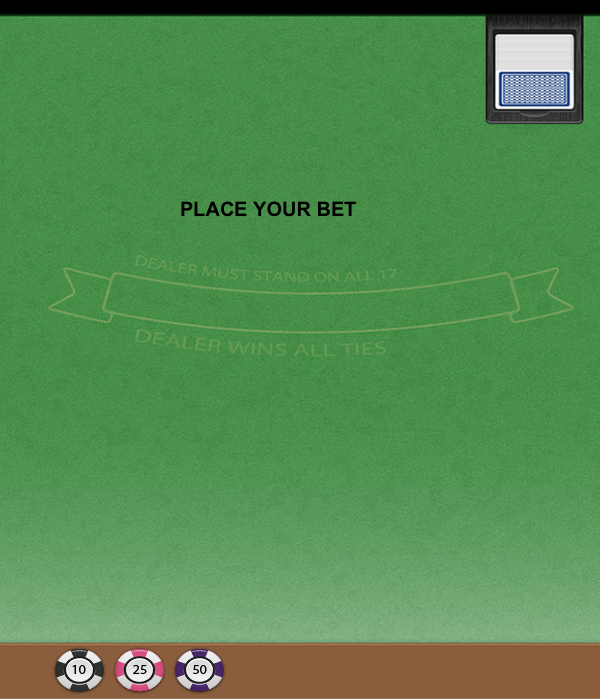
10. Check Progress
If you test the app, you should see the interface running properly.
11. AddListeners()
Add the following beneath the setupGroups() function.
function addListeners()
    money10:addEventListener('touch', betHandler);
    money25:addEventListener('touch',betHandler);
    money50:addEventListener('touch',betHandler);
    dealBtn:addEventListener('touch',deal);
    hitBtn:addEventListener('touch',hit);
    standBtn:addEventListener('touch',stand);
end
This adds touch listeners to our interface elements so that the user can interact with them. We need to create the functions that will be called when the user clicks on them.
12. BetHandler()
Enter the following beneath the addListeners() function.
function betHandler( event )

end
This function will handle the betting. It'll make sure that the user doesn't try to bet more than he has in his bank.
13. Deal()
Enter the following beneath the code you entered in the step above.
function deal()

end
This function is where the heart of the game lies. All of the logic of the game will be handled in this function.
14. Hit()
Add the following beneath the deal() function.
function hit(event)

end
This function will be called when the user presses the "hit" button.
15. Stand()
Enter the following beneath the code you entered in the step above.
function stand()

end
When the player decides to stand, this function will be called.
16. CreateDeck()
Add the following beneath the createDeck() function.
function createDeck()
    deck = {};
      for i=1, 4 do
     	 for j=1, 13 do
    	    local tempCard = suits[i]..j;
    	    table.insert(deck,tempCard);
     	end
    end
end
This resets the deck table and creates a fresh deck. It runs through each value in the suits table and appends the number 1 through 13 to them. We set the variable tempCard equal to the result, then insert it into the deck table.
Now call this in the Setup() function.
function Setup()
    setupCoins();
    setupButtons();
    setupTextFields();
    setupGroups();
    createDeck();
end
We'll be getting some random cards from the deck, so ensure that it's truly random we'll need to seed the random generator. If we don't do this, every time the game starts it'll generate the same randomness. Add the following createDeck().
function Setup()
    setupCoins();
    setupButtons();
    setupTextFields();
    setupGroups();
    math.randomseed(os.time());
    createDeck();
end
Conclusion
This brings part one of this tutorial to a close. In the next part of the series we will begin incorporating the gameplay. Thanks for reading. Stay tuned for part two!

Comments