So far in this series, you've learned how to create a basic theme from static HTML. You've done the following:
- Prepared your markup for WordPress
- Converted your HTML to PHP and split your file into template files
- Edited the stylesheet and uploaded your theme to WordPress
- Added a loop to your index file
In this tutorial, you'll work on the header.php file that you created in Part 2. You'll learn how to:
- Add automatically generated meta tags in place of the existing static ones in the
<head>section - Replace the static site title and description with one you (or other users of your theme) can update via the WordPress admin
- Add the
wp_headaction hook to your header file for use by plugins
What You'll Need
- Your code editor of choice
- A browser for testing your work
- A WordPress installation, either local or remote
- If you're working locally, you'll need MAMP, WAMP or LAMP to enable WordPress to run
- If you're working remotely, you'll need FTP access to your site plus an administrator account in your WordPress installation
1. Adding Meta Tags to Your Header File
You need to add two meta tags to your theme: the <title> tag and the charset meta tag.
Updating the Charset Meta Tag
Find the line which reads:
<meta charset="utf-8" />
Replace it with this:
<meta charset="<?php bloginfo( 'charset' ); ?>" />
This will automatically use the charset meta tag as set via the Settings admin screen.
Updating the <title> Tag
At the moment, the theme has a static title tag added via the following code in header.php:
WordPress Theme Building - Creating a WordPress Theme from Static HTML
By adding a dynamically generated title tag, you can tap into additional functionality offered by WordPress for these which will give you SEO and usability benefits.
Delete the code above and replace it with the following:
	<?php
	global $page, $paged;
	wp_title( '|', true, 'right' );
	// Add the blog name.
	bloginfo( 'name' );
	// Add the blog description for the home/front page.
	$site_description = get_bloginfo( 'description', 'display' );
	if ( $site_description && ( is_home() || is_front_page() ) )
		echo " | $site_description";
	?>
This code does a few things:
- First it uses the
wp_title()template tag to output the title of the current page, followed by a separator on the right hand side - After this, it uses the
bloginfo()template tag with the'name'parameter to output the name of the site itself - If the visitor is on the home page (which it checks using the conditional tags
is_home() || is_front_page()), it outputs the site description using theget_bloginfo()template tag with the'description'parameter
Now save your header file.
2. Adding a Dynamically Generated Site Title and Description
The next step is to replace your static site title and description with a dynamic one.
Still in header.php, find the following code:
<div class="site-name half left"><!-- site name and description  --></div>

<div class="site-name half left">
	<h1 class="one-half-left" id="site-title"><a title="Creating a WordPress theme from static html - home" rel="home">WordPress Theme Building</a></h1>
	<h2 id="site-description">Creating a WordPress theme from static html</h2>
</div>
Replace it with the code below:
<div class="site-name half left"><!-- site name and description  --></div>

<div class="site-name half left">
	<h1 id="site-title"></h1>
	<h2 id="site-description"></h2>
</div>
This code does the following:
- Wraps a link to the home page around the site title using
echo home_url() - Displays the site title using the
bloginfo()template tag with the'name'parameter - Displays the site description using the
bloginfo()template tag again, this time with the'description'parameter
Now you'll find that you can change your site title and description via the Settings screen in the admin, and it will change on every page of your site.
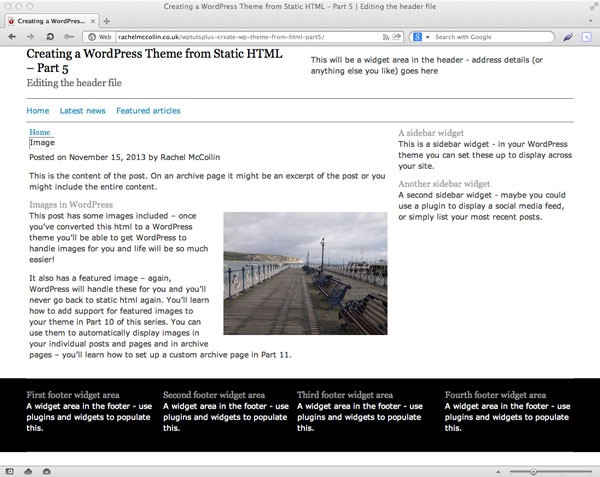
I've changed mine and you can see the results below. Note that this is also reflected in the title as shown at the top of the browser window.

3. Adding the wp_head Action Hook to Your Theme
The wp_head action hook is an essential one to add to every theme. It's placed just after the closing </head> tag in your header.php file and it's used by lots of plugins to hook their functionality into your theme. If you don't add it, you'll find that plugins activated on sites using your theme may not work.
The wp_footer action hook is similar and sits in the footer.php file - we'll come to that in Part 8 of this series.
Immediately above the closing </head> tag, add the following code:
<?php wp_head(); ?>
Now save your file. You're all done!
Summary
You've set up some essential elements of your header.php file, which should be included in every theme.
In the next part of this series, you'll learn how to add a navigation menu to your header file, and then in Part 7 you'll learn how to add a widget to your header so that you can add contact details, or whatever you'd like, into your header.
Resources
- The wp_title() template tag (Codex page)
- The bloginfo() template tag (Codex page)
- WordPress conditional tags (Codex page)
- The Settings screen (Codex page)
- The wp_head action hook (Codex page)


Comments