You've now worked through a number of steps to create a WordPress theme from static HTML files.
Specifically, we've looked covered the following:
- preparing your markup for WordPress
- converting your HTML to PHP and splitting your file into template files
- editing the stylesheet and uploading your theme to WordPress
- adding a loop to your index file
- adding meta tags, the
wp_headhook and the site title and description to your header file - adding a navigation menu
- adding widget areas to the header and sidebar
- adding widget areas, a colophon and the
wp_footerhook to the footer file - creating template files for static pages
- creating an archive template file.
Your theme now has a template file for displaying archive pages, but at the moment it's not displaying images properly. In this tutorial, you'll learn how to add featured image support to your theme and how to display and style them in your archive template.
What You'll Need
- your code editor of choice
- a browser for testing your work
- a WordPress installation, either local or remote
- if you're working locally, you'll need MAMP, WAMP or LAMP to enable WordPress to run
- if you're working remotely, you'll need FTP access to your site plus an administrator account in your WordPress installation
About Featured Images
Featured Images, or post thumbnails, are a really useful WordPress feature, which has been in place since version 2.9. The terminology surrounding them can be a little confusing, so I'll try my best to define it here:
- A featured image—or post thumbnail—is a single image attached to a post via the Featured Images metabox on the page editing screen. When working with featured images in your code you generally use the term 'featured image' (e.g. when adding support for them in your theme) or 'thumbnail' (e.g. when displaying them in your template files). However, they are the same thing.
- The term 'thumbnail' is also used as an image size. This way, you can display any image you upload to WordPress in its 'thumbnail' size. This applies to all images, not just featured images. So, you could display a post thumbnail in its thumbnail, medium, large or full size.
It's a bit confusing, but as long as you use the right code, you shouldn't go wrong.
1. Adding Featured Image Support to Your Theme
The first step is to add support for featured images to your theme—without this you won't have access to the featured images metabox in the post editing screen.
Open your theme's functions.php file and add the following at the bottom, before the closing ?> tag:
function wptutsplus_theme_support() {
	add_theme_support( 'post-thumbnails' );
}
add_action( 'after_setup_theme', 'wptutsplus_theme_support' );
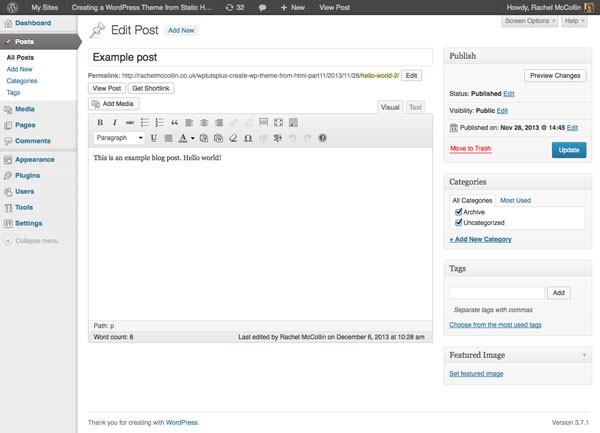
Save your functions file and open the editing screen for one of your posts. You will see that the featured images metabox has appeared, as shown in the screenshot.

Now work through each of the posts in your blog in turn, adding a featured image to each one and saving it. You don't need to specify the size of the image you're displaying—that will be done in the code.
2. Adding Featured Images to the Archive Template
The next step is to add the code to display the featured images on your archive page. You do this inside The Loop.
Open your archive.php file and find the following line:
<img class="size-thumbnail" alt="" src="images/featured-image.jpg" />
Replace it with this:
<?php if ( has_post_thumbnail() ) { ?>
    <a href="<?php the_permalink(); ?>">
	<?php the_post_thumbnail( 'medium', array( 'class' => 'left',
			'alt'	=> trim( strip_tags( $wp_postmeta->_wp_attachment_image_alt ) )
		) ); ?>
    </a>
<?php } ?>
That code does a few things:
- The code checks if the post has a featured image using
if ( has_post_thumbnail() ). If this isn't the case, it won't display the featured image. - Next, it encloses the image in a link to the post permalink, so visitors can click on the image as well as the post title to view the post in full.
- Finally, it displays the featured image using
the_post_thumbnail(). This has the'medium'parameter to tell WordPress to show the medium size image, and an array of arguments including a class for styling and the'alt'argument to set the alt attribute for the image.
Now save your archive file and visit an archive page on your site (not the main blog page, but a category archive or similar).
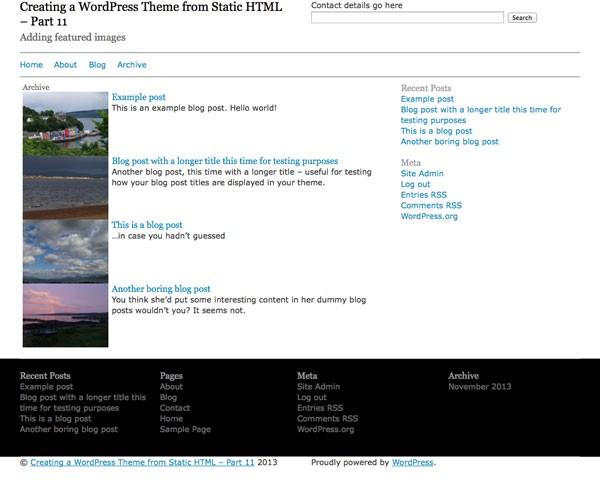
This is what my archive page looks like now:

This still needs a bit of styling as the images are butted up together. So open your style.css file and add the following:
.archive #content article,
.blog #content article {
	margin-top: 10px;
	overflow: auto;
}
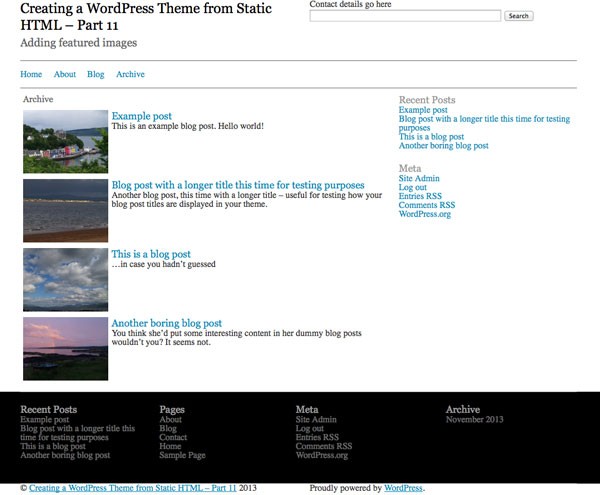
Note that by using the .archive and .blog classes I'm targeting the <body> tag on the main blog page and any archive page. Now the posts should be more clearly laid out:

3. Adding Featured Images to the Index File
You now have a working archive template with featured image support. Before you finish, however, you need to copy the same code to the index.php file.
Find the same line of code you replaced in the archive.php file and replace it with exactly the same code as you added to the archive file. Now save your file and check your main blog page. It too will display the featured image for each post.
Summary
Featured images are a great way of making archive pages more visual and user-friendly. You can also add featured images to other templates such as the page.php template.
In this case you might want to set the parameters differently, perhaps using the large file size instead of medium and changing the class. You would also remove the link, as the visitor is already on the single page.
In the next and final part of this series I'll show you how to upload a theme to the WordPress theme repository. Once you have a theme you feel is good enough for others to use, this is a great way to contribute to the community and help other WordPress users.


Comments