In this tutorial, we'll be building a class file that creates a stylized mask for any DisplayObject. The mask will be based on Perlin noise, and create an effect of growing holes that progressively "eat away" at the DisplayObject until it is completely obscured. Along the way, we'll learn some of the more advanced techniques available using BitmapData.
Preview the Final Effect
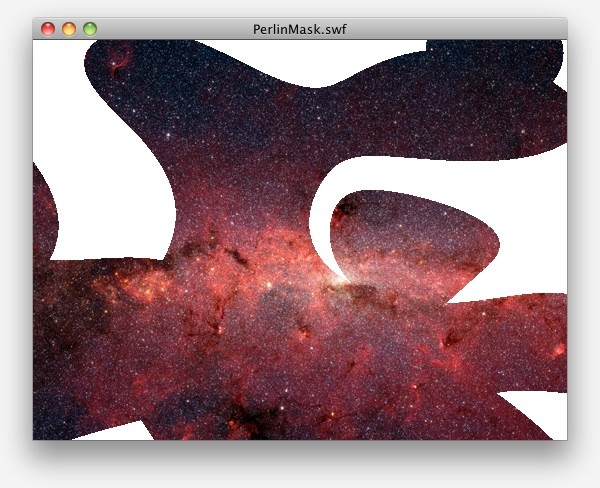
Let's take a look at the effect we're after. The SWF below shows it off, in the form of the transition between images.
You can see that the images sort of melt into each other, in a random but organic way. New images begin to grow out of little spots, which eventually fill up the entire canvas. This effect is based on Perlin Noise.
What is Perlin Noise?
Perlin Noise is named after Ken Perlin, who developed this noise pattern for use in computer graphics applications. To better understand it, let's first take a look at regular noise.
Noise in computer graphics is basically just a completely random image. If you open up Photoshop, create a new image, and fill the canvas with white, you can see the effects of regular noise by choosing the Filter > Noise > Add Noise… menu. Set the amount to 100%, and optionally turn on the Monochromatic option. The effect will look like static:
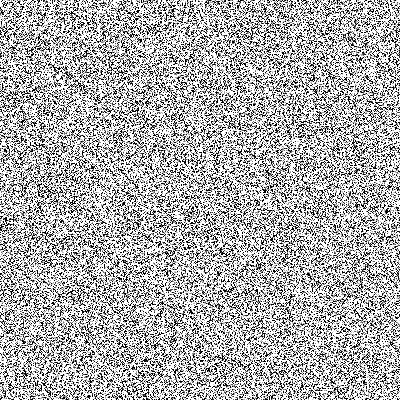
This can be produced simply by just setting each pixel of an image to a random grayscale amount (that's a bit of a simplification, but let's keep it simple).
Perlin noise, on the other hand, has a more organic feel to it, which is why it was developed. You can get a sense for it, in Photoshop, by creating a new document and then choosing Filter > Render > Clouds. You'll immediately see the difference:
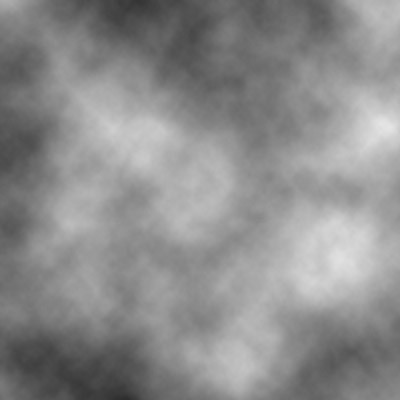
You can see that each pixel has an influence over its neighbors; dark areas are grouped together, which gives it a smoother appearance.
Because of the "controlled randomness" of Perlin noise, it has tons of applications in computer graphics, from textures in 3D simulations to simulating smoke and fire. We'll take advantage of the "luminance grouping" of Perlin noise to map the holes in our mask.
Wikipedia has a short article on Perlin Noise. This article gets into quite a bit of detail on noise in general and Perlin noise in particular, if you'd like to know more about the mechanics of the process.
Step 1: Create the Project
To build our effect, we'll write the class that will ultimately handle the graphics, as well as a testing file in which to see how our effect is going.
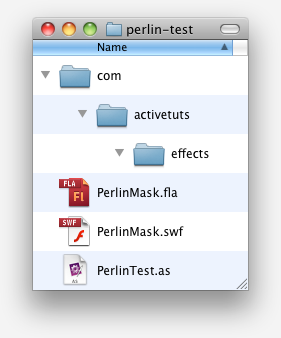
Start by simply creating a new folder on your hard drive called Perlin Mask to house all project-related files.
Step 2: Create a Flash file
Open Flash Professional (CS4 was used to write this tutorial, but in Step 15 you'll need to use a Vector, which is only available in Flash Pro CS4+; I've provided an alternative at the end of that step) and create a new ActionScript 3.0 file (go to the File > New menu and choose "ActionScript 3.0" from the list).
Save this file as PerlinMask.fla in your project folder.
Note: If you like, you can use the start file found in the test-start folder of the download package. This FLA has an image in it already, so you can skip the next step, if you don't like the idea of importing and using your own images.
Step 3: Import an Image
It doesn't matter what image, just so long as we have something to work with in Flash. A bigger image will provide a larger canvas on which to view the effect, but too big and you might start running into performance issues.
Choose the File > Import > Import to Stage… menu, navigate to an image on your hard drive, and select it to bring it into Flash. (Naturally, feel free to resize it appropriately in Photoshop or another image editor before importing it into Flash.)
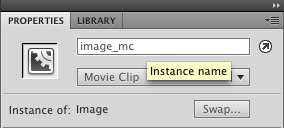
We'll want to address the image using ActionScript, so we'll have to bundle it into a MovieClip. With the image selected, press F8, and make sure your "Convert to Symbol" dialog looks like the following:

Make sure the top left registration point is selected.
Finally, give the symbol instance an instance name of "image_mc" by typing that into the Properties panel for the image.
Step 4: Create a Document Class
Create a new AS file in your project folder, and name it PerlinTest.as. This will be the document class for our FLA. The Perlin noise mask effect won't be contained in this file; rather, it will use the class that we create for the effect, for the purposes of testing the effect while we build it. It will, in the end, serve as an example for how to use the effect in other projects.
Enter the following code into the file you just created:
package {
    import flash.display.Sprite;
    public class PerlinTest extends Sprite {
        public function PerlinTest() {
            trace("PerlinTest");
        }
    }
}
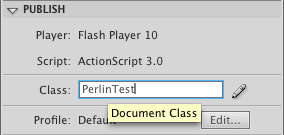
Back in the Flash file, make sure nothing is selected, then type PerlinTest into the Class field of the Properties panel to set the PerlinTest class as the document class for the FLA.
Run the Flash file (Control > Test Movie > Test, or just Command/Control-Enter), and you should see the trace in the Output panel:

Step 5: Create the PerlinMask Class
We'll come back to the document class soon enough, but we're still creating files for our little project.
In the project folder, create a small hierarchy of folders, starting with com. Next, inside "com", create an activetuts folder. Lastly, inside of that, create a folder named "effects"
Create one more text file, and save it as PerlinMask.as in the effects folder you just created. Add in the following code to start:
package com.activetuts.effects {
    public class PerlinMask {
        public function PerlinMask() {
            trace("PerlinMask");
        }
    }
}
Step 6: Create a PerlinMask Instance
In PerlinTest.as, we'll create an instance of the PerlinMask class we just created and test it just to make sure everything is hooked up properly.
Below is the full PerlinTest class, with lines added in this step highlighted:
package {
    import flash.display.Sprite;
    import com.activetuts.effects.PerlinMask;

    public class PerlinTest extends Sprite {

        private var _mask:PerlinMask;

        public function PerlinTest() {
            trace("PerlinTest");
            _mask = new PerlinMask();
        }
    }
}
Note that we need to import the class (line 3), then we're declaring an instance property (line 7) so that we'll be able to refer to the mask later. Finally, we simply create a new instance of the PerlinMask class (line 11).
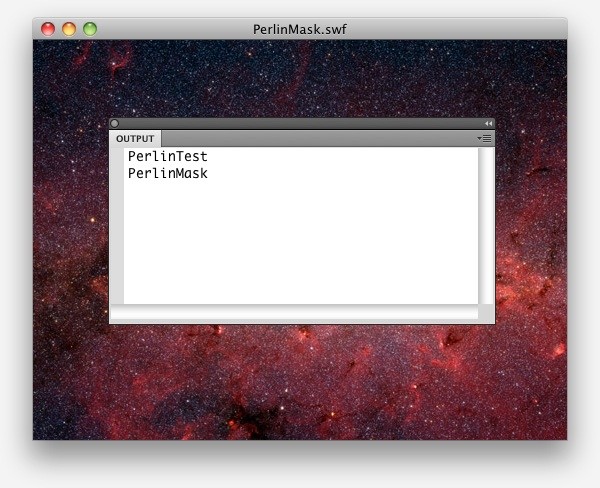
Run the movie again, and you should now have two traces, indicating that we're successfully creating the PerlinMask object.
Step 7: Give PerlinMask Something to Mask
Now we get to start working in earnest on the effect. Hop back to PerlinMask.as and we'll start by adding a property to store the DisplayObject we want to mask. Here is the full code of the class, with new lines highlighted:
package com.activetuts.effects {

    import flash.display.*;

    public class PerlinMask {

        private var _target:DisplayObject;

        public function PerlinMask(target:DisplayObject) {
            _target = target;
        }
    }
}
The target will ultimately get masked by our Perlin noise mask. Further testing will require that this property be set, so before going any further, go back to the PerlinTest.as file and update the line where we're creating the PerlinMask object:
public function PerlinTest() {
    _mask = new PerlinMask(image_mc);
}
We're simply passing in the named instance on the stage to the PerlinMask constructor.
Note that I'm taking the opportunity to delete the trace lines while we're editing the code.
Step 8: Create a Bitmap to Use as a Mask
In order to mask the target object, we need another DisplayObject. The nature of using Perlin noise as our mask means that we're going to have to use a Bitmap object as the mask. And to work with a Bitmap in code, we also need a BitmapData object. The following code will get us set up for these items:
package com.activetuts.effects {

    import flash.display.*;
    import flash.geom.*;

    public class PerlinMask {

        private var _target:DisplayObject;
        private var _mask:Bitmap;
        private var _maskPixels:BitmapData;

        private var _rect:Rectangle;

        public function PerlinMask(target:DisplayObject) {
            _target = target;

            _rect = new Rectangle(0, 0, _target.width, _target.height);

            _maskPixels = new BitmapData(_rect.width, _rect.height, true, 0xFF000000);
            _mask = new Bitmap(_maskPixels);
            _mask.x = _target.x;
            _mask.y = _target.y;
            _target.parent.addChild(_mask);
        }
    }
}
There's an extra import statement so we can use Rectangles, and three new properties set up. The Bitmap and BitmapData properties you knew were coming, but the Rectangle's purpose doesn't seem obvious now. We'll be using it more later, and it makes sense to go ahead and set it up now, since we want to use the dimensions for the BitmapData object. In short, the Rectangle will be used to define the area we want to affect as we perform our BitmapData effects. So, we set it the size of our target object and use those dimensions.
After we have our BitmapData object created, we then create a Bitmap object so we can display the pixels (I won't get into too many details here, but a BitmapData object is purely a bunch of pixels, or rather, the data representing those pixels. A Bitmap object is a kind of DisplayObejct designed to display pixels. So feeding a Bitmap some pixels in the form of BitmapData is the way to see those pixels).
The next three lines might seem a little odd. But because we want the Bitmap to mask the target, we need to make sure the Bitmap is in the same location and in the same container as the target. So we position them to the same coordinates, and then add the Bitmap to the display list by adding it to the target's parent, which puts it in the same DisplayObjectContainer as the target. The final result is that the two objects should be the exact same size and in the exact same position.
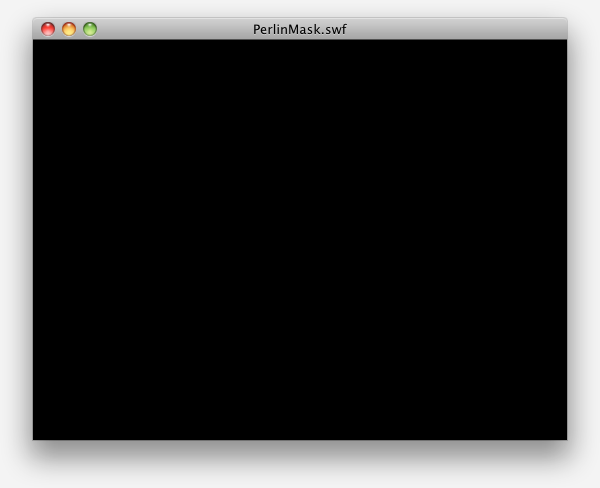
In fact, if you run the movie now, you should see your image being covered up by a black rectangle:
Step 9: Create Reusable Properties for the BitmapData Operations
Next we have some house keeping to do. Our forthcoming pixel manipulations will require the use of several values, which will be sent to various methods. Many of these values will remain the same every time we perform the manipulations, so we may as well create properties in which to store them. As cached values in properties, it will be faster to simply look up the existing values rather than create new values every time we need them.
In PerlinMask.as, add the following new properties, along with the initial values set in the constructor (new lines are highlighted):
package com.activetuts.effects {

    import flash.display.*;
    import flash.filters.*;
    import flash.geom.*;

    public class PerlinMask {

        private var _target:DisplayObject;
        private var _mask:Bitmap;
        private var _maskPixels:BitmapData;

        private var _rect:Rectangle;
        private var _point:Point;
        private var _blur:BlurFilter;
        private var _operation:String;

        public function PerlinMask(target:DisplayObject) {
            _target = target;

            _rect = new Rectangle(0, 0, _target.width, _target.height);

            _maskPixels = new BitmapData(_rect.width, _rect.height, true, 0xFF000000);
            _mask = new Bitmap(_maskPixels);
            _mask.x = _target.x;
            _mask.y = _target.y;
            _target.parent.addChild(_mask);

            _point = new Point(0, 0);
            _blur = new BlurFilter(16, 16, 2);
            _operation = "<";
        }
    }
}
We'll get to what these do at a later point; suffice it to say that we'll use them in methods called on the BitmapData objects.
There's not much to test in this step, other than compiling to make sure errors weren't introduced. We'll have something new to see in a few steps.
Step 10: Create the Perlin Noise Source
The nature of our effect will actually require another BitmapData object. This second BitmapData will be where we create the Perlin noise. The BitmapData object we already created, which is being displayed by the Bitmap object, will eventually receive pixels based on this other BitmapData object. It might seem superfluous now, but we will need it down the line.
For now we just need a property declared, and then a new BitmapData created for it in the constructor:
public class PerlinMask {

    private var _target:DisplayObject;
    private var _mask:Bitmap;
    private var _maskPixels:BitmapData;
    private var _noise:BitmapData;

    private var _rect:Rectangle;
    private var _point:Point;
    private var _blur:BlurFilter;
    private var _operation:String;

    public function PerlinMask(target:DisplayObject) {
        _target = target;

        _rect = new Rectangle(0, 0, _target.width, _target.height);

        _maskPixels = new BitmapData(_rect.width, _rect.height, true, 0xFF000000);
        _mask = new Bitmap(_maskPixels);
        _mask.x = _target.x;
        _mask.y = _target.y;
        _target.parent.addChild(_mask);

        _noise = new BitmapData(_rect.width, _rect.height, false, 0xFFFFFF);

        _point = new Point(0, 0);
        _blur = new BlurFilter(16, 16, 2);
        _operation = "<";
    }

}
Just a property and its value. Note that this BitmapData is opaque (the false third parameter); as mentioned earlier, we're creating the Perlin noise into this BitmapData, and as the Perlin noise itself is opaque, we don't need a transparent bitmap. Things will perform a touch faster with an opaque BitmapData as opposed to a transparent one.
Step 11: Make Some Noise
Finally, we can create the Perlin noise! We will move the noise creation to another method, called reseed(). This method will simply create the Perlin noise. We're putting it in a separate method so that it can be called externally. Each time the Perlin noise is generated, it will use a new random seed, so the effect will be different each time. We will need to make sure this method gets called from the constructor, to make sure the noise is ready to go when the object is first instantiated.
In the PerlinMask class, add a call to reseed(), then add that method:
public function PerlinMask(target:DisplayObject) {
    _target = target;

    _rect = new Rectangle(0, 0, _target.width, _target.height);

    _maskPixels = new BitmapData(_rect.width, _rect.height, true, 0xFF000000);
    _mask = new Bitmap(_maskPixels);
    _mask.x = _target.x;
    _mask.y = _target.y;
    _target.parent.addChild(_mask);

    _noise = new BitmapData(_rect.width, _rect.height, false, 0xFFFFFF);

    _point = new Point(0, 0);
    _blur = new BlurFilter(16, 16, 2);
    _operation = "<";

    reseed();
}

public function reseed():void {
    var seed:int = Math.random() * 32000;
    _noise.perlinNoise(_rect.width, _rect.height, 2, seed, false, false, 7, true);
    _maskPixels.copyPixels(_noise, _rect, _point);
}
The reseed method is a few steps away from being finished. The third line of the method (copyPixels) isn't final, it's just there so that we take the Perlin noise from the second BitmapData (_noise) and copy the pixels into the first BitmapData (_maskPixels). Doing this lets us see the Perlin noise, because that first BitmapData is visible through the Bitmap object.
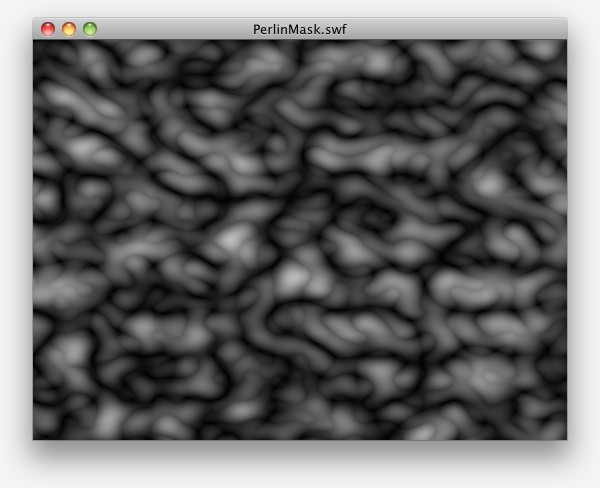
Go ahead and test the movie; you should see something like (but not exactly) the following:

So, let's explain the parameters to perlinNoise.
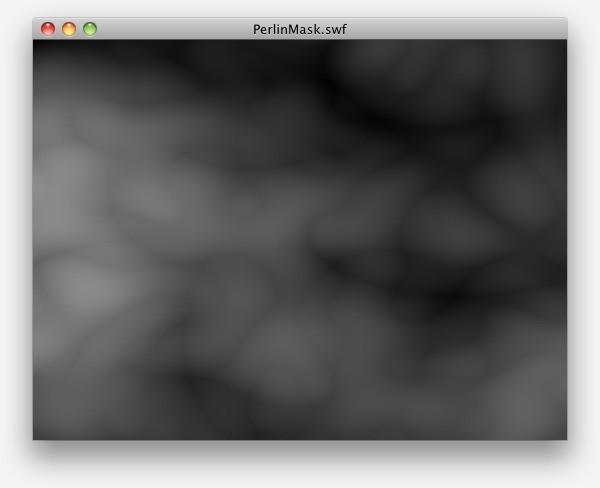
The first two parameters are sort of a width and height. It has to do with frequency, and these values adjust that frequency based on the size of the image. Larger values will "spread out" the effect. If you put in _rect.width*10 and _rect.height*10, you'll lose a lot of the detail that you see now:
If you try _rect.width/10 and _rect.height/10, you'll see smaller "pools" of shading:
You can think of this as a sort of scale parameter…the higher value scaled the noise pattern up so that we were "zoomed in" on a tiny portion of the entire pattern. The lower value took us a step back so we could see more of the pattern.
You may want to adjust this value, to your taste, but you should adjust it based on the size of the mask target, rather than using any absolute values, so that you ensure a consistent effect across various sizes.
The third parameter is listed as "octaves" in the documentation. It determines how many noise generators to use. The higher the number, the greater the detail. You'll see finer lines threading their way through the noise. It kind of looks like multiple layers of noise, each one getting a littler more wispy and delicate. I find 2 octaves gives the effect I was after: a smaller number of larger "pools."
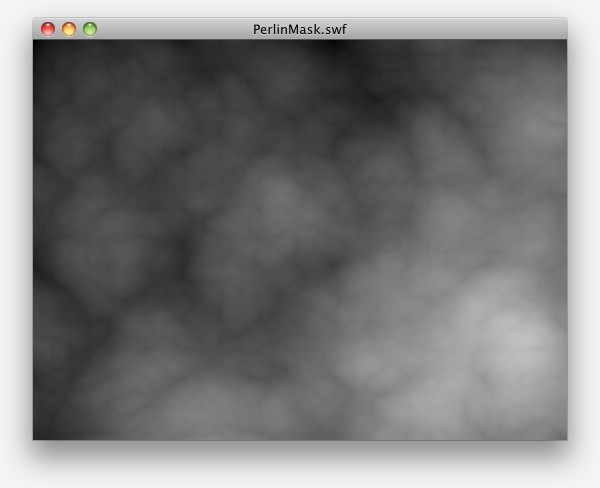
For quick comparison, here is Perlin noise generated with 4 octaves:
And 10 octaves:
The fourth parameter, seed, is a random seed. If this number were the same every time, we'd get the exact same effect every time. That's why we create the value as a random integer. Once the noise is generated, we use it the noise as-is, but if we wanted to reuse this mask over and over as it animated in and out, we could reseed the noise to get a different effect every time.
The fifth parameter gives us the option to smooth the edges so that the generated noise can be tiled together with itself. It's not something we need, so we leave it off.
The sixth parameter indicated whether or not to use fractal noise. Turning this on creates a finer, cloudier effect, and not quite what I was looking for in the mask effect.

The seventh parameter (where the number 7 is passed in) is the channel options. This indicates which color channels to use. My use of 7 is a combination of the RGB channels. I settled on this through experimentation, and it seemed to give the strongest contrast between the highest and lowest luminance values in the image.
The eighth parameter indicates whether or not to turn the noise grayscale. We're going to use it as a map for alpha, so grayscale is desirable. If false, you'll be able to see the effects of passing in various options to the previous parameter.
Finally, the last parameter (which are not using) is an array of points. These points are each an offset. There is one offset for each octave. This gives you some interesting options; updating the offset values lets you smoothly scroll the noise. By scrolling the octaves independently, you can create water effects. That's not what we're interested in, though, and we want our octaves to be locked together into one texture, so we make sure, by passing in a single offset point in the Array, that all octaves use the same offset.
It's worth noting that this tutorial builds an effect that sets the Perlin noise once and leaves it alone. I originally toyed around with regenerating the noise as the mask animated, and manipulating the offset values as I did so. In the end, the result was very subtle, and I decided in favor of the lower overhead of not generating the noise during animation. However, it's something to keep in mind if you want to tweak the effect on your own.
Step 12: Use Threshold to Poke Holes in the Noise
Now, we'll use another BitmapData method to copy the pixels from the Perlin noise to our mask Bitmap, but only certain pixels. The threshold method lets us run a comparison on each pixel in a BitmapData and, if the condition is satisfied, copy that pixel over. We'll set a threshold in the middle, and you'll see the effects of this.
Still working in PerlinMask.as, we need to remove the line in reseed() that copies the pixels:
public function reseed():void {
    var seed:int = Math.random() * 32000;
    _noise.perlinNoise(_rect.width, _rect.height, 2, seed, false, false, 1, true);
}
Then place a call to a method called updateMask (we will write this method next) at the very end of the constructor:
    _point = new Point(0, 0);
    _blur = new BlurFilter(16, 16, 2);
    _operation = "<";

    reseed();
    updateMask();
}
And finally write the updateMask method:
private function updateMask():void {
    _maskPixels.threshold(_noise, _rect, _point, _operation, 0xFF666666, 0, 0xFFFFFFFF, false);
}
If you run the movie now, you'll see that we have some random, organic shapes covering up the image, but that parts of the image are showing through.
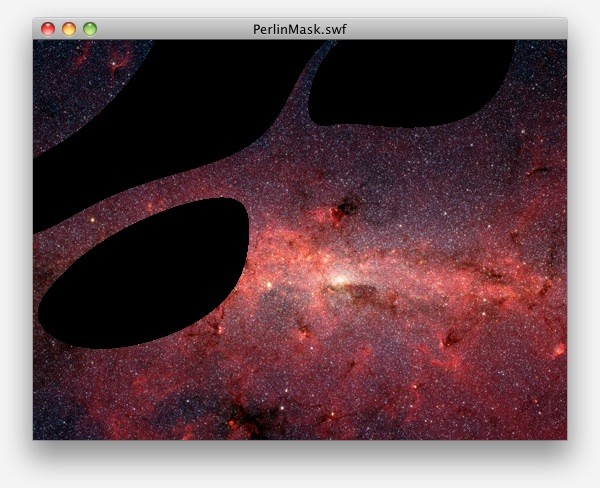
You can experiment with the actual threshold by changing the fifth parameter. For example, setting it to 0xFF222222 makes the threshold lower, and covers up more of the image with black.
In the end, we'll be animating this threshold value to create our final effect.
In case you're interested, here's a rundown of the other parameters.
The first parameter is the BitmapData object to run the threshold on. We're using the Perlin noise as our source.
The second and third parameters are geometric properties. The rectangle defines the area of the source BitmapData to run through the threshold. The point is the location in the target BitmapData (_maskPixels in this case) to place the top-left corner of that rectangle. Since our rectangle is the same size as our image and the Perlin noise BitmapData, and the point is set to (0,0), we're basically copying pixels over in a very parallel fashion.
The fourth parameter is the _operation. This String tell the threshold method how to run the comparison. We're passing in "
The next parameter is the threshold value used for the comparison. This is an ARGB integer (most-easily represented in hex notation). Our Perlin noise source is opaque, so the "A" channel should be FF. At this stage of development, we're hard-coding in a middle-range value for the "RGB" channels (remember, we're generating the noise in grayscale).
The net effect between the 4th and 5th parameters is that if a given pixel in the Perlin noise is less than (or darker than) a grey of 0x666666, then it gets copied to _maskPixels. The pixel is copied to the same location. But that's not all, oh no, that is not all.
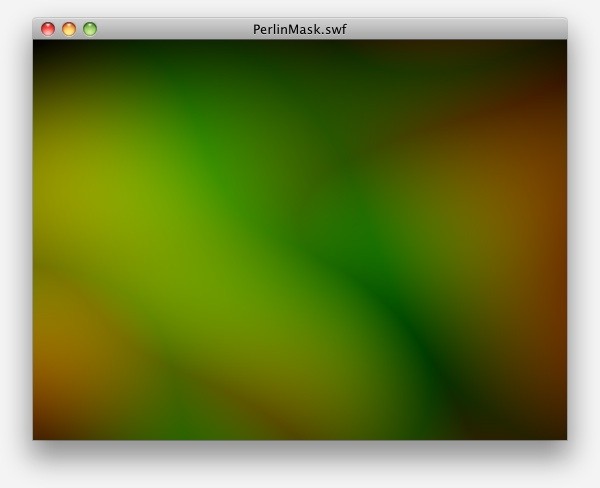
The pixel isn't just copied over directly. The sixth parameter is a color used in the copy. The default is 0, and keep in mind that it's another ARGB value, so 0 is fully transparent black. If we pass in a non-transparent color value, you'll see other effects:
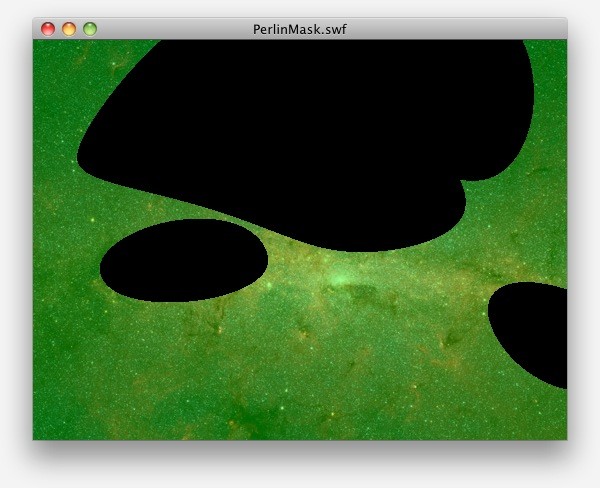
Above image: Threshold with a color of 0x6600FF00 (a semi-transparent green).
The seventh parameter is a mask used to isolate color components. You won't see any changes by using this parameter in this particular example.
The final parameter is a Boolean to indicate whether or not to copy the pixels from the source BitmapData. You can set this to true right now to get a sense of how the noise looks, and how it affects what gets copied. Keep in mind that this parameter is for pixels that fail the threshold test, so you'll see the lighter pixels if you set it to true.
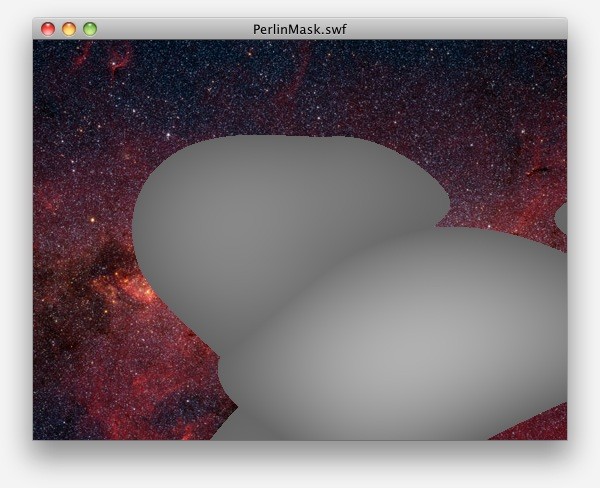
Whether this parameter is true or false, our final result for the mask will be the same. You can leave it to true if you like the visualization, but in the end you won't see it.
I'm not afraid to admit that I don't fully understand everything that's going on here; threshold is very flexible and powerful. But fortunately the effect I'm after is more straight-forward than some of the more involved color manipulations you can perform with this method.
Now, the key will be to manipulate the actual threshold being passed in; as that changes, we'll get more or fewer pixels copied into the mask depending on the threshold, and then by animating that value we can create the growing amorphous blob effect we're after.
Step 13: Creating a percent Property
We want to make adjusting the threshold, and therefore the mask effect, as simple as setting a percent property to something between 0 and 1. This will require a private property to hold the percent value, a public setter and getter, and some logic added to updateMask.
public class PerlinMask {

    private var _target:DisplayObject;
    private var _mask:Bitmap;
    private var _maskPixels:BitmapData;
    private var _noise:BitmapData;

    private var _rect:Rectangle;
    private var _point:Point;
    private var _blur:BlurFilter;
    private var _operation:String;

    private var _percent:Number;

    public function PerlinMask(target:DisplayObject) {
        _target = target;

        _rect = new Rectangle(0, 0, _target.width, _target.height);

        _maskPixels = new BitmapData(_rect.width, _rect.height, true, 0xFF000000);
        _mask = new Bitmap(_maskPixels);
        _mask.x = _target.x;
        _mask.y = _target.y;
        _target.parent.addChild(_mask);

        _noise = new BitmapData(_rect.width, _rect.height, false, 0xFFFFFF);

        _point = new Point(0, 0);
        _blur = new BlurFilter(16, 16, 2);
        _operation = "<";

        reseed();
        updateMask();
    }

    public function reseed():void {
        var seed:int = Math.random() * 32000;
        _noise.perlinNoise(_rect.width, _rect.height, 2, seed, false, false, 7, true);
    }

    private function updateMask():void {
        var channelThreshold:uint = 0xFF * _percent;
        var thresh:uint = 0xFF000000 + (channelThreshold << 16) + (channelThreshold << 8) + channelThreshold;
        _maskPixels.threshold(_noise, _rect, _point, _operation, thresh, 0, 0xFFFFFFFF, true);
    }

    public function set percent(value:Number):void {
        _percent = value;
        updateMask();
    }

    public function get percent():Number {
        return _percent;
    }

}
The property business should be fairly straight-forward: we declare the property (line 19), and create a setter and getter for it (lines 53-60). The setter also calls updateMask again, so that we can redraw the mask with the new percent value.
The new logic in updateMask, however, might need some further explanations. Our goal is to take that percent and turn it into an opaque grayscale value. We know the Perlin noise is grayscale, and fully opaque, so we need a threshold in the same vein.
We take our percent value and multiply it with 0xFF, or 255 in decimal. This is the maximum value for one channel in our bitmaps. We then need to put that single-channel value into the R, G, and B channels. At the same time, we need 0xFF in the A channel. For the R, G, and B channels we take that channelThreshold and use bitshift operators to place that value in each of the channels. Then we add them all up and we get our actual threshold value.
This stuff isn't exactly intuitive, so let's try walking through an example.
If we set percent to .5, when updateMask runs it will first set channelThreshold to 0xFF * .5, which is 0x7F.
Using the bitshift operator take the bits that represent that number, and moves them over to the left by the specified number of places. Thus, 0x7F becomes 0x7F00, and 0x7F becomes 0x7F0000. It may be confusing as to why bitshifting 8 places only moves the digits by 2 places, but if you know how binary relates to hexadecimal, this will actually make sense. If it doesn't, I'm sorry, but a further explanation would turn this into a tutorial on base numeral systems.
(Check out this presentation by Lee Brimelow if you'd like to learn more about bit-shifting.)
Regardless, adding up 0xFF000000 + 0x7F0000 + 0x7F00 + 0x7F results in 0xFF7F7F7F, which is a fully-opaque mid-grey color. And then we use that as our threshold, and pixels darker than that get copied as transparent black, and pixels lighter than that get copied from the source (the Perlin noise).
Finally, test this out by going to the document class (PerlinTest.as) and adding a line to set the percent:
public function PerlinTest() {
    _mask = new PerlinMask(image_mc);
    _mask.percent = .3;
}
You can change the value to other values between 0 and 1 and test the movie to see the results. Note, though, that one PerlinMask's noise source, a percent of .4 might be less obvious than another PerlinMask's percent of .3. It's part of the random nature of the noise. You may also notice that around .6 or higher, you start losing the noise entirely; that is, the entire noise source is under the threshold already. We'll address that in just a moment.
Step 14: Setting an Initial Percent
We should assume that we want an initial percent value when we set up the mask. We'll add a parameter to the constructor to indicate a starting value for the percent. Still in PerlinMask, modify the constructor to add the parameter and to set the property.
public function PerlinMask(target:DisplayObject, initialPercent:Number=0) {
    _target = target;

    _rect = new Rectangle(0, 0, _target.width, _target.height);

    _maskPixels = new BitmapData(_rect.width, _rect.height, true, 0xFF000000);
    _mask = new Bitmap(_maskPixels);
    _mask.x = _target.x;
    _mask.y = _target.y;
    _target.parent.addChild(_mask);

    _noise = new BitmapData(_rect.width, _rect.height, false, 0xFFFFFF);

    _point = new Point(0, 0);
    _blur = new BlurFilter(16, 16, 2);
    _operation = "<";

    reseed();
    this.percent = initialPercent;
}
In line 21 we add the parameter, with a default value of 0. Then in the last line of the constructor (line 39), I've removed the call to updateMask() and replaced it with a setting of the percent property to the value of the parameter. Since updateMask gets called from the percent setter, we can effectively replace it.
To test this, go back to PerlinTest.as and modify the setup code:
public function PerlinTest() {
    _mask = new PerlinMask(image_mc, .3);
}
I've removed the second line in the constructor, which set the percent separately, and added the value as the second argument.
There should be no real change in functionality from the last step, but do test the movie to make sure you haven't introduced errors.
Step 15: Normalizing the Threshold
There is one slight problem, however. If you've been paying attention to the images generated by Perlin noise, they have lots of black in them but not very much white. Some noise images are quite dark, while others have a bit more higher values of brightness in them. But for some reason, they tend toward the darker end of the spectrum.
The upshot of this is that it when we set a percent of, say, .7, we already have a threshold that "approves" every pixel and we reach a fully-transparent mask a little too early. You may have already noticed this if you've tested various percent values.
We can work around this by finding the highest grey value in the Perlin noise source image, and then using that as the value we take a percent from, instead of 0xFF.
The question is how we find the highest grey value. There are probably any number of techniques to accomplish this, but we'll be using the histogram method, provided for BitmapData objects as of Flash 10.
This involves a bit of computation, but fortunately we just need to do it once per Perlin noise generation. So, in the PerlinMask class, update the reseed() method like so:
public function reseed():void {
    var seed:int = Math.random() * 32000;
    _noise.perlinNoise(_rect.width, _rect.height, 2, seed, false, false, 7, true);

    var histogram:Vector.<Number> = _noise.histogram()[0];
    var i:Number = histogram.length-1;
    while (i > 0) {
        if (histogram[i] > 0) {
            break;
        }
        i--;
    }
    _maxGrey = i;
}
You may notice that the last line sets a property that we haven't defined yet. Make sure to declare that with the rest of the properties:
private var _percent:Number;
private var _maxGrey:Number;
And lastly we need to use that property in updateMask:
private function updateMask():void {
    var channelThreshold:uint = _maxGrey * _percent;
    var thresh:uint = 0xFF000000 + (channelThreshold << 16) + (channelThreshold << 8) + channelThreshold;
    _maskPixels.threshold(_noise, _rect, _point, _operation, thresh, 0, 0xFFFFFFFF, true);
}
The property itself is set up and used in a normal fashion. However, the logic of putting a value into that property could use a bit more commentary.
The histogram method takes one parameter, a rectangle defining the area for which to perform the histogram on the targeted BitmapData (our Perlin noise, in this case). In our code (line 46) we perform histogram on the _noise, not even bothering to pass in a Rectangle because the default is to use the entire image area.
The trickier part is that histogram returns a multi-dimensional Vector of Numbers (a Vector is an Array, except that all elements in the Vector are declared as being typed with a certain datatype. It was introduced in Flash Player 10, and general wisdom says you should use them when possible as they're faster than Arrays).
This return Vector has as its elements four Vectors, each representing one channel. In order, they are red, green, blue, and alpha (which is a little weird, since most everywhere else we treat alpha as being the first channel. Not much to be done about it, though). Because we know our Perlin noise is grayscale, we can safely assume that the red, green, and blue channels will all be identical. So, we grab the first item out of the Vector returned from histogram, and in the histogram variable we have the red channel.
This item is another Vector, and its elements are all Numbers. There are 256 entries (0 through 255). Each of these Numbers represents a value within that channel (red, in our case). That is, histogram[0] represents a red value of 0x00, and histogram[255] represents a red value of 0xFF. The values contained in these elements are the number of pixels in the BitmapData that have this value of red. So, if we had a completely "black" red channel (absolutely no red at all in the BitmapData), our Vector would looks something like this:
histogram[0] = _noise.width * _noise.height;
histogram[1] = 0;
//...
histogram[255] = 0;
If you had an image where the left half was filled with black and the right half was filled with white, you would get this:
histogram[0] = _noise.width * _noise.height / 2;
histogram[1] = 0;
//...
histogram[254] = 0;
histogram[255] = _noise.width * _noise.height / 2;
Keep in mind that the above code lists are more illustrative; you can't set the histogram of a BitmapData by setting these Vector values.
You've seen these histograms in graphical form, in Photoshop and most other image editors (including iPhoto):
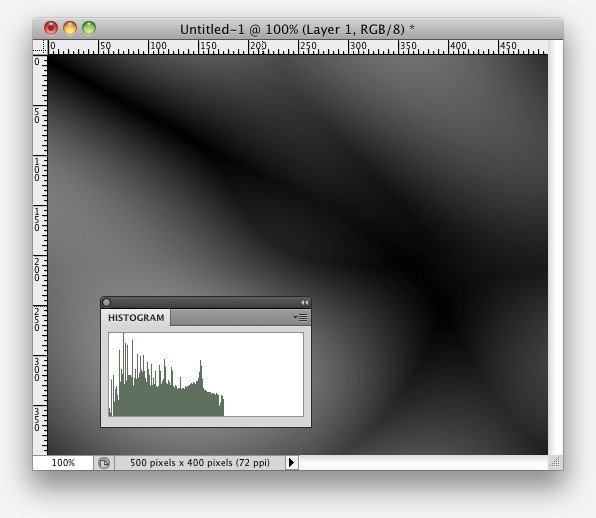
In this representation, the horizontal axis are the values from 0 to 255 (that is, individual slots in a channel's Vector), and the vertical axis represents the "population" of that value. The above image is a histogram taken from a sample Perlin noise generation, and you can see that things trail off toward the upper end. That is, the higher values (brighter pixels) have a lower population count, thus the flatline.
Now that we know what return value we're getting back, we can work with it. As I just mentioned, there isn't a whole lot of brightness in the Perlin noise images. Our approach is to loop over the elements in our histogram Vector, which is a normal loop except that we'll start at the end and work our way backwards. At each iteration, we check the value contained in that slot, and if it's greater that 0, we've found a slot that actually has some pixels in it. Since we're working from high end down to the bottom, the first time this happens is the highest value that actually has information.
Once we have that index number, we store it in the _maxGrey property. This value will depend on the Perlin noise generated, so it will be somewhat arbitrary. But suppose it ends up being 0xA4. Now, when we run updateMask, we use the percent value on 0xA4, not 0xFF, and so we get a percent between black and the brightest pixel in the Perlin noise. This is a dynamically generated range, not just a percent between black and white. We really only need to do this because of the nature of Perlin noise, but hopefully you've learned something along the way.
If you need to target Flash 9, then this technique won't work. You can either skip this step and live with the percent being off, or the most obvious approach I can think of is to loop over the pixels in the Perlin noise BitmapData individually, get there value, and compare them manually until you find the highest value. This will surely be a more intense process than using the histogram approach, but I bring it up for Flash Player 9 (and Flash Professional CS3) compatibility. Something like this:
var w:uint = _noise.width;
var h:uint = _noise.height;
var maxPixel:uint = 0;
for (var j:uint = 0; i < h; j++) {
    for (var i:uint = 0; i < w; i++) {
        maxPixel = Math.max(maxPixel, _noise.getPixel(i, j));
    }
_maxValue = maxPixel >> 16;
}
I have not actually tested this code, so take it for what it's worth.
Step 16: Using Perlin Noise as a Mask
So far we've been making the noise visible, which is handy to see what's going on as we're developing. But in the end, we want our _mask Bitmap to be a mask for some other DisplayObject. We've already set up the target object, which in our test project is the image wrapped in a MovieClip called image_mc.
It doesn't take much to achieve a mask. In PerlinMask.as, add the highlighted lines to the constructor:
public function PerlinMask(target:DisplayObject, initialPercent:Number=0) {
    _target = target;

    _rect = new Rectangle(0, 0, _target.width, _target.height);

    _maskPixels = new BitmapData(_rect.width, _rect.height, true, 0xFF000000);
    _mask = new Bitmap(_maskPixels);
    _mask.x = _target.x;
    _mask.y = _target.y;
    _target.parent.addChild(_mask);

    _noise = new BitmapData(_rect.width, _rect.height, false, 0xFFFFFF);

    _point = new Point(0, 0);
    _blur = new BlurFilter(16, 16, 2);
    _operation = "<=";

    reseed();
    this.percent = initialPercent;

    _target.cacheAsBitmap = true;
    _mask.cacheAsBitmap = true;
    _target.mask = _mask;
}
It's as simple as setting the mask property on the _target. But we also need to set both the _mask and the _target to have cacheAsBitmap set to true. When you enable bitmap caching on both the mask and the DisplayObject being masked, then the mask honors semi-transparency.
That is, even though our _mask bitmap has some solid blobs surround by transparent pixels, the problem is that Flash's masking system sees the bitmap as a large rectangle. Without the bitmap caching, our mask would simply let the image shine through, as the mask is simply a rectangle the size of the image we're masking.
However, turning on bitmap caching enables Flash to look at the transparency of the mask, and map that to alpha on the masked object. It's a bit more processor intensive to do this, but it's what we need for our effect, so we're turning it on.
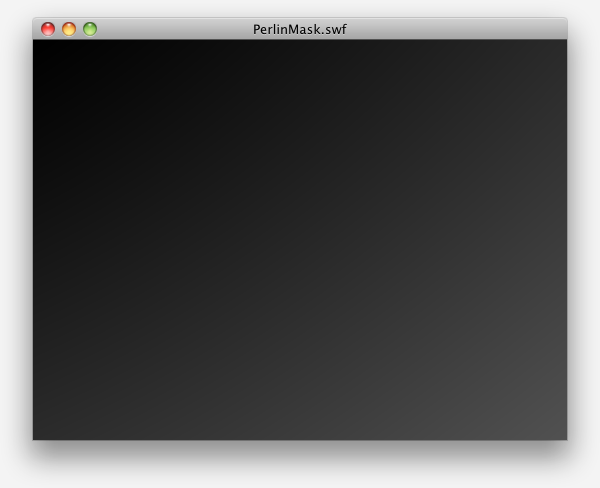
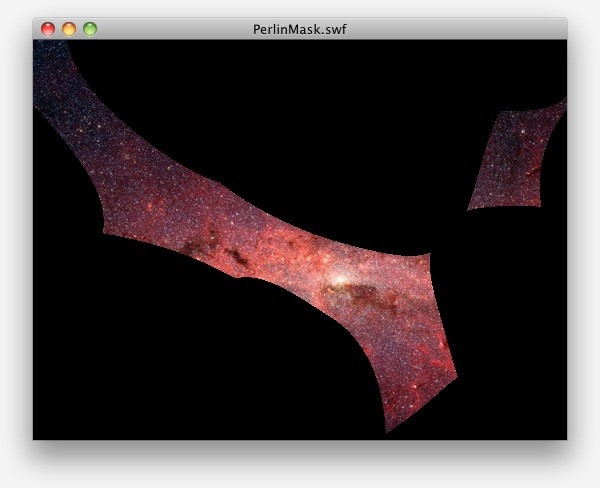
To see the effects of this, test the movie. Depending on the value passed in to initialPercent in PerlinTest, you may see something like this:
Change the numeric value in the code below to see the various effects. 0 means "no mask", so you'll see the whole image. 1 means "full mask" and you won't see anything. Numbers in between will provide blobs of the image.
Step 17: Blurring the Edges
The effect is coming along, but there's one more little problem. The threshold method copies, essentially, one pixel or another. It's either fully transparent, or fully opaque. The edges to the blobs are aliased.
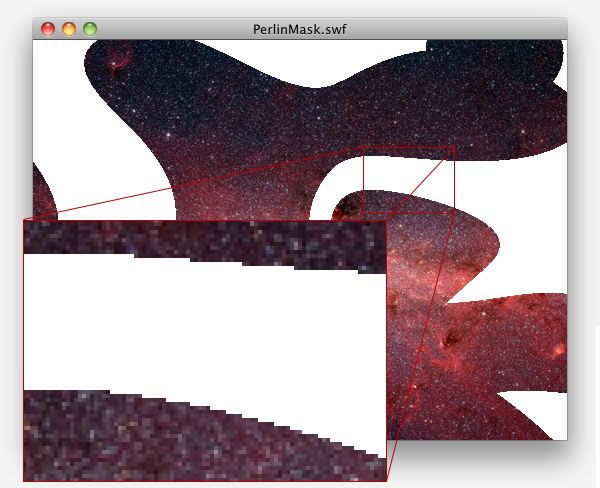
Not only that, but the edge is hard. The effect would be a little trippier if there was a soft transition between visible and non-visible parts of the image.
We can solve both of these issues by applying a blur to the mask bitmap. This is why we created the _blur property earlier on.
The idea is to apply the blur after copying the pixels from the threshold method. This will soften those edges, getting rid of the stair-stepped aliasing, and provide a gradation between opaque black and fully transparent. This is as simple as using BitmapData's applyFilter method:
private function updateMask():void {
    var channelThreshold:uint = _maxGrey * _percent;
    var thresh:uint = 0xFF000000 + (channelThreshold << 16) + (channelThreshold << 8) + channelThreshold;
    _maskPixels.threshold(_noise, _rect, _point, _operation, thresh, 0, 0xFFFFFFFF, true);
    _maskPixels.applyFilter(_maskPixels, _rect, _point, _blur);
}
Applying a filter to BitmapData objects is little more verbose, but by this point you'll be identifying some recurring themes in working with BitmapData methods. The first parameters is a BitmapData to use as a source. An interesting capability is that you need not apply the filter to the BitmapData that actually renders the filter. In our case, though, we want to apply the filter to _maskPixels and also display it through _maskPixels, so we pass in _maskPixels.
The second and third parameters are the Rectangle across which to apply the filter, and the Point where that rectangle of pixels will get copied to the BitmapData. As usual (in both our application and in most applications involving BitmapData manipulation), we want the whole image rectangle, mapped to (0,0). So we use our stored _rect and _point objects.
The final parameter is the filter to apply. We want the same amount of blurring through the mask, so that's why we created a BlurFilter object up front. We can reuse it ever time we re-blur the re-threshold-ed noise.
Go ahead and test the movie again; you'll see a noticeable difference in the way the mask is applied.
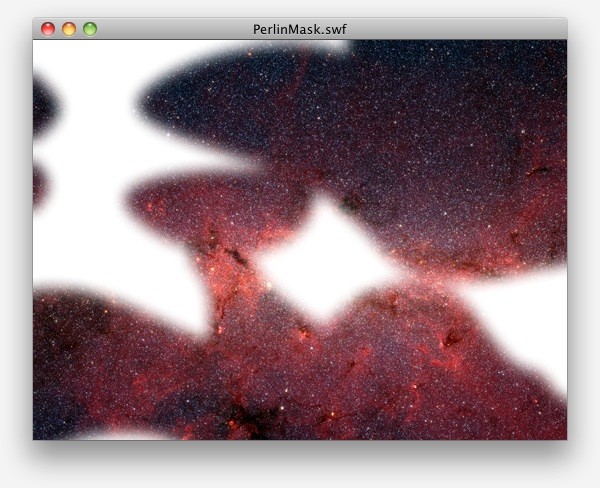
At this point, our PerlinMask class is finished (at least for the purposes of this tutorial). Our remaining steps involve learning how to animate the mask for a cool transition.
Step 18: Download and Install a Tweening Package
We'll rely on a third-party tweening package to manage the tweening. If you already have a tweening library at your disposal, and are comfortable with it, then feel free to use it and skip this step. However, it will be up to you to translate between the TweenLite syntax you see in this tutorial and the syntax of your chosen tweening library.
Go to http://www.greensock.com/tweenlite/ to download the AS3 version of TweenLite. The direct link to the zip is http://www.greensock.com/as/greensock-as3.zip.
The zip file is 2MB or so, so it should download fairly quickly on a decent connection. Once downloaded, uncompress the zip archive, if your browser doesn't do that automatically for you.
In the decompressed folder, there will be a greensock.swc file. You can place this file in a few different places.
The simplest thing to do, and most convenient for our purposes, is to simply move it to the project folder. This is pretty much guaranteed to work, but means you'll only be able to use TweenLite for this project.
If you have a global library path set up, you can move the SWC file to that location, where it will then be available to every Flash file you open up. If you'd like to set one up, go in to Flash's preferences (on the Mac: choose the Flash > Preferences menu or press Command-U; on the PC: choose the Edit > Preferences or press Control-U). Next choose ActionScript from the menu on the left, then the ActionScript 3.0 Settings… button at the bottom. Finally, in the middle, where it says Library path:, click on the folder button and choose a folder on your file system in which you'll place globally-accessibly SWCs. Click OK twice to commit your preference. And, of course, move the greensock.swc to the folder you chose.
If you have Flash CS3, using SWCs is a lot harder to do, and it's usually easier to just use the AS files instead of the SWC. The simplest thing to do is just move the com folder from the TweenLite download to your project folder.
Step 19: Animating the Mask
With TweenLite available, we can start animating the mask for a transition. However, one design consideration to note: we are not going to build tweening into the PerlinMask object itself. It has a percent property, which can be used as a tweening property by any of the tweening packages available. Requiring TweenLite/Max, or Tweener, or GTween, or Twease, or Tweensy, or any other third-party library will potentially be at odds with whatever other tweening library that might be in use. The responsibility of PerlinMask is to apply the mask and provide the percent property. If you want it animated, that will be the responsibility of another object.
With that in mind, open up PerlinTest and import TweenLite:
import com.greensock.*;
And then modify the constructor:
public function PerlinTest() {
    _mask = new PerlinMask(image_mc, 0);
    TweenLite.to(_mask, 1, {percent:1, delay:1});
}
This is a simple tween of the percent property from 0 to 1. I put a delay on it so that you'd have a moment to register the screen before the mask started animating, and for no other reason, really.
Go ahead and test the movie. You should see the image briefly, and it should then sort of melt away into the background color. If you like, reverse the direction with this bit of code:
public function PerlinTest() {
    _mask = new PerlinMask(image_mc, 1);
    TweenLite.to(_mask, 1, {percent:0, delay:1});
}
...where we start the mask at 1 and tween to 0, for a "melting on" kind of animation.
Either way, your brain should more or less explode from the awesome.
Step 20: Using a Tweened Mask as a Transtion for a Slide Show
For my final trick, I'll quickly go over the use of the PerlinMask class as the basis for a slide show where the images melt into each other.
For convenience, you can use the FLA named slideshow.fla found in the slideshow-start folder of the download package. If you'd like to start from scratch, here's what is in it:
- There are five images. For simplicity in this example, these images are simply imported into the Flash document, each made into symbols and placed on the stage. This effect could easily be extrapolated into a system that loads images externally, based on data loaded from XML, but that adds a level of complexity that has nothing to do with the
PerlinMaskeffect. - The five image instances all have names, which will be referenced in the document class for the FLA.
- All images are sized to the same dimensions, and placed at the same location.
- There is a file called SlideShow.as, which is empty but entered in as the FLA's document class.
Copy the com folder from the original test project to your new slideshow project, so that we have access to the PerlinMask class.
In the SlideShow class, add this code:
package  {

    import flash.display.*;
    import flash.events.*;
    import flash.utils.*;

    import com.activetuts.effects.PerlinMask;
    import com.greensock.*;
    import com.greensock.easing.*;

    public class SlideShow extends Sprite {

        private var _images:Array;
        private var _masks:Array;
        private var _timer:Timer;
        private var _index:uint;

        public function SlideShow() {
            _images = [saturn_mc, spiral_mc, mars_mc, hyperion_mc, galacticCenter_mc];
            _masks = [];
            for each (var img:Sprite in _images) {
                _masks.push(new PerlinMask(img, 1));
            }
            _timer = new Timer(5000);
            _timer.addEventListener(TimerEvent.TIMER, onTimer);
            _timer.start();
            _index = 0;
            onTimer(null);
        }

        private function onTimer(e:TimerEvent):void {
            var mask:PerlinMask = _masks[_index];
            var image:Sprite = _images[_index];
            setChildIndex(image, this.numChildren-1);
            mask.reseed();
            mask.percent = 1;
            TweenLite.to(mask, 2, {percent:0, ease:Quad.easeOut});

            _index++;
            if (_index >= _masks.length) {
                _index = 0;
            }
        }
    }

}
After the imports and property declarations, we set things up in the constructor. First, we stash an Array of images (the images are Sprite objects, each with an image contained within), and we also initialize an empty array to hold masks objects. Then we loop over the Array of images, and for each image we create an associated mask. The PerlinMask references the given image, and also occupies the same slot in the _masks array as the image does in the _images array.
The next step is to set up a Timer, which fires every 5 seconds. We trigger the timer's listener manually at the start, so as to get the first image to transition in right away, as opposed to having to wait 5 seconds for the timer to fire. Also, there is an _index property that we initialize to 0. This tracks the position of the currently showing image within the array.
Next, in the TIMER event handler, the first thing we do is grab references to the current image and mask objects, using _index. We then pop the image to the top of the display stack, so that it fades in on top of the previous image. Then we ask the mask to reseed so we get a new transition, make sure its percent is 1 so that the image starts out completely invisible, and then finally start a tween to a percent of 0, bringing the image into existence.
The last part of the event handler increments the _index property, checking to make sure it's in a legal range for the array, wrapping it back to 0 if need be. This keeps our slide show going indefinitely, looping back around to the beginning.
Taking it Further
There are certainly niceties we could add to the PerlinMask class. For example, it would be relatively easy to add some setters and getters for blur amount. The setter would just set the existing _blur property's blurX and blurY to the desired value. This could even be tweened in addition to the percent for an extra-trippy effect.
Also, it would be convenient to add at least a getter for the _target, so that you could always reference the masked object from a given mask. Likewise, it could be useful to even add a setter for the _target, so that you could repurpose a mask amongst any number of DisplayObjects. We could, for instance, not create five mask objects in the slide show project; just create one and reassign it to the currently transitioning image as needed.
There could also be other parameters exposed, to tweak the result of the Perlin noise. Octaves, offset, or even the seed value could potentially be customized for specific effects. Possibly you're after a specific noise pattern, and you know a seed of 420 gets you that pattern.
These are all useful ideas, but are getting beyond the scope of this tutorial. I leave it to you as an exercise to implement these capabilities if you wish to have them.
Image Credits
All images provided in the download package and presented in the images and SWFs on this page are provided courtesy of NASA. They were culled from recent posts on the Astronomy Picture of the Day website, which can be found here. They have an RSS feed, which is highly recommended.
NASA provides their images in the public domain, as explained here. For completeness's sake, the images were found at the following URLs (where you can also go to read about the subject matter).
- Galactic Center: http://apod.nasa.gov/apod/ap090614.html
- Hyperion: http://apod.nasa.gov/apod/ap110227.html
- Saturn & Titan: http://apod.nasa.gov/apod/ap110308.html
- Mars: http://apod.nasa.gov/apod/ap110313.html
- Spiral Galaxy: http://apod.nasa.gov/apod/ap110322.html
Conclusion
We've managed to create a pretty cool way to transition artwork from being visible to not, or the other way around. Along the way we've explored some of the fancier methods involved with BitmapData. I hope that you've not only expanded your knowledge of ActionScript, but ended up with a fancy effect for your toolbox. Thanks for coming out to play!

Comments