In this tutorial, you'll learn how to create a simple plugin that uses PHP's built-in SimpleXML library to access the Yahoo! Weather Service. The current weather conditions will be displayed with either a shortcode or template tag.
Yahoo! Weather
Yahoo! provides a free RSS/XML weather feed that returns current conditions (and forecast) data for a given location. Here's the feed url for London, GB:
You'll see something like this:
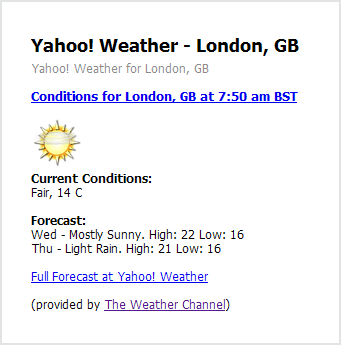
View the source of that page and you'll find a goldmine of weather data in XML format. We can parse this data using PHP's SimpleXML library, extract what we need, and display it in our WordPress posts, pages and template files.
WOEIDs
Yahoo! uses WOEIDs to uniquely identify geographical entities like cities as well as specific points of interest such as Disneyland and the Eiffel Tower. Querying the Yahoo! weather service using WOEIDs is extremely accurate since each location has a unique WOEID. For instance, there are 36 places named Paris in the world but each one has a unique WOEID.
You can use this WOEID Lookup service to find an exact location match.
In the above URL the two parameters used are w for WOEID and u for temperature scale (Celsius or Fahrenheit). We'll use both of them in our plugin.
Step 1 Set-Up the Plugin
The WordPress plugin folder is located in your WordPress installation folder at wp-content/plugins. Create a folder inside the plugins folder. Let's call it get-current-weather. Now, create the plugin file itself. Let's call it get_current_weather.php The path to your plugin file should now be: wp-content/plugins/get-current-weather/get_current_weather.php
Every WordPress plugin needs some header information so WordPress can identify it and make it available on your dashboard plugin page. Place this code at the top of your plugin file and save it.
<?php
/*
Plugin Name: Get Current Weather
Plugin URI: http://woeid.rosselliot.co.nz
Description: Gets current weather data (temperature, weather icon, conditions) from Yahoo weather API.
Version: 1.0
License: GPLv2
Author: Ross Elliot
Author URI: http://woeid.rosselliot.co.nz
*/
You can edit this info as per your own requirements.
Now, go to your WordPress dashboard and select the Plugins menu. You'll see the plugin listed like this:

Don't activate it just yet.
Step 2 Shortcode and Template tag
WordPress shortcodes allow you to place plugin output into your posts and pages. Template tags allow you to place plugin output into you template files (header, footer, sidebar, etc.) We need to define two functions in our plugin, one for the shortcode and one for the template tag. Both will return the same weather data.
The Template Tag
The template tag will be used like: get_current_weather_template_tag(woeid, tempscale), where woeid is the WOEID for a location and tempscale is the temperature scale required, Celsius or Fahrenheit. So, to get the weather data for London, GB in degrees Celsius we would use the template tag get_current_weather_template_tag('44418', 'c').
Place the following code in your plugin file:
function get_current_weather_template_tag($woeid = '', $tempscale = 'c'){

  echo get_current_weather_display($woeid, $tempscale);

}
This function accepts the WOEID and the tempscale. You'll notice the tempscale has a default parameter of c, just in case it's not defined and for convenience. The function echoes a call to another function get_current_weather_display which will provide us with the formatted weather data.
The Shortcode
The shortcode will return the same formatted weather data as the template tag, with a little more work. The WordPress shortcode will be used in posts and pages like this: [get_current weather woeid = '' tempscale = '']. So, to get the weather data for London, GB in degrees Celsius we would use the shortcode [get_current_weather woeid = '44418' tempscale = 'c'). Because we're using a shortcode, we need to tell WordPress about it. To do that we use the WordPress function add_shortcode.
Place the following code in your plugin file:
add_shortcode('get_current_weather', 'get_current_weather_shortcode');
The first parameter get_current_weather defines the name of the shortcode we'll use in our posts and pages. The second parameter get_current_weather_shortcode is the name of the function that is called by the shortcode.
Here's the function called by get_current_weather. Place the following code in your plugin file:
function get_current_weather_shortcode($atts){

  $args = shortcode_atts(array('woeid' => '', 'tempscale' => 'c'), $atts );

  $args['tempscale'] = ($args['tempscale']=='c') ? 'c' : 'f';

  return get_current_weather_display($args['woeid'], $args['tempscale']);

}
The Shortcode Function Explained
Our shortcode function get_current_weather_shortcode accepts shortcode attributes contained in the $atts array. These attributes should be our WOEID and tempscale. But what if they're not? The shortcode API provides us with a way to provide defaults for these expected attributes, the shortcode_atts function.
Shortcode_atts takes two arguments. The first is an array of name => value pairs. Name is the expected shortcode attribute and value is its default value. If name is not present in $atts, it is created with the default value. This allows us to make sure that our function has the correct attributes with defaults.
But what if instead of c or f, another value was passed through for the tempscale? That's where the next statement comes into play.
$args['tempscale'] = ($args['tempscale'] == 'c') ? 'c' : 'f';
This statement is our guarantee that either c or f is used for the tempscale. It uses the PHP ternary operator and is functionally equivelant to:
if($args['tempscale'] == 'c'){

  $args['tempscale'] = 'c';

}else{

  $args['tempscale'] = 'f';

}
You could use either but the ternary operator is more elegant for this purpose.
Finally, the arguments are passed to the get_current_weather_display function.
Step 3 Light Lifting
Here's the get_current_weather_display function which is called by both the shortcode and the template tag.
Place the following code in your plugin file:
function get_current_weather_display($woeid, $tempscale){

  $weather_panel = '<div class = "gcw_weather_panel">';

  if($weather = get_current_weather_data($woeid, $tempscale)){

    $weather_panel .= '<span>' . $weather['city'] . '</span>';
    $weather_panel .= '<span>' . $weather['temp'] . ' ' . strtoupper($tempscale) . '</span>';
    $weather_panel .= '<img src = "' . $weather['icon_url'] . '" />';
    $weather_panel .= '<span>' . $weather['conditions'] . '</span>';

  }else{//no weather data

    $weather_panel .= '<span>No weather data!</span>';

  }

  $weather_panel .= '</div>';

  return $weather_panel;

}
This function is really just for formatting the weather data returned from get_current_weather_data (Step 4). If no weather data is returned, the "No Weather Data!" message is returned.
Step 4 Heavy Lifting
Here's the get_current_weather_data function which is called by the get_current_ weather_display function in Step 3
Place the following code in your plugin file:
function get_current_weather_data($woeid, $tempscale){

  $query_url = 'http://weather.yahooapis.com/forecastrss?w=' . $woeid . '&u=' . $tempscale;

  if($xml = simplexml_load_file($query_url)){

    $error = strpos(strtolower($xml->channel->description), 'error');//server response but no weather data for woeid

  }else{

    $error = TRUE;//no response from weather server

  }

  if(!$error){

    $weather['city'] = $xml->channel->children('yweather', TRUE)->location->attributes()->city;
    $weather['temp'] = $xml->channel->item->children('yweather', TRUE)->condition->attributes()->temp;
    $weather['conditions'] = $xml->channel->item->children('yweather', TRUE)->condition->attributes()->text;

    $description = $xml->channel->item->description;

    $imgpattern = '/src="(.*?)"/i';
    preg_match($imgpattern, $description, $matches);

    $weather['icon_url']= $matches[1];

    return $weather;

  }

  return 0;

}
Contacting Yahoo! Weather And Checking The Response
The get_current_weather_data function uses SimpleXML to query the Yahoo! weather service using the given WOEID and tempscale. If there's an error, we return 0.
SimpleXML allows us to access xml items in an object-orientated fashion. The first time we need to do this is to check if we have an error in our response.
if($xml = simplexml_load_file($query_url)){

  $error = strpos(strtolower($xml->channel->description), 'error');//server response but no weather data for woeid

}else{

  $error = TRUE;//no response from weather server

}
This if-else block attempts to load the response from $query_url into $xml using the SimpleXML method simplexml_load_file.
If we get a response, we check the channel->description field of the returned xml for the string "error". For example, try the following url which will return an error. View the source to see the channel->description field that contains the string "error".
If we don't get a response (the else), it means there must be a problem reaching the Yahoo! service and $error is set to TRUE. That takes care of both error possibilities: invalid data or bad connection.
Extracting Weather Data
If no errors were found, we can extract the relevant weather data from the xml.
First, let's revisit what good response data looks like:
<?xml version="1.0" encoding="UTF-8" standalone="yes" ?>
<rss version="2.0" xmlns:yweather="http://xml.weather.yahoo.com/ns/rss/1.0" xmlns:geo="http://www.w3.org/2003/01/geo/wgs84_pos#">
  <channel>
    <title>Yahoo! Weather - London, GB</title>
    <yweather:location city="London" region=""   country="United Kingdom"/>
    <yweather:units temperature="C" distance="km" pressure="mb" speed="km/h"/>
    <yweather:wind chill="15"   direction="210"   speed="9.66" />
    <yweather:atmosphere humidity="88"  visibility="9.99"  pressure="1015.92"  rising="0" />
    <yweather:astronomy sunrise="5:48 am"   sunset="8:23 pm"/>
    <item>
      <title>Conditions for London, GB at 3:49 am BST</title>
      <geo:lat>51.51</geo:lat>
      <geo:long>-0.13</geo:long>
      <link>http://us.rd.yahoo.com/dailynews/rss/weather/London__GB/*http://weather.yahoo.com/forecast/UKXX0085_c.html</link>
      <pubDate>Tue, 16 Aug 2011 3:49 am BST</pubDate>
      <yweather:condition  text="Fair"  code="33"  temp="15"  date="Tue, 16 Aug 2011 3:49 am BST" />

      <description>
        <![CDATA[
        <img src="http://l.yimg.com/a/i/us/we/52/33.gif"/><br />
        <b>Current Conditions:</b><br />
        Fair, 15 C<BR />
        <BR /><b>Forecast:</b><BR />
        Tue - Partly Cloudy. High: 21 Low: 13<br />
        Wed - Partly Cloudy. High: 23 Low: 14<br />
        <br />
        <a href="http://us.rd.yahoo.com/dailynews/rss/weather/London__GB/*http://weather.yahoo.com/forecast/UKXX0085_c.html">Full Forecast at Yahoo! Weather</a><BR/><BR/>
        (provided by <a href="http://www.weather.com" >The Weather Channel</a>)<br/>
        ]]>
      </description>
    </item>
  </channel>
</rss>
Let's grab the city value (London) which is stored in the channel->yweather:location->city attribute.
Note that the RSS header for the xml response defines two namespaces: yweather and geo. To get the city attribute, we need to access the yweather namespace as a child of channel. The TRUE argument to children tells SimpleXML that yweather is an item prefix as in yweather:location.
$weather['city'] = $xml->channel->children('yweather', TRUE)->location->attributes()->city;
Using the same technique, we can get the values for the current temp and conditions (text):
$weather['temp'] = $xml->channel->item->children('yweather', TRUE)->condition->attributes()->temp;
$weather['conditions'] = $xml->channel->item->children('yweather', TRUE)->condition->attributes()->text;
Getting the Weather Icon URL
The channel->item->description item contains HTML enclosed in CDATA tags. We can't access the HTML tags and attributes directly using SimpleXML, so first we get the description data:
$description = $xml->channel->item->description;
Then we use preg_match and a regular expression to extract the everything between src=" and " from the img tag.
$imgpattern = '/src="(.*?)"/i';
preg_match($imgpattern, $description, $matches);

$weather['icon_url']= $matches[1];
We've got all the weather data we came for so we can return it to the get_current_weather_display function for formatting as per Step 3.
Step 5 Activate and Test
Activate the plugin in your WordPress dashboard. Create a new post or page and insert the shortcode [get_current_weather woeid = '44418' tempscale = 'c'] into the content area. View the post or page and you should see the weather conditions for London.
Now we'll test the template tag. Open the footer.php file in your site's theme folder. Add the template tag get_current_weather_template_tag('44418', 'c') just after the <div id="footer"> tag. Refresh your page and you should see the weather conditions for London in the footer.
Additional
Make It Pretty
Let's add a little CSS to the style.css file in your theme folder.
.gcw_weather_panel {
  background-color: #B1E7FB;
  border: 1px solid #4BCBFA;
  padding: 10px;
  width: 180px;
}
.gcw_weather_panel * {
  margin: 0 auto;
  text-align: center;
  display: block;
}
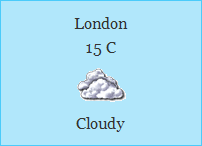
Your weather output should now look like this:
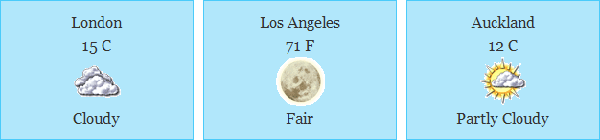
As Many As You Like
Because each shortcode or template tag outputs discrete data, you can have as many different weather outputs as you like, and all on the same page.
Go For It!
If you look at the xml returned from Yahoo!, you'll notice that we've used very little of the available data. There are many other fields and attributes, including forecast data. One immediate improvement to make would be to show the region and country of the city you're displaying. You could also show humidity, wind speed, and lots more.
Have fun!

Comments