Welcome to the final tutorial in our Frenzic like game series! In this tutorial, we’ll handle the logic of the blocks and the steps to build the final app.
Where We Left Off. . .
Please be sure to check part 1 and part2 of the series to fully understand this tutorial.
Step 1: Place Blocks Function
This function runs when the player taps any of the container squares. It basically checks if the correct position is available to place the square and places it if true. The function in the next step is called when the block is placed.
function placeBlock:tap(e)
	eventTarget = e.target

	-- Check if position is available

	local position = {currentXPosition, currentYPosition}

	if(position[1] == 5 and position[2] == 5 and eventTarget.a == false) then
		blocks[#blocks].x = eventTarget.x + position[1]
		blocks[#blocks].y = eventTarget.y + position[2]
		eventTarget.a = true
		blockPlaced()
	elseif(position[1] == 35 and position[2] == 5 and eventTarget.b == false) then
		blocks[#blocks].x = eventTarget.x + position[1]
		blocks[#blocks].y = eventTarget.y + position[2]
		eventTarget.b = true
		blockPlaced()
	elseif(position[1] == 5 and position[2] == 35 and eventTarget.c == false) then
		blocks[#blocks].x = eventTarget.x + position[1]
		blocks[#blocks].y = eventTarget.y + position[2]
		eventTarget.c = true
		blockPlaced()
	elseif(position[1] == 35 and position[2] == 35 and eventTarget.d == false) then
		blocks[#blocks].x = eventTarget.x + position[1]
		blocks[#blocks].y = eventTarget.y + position[2]
		eventTarget.d = true
		blockPlaced()
	end
end
Step 2: Add Block to Array
When the block is placed in the container, we add the block to the array that keeps record of the stored blocks in that container. This will help us determine when the container is full. We also play a sound and increase the score by one every time a block is placed.
function blockPlaced()

	-- Push block to containers blocks array

	if(eventTarget.name == 'up') then
		table.insert(up.blocksGFX, blocks[#blocks])
		up.blocks = up.blocks + 1
	elseif(eventTarget.name == 'right') then
		table.insert(right.blocksGFX, blocks[#blocks])
		right.blocks = right.blocks + 1
	elseif(eventTarget.name == 'down') then
		table.insert(down.blocksGFX, blocks[#blocks])
		down.blocks = down.blocks + 1
	elseif(eventTarget.name == 'left') then
		table.insert(left.blocksGFX, blocks[#blocks])
		left.blocks = left.blocks + 1
	end
	-- Score

	score = score + 1

	-- Sound

	media.playEventSound('bell.caf')
Step 3: Complete Container (Single Color)
The next code checks if the container was filled by a single color block using the container array. It increments the score by 150 and plays the corresponding sound. A function to remove the blocks is called -we'll create that function in the next steps.
if(up.blocks == 4) then
		if(up.blocksGFX[1].name == up.blocksGFX[2].name and up.blocksGFX[2].name == up.blocksGFX[3].name and up.blocksGFX[3].name == up.blocksGFX[4].name) then
			score = score + 150
			complete()
		end
	elseif(right.blocks == 4) then
		if(right.blocksGFX[1].name == right.blocksGFX[2].name and right.blocksGFX[2].name == right.blocksGFX[3].name and right.blocksGFX[3].name == right.blocksGFX[4].name) then
			score = score + 150
			complete()
		end
	elseif(down.blocks == 4) then
		if(down.blocksGFX[1].name == down.blocksGFX[2].name and down.blocksGFX[2].name == down.blocksGFX[3].name and down.blocksGFX[3].name == down.blocksGFX[4].name) then
			score = score + 150
			complete()
		end
	elseif(left.blocks == 4) then
		if(left.blocksGFX[1].name == left.blocksGFX[2].name and left.blocksGFX[2].name == left.blocksGFX[3].name and left.blocksGFX[3].name == left.blocksGFX[4].name) then
			score = score + 150
			complete()
		end
	end
Step 4: Complete Container
This code runs when the container is full, but the blocks inside aren't the same color.
if(up.blocks == 4 or right.blocks == 4 or down.blocks == 4 or left.blocks == 4) then
		score = score + 50
		complete()
	end
Step 5: Reset Timer
After clearing the full containers, the score is set to the Textfield in the stage, the timer is reset and another block is called.
	scoreTF.text = score
	timer.cancel(timerSource)
	timerSource = nil
	timerSource = timer.performWithDelay(3000, timesUp, 0)
	newBlock(false)
end
Step 6: Remove Blocks
This functions clear the blocks in the containers and reset the correct variables to prepare the container for new blocks.
function complete()
	media.playEventSound('bell4.caf')
	removeBlocks()
	eventTarget.a = false
	eventTarget.b = false
	eventTarget.c = false
	eventTarget.d = false
end

function removeBlocks()
	if(eventTarget.name == 'up') then
		for i = 1, 4 do
			display.remove(up.blocksGFX[i])
			up.blocksGFX[i] = nil
		end
		up.blocks = 0
	elseif(eventTarget.name == 'right') then
		for i = 1, 4 do
			display.remove(right.blocksGFX[i])
			right.blocksGFX[i] = nil
		end
		right.blocks = 0
	elseif(eventTarget.name == 'down') then
		for i = 1, 4 do
			display.remove(down.blocksGFX[i])
			down.blocksGFX[i] = nil
		end
		down.blocks = 0
	elseif(eventTarget.name == 'left') then
		for i = 1, 4 do
			display.remove(left.blocksGFX[i])
			left.blocksGFX[i] = nil
		end
		left.blocks = 0
	end
end
Step 7: Alert
The alert function runs when the player is out of lives, it displays the final score reached and adds a listener to go back to the title screen.
function alert()
	timer.cancel(timerSource)
	timerSource = nil
	native.showAlert( 'Game Over', 'Your Score: ' .. score, {'OK'}, alertHandler)
end

function alertHandler(e)
	if(e.action == 'clicked') then
		if (e.index == 1) then
			restart()
		end
	end
end
Step 8: Restart
The next function will reload the game and return to the Title View.
function restart(e)
	display.remove(gameView)
	Main()
end
Step 9: Call Main Function
In order to initially start the game, the Main function needs to be called. With the above code in place, we’ll do that here:
Main()
Step 10: Loading Screen

The Default.png file is an image that will be displayed right when you start the application while the iOS loads the basic data to show the Main Screen. Add this image to your project source folder, it will be automatically added by the Corona compliler.
Step 11: Icon
Using the graphics you created before you can now create a nice and good looking icon. The icon size for the non-retina iPhone icon is 57x57px, but the retina version is 114x114px and the iTunes store requires a 512x512px version. I suggest creating the 512×512 version first and then scaling down for the other sizes.
It doesn’t need to have the rounded corners or the transparent glare, iTunes and the iPhone will do that for you.
Step 12: Testing in Simulator
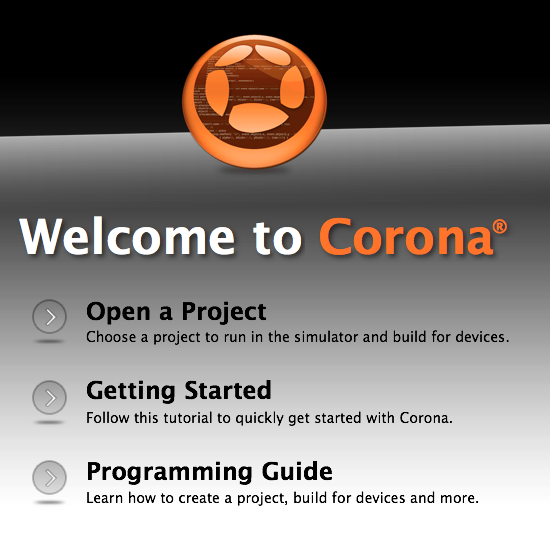
It's time to do the final test. Open the Corona Simulator, browse to your project folder, and then click open. If everything works as expected, you are ready for the final step!
Step 13: Build
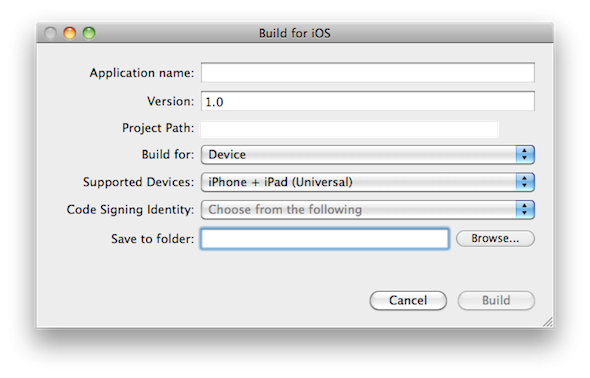
In the Corona Simulator go to File > Build and select your target device. Fill the required data and click build. Wait a few seconds and your app will be ready for device testing and/or submission for distribution!
Conclusion
Experiment with the final result and try to make your custom version of the game!
I hope you liked this tutorial series and find it helpful. Thank you for reading!

Comments