In this tutorial series we will create a Whack-a-Groundhog game. The objective of the game is tap on the groundhogs before they disappear. Read on!
1. Intro Screen
The intro screen will allow the user to set some options or begin to play the game.
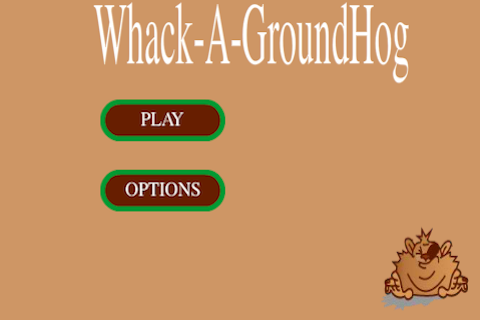
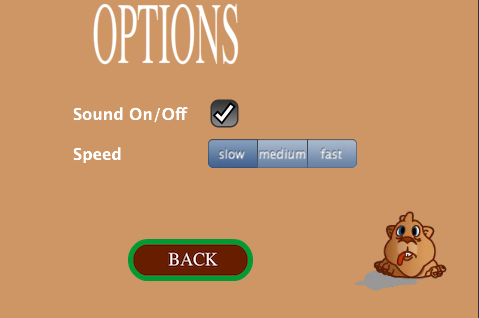
2. Options Screen
The options screen will allow the user to turn on/off the music and choose at which speed the groundhogs appear.
3. Game Screen
The game screen is where all the action takes place. The groundhogs randomly pop out of their holes,
and the player tries to "whack" them before they go back inside. The player can also get to the options screen from here as well.

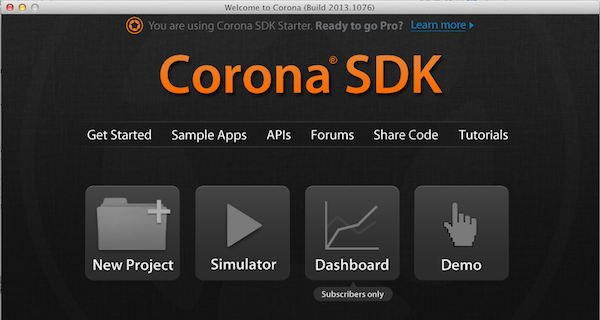
4. New Project
Open the Corona Simulator and choose "New Project".
On the screen that follows, choose the following settings:
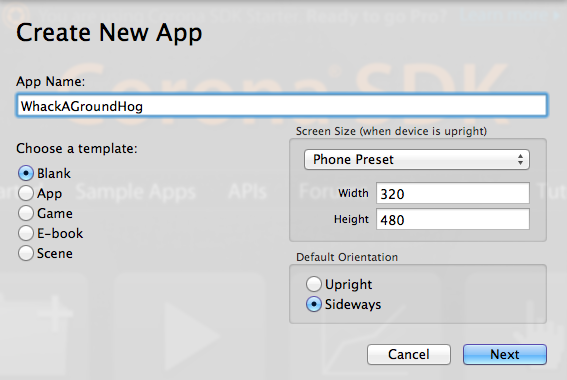
Press the "Next" button, then choose open in editor. This will open "Main.lua" in your default text editor.
5. Project Configuration
Open "Config.lua" and delete everything. Update the file with the following:
application = {
   content = {
     width = 320,
     height = 480,
     scale = "letterBox",
     fps = 30,
   }
}
This sets the project’s default width, height, scale, and FPS. The "letterBox" scale setting means the app will scale up in both directions as uniformly as possible. If necessary the game will display "Letter Boxed", like you see in some DVD movies or with old apps on an iPhone 5.
6. Hiding the Status Bar
We don’t want the status bar showing in our app, so enter the following in "Main.lua":
display.setStatusBar(display.HiddenStatusBar);
7. Local Variables
These are all of the variables we’ll be using in this game. Read the comments to understand what each is for.
local allGroundHogs = {} -- Table to hold all the groundhogs
local groundHogXPositions = {240,410,280,145,429,80,208,366}
local groundHogYPositions = {259,259,209,184,166,118,91,99}
local gameScreenGroup -- group that holds the game screen
local introScreenGroup -- group that holds the intro screen
local optionsScreenGroup -- group that holds options screen
local isPlaying = false -- whether the player has started the game or not
local groundHogTimer -- timer that is used to generate groundhogs
local groundHogSpeed = 1500
8. SetUpIntroScreen()
The setUpIntroScreen() function is used to setup the first screen the user will be presented with.
function setUpIntroScreen()

end
9. SetUpOptionsScreen()
The setUpOptionsScreen() function takes care of setting up the options screen.
function setUpOptionsScreen()

end
10. SetUpGameScreen()
The setUpGameScreen() function sets up the game screen.
function setUpGameScreen()

end
11. GetRandomGroundHog()
The getRandomGroundHog() function selects a random groundhog to appear in one of the holes.
function getRandomGroundHog()

end
12. GroundHogSpriteListener()
This function is used to tell when the groundhog's animation has ended.
function groundHogSpriteListener( event )

end
13. GroundHogHit()
The groundHogHit(e) function is used to tell when the player has tapped a groundhog.
function groundHogHit(e)

end
14. SoundComplete()
When the music stops playing we use this function to start it over again.
function soundComplete()

end
15. Setting Up the Game BackGround
In this step we will begin to setup the game screen. Enter the following code inside the setUpGameScreen() function you entered in the step above.
gameScreenGroup = display.newGroup()
    local gameBackground = display.newImage("background.png", true);
    gameScreenGroup:insert(gameBackground)
At the very bottom of "main.lua", enter the following:
setUpGameScreen()
If you test now you should see the game background.
16. Setting Up the Image Sheet
The groundhogs are animated using a sprite sheet. Enter the following beneath the line gameScreenGroup:insert(gameBackground) that you entered in the step above.
local options = {width = 142, height = 91, numFrames = 7}
local imageSheet = graphics.newImageSheet("groundhogsheet.png",options)
The options variable is a table that holds the options for the image sheet. The width and height are the width and height of the images in the "groundhogsheet.png", and the numFrames is equal to the number of images in the .png
17. Sequence Data
Now that we have our imageSheet setup we can setup the animations. The animation(sequence) data is kept in a variable sequenceData. Enter the following beneath the code from above.
local sequenceData = {
    {name="show", start=2 , count = 3,time=1000,loopCount=0,loopDirection="bounce"}
}
Here we name the sequence "show", the start is the "frame" of the imageSheet that the sequence starts on and count is the number of frames in the sequence.
The loopCount is how many times you want the sequence to play. Zero means forever, and the loopDirection is how you want the sequence to play. The bounce option means play forward, then backwards.
18. GroundHog Sprites
With the imageSheet and sequenceData setup, we can place our groundhogs and animate them. Enter the following code beneath the sequenceData you entered in the step above.
local tempGroundHog
    for i=1, #groundHogXPositions do
     	tempGroundHog = display.newSprite(imageSheet,sequenceData)
	     tempGroundHog.x = groundHogXPositions[i]
	     tempGroundHog.y = groundHogYPositions[i]
	     tempGroundHog:setSequence("show")
	     gameScreenGroup:insert(tempGroundHog)
         table.insert(allGroundHogs,tempGroundHog)
         tempGroundHog:play()
    end
Each time through the loop we create a new tempGroundHog Sprite, set its x an y positions, set the Sequence to "show", insert it into the gameScreenGroup, and then insert it into the allGroundHogs table.
IF you test now you should see all of the groundhog animations playing. It looks a little wrong though, and that is something we will fix in the next part of this series!
Conclusion
This brings the first part of this series to an end. In the next part we will finish the groundhog animation and complete the game logic. Thanks for reading and stay tuned!

Comments