This tutorial covers the creation of a shiny text effect, which can then be easily edited for rapid prototyping.
The animation can be published to Flash Player 8 and up, and can be created in Flash 8 and up. There is no ActionScript running this animation, so it can easily be implemented in both AS2 and AS3 projects. It can serve as a fun Flash game intro logo, banner ad, or however you see fit. Have fun with it!.
Final Result Preview
Let's take a look at the final result we will be working towards:
Step 1: Create a new Flash Document
Using File > New > Create a new Flash ActionScript 2 or 3 document.
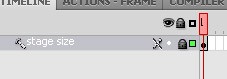
In the Properties window, make the stage size 590 by 300.
Also edit the frames per second to be 30.

Step 2: Gradient Shape
Using the Rectangle tool (R), place a square on the stage with the preset black and white radial gradient, and no stroke.

It doesn't matter how big the square you create is.
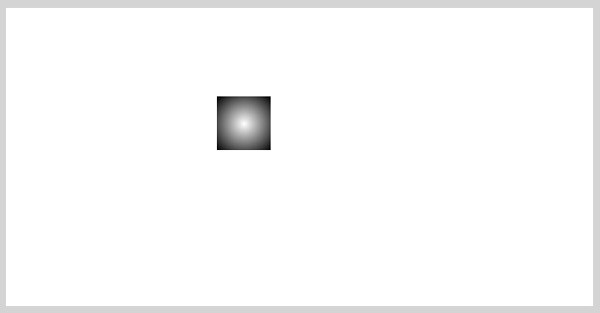
Label this layer "gradient".

Step 3: Re-size and Align
Select your gradient square, and open the Align Options using CTRL + K.
Ensure that "Align to stage" is checked.

First match the width and height of the square to the stage.

Your result should be something like this:

Next align the left edge of the shape to the stage.

Your result should now be as follows:

Then align the top edge of the shape to the stage.

Bingo:

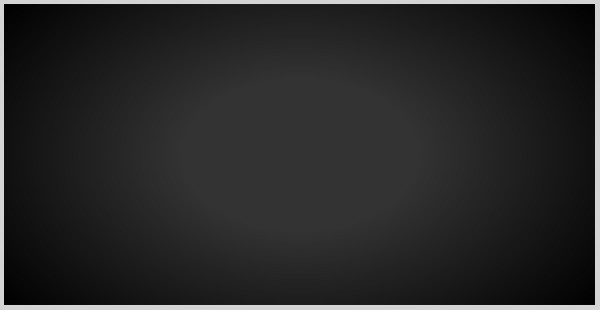
Step 4: Edit the Size and Colors
Select your gradient transform tool (F).
Click on the gradient on the stage.

Using the gradient control handles, alter the size and shape of the gradient so that it is more evenly distributed across the stage.

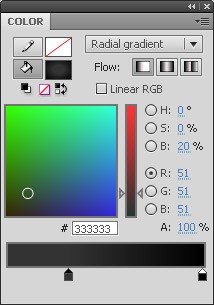
Open the Color window (Alt+Shift + F9).
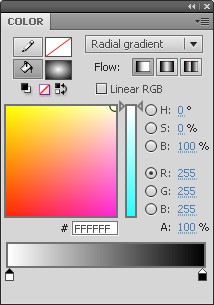
Change the white color on the gradient to a #333333 grey, and slide the color to the right so that there is a grey circle in the middle of the gradient.
This is what you should see:
Step 5: Add Horizontal Lines
Create a new layer above the gradient, and name it "lines".

Using the Rectangle tool (R), draw a rectangle on the stage with no stroke, and a 9% opaque white fill.

Using the properties panel, alter the size of the shape to be 590 by 5.

Using the Align options, align the shape to the horizontal center of the stage.

Next, using the Align options, align the shape to the top edge of the stage.

With this shape still selected, copy it, and paste it in place (CTRL + Shift + V).
Move this new shape down ten pixels below the first shape, and duplicate it again using the same method. You now have something like this:

Duplicate this process above until you have the entire screen covered with these horizontal shapes. You'll end up with something like this:

Step 6: Logo Animation Movieclip
Create a new layer called "logo".

Draw a rectangle (R) with a white stroke, but no fill.

Under Properties, change the dimensions to 590 by 300px.

Using the Align window (CTRL + K), align the shape to the left and top edge so that your result is this:

Select the white rectangle, and convert it to a symbol under Modify > Convert to Symbol.

Name the movieclip "masterClip", and ensure that the registration point is in the top left corner. Then click "OK".

Step 7: Make the Rectangle a Guide
Double-click on the masterClip on the stage to edit it in context.

Double-click on the layer name and change it to "stage size".

Right-click on the layer and choose "Guide".

Lock the layer by clicking on the second white circle.
You now have a reference layer, which tells you how how large the stage is, in context to the masterClip.
Step 8: Add the Text
Create a new layer, and add your text to this movieclip using the text tool (T). I chose SF Sports Night for this animation.

These are the type settings to apply to the text field (your available settings may be slightly different, depending on which version of Flash you're using):

To achieve the line break in the text, manually enter nine blank spaces on the second line to get the text to line up as displayed.
Step 9: Rotate the Text
Select the text, and using the Transform Window (CTRL + T) rotate the text to -6.5.

Step 10: Adjust the Spacing
Select the text, move it down so that it is in the center of the frame.

Step 11: Convert the Text to a Movieclip
Select the text on the stage, and convert it to a symbol with Modify > Convert to Symbol (or F8).
Name the clip, "sourceText" and ensure that it is a Movie Clip, not a button or a graphic clip. Then click "OK".

Step 12: Place on Four More Layers
Select the text clip and copy it, using CTRL + C.
Create four new layers using the "New Layer" button within the timeline pane.
.

Put the text clip that you copied on each layer, using Edit > Paste in Place.

You now have five identical layers.

Rename each layer by double-clicking on each layer's name. Use the image below as a guide for naming each one.

Lock and hide all of your layers using the lock and visible toggles within the timeline.

By hiding and locking each layer, we'll be able to isolate and edit each layer independently.
Step 13: Edit the "Glows" Layer
Make the "glows" layer visible, and unlock it. Click on this layer to ensure that you're editing it.

Select the text clip on the stage, and ensure that the filters are open in the Properties panel.
Add a glow to the text clip, using the Add Filter button. Choose the "Glow" option.

Apply these settings to the glow that was just created.

You now have this effect:

Now using the same method, apply a second glow filter to the same clip.
Apply these settings to the new glow that was just created.

You now have this effect:

Now apply a Drop Shadow to this same clip.

Apply these settings to the drop shadow that was just created.

You now have this effect:

Step 14: Edit the "Mask3" Layer
With the "glows" layer still visible and selected, add a new layer. Name it "green".
.

Now lock and hide and "glows" layer. Make the "mask3" layer visible, and unlock it.

Make the "mask3" layer a mask by right-clicking on the layer, and choosing "mask".

The green layer will now be temporarily locked. Unlock it by clicking on the layer's lock icon.

Use the Rectangle tool (R) to draw a shape on the "green" layer.
Apply no stroke, and the standard black-to-white linear gradient.

Draw the shape, so that it is larger than the stage size.

Select the Gradient Transform Tool (F) and click on the gradient on the stage.

Using the Gradient Transform Handles, rotate the gradient 90 degress, and change the span of the gradient so it only covers the text area of the stage.

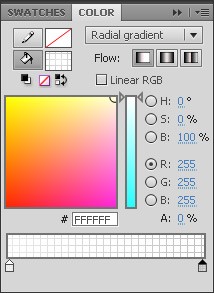
Alter the colors of the gradient using the Color Window. (Alt + Shift + F9).
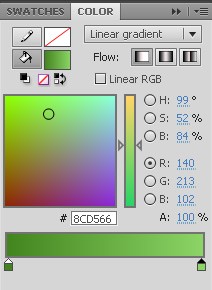
The Green on the right is #8CD566.
The Green on the left is #43851F.
Now lock the "green" layer, and ensure that the "mask3" layer is also locked. Also turn the visibility of the "glows" layer back on. .

The result is now this:

Step 15: Edit the "Inner Glow" Layer
Make the "inner glow" layer visible, and unlock it.

Select the clip on the "inner glow" layer, and add a glow to it under the filters in the proerties window.
Apply these settings to the new glow:

Tip: Notice that this glow is an inner glow, which means that it glows from the inside, not the outside.
Your result is now this:

With the clip still selected, change the blending mode to Overlay under Display in the Properties Panel:

With the new blending mode in place, your result is now this:

Step 16: Increase the Timeline Span
This masterClip is currently only one frame long. We need to add more frames, so that we can animate the shine effects.
Within the timeline, click and drag to highlight all layers on frame 88.

With the frame still selected, right-click and choose "Insert Frame" from the drop-down list.
Tip: Aside from right-clicking to add frames, you can also use F5 as a shortcut.

The timeline now has a span of 88 frames.

Step 17: Add the First Animated Shine
Start by first locking, and hiding, the "inner glow" layer.

With the "inner glow" layer still selected, add a new layer using the button within the layers window.
Double-click on the new layer's name and name it "shine".

Right-click on the bottom "mask1" layer and make it a mask.

Now unlock the "shine" layer and click on it, so you can begin to work on this layer.

The shine that we are adding will begin animating roughly half-way through the animation. Use the scrubber in the timeline to navigate to frame 47.

Click on frame 47 of the "shine" layer, and right-click to insert a keyframe.
Tip: Aside from right-clicking, you can also use F6 to insert a keyframe.

This is the keyframe that we will add our shine to.

Leave this new keyframe selected, and select the Rectangle Tool (R).
Choose the standard white-to-black linear gradient for the fill, and no stroke.

Draw a rectangle on the stage, slightly taller than the stage's height, and with a width of 150 pixels.

Use the Gradient Transform Tool (F) to edit the span/rotation of this new gradient shape.
Use the Gradient control handles to rotate the gradient slightly to left.

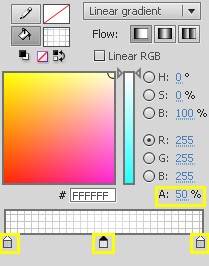
With this gradient still selected, open your Colors Window (Alt + Shift + F9) to edit the colors.
Apply these settings to your gradient:
- The swatch on the left of the gradient is a white fill, at 0% Alpha.
- Click just below the middle of the gradient, to add a middle swatch. Make it a white fill, at 50% Alpha.
- The swatch on the right of the gradient is a white fill, at 0% Alpha.
Tip: To edit a color of a gradient swatch, double-click on the swatch itself.
You now have a faint, faded white gradient off to the left of the stage.

We now need to add a second keyframe to the timeline, so that we can animate this gradient. Click on the last frame of the "shine" layer (frame 88), and insert a keyframe with F6.

We are now ready to apply a tween to this gradient.
Right-click anywhere on the "shine" layer between the two keyframes, and choose Create Shape Tween.

We now have a shape tween on the layer within the timeline.

In order to actually see movement with the gradient, we need to edit the second keyframe. Click on the keyframe in the timeline.

The gradient is now selected. Use your Right arrow key to move the gradient over to the right side of the stage.
Tip: To do this quickly, hold down SHIFT as you press down the Right arrow key. This will move the shape in 10 pixel increments.
The gradient is now sitting on the right side of the stage. We now have this on the second keyframe in the timeline.

Now lock the "shine" layer, and ensure that "shine" and the bottom "mask1" layer are visible.

You can now preview the animation using the ENTER key.
The animation on this layer looks like this.
Step 18: Add the Second Animated Shine
Select the bottom "mask1" layer, and add a new layer using the New Layer button.
Double-click on the new layer, and name it "fade".

Right-click on the top "mask1" layer, and make it a Mask.

Now unlock the "fade" layer. This is where we will add our next shine effect.

Select the rectangle tool (R). Set the stroke to null, and make the fill black.

Draw a rectangle slightly wider than the stage, and with a height of 174.
Position the rectangle just above the stage.

Select the Selection Tool (V) from the tools.

Hover your mouse over the bottom edge of the black shape. You'll see a curved dotted line appear under the cursor, signifying that you can edit the vector shape.

Click and drag the bottom edge up slightly, and you'll now have a concave shape.

Now select the Subselection Tool (A) from the tools.

Click on the bottom right corner of the black shape. The bezier point will be black, signifying that it is being edited. You can also see the control handles that alter the curves of this shape. .

Click on the curve handle and drag it down to produce this shape.

Now click on the handle for the left corner.

Drag it up and to the right to produce this shape.

Notice that the curve overlaps the stage slightly. Use the Selection Tool (V) to move the shape up so it doesn't cover the stage.

Select the shape and give it a gradient fill by choosing the standard black-to-white fill.

This is our result.

Select the Gradient Transform Tool (F) and click on the gradient shape.

Use the gradient control handles to rotate it, and squeeze it vertically.

Open up the Colors Window (Alt + Shift + F9) to edit the colors of the gradient.


Move the two gradient swatches closer together and set the following:
- The swatch on the left of the gradient is a white fill, at 0% Alpha.
- The swatch on the right of the gradient is a white fill, at 50% Alpha.
This is now our result.

In the timeline on the "fade" layer, now insert a keyframe (F6) on frame 48.
Insert a blank keyframe (F7) on frame 49.

Right-click anywhere between the first two keyframes and select Create Shape Tween.

We now have this on the "fade" layer.

Select the second keyframe in the timeline.

Using the Selection Tool (V), move the shape down to the bottom of the stage. .

Tip: Notice that only the white portion of the gradient is off the bottom of the stage. The transparent area isn't visible.
Now lock the "fade" layer and play the animation using the ENTER key. You'll see this:
Now ensure that all the layers are locked and make them all visible.

Now when you play the animation, you'll see this:
We're almost done! All we have left to do is add the sparkle animations.
Step 19: Add the First Sparkle Highlight
Click on the top "Mask1" layer.

Now add three layers using the New Layer button.
Name them "sparkle" 1, 2, and 3.

Insert keyframes on these three new layers.
- Sparkle 1 layer has a keyframe on frame 33.
- Sparkle 2 layer has a keyframe on frame 43.
- Sparkle 3 layer has a keyframe on frame 53.

On the keyframe on the "sparkle1" layer, we're going to draw a red line. Click on the Line Tool (N) and draw one line as it appears here.

Click on the red line with the Selection Tool (V) and convert it to a symbol with Modify > Convert to Symbol (F8).
Ensure that it is a Movie Clip, and name it "sparkleMove".

Now double-click on the new movieclip to edit it in context.

Name "Layer 1" "reference" by double-clicking the Layer Name. Then create a new layer and name it "sparkle".

Now extend the frames by clicking on frames 25 on both layers, and then right-click and choose Insert Frame (F5).

Lock the reference layer and draw a square with no stroke and a black fill on the sparkle layer.

Rotate the black square 90 degrees with the Free Transform tool (Q).

Using the Selection Tool (V), roll your mouse over each side of the square, and click and drag the edges in, creating subtle arcs. Your result is a small starburst shape.

Click on the shape, and assign it the default black-to-white radial gradient from the Fills.

Zoom in on the starburst with the Zoom Tool (Z). Then Select the Gradient Transform Tool (F). Click on the starburst to edit it.

Open up the Colors Window (Alt + Shift + F9) to edit the colors of the gradient.

Apply these settings to the radial gradient:
- The swatch on the left of the gradient is a white fill, at 65% Alpha.
- The swatch on the right of the gradient is a white fill, at 0% Alpha.
The result is this.

Click on this shape with the Selection Tool (V), and convert it to a symbol with Modify > Convert to Symbol (F8). Ensure that the registration point is in the center, and name it "sparkle".

Zoom out and center the sparkle clip over the left edge of the red line.

Insert a keyframe on the "sparkle" layer on frame 25.

On this new keyframe, use the Free Transform Tool (Q) to rotate the starburst shape 90 degrees to the right. Also use the Selection Tool to move the shape and center it over the right side of the line.

Right-click between the two keyframes on this layer and select "Create Classic Tween".

You can now watch the animation. You'll see the star move and rotate from the left side to the right.
Unlock the "reference" layer and set the stroke color to an alpha level of zero.

Now lock the reference layer, and click on the "sparkle" layer to edit it.
Insert keyframes on frames 6 and 20.

On frame 1, click on the starburst movieclip. In Properties, under Color Effect, Choose Alpha from the Style drop-down list. Set the Alpha to zero.

Do the same on frame 25.
Now the starburst fades in as it moves across the stage. It also fades out.
Go back to the masterClip level by double-clicking the stage.
Click on the outline view button on the "sparkle1" layer, and insert a Blank Keyframe (F7) on frame 59.

Put sparkle layers 2 and 3 in outline view as well.

On the "sparkle2" layer, insert a blank keyframe (F7) on frame 69.
On the "sparkle3" layer, insert a blank keyframe (F7) on frame 79.

Step 20: Add the Last Two Sparkles
Copy and paste the sparkleMove clip to the other two layers.

Because we are currently in outline mode, it's easy to place the animations where they need to be. The line shows the duration of the animation, and we'll use that as reference. Because these sparkle animations are supposed to be small highlights, we're placing them on the edges of the text.
Place the sparkleMove clip on the "sparkle2" layer below the letters L and E.

Place the sparkleMove clip on the "sparkle3" layer above the letters T and E.

Now when you publish your animation (CTRL + ENTER), you'll see this:
Conclusion
And we're done! The great thing about this setup, is that it is extremely easy to edit this animation. To change the type content, font, etc, you simply need to edit the sourceText movie clip in the library and tweak the location of the sparkle movie clips. Play around with the colors of each element to make it your own:
Thank you so much for taking the time to go through this tutorial, I hope you learned some handy techniques. If you have any questions, don't hesitate to leave them behind in the comments!

Comments