In the first part, we touched on the basics of the WordPress HTTP API and how to make a simple GET request and read the response. In this tutorial, we'll learn about the PayPal Express Checkout API and how to build a class that uses the HTTP API to process payments with PayPal. Preferably, you will have some knowledge of what PayPal is and also a Sandbox account (which is free and easy to get). We've done this as a plugin to show how the PayPal class works and ease making the HTTP requests.
An Overview of the PayPal API
PayPal is an online payment processor. It's quite popular, and enables millions of professionals and businesses to exchange money online with just an email address. You may even already be using PayPal to receive payments from clients. Clients login to their PayPal account and send the money to your PayPal account using your email address.
This is good for personal and manual money sending. Businesses, however, need to automate the process. They usually setup a shopping cart where purchasers add items and then complete the purchase by entering their shipping details and payment information.
The PayPal team have put various procedures to automate payments. They are confusing at times; and to be honest, their documentation is a little messy. I have picked the Express CheckOut API for two reasons: It's quite simple and straightforward to implement; and it enables a very good degree of customization.
The Express Checkout Flow
The payment process begins from your website. After putting some items in their shopping cart, your visitor goes to the shopping cart page where they find the items they added and the total amount. You should also include the PayPal payment button.

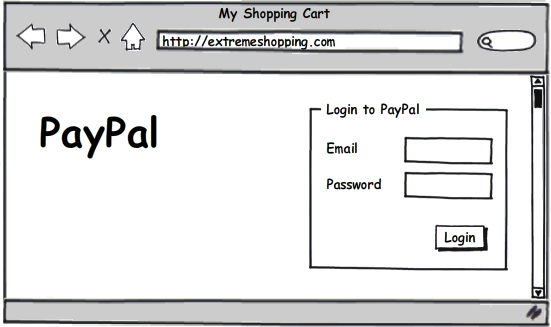
When the user clicks the PayPal payment button, they get redirected to the PayPal login page. They need to enter their login details, and confirm the purchase. The PayPal login and confirmation page can be customized (by adding the order details and total amount to be paid) but it's optional. After confirming the payment, the user is returned to your website to a web page that you specify.
When the user is returned to your page, you complete the purchase order. First, you execute the payment order (charge the buyer's PayPal account), and when the transaction succeeds, you redirect the user to your product download page, or you notify your shipping department of the order.
What Does It Have to Do With HTTP?
Although it may not look like it, most of the stuff actually happens on your website and servers. To redirect the user to the PayPal page, you need first to get a "Token" key from PayPal. To get this key, you need to send a POST request to the PayPal Server API with your account and transaction details. If the request succeeds, PayPal will answer with a "Token" key.
When the user logs in to his PayPal account and confirms the payment, the payment isn't actually processed. In this step, the user only grants the right for your service to process the transaction. After the authorization, the buyer is returned to your website where you can complete the process and charge the user.
At least, you'll have two HTTP requests. The first one is to get the "Token" which you'll use to redirect the user to the payment page. The second is to complete processing the payment for the buyer. You can do additional requests before completing the payment in which you request the payer details (like the Shipping address), but it is optional.
The PayPal Gateway Class
To standardize and streamline the process, I have coded a PHP class which does the required requests by simply giving it the parameters. The class implements the 3 request methods supported by the PayPal API:
-
setExpressCheckout– This request returns a "Token" key which will be used to redirect the user to a login page. -
getExpressCheckout– Use this request to get information about your buyer, like the shipping address or the payment status. -
doExpressCheckout– This request completes the payment and charges the user account.
These methods require some common parameters like the PayPal API version, your account username, password and also a signature. If you haven't already, sign up for the PayPal Sandbox which is a test platform that emulates the real PayPal. Our class will support the sandbox environment.
Making the HTTP Request
For the 3 methods mentioned above, I have found out that they share a good amount of code. They basically do the same request, but use different parameters for each.
- Request type: POST
- Request URL: The PayPal API server or the Sandbox PayPal API server
- Timeout: 60 (a short timeout might result in an unsuccessful request)
- SSL Verification: Default to false if the "https_local_ssl_verify" is not set
- Request body: different from one method to another.
Using the Class
First, you'll need to have an idea about the required parameters. I'm going to summarize them here, but for more extensive and complete details, check out the PayPal Express Checkout documentation. The following table tries to summarize the required parameters for successful set, get and do requests.

// Loading the Class file
require_once ('paypal.php');

// Create a new PayPal class instance, and set the sandbox mode to true
$paypal = new wp_paypal_gateway (true);

// Common Parameters
$paypal->version = '84.00';
$paypal->user = 'sdk-three_api1.sdk.com';
$paypal->password = 'QFZCWN5HZM8VBG7Q';
$paypal->signature = 'A-IzJhZZjhg29XQ2qnhapuwxIDzyAZQ92FRP5dqBzVesOkzbdUONzmOU';

// Required Parameter for the getExpresscheckout
$param = array(
	'amount' => '20.00',
	'currency_code' => 'USD',
	'payment_action' => 'Sale',
	'return_url' => 'http://example.com/return',
	'cancel_url' => 'http://example.com/cancel'
);

// Display the response if successful or the debug info
if ($paypal->setExpressCheckout($param)) {
	print_r($paypal->getResponse());
} else {
	print_r($paypal->debug_info);
}
The Class Code
Step 1 The Class, Properties, and Methods
We start off with a class skeleton defining the properties, the constructor and the different methods. Each property and method is preceded with a comment section that has a description, the accepted parameters and the returned variable. The comments follow the PhpDoc guidelines.
class wp_paypal_gateway
{
    /**
     * PayPal API Version
     * @string
     */
    public $version;

    /**
     * PayPal account username
     * @string
     */
    public $user;

    /**
     * PayPal account password
     * @string
     */
    public $password;

    /**
     * PayPal account signature
     * @string
     */
    public $signature;

    /**
     * Period of time (in seconds) after which the connection ends
     * @integer
     */
    public $time_out = 60;

    /**
     * Requires SSL Verification
     * @boolean
     */
    public $ssl_verify;

    /**
     * PayPal API Server
     * @string
     */
    private $server;

    /**
     * PayPal API Redirect URL
     * @string
     */
    private $redirect_url;

    /**
     * Real world PayPal API Server
     * @string
     */
    private $real_server = 'https://api-3t.paypal.com/nvp';

    /**
     * Read world PayPal redirect URL
     * @string
     */
    private $real_redirect_url = 'https://www.paypal.com/cgi-bin/webscr';

    /**
     * Sandbox PayPal Server
     * @string
     */
    private $sandbox_server = 'https://api-3t.sandbox.paypal.com/nvp';

    /**
     * Sandbox PayPal redirect URL
     * @string
     */
    private $sandbox_redirect_url = 'https://www.sandbox.paypal.com/cgi-bin/webscr';

    /**
     * Array representing the supported short-terms
     * @array
     */
    private $short_term = array(
        'amount' => 'PAYMENTREQUEST_0_AMT',
        'currency_code' => 'PAYMENTREQUEST_0_CURRENCYCODE',
        'return_url' => 'RETURNURL',
        'cancel_url' => 'CANCELURL',
        'payment_action' => 'PAYMENTREQUEST_0_PAYMENTACTION',
        'token' => 'TOKEN',
        'payer_id' => 'PAYERID'
    );

    /**
     * When something goes wrong, the debug_info variable will be set
     * with a string, array, or object explaining the problem
     * @mixed
     */
    public $debug_info;

    /**
     * Saves the full response once a request succeed
     * @mixed
     */
    public $full_response = false;

    /**
     * Creates a new PayPal gateway object
     * @param boolean $sandbox Set to true if you want to enable the Sandbox mode
     */
    public function __construct($sandbox = false)
    {

    }

    /**
     * Executes a setExpressCheckout command
     * @param array $param
     * @return boolean
     */
    public function setExpressCheckout($param)
    {

    }

    /**
     * Executes a getExpressCheckout command
     * @param array $param
     * @return boolean
     */
    public function getExpressCheckout($param)
    {

    }

    /**
     * Executes a doExpressCheckout command
     * @param array $param
     * @return boolean
     */
    public function doExpressCheckout($param)
    {

    }

    /**
     * @param string $type
     * @param array $param
     * @return boolean Specifies if the request is successful and the response property
     *                 is filled
     */
    private function requestExpressCheckout($type, $param)
    {

    }

    /**
     * Replace the Parameters short terms
     * @param array $param The given parameters array
     * @return array $param
     */
    private function replace_short_terms($param)
    {

    }

    /**
     * Builds the request array from the object, param and type parameters
     * @param string $type
     * @param array $param
     * @return array $body
     */
    private function build_request($type, $param)
    {

    }

    /**
     * Returns the PayPal Body response
     * @return array $reponse
     */
    public function getResponse()
    {

    }

    /**
     * Returns the redirect URL
     * @return string $url
     */
    public function getRedirectURL()
    {

    }

    /**
     * Returns the response Token
     * @return string $token
     */
    public function getToken()
    {

    }
}
Step 2 The Constructor
The constructor initiates a new instance of our class. It accepts one parameter which enables the sandbox mode if you pass "true" to it. The method will set the Server and Redirect URL following the sandbox argument. It'll also set the SSL Verify property applying the "https_local_ssl_verify" filter.
public function __construct($sandbox = false)
{
	// Set the Server and Redirect URL
	if ($sandbox) {
		$this->server = $this->sandbox_server;
		$this->redirect_url = $this->sandbox_redirect_url;
	} else {
		$this->server = $this->real_server;
		$this->redirect_url = $this->real_redirect_url;
	}

	// Set the SSL Verification
	$this->ssl_verify = apply_filters('https_local_ssl_verify', false);
}
Step 3 The Request Method
The class implements the 3 request methods as specified by the PayPal API: setExpressCheckout, getExpressCheckout, and doExpressCheckout. The common thing about these 3 functions is that they all do a POST request to the PayPal server.
To keep our code DRY, I have created a single function to make the other 3 helper functions that call our main function and specify the type of the request.
If our request is successful, the function will return "true" and save the request response to the "full_response" property. If our request fails for whatever reason, the function will return "false" and saves information about the error in the "debug_info" property.
private function requestExpressCheckout($type, $param)
{
	// Construct the request array
	$param = $this->replace_short_terms($param);
	$request = $this->build_request($type, $param);

	// Makes the HTTP request
	$response = wp_remote_post($this->server, $request);

	// HTTP Request fails
	if (is_wp_error($response)) {
		$this->debug_info = $response;
		return false;
	}

	// Status code returned other than 200
	if ($response['response']['code'] != 200) {
		$this->debug_info = 'Response code different than 200';
		return false;
	}

	// Saves the full response
	$this->full_response = $response;

	// Request succeeded
	return true;
}
Step 4 Utilities Functions
Our class makes use of two utility functions. The first function replaces the long PayPal parameters with short names. So instead of using "PAYMENTREQUEST_0_AMT" as your input key, you just put "amount"; a less cryptic and easier to remember word.
private function replace_short_terms($param)
{
	foreach ($this->short_term as $short_term => $long_term)
	{
		if (array_key_exists($short_term, $param)) {
			$param[$long_term] = $param[$short_term];
			unset($param[$short_term]);
		}
	}
	return $param;
}
The second function builds the request array. It's just added for separation of concerns; you can move it to the requestExpressCheckout.
private function build_request($type, $param)
{
	// Request Body
	$body = $param;
	$body['METHOD'] = $type;
	$body['VERSION'] = $this->version;
	$body['USER'] = $this->user;
	$body['PWD'] = $this->password;
	$body['SIGNATURE'] = $this->signature;

	// Request Array
	$request = array(
		'method' => 'POST',
		'body' => $body,
		'timeout' => $this->time_out,
		'sslverify' => $this->ssl_verify
	);

	return $request;
}
Step 5 The Response Methods
The request methods return the full, unaltered response. That's where our response methods come in handy. If the request is successful, PayPal will return the response in a URL like encoded string. The helper functions will decode and return only the required part and in a more accessible format.
getResponse – Returns an array of key/value pairs containing the full PayPal response.
public function getResponse()
{
	if ($this->full_response) {
		parse_str(urldecode($this->full_response['body']), $output);
		return $output;
	}
	return false;
}
getRedirectURL – Returns only the redirect URL to the payment page. This is available only after calling the setExpressCheckout function.
public function getRedirectURL()
{
	$output = $this->getResponse();
	if ($output['ACK'] === 'Success') {
		$query_data = array(
			'cmd' => '_express-checkout',
			'token' => $output['TOKEN']
		);
		$url = $this->redirect_url . '?' . http_build_query($query_data);
		return $url;
	}
	return false;
}
getToken – Returns the response token.
public function getToken()
{
	$output = $this->getResponse();
	if ($output['ACK'] === 'Success') {
		return $output['TOKEN'];
	}
	return false;
}
The Full Code
The full code is available also on GitHub. I have chosen not to license the code. Feel free to use it for any kind (free/commercial) projects. No attribution is required, but it'll be appreciated.
class wp_paypal_gateway
{
    /**
     * PayPal API Version
     * @string
     */
    public $version;

    /**
     * PayPal account username
     * @string
     */
    public $user;

    /**
     * PayPal account password
     * @string
     */
    public $password;

    /**
     * PayPal account signature
     * @string
     */
    public $signature;

    /**
     * Period of time (in seconds) after which the connection ends
     * @integer
     */
    public $time_out = 60;

    /**
     * Requires SSL Verification
     * @boolean
     */
    public $ssl_verify;

    /**
     * PayPal API Server
     * @string
     */
    private $server;

    /**
     * PayPal API Redirect URL
     * @string
     */
    private $redirect_url;

    /**
     * Real world PayPal API Server
     * @string
     */
    private $real_server = 'https://api-3t.paypal.com/nvp';

    /**
     * Read world PayPal redirect URL
     * @string
     */
    private $real_redirect_url = 'https://www.paypal.com/cgi-bin/webscr';

    /**
     * Sandbox PayPal Server
     * @string
     */
    private $sandbox_server = 'https://api-3t.sandbox.paypal.com/nvp';

    /**
     * Sandbox PayPal redirect URL
     * @string
     */
    private $sandbox_redirect_url = 'https://www.sandbox.paypal.com/cgi-bin/webscr';

    /**
     * Array representing the supported short-terms
     * @array
     */
    private $short_term = array(
        'amount' => 'PAYMENTREQUEST_0_AMT',
        'currency_code' => 'PAYMENTREQUEST_0_CURRENCYCODE',
        'return_url' => 'RETURNURL',
        'cancel_url' => 'CANCELURL',
        'payment_action' => 'PAYMENTREQUEST_0_PAYMENTACTION',
        'token' => 'TOKEN',
        'payer_id' => 'PAYERID'
    );

    /**
     * When something goes wrong, the debug_info variable will be set
     * with a string, array, or object explaining the problem
     * @mixed
     */
    public $debug_info;

    /**
     * Saves the full response once a request succeed
     * @mixed
     */
    public $full_response = false;

    /**
     * Creates a new PayPal gateway object
     * @param boolean $sandbox Set to true if you want to enable the Sandbox mode
     */
    public function __construct($sandbox = false)
    {
        // Set the Server and Redirect URL
        if ($sandbox) {
            $this->server = $this->sandbox_server;
            $this->redirect_url = $this->sandbox_redirect_url;
        } else {
            $this->server = $this->real_server;
            $this->redirect_url = $this->real_redirect_url;
        }

        // Set the SSL Verification
        $this->ssl_verify = apply_filters('https_local_ssl_verify', false);
    }

    /**
     * Executes a setExpressCheckout command
     * @param array $param
     * @return boolean
     */
    public function setExpressCheckout($param)
    {
        return $this->requestExpressCheckout('SetExpressCheckout', $param);
    }

    /**
     * Executes a getExpressCheckout command
     * @param array $param
     * @return boolean
     */
    public function getExpressCheckout($param)
    {
        return $this->requestExpressCheckout('GetExpressCheckoutDetails', $param);
    }

    /**
     * Executes a doExpressCheckout command
     * @param array $param
     * @return boolean
     */
    public function doExpressCheckout($param)
    {
        return $this->requestExpressCheckout('DoExpressCheckoutPayment', $param);
    }

    /**
     * @param string $type
     * @param array $param
     * @return boolean Specifies if the request is successful and the response property
     *                 is filled
     */
    private function requestExpressCheckout($type, $param)
    {
        // Construct the request array
        $param = $this->replace_short_terms($param);
        $request = $this->build_request($type, $param);

        // Makes the HTTP request
        $response = wp_remote_post($this->server, $request);

        // HTTP Request fails
        if (is_wp_error($response)) {
            $this->debug_info = $response;
            return false;
        }

        // Status code returned other than 200
        if ($response['response']['code'] != 200) {
            $this->debug_info = 'Response code different than 200';
            return false;
        }

        // Saves the full response
        $this->full_response = $response;

        // Request succeeded
        return true;
    }

    /**
     * Replace the Parameters short terms
     * @param array $param The given parameters array
     * @return array $param
     */
    private function replace_short_terms($param)
    {
        foreach ($this->short_term as $short_term => $long_term)
        {
            if (array_key_exists($short_term, $param)) {
                $param[$long_term] = $param[$short_term];
                unset($param[$short_term]);
            }
        }
        return $param;
    }

    /**
     * Builds the request array from the object, param and type parameters
     * @param string $type
     * @param array $param
     * @return array $body
     */
    private function build_request($type, $param)
    {
        // Request Body
        $body = $param;
        $body['METHOD'] = $type;
        $body['VERSION'] = $this->version;
        $body['USER'] = $this->user;
        $body['PWD'] = $this->password;
        $body['SIGNATURE'] = $this->signature;

        // Request Array
        $request = array(
            'method' => 'POST',
            'body' => $body,
            'timeout' => $this->time_out,
            'sslverify' => $this->ssl_verify
        );

        return $request;
    }

    /**
     * Returns the PayPal Body response
     * @return array $reponse
     */
    public function getResponse()
    {
        if ($this->full_response) {
            parse_str(urldecode($this->full_response['body']), $output);
            return $output;
        }
        return false;
    }

    /**
     * Returns the redirect URL
     * @return string $url
     */
    public function getRedirectURL()
    {
        $output = $this->getResponse();
        if ($output['ACK'] === 'Success') {
            $query_data = array(
                'cmd' => '_express-checkout',
                'token' => $output['TOKEN']
            );
            $url = $this->redirect_url . '?' . http_build_query($query_data);
            return $url;
        }
        return false;
    }

    /**
     * Returns the response Token
     * @return string $token
     */
    public function getToken()
    {
        $output = $this->getResponse();
        if ($output['ACK'] === 'Success') {
            return $output['TOKEN'];
        }
        return false;
    }
}
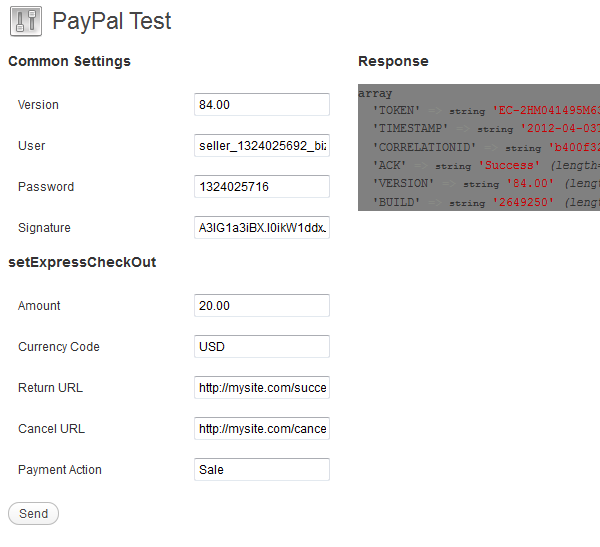
The PayPal Test Plugin
To make the debugging and testing of the PHP class easier, I have created a WordPress plugin which offers a simple interface. You enter the required parameters for each type of the request, and you click the send button. The request will be processed with AJAX, no page reload is required. The request results will be displayed on the right of the forms.
The Plugin Code
The test plugin is made up of two components: The front-end which is a set of input boxes and the second is the back-end which handles the AJAX requests submitted by the plugin front-end.
Each request has common settings which are the same on every request, and specific settings which depends on its type. The front-end references the input boxes value, and groups them on objects. It also adds a click handler for every button which does a simple jQuery post request to the "ajaxurl" with the specified input.
The test plugin doesn't do any checking on the input. So make sure you are typing the correct parameters.
(function ($) {
    $(document).ready(function () {
        /**
         * Reference input boxes
         */
        var common_data = {
            version:$('#paypal_setec_version').val(),
            user:$('#paypal_setec_user').val(),
            password:$('#paypal_setec_password').val(),
            signature:$('#paypal_setec_signature').val()
        },
        setec_data = {
            amount:$('#paypal_setec_amount').val(),
            currency:$('#paypal_setec_currency').val(),
            returnurl:$('#paypal_setec_returnurl').val(),
            cancelurl:$('#paypal_setec_cancelurl').val(),
            paymentaction:$('#paypal_setec_paymentaction').val()
        },
        getec_data = {
            token:$('#paypal_getec_token').val()
        },
        doec_data = {
            token:$('#paypal_doec_token').val(),
            payerid:$('#paypal_doec_payerid').val(),
            amount:$('#paypal_doec_amount').val(),
            currency:$('#paypal_doec_currency').val(),
            paymentaction:$('#paypal_doec_paymentaction').val()
        },
        display_info = $('#display_debug_info');

        /**
         * setExpresscheckout form
         */
        $('#paypal_setec_send').on('click', function (e) {
            e.preventDefault();
            var data = {
                action:'pp_setec',
                common:common_data,
                setec:setec_data
            };
            $.post(ajaxurl, data, function (response) {
                display_info.html(response);
            });
        });

        /**
         * getExpresscheckout form
         */
        $('#paypal_getec_send').on('click', function (e) {
            e.preventDefault();
            var data = {
                action:'pp_getec',
                common:common_data,
                setec:getec_data
            };
            $.post(ajaxurl, data, function (response) {
                display_info.html(response);
            });
        });

        /**
         * doExpresscheckout form
         */
        $('#paypal_doec_send').on('click', function (e) {
            e.preventDefault();
            var data = {
                action:'pp_doec',
                common:common_data,
                setec:doec_data
            };
            $.post(ajaxurl, data, function (response) {
                display_info.html(response);
            });
        });
    });
})(jQuery);
On the back-end, the AJAX requests are handled using the "wp_ajax_" action. The function associated with the action will evaluate the global "$_POST" variable and create a new instance of the PayPal class.
If the ExpressCheckout request is successful, the full response is returned; otherwise, the debugging information will be returned.
add_action('wp_ajax_pp_setec', 'pp_ajax_setec');
/**
 * AJAX handler for the setExpressCheckout request
 */
function pp_ajax_setec()
{
    global $_POST;
    require_once ('paypal.php');
    $paypal = new wp_paypal_gateway (true);
    $paypal->version = $_POST['common']['version'];
    $paypal->user = $_POST['common']['user'];
    $paypal->password = $_POST['common']['password'];
    $paypal->signature = $_POST['common']['signature'];
    $param = array(
        'amount' => $_POST['setec']['amount'],
        'currency_code' => $_POST['setec']['currency'],
        'return_url' => $_POST['setec']['returnurl'],
        'cancel_url' => $_POST['setec']['cancelurl'],
        'payment_action' => $_POST['setec']['paymentaction']
    );
    if ($paypal->setExpressCheckout($param)) {
        var_dump($paypal->getResponse());
    } else {
        var_dump($paypal->debug_info);
    }
    die();
}

add_action('wp_ajax_pp_getec', 'pp_ajax_getec');
/**
 * AJAX handler for the getExpressCheckout request
 */
function pp_ajax_getec()
{
    global $_POST;
    require_once ('paypal.php');
    $paypal = new wp_paypal_gateway (true);
    $paypal->version = $_POST['common']['version'];
    $paypal->user = $_POST['common']['user'];
    $paypal->password = $_POST['common']['password'];
    $paypal->signature = $_POST['common']['signature'];
    $param = array(
        'amount' => $_POST['getec']['token']
    );
    if ($paypal->getExpressCheckout($param)) {
        print_r($paypal->getResponse());
    } else {
        print_r($paypal->debug_info);
    }
    die();
}

add_action('wp_ajax_pp_doec', 'pp_ajax_doec');
/**
 * AJAX handler for the doExpressCheckout request
 */
function pp_ajax_doec()
{
    global $_POST;
    require_once ('paypal.php');
    $paypal = new wp_paypal_gateway (true);
    $paypal->version = $_POST['common']['version'];
    $paypal->user = $_POST['common']['user'];
    $paypal->password = $_POST['common']['password'];
    $paypal->signature = $_POST['common']['signature'];
    $param = array(
        'amount' => $_POST['doec']['amount'],
        'currency_code' => $_POST['doec']['currency'],
        'payment_action' => $_POST['doec']['paymentaction'],
        'payer_id' => $_POST['doec']['payerid'],
        'token' => $_POST['doec']['token']
    );
    if ($paypal->doExpressCheckout($param)) {
        print_r($paypal->getResponse());
    } else {
        print_r($paypal->debug_info);
    }
    die();
}
Conclusion
In this tutorial, we learned some basics about the PayPal Express Checkout API; and also explored how to build a payment gateway class using the WordPress HTTP API. Now you can use this class to easily implement PayPal payments in your plugin.
In the next and final article in the series, we'll learn how to build a self-hosted plugin repository to enable automatic updates for plugins which are not hosted in the WordPress Plugins repository.

Comments