OOP is the standard for great code, it is flexible, scalable and extendable. WordPress developers need a framework on which to base their code, something that can be easily ported to other projects to save inventing the wheel twice a week. It's all about working smarter, not harder!
There is nothing worse than activating a plugin to find that it kills your website because two plugin authors have a global function called initialise() !
All code needs an aim, you should never start writing something ( Book, Plugin, Theme or Tutorial! ) without a clear, defined goal of where you want to go with it.
For this tutorial, we are going to use a basic OOP class to do the following in a plugin.
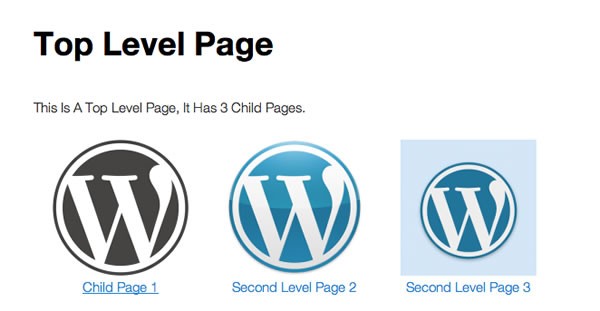
- Get links to the child pages of the current page
- Save The HTML string in PHP memory to save regenerating the HTML more than once if we need to display the links twice
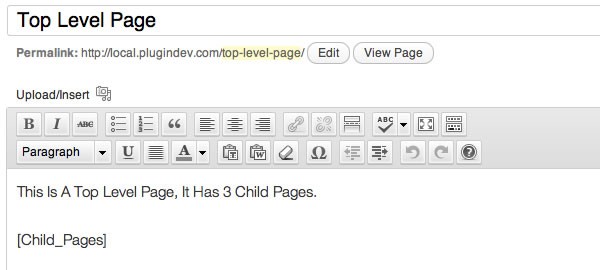
- Define this in a shortcode to save messing around with theme source code
Step 1 Start Creating The Class
Let's start by creating an empty class with nothing but a constructor function and instantiating it into a global variable ( this is really cool, I'll explain later! )
<?php
class OOP_Class{

    /**
     * Class Constructor
     */
    function __construct() {

    }

}

//Engage.
$OOP_Class = new OOP_Class();
?>
Step 2 Start Delegating Functionality
Then we start delegating functionality from the constructor, define some plugin paths, and create separate functions to add actions to hook into WordPress, all called automatically from the class constructor.
<?php
class OOP_Class{

    /**
     * Class Constructor
     */
    function __construct() {

        $this->plugin_defines();
        $this->setup_actions();

    }

    /**
     * Defines to be used anywhere in WordPress after the plugin has been initiated.
     */
    function plugin_defines(){

        define( 'MY_PLUGIN_PATH', trailingslashit( WP_PLUGIN_DIR.'/'.str_replace(basename( __FILE__ ),"",plugin_basename( __FILE__ ) ) ) );
        define( 'MY_PLUGIN_URL' , trailingslashit( WP_PLUGIN_URL.'/'.str_replace(basename( __FILE__ ),"",plugin_basename( __FILE__ ) ) ) );

    }

    /**
     * Setup the actions to hook the plugin into WordPress at the appropriate places
     */
    function setup_actions(){


    }

}

//Engage.
$OOP_Class = new OOP_Class();
?>
Step 3 Build Out Some Actions
This is looking good so far, it's all setup, but it's really not doing much just yet. Let's keep going on the required functionality.

Setup the plugin enqueues from template_redirect
    //Do something on template_redirect, perhaps enqueue some scripts while not in admin?
    if( ! is_admin() ) {
        $this->plugin_enqueues();
	}
And the plugin_enqueues function:
	/**
 	 * Used to enqueue styles and scripts necessary for the plugin.
 	 */
	function plugin_enqueues() {

		//Enqueue jQuery
		wp_enqueue_script( 'jquery' );

		//Our Init Script
		wp_enqueue_script( 'plugin_init', MY_PLUGIN_URL . 'js/init.js', array( 'jquery' ) );

		//Some basic Styles:
		wp_enqueue_style( 'plugin_style', MY_PLUGIN_URL . 'css/pluginstyles.css' );

	}
Setup a class variable before the constructor ( just to keep it all neat ).
    //The links to the child pages. False by default.
    var $child_page_links = false;
Define the function to retrieve the child page links and set the HTML into the object.
	/**
	 * Sets the child page links variable of this class.
	 */
	function set_child_page_links(){
		global $post;

		//Get The Child Pages Of The Current Page
		$children = get_pages( array( 'child_of' => $post->ID ) );

		if( ! empty( $children ) ):

			$out = '<div class="child_page_wrapper">';
			//Loop through the child pages, generating some HTML with the image, the link and the title of the child page.
			foreach( $children as $child ) {

				$img = get_the_post_thumbnail( $child->ID, 'thumbnail' );
				$title = $child->post_title;
				$url = get_permalink( $child->ID );

				$out .= '<div class="child_page">';
				$out .= '<a href="' . esc_attr( $url ) . '">' . $img . '<span>' . esc_html( $title ) . '</span></a>';
				$out .= '</div>';

			}

			$out .= '</div>';

		else:
			//We have no children, we need to be able to handle that.
			$out = false;

		endif;

		$this->child_page_links = $out;

	}
And run it from the template_redirect function
	//Only on a page.
	if( is_page() ) {
		$this->set_child_page_links();
	}
Step 4 Setup The Shortcode And Template Tag!

This is where this starts getting cool, as our shortcode is not going to have any options, we can use what is called a "getter", which simply returns the class variable.
	/**
	 * Getter for the child page links
	 */
	function return_child_pages() {
		return $this->child_page_links ;
	}
This function can be hooked into the shortcode API like so:
add_shortcode( 'Child_Pages' , array( $this, 'return_child_pages' ) );
Also, because we have instantiated this all on template_redirect, there is no need to regenerate the links, we can just spit them out anywhere, like this:
	<?php
		global $OOP_Class;

		if( $OOP_Class->child_page_links ) {
			echo $OOP_Class->child_page_links;
		}
	?>
Step 5 Pretty It Up

And the JavaScript snippet. ( This goes in js/init.js in our plugin folder). This highlights the link on hover and asks the user's permission to continue to the child page.
	jQuery( document ).ready( function($) {
		$( '.child_page a' ).click( function() {
			if ( confirm("Are you sure you want to go to the child page?") ) {
				return true;
			} else {
				return false;
			}
		}).hover( function() {
			$( this ).css( 'background-color' , '#EFEFEF' );
		}, function() {
			$( this ).removeAttr( 'style' );
		});
	});
Last but not least, some basic CSS styles for our plugin ( /css/pluginstyles.css ).
.child_page_wrapper .child_page {
    float:left;
    width:33%
}

.child_page_wrapper .child_page a {
    display:block;
}

.child_page_wrapper .child_page span {
    display:block;
    text-align: center;
}

.child_page_wrapper .child_page img {
    display:block;
    margin:0 auto;
}
Wrap Up
This class can be used in almost any situation, and is well suited ( but certainly not limited to ) for use within the WordPress system. It can be used once for a theme, and then another class setup for some integrated functionality ( meaning we can almost copy / paste the individual functionality from project to project with ease ) and then again for a quick custom plugin for that cool functionality your client needs that is way overdone in the available plugins.
If written to be independent "sections" of the site, then the classes could easily be lifted to your next project, making advanced functionality quick and easy for you!
Although we haven't really even touched on the potential of classes and objects, this is a great start to understanding the flexibility and extendability of OOP.
Also beware that storing objects in PHP like that does take up PHP memory so use thoughfully!!


Comments