The daily life of a developer is filled with monotonous and repetitive tasks. Fortunately, we live in a pre-artificial intelligence age, which means computers are great at handling boring chores and they hardly ever complain about it! So let's set up some automation to make our daily grind a little less grindy.
Testing and deployment are two integral elements of web development. With some automation mixed in, they become solutions commonly called "continuous integration" (CI) and "continuous deployment" (CD). The "continuous" aspect of these solutions means that your projects will be automatically tested and deployed, allowing you to focus more on writing code and less on herding it onto servers.
In this tutorial, we'll set up a popular continuous integration server called Jenkins and sync it with GitHub so it will run tests every time new code is pushed. After that, we'll create a solution to automatically push that code to our app server, eliminating the need for us to deploy manually.
We'll be using DigitalOcean to quickly and easily create cloud-based virtual private servers (VPSs) to host our app and Jenkins.
Note: This tutorial assumes you have a baseline knowledge of working on the command line, and that your machine has both Git and Node.js installed.
Our Super Sample App
Before we can test or deploy anything, we need something to test and deploy. Allow me to introduce you to our friendly tutorial test app, aptly called "hello-jenkins."
We'll be writing a simple Node.js app to suit our purposes. It won't do much more than display a line of text in the browser, but that's just enough functionality to ensure that we've properly set up continuous integration and continuous deployment.
Git Up on GitHub
Since we'll be storing our project on GitHub, let's begin there. Login to (or create) your GitHub account and create a new repository. Name it "hello-jenkins" and give it the following description:
My super sample app to test out Jenkins.
For simplicity, let's keep the repo Public. Go ahead and check the Initialize this repository with a README option, and select the Node option from the Add .gitignore drop-down list.
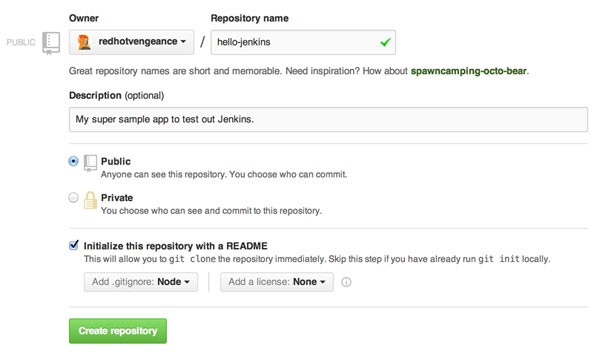
Click the Create repository button, and our repo will be ready.
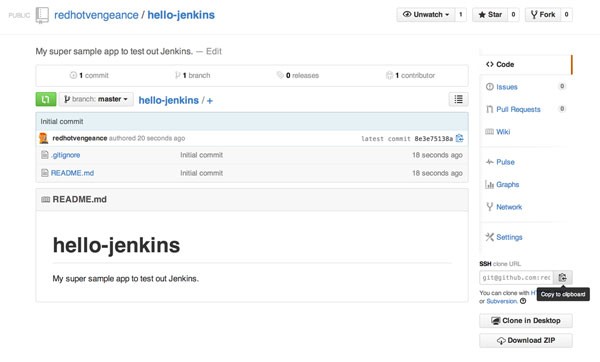
Now let's clone our new repository down to our local machine and navigate into it:
git clone [email protected]:<you>/hello-jenkins.git
cd hello-jenkins
Our Node App
Here's what the final structure of our app will be:
├── .gitignore
├── app.js
├── package.json
├── README.md
├── script
│   ├── deploy
│   └── test
└── test
    └── test.js
Let's tackle this one-by-one. The first step to building any Node.js app is to create a package.json file. Here's ours:
{
  "name": "hello-jenkins",
  "description": "hello jenkins test app",
  "version": "0.0.1",
  "private": true,
  "dependencies": {
    "express": "3.12.0"
  },
  "devDependencies": {
    "mocha": "1.20.1",
    "supertest": "0.13.0"
  }
}
Under dependencies we've added express, which we'll be using to help create our Node.js app. Under devDependencies we've added mocha and supertest, both of which will help us write our tests.
Now that our package.json is defined, install our app dependencies by running:
npm install
It's time to write our app code. Create a file named app.js and add the following to it:
var express = require('express');

var app = express();

app.get('/', function (req, res) {
  res.send('hello world');
});

app.listen(process.env.PORT || 5000);

module.exports = app;
Let's breakdown our simple Node.js app:
- First, we import the
expresslib we specified in ourpackage.json. - We use
expressto create a newapp. - We tell our
appto respond to all requests hitting to root of our site (/) with the text "hello world." - Next, we tell our
appon what port to listen for requests (process.env.PORTrefers to the environment variable called "PORT", and if it doesn't exist, we instead default to port 5000). - Finally, we make our
appavailable to other Node.js modules throughmodule.exports(this will come in handy later when we add tests).
That's it! Our app is ready - let's run it:
node app.js
Open your favorite browser and navigate to http://localhost:5000, and you should see hello world sitting in all of its glorious plainness.
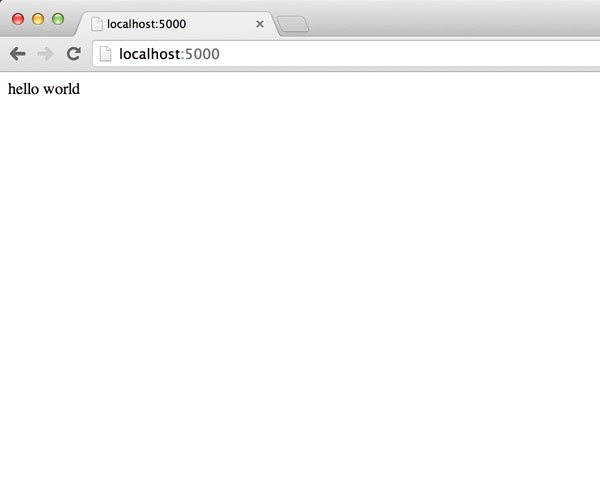
It's not the most exciting test app, but it works! Go ahead and shutdown our Node.js app with Ctrl-C, and let's move on.
Some Testing Is in Order
It's time to write a test for our app - after all, if we have nothing to test, then Jenkins won't have anything to do!
Create a folder called test, and in it create a file named test.js. Add the following code to test/test.js:
var request = require('supertest');
var app = require('../app.js');

describe('GET /', function() {
  it('respond with hello world', function(done) {
    request(app).get('/').expect('hello world', done);
  });
});
How does our test work? First, we import both the supertest lib and our app. Then we add a single test, describing what should happen when a GET request hits the root of our site. We tell our test to expect the response to be "hello world," and if it is, the test passes.
To run the test, we'll use the Mocha library. We installed Mocha as a part of our devDependencies, so we'll simply run a command that passes our test file to Mocha and Mocha will run our tests:
./node_modules/.bin/mocha ./test/test.js
When finished, you should see a green dot along with information saying that one test has passed. That means our test was successful! But typing that command over and over will soon produce finger cramps and eye twitches, so let's make a helper script to do it for us (remember, computers don't get bored!).
Make a new directory called script, and in it create a file named test (notice there is no extension). Add the following to script/test:
#!/bin/sh

./node_modules/.bin/mocha ./test/test.js
There - now we have a shell script to execute that gnarly line for us. But before we can use it, we have to grant it executable permissions:
chmod +x script/test
Let's test it! Run:
./script/test
...and you should see the same passing test as before.
Time to Push
Alright, we have a working app and a working test, so let's push our new code to GitHub:
git add .
git commit -m 'Add node app'
git push origin master
And that's it - our app is done and on GitHub!
Our App Gets Served
We have an enthralling and captivating app ("hello world" has a sort of poetry to it, don't you agree?), but nobody can see it! Let's change that and get our app running on a server.
For our hosting needs, we'll turn to DigitalOcean. DigitalOcean provides a fast and simple way to spin up VPS cloud instances, making it the perfect host for our CI/CD playground.
The First Drop
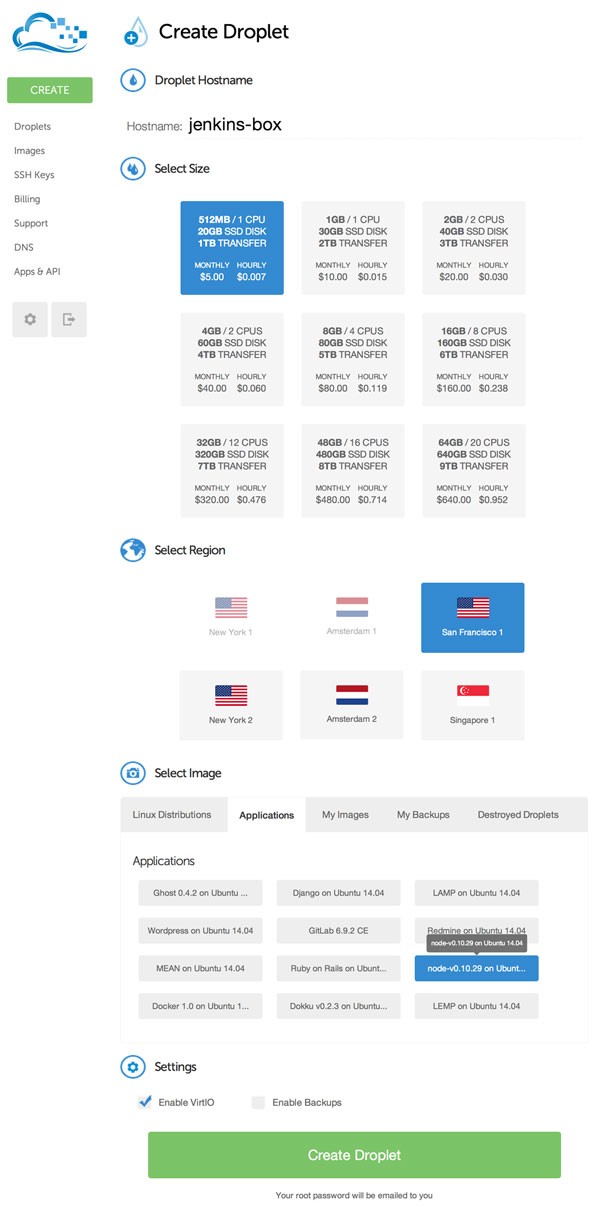
Login to (or sign up for) DigitalOcean and click the Create Droplet button. For the hostname, call it "hello-jenkins". The lowest size instance (512MB/1/20GB) will suite our needs, and select the geographical region closest to you. Next, we need to choose the image used to create the droplet. DigitalOcean provides a wide-selection of operating systems to choose from, but what's really nice is that they also provide images tailored specifically for certain application types.
Click the Applications tab, and select the node-v0.10.29 on Ubuntu 14.04 option - this will create a server that's nicely bootstrapped for our Node.js app.
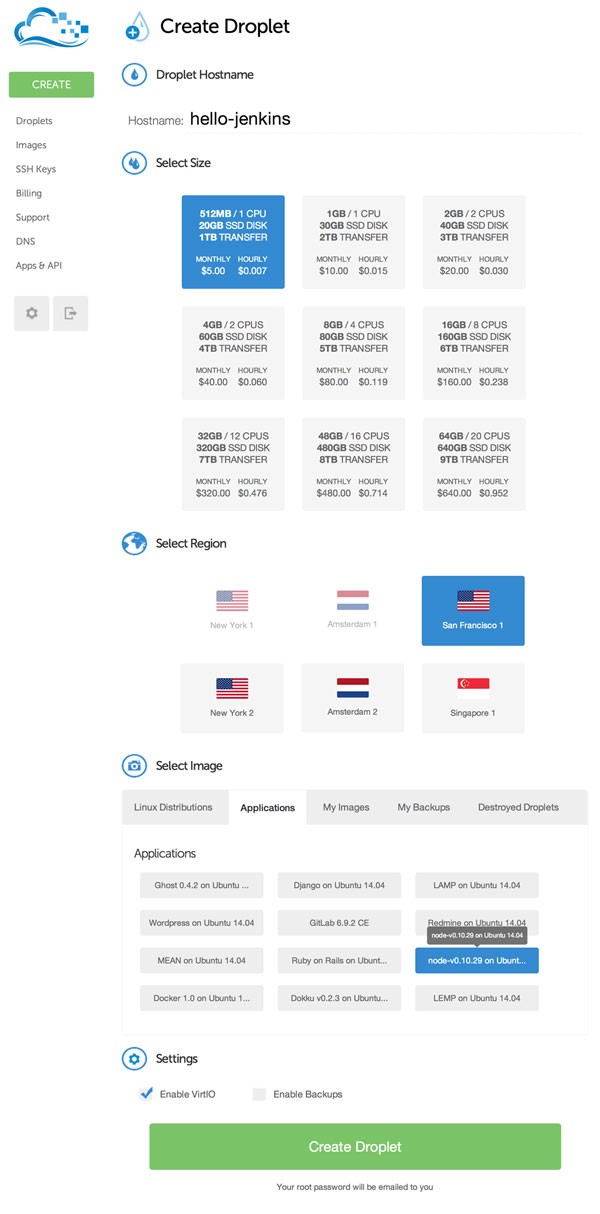
Now click Create Droplet, and DigitalOcean will get started initializing our server.
Configure the Server
Within a minute our new server should be ready, and you should have received an email with your server's root credentials. Let's use that info to login:
ssh [email protected]
You'll be prompted for the password provided in the email, and then immediately forced to create a new password (make it something very strong, and store it in a secure location, like a KeePass database).
Right now we are logged in as root, which is the all-powerful demigod of Linux-land. But heavy is the head that wears the crown, and operating as root is generally a bad idea. So the first thing we'll want to do is create a new user - let's call it "app":
adduser app
You'll need to provide a password (a different strong password, stored securely), and then it'll ask a series of optional questions.
We want to switch to our app user, but before we logout, we need to grant our new user sudo privileges so it'll have the ability to perform administrative actions:
usermod -a -G sudo app
Now close the connection with exit, and then connect as app:
ssh [email protected]
You'll be prompted for the app user's password, and then you should be logged in and good to go.
Install Our App
Let's get our app onto the machine. Thanks to DigitalOcean's application images, our machine comes with Node.js and npm preinstalled, but we still need to install Git:
sudo apt-get install git
You'll be prompted for your password (since you're using sudo), and you'll have to confirm the install with Y. Once Git is installed, we can use it to get our app from GitHub.
Copy the HTTPS clone URL from the project's GitHub page, and then clone the repo to your home folder on the server:
cd
git clone https://github.com/<you>/hello-jenkins.git
Now our app is on our server, in a folder called "hello-jenkins." Let's navigate into that:
cd hello-jenkins
The first thing we need to do is install the app dependencies:
npm install --production
Once that's done, we can run our app! Spin it up with:
node app.js
...and navigate to your server's IP address in your browser.
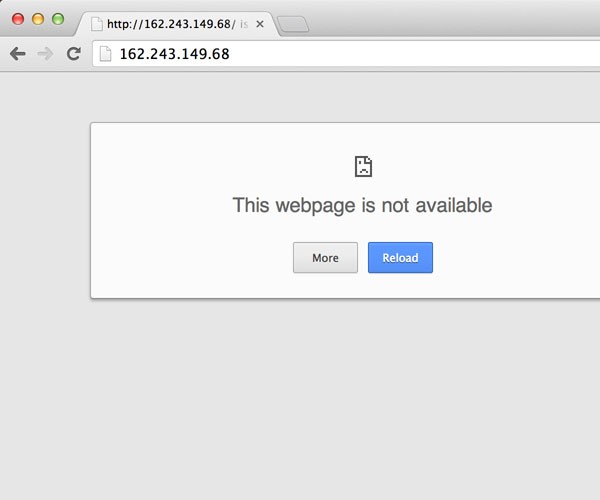
But wait, it doesn't work! What's the deal?
Well, let's recall this line of code in our app.js:
app.listen(process.env.PORT || 5000);
Right now, we don't have a PORT environment variable set, so our app is defaulting to port 5000 and you need to append the port to the IP address in the browser (http://YOUR.SERVER.IP.ADDRESS:5000).
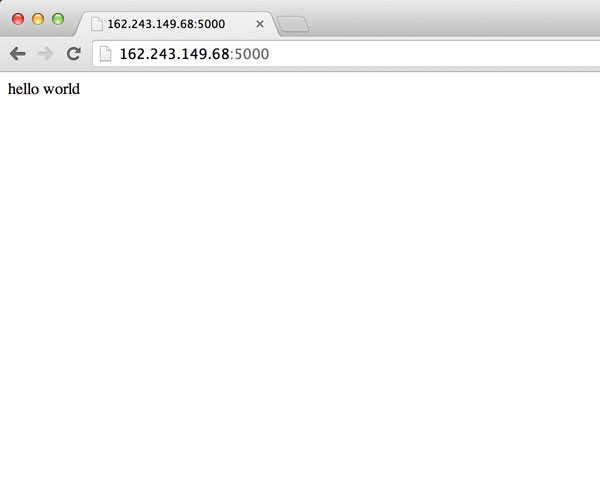
So how do we get our app to serve as expected, sans having to specify the port? Well, when a browser makes an HTTP request, it defaults to port 80. So we just need to set our PORT environment variable to 80.
We'll set our environment variables in the /etc/environment file on the server - this file gets loaded on login, and the variables set will be available globally to all applications. Open up the file:
sudo nano /etc/environment
You'll see that right now the PATH is being set in this file. Add the following line after it:
PORT=80
Then type Ctrl-X, Y, and Enter to save and exit. Logout of the server (exit) and SSH back in (this will load the new environment variable).
One last little chore - running an app on port 80 requires root privileges, but executing sudo node app.js will not preserve the environment variables we have set up. To get around this, we'll enable node to have the ability to run on port 80 sans sudo:
sudo setcap cap_net_bind_service=+ep /usr/local/bin/node
That should do it. Now run:
node app.js
Navigate to http://YOUR.SERVER.IP.ADDRESS, and you'll see hello world!

Keep It Running
Right now our app only runs while we're executing the process - if we close it, our site is no longer available. What we need is a way to keep our Node.js app running in the background. For that, we'll use forever. The first step is to install it globally:
sudo npm install -g forever
Now, instead of starting our app with node app.js, we'll use:
forever start app.js
Notice that instead of the process hanging on execution, it exits immediately and gives you back control. This is because the Node.js server is running in the background. Now we don't have to worry about our server shutting down when we logout of the server. forever will even automatically restart our app if it happens to crash!
To stop our app, we can run:
forever stopall
For now, let's keep it running, and move on to Jenkins.
A Time to Test
We'll be hosting our Jenkins server on a separate DigitalOcean droplet. Let's spin that up now.
The Second Drop
Create a new droplet with the hostname "jenkins-box". Choose 512MB/1/20GB again, along with the same location and the same application type (node-v0.10.29 on Ubuntu 14.04) as with the previous droplet.
Click Create Droplet and once it is finished, use the credentials emailed to you to login via SSH (you'll have to set a new password, just as before).
As before, we should create a new user before we do anything else. This time let's call it admin:
adduser admin
usermod -a -G sudo admin
Log off as root and login as the newly created admin.
Since the purpose of Jenkins is retrieve our project and run its tests, our machine needs to have all of the project's dependencies installed. We spun up this instance with DigitalOcean's Node.js application, so Node.js and npm are already installed. But we still need to install Git:
sudo apt-get install git
Hire the Butler
Next up is Jenkins. Installing Jenkins is fairly simple - we'll have apt-get do all of the heavy lifting. The only catch is that we need to add a new apt repository before starting the install:
sudo wget -q -O - http://pkg.jenkins-ci.org/debian/jenkins-ci.org.key | sudo apt-key add -
sudo sh -c 'echo deb http://pkg.jenkins-ci.org/debian binary/ > /etc/apt/sources.list.d/jenkins.list'
sudo apt-get update
Now we can install Jenkins:
sudo apt-get install jenkins
Once complete, Jenkins will be running and available on port 8080. Navigate your browser to the jenkins-box IP address at port 8080 and you'll see the Jenkins landing page.
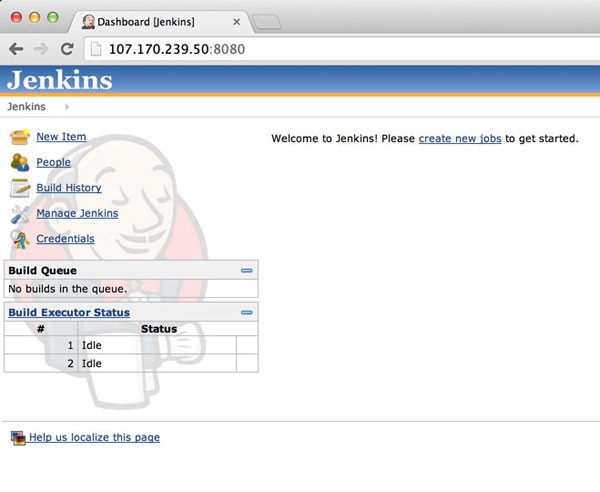
Click the Manage Jenkins link, and then the Manage Plugins link. Switch to the Available tab, and search for the GitHub Plugin. Click the Install checkbox, and then the Download now and install after restart button.
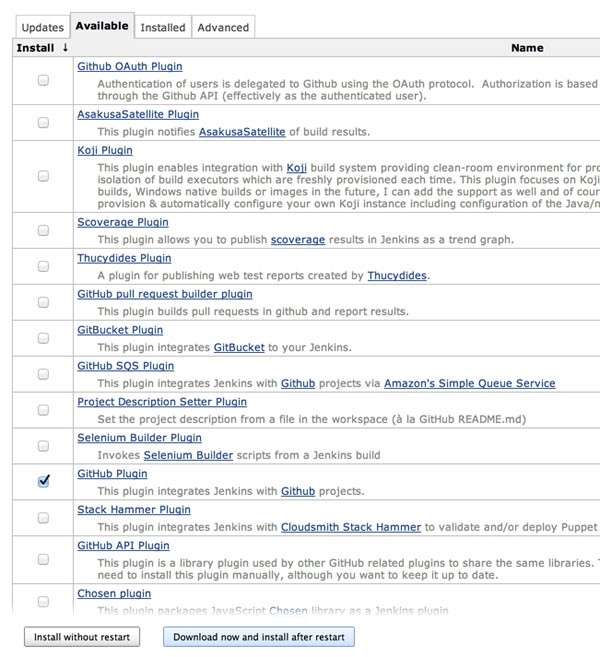
This will initiate the install sequence. The GitHub plugin has several dependencies, so multiple plugins will be installed. At the bottom of the page, check the Restart Jenkins when installation is complete and no jobs are running - this will prompt Jenkins to restart once the installations are complete.
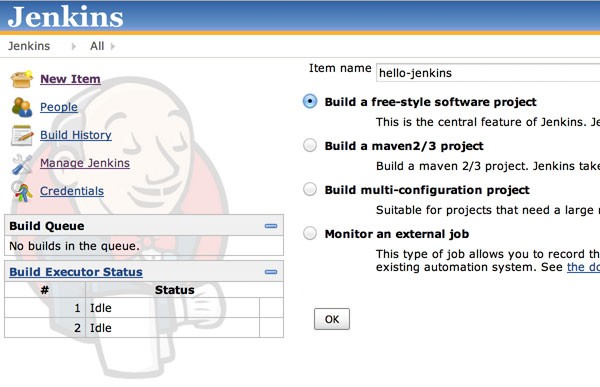
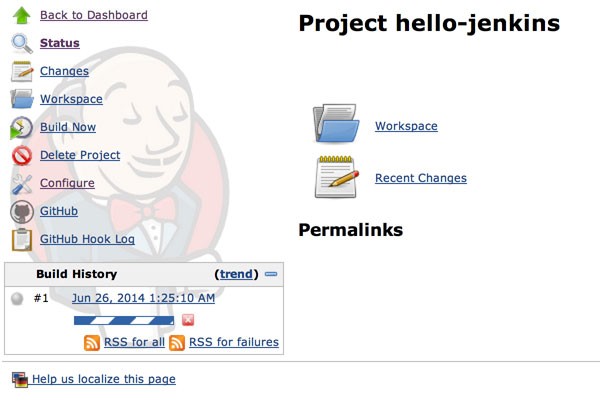
Once Jenkins has restarted, it's time to add our project. Click the New Item button. Use "hello-jenkins" for the item name, select Build a free-style software project, and click the button labeled OK.
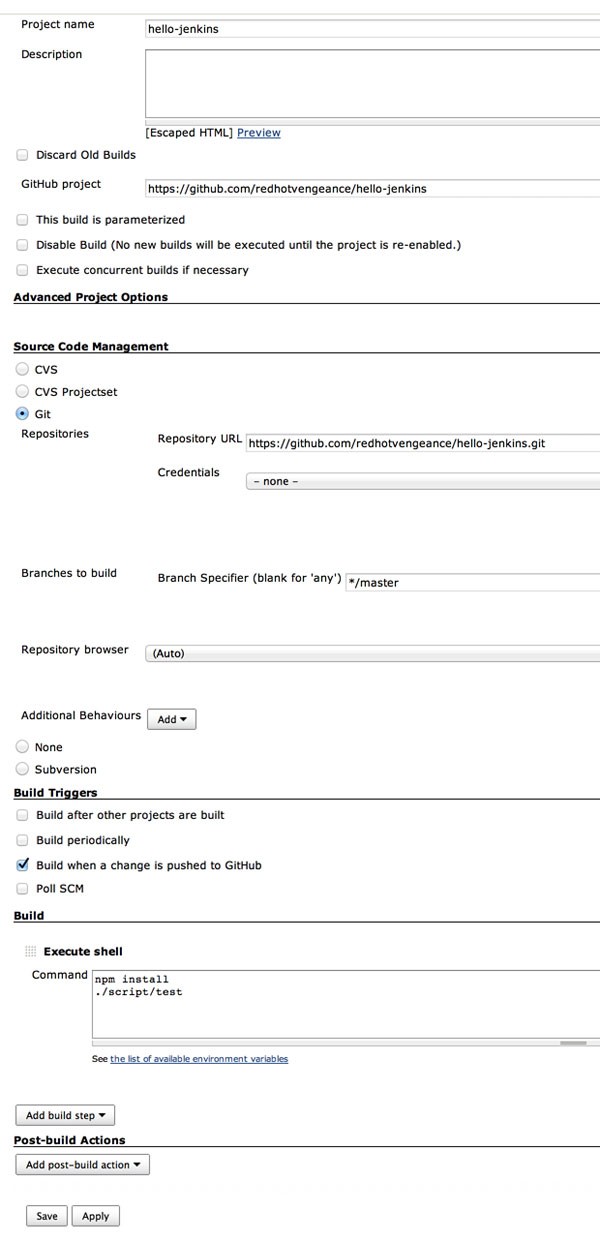
Once the project is setup, you'll find yourself on the project's settings page. Add our project's GitHub URL to the GitHub project box:
https://github.com/<you>/hello-jenkins
Next, select the Git option under Source Code Management. In the newly appeared fields, add the URL to our GitHub project repo to the Repository URL field:
https://github.com/<you>/hello-jenkins.git
Scroll a little further down and click the box to enable Build when a change is pushed to GitHub. With this option checked, our project will build every time we push to our GitHub repo. Of course, we need Jenkins to know what to do when it runs a build. Click the Add build step drop-down, and select Execute shell. This will make a Command dialogue available, and what we put in this dialogue will be run when a build initiates. Add the following to it:
npm install
./script/test
Our build consists of two steps. First, it installs our app dependencies. Then it executes ./script/test to run our tests.
Click "Save".
To finish setting up the integration, head over to the GitHub repo, and click Settings. Click the Webhooks & Services tab, and then the Add service drop-down. Select the Jenkins (GitHub plugin) service.
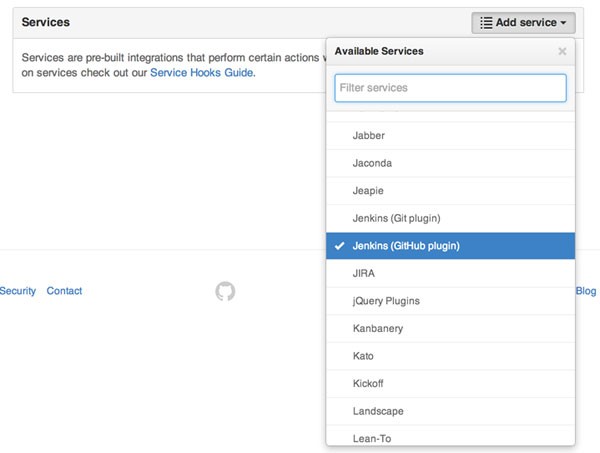
Add the following as the Jenkins hook url:
http://JENKINS.SERVER.IP.ADDRESS:8080/github-webhook/
Click Add service. Our project is now ready for its first continuous integration test!
Let's give it something to test. Open up app.js locally and change this line:
res.send('hello world');
...to this:
res.send('hello jenkins');
Save the change and commit it:
git add .
git commit -m 'Switch to hello jenkins'
Now keep your eye on Jenkins while you push your changes to GitHub:
git push origin master
After a second or two, you should see that a new job has been initiated for our hello-jenkins project in Jenkins - our continuous integration works!
The Continuous Integration Flow
But...the job fails! Why?
Well, remember that our test is expecting the root call to return "hello world", but we've changed it to "hello jenkins". So let's change the expectations of our test. Swap this line:
request(app).get('/').expect('hello world', done);
...with this line:
request(app).get('/').expect('hello jenkins', done);
Save, commit, and push again:
git add .
git commit -m 'Switch test to hello jenkins'
git push origin master
Watch Jenkins - once again, you'll see a build is automatically started, and this time, it succeeds!
This is the flow of continuous integration. The test server is continually testing any new code you push so you are quickly informed of any failing tests.
Get It Deployed
Alright, so we're automatically testing our changes, but what about deploying those changes? No problem!
If you've been watching closely, you've no doubt noticed that something is missing from our project so far. In the project structure at the beginning of the tutorial, there exists a script/deploy file, but we have yet to make any such file. Well, now we will!
The Key to Authentication
But first, let's discuss how the deployment will work. Our script (run by Jenkin's build step) will login to the app server via SSH, navigate to our app folder, update the app, and then restart the server. Before writing our deploy script, we need to handle how our Jenkins server will SSH into our app server.
So far, we've accessed our servers by manually entering passwords, but this approach won't work for automated scripts. Instead, we'll create an SSH key that the Jenkins server will use to authenticate itself with the app server.
When Jenkins installs, it creates a new user called jenkins. Jenkins executes all commands with this user, so we need to generate our key with the jenkins user so that it has the appropriate access to it.
While logged in as admin on the jenkins-box, execute the following:
sudo su
Provide your admin password, and it'll switch you to the root user. Then execute:
su jenkins
Now you are acting as the jenkins user. Generate an SSH key:
ssh-keygen -t rsa
Save the file in the default location (/var/lib/jenkins/.ssh/id_rsa), and make sure to not use a passphrase (otherwise SSH access will require a password and won't work when automated).
Next, we need to copy the public key that was created. Run this:
cat ~/.ssh/id_rsa.pub
...and copy the output. It should be a long string starting with "ssh-rsa" and ending with "jenkins@jenkins-box".
Log out of jenkins-box and log back into our app server (hello-jenkins) as the app user. We need to create a file named authorized_keys in our app user's.ssh folder:
mkdir ~/.ssh
nano ~/.ssh/authorized_keys
Paste the public key you copied, and then Ctrl-X/Y/Enter to save and exit. In order for this file to properly work, it needs to have strict permissions set on it:
chmod 700 ~/.ssh
chmod 600 ~/.ssh/*
Head back to the jenkins box, switch to the jenkins user, and verify that you can login to our app server without entering a password:
ssh [email protected]
You should successfully login to the app server without having to enter the password. With that established, we can now turn to deployment.
Ship It Automatically
Create a file in the script folder named deploy (notice there is no extension). Add the following to script/deploy:
#!/bin/sh

ssh [email protected] <<EOF
  cd ~/hello-jenkins
  git pull
  npm install --production
  forever restartall
  exit
EOF
Let's walk through this:
- First, we log into the app server as the
appuser. - Then we navigate into our app folder and update to the latest version from GitHub.
- After that, we install our dependencies.
- Finally, once our app code is updated, we restart our server with
forever restartall.
Make our new script file executable:
chmod +x script/deploy
Add this new file and commit it:
git add .
git commit -m 'Add deploy script'
But let's not push quite yet. First, head back over to our project configuration in Jenkins, and scroll down to the build command. Add this new line at the end of it:
./script/deploy
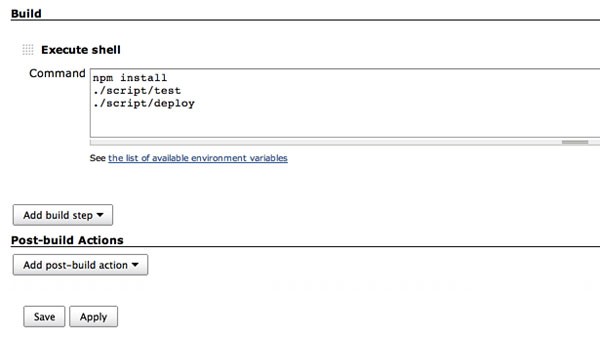
Save the Jenkins project.
Now go ahead and push to GitHub, and watch as Jenkins automatically builds. Once the build is done (it should succeed), navigate your browser to our app server's IP. Presto! Our exciting "hello world" has been replaced with an exhilarating "hello jenkins"!
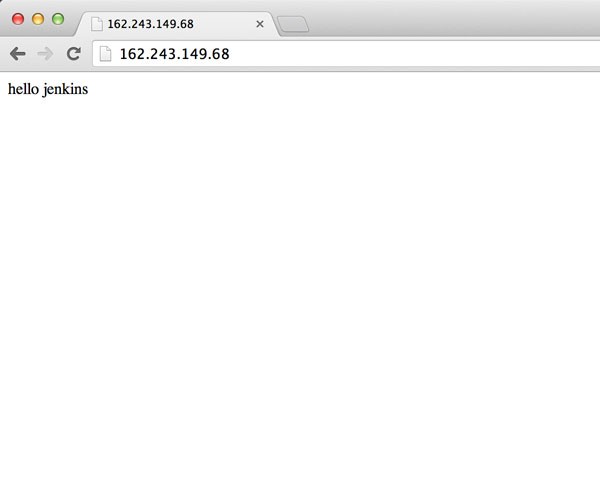
Our app is now being continuously deployed!
All's Well That Automates Well
Phew. That was quite the ride!
In the end, we've successfully set up both continuous integration and continuous deployment, which provides a very nice level of automation in our daily developer lives. Remember, computers don't get bored, so while they handle testing and deploying, you're free to do important things, like make yourself a sandwich. So go make that sandwich, and eat it like an automation champ!

Comments