In the first part of this series, we looked at the basic setup of iThemes Exchange, but it's unlikely that this simplistic setup will do everything that you need. This article will explain more Exchange settings in detail which allow you to further customize your store and tailor the user experience.
General
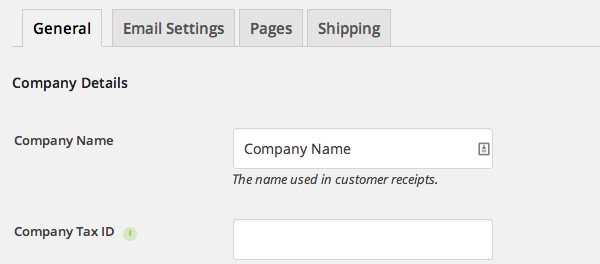
We've now done the basic setup but there are still quite a lot of options that we may need to change before we can have a fully functioning eCommerce store. You should now have an Exchange tab in your WordPress dashboard. To bring up the full set of Exchange options, click the "Exchange" tab and select "Settings".
The first screen within the Settings menu is more general information about your store. This is broken down in to six categories. The company details and currency settings are rather self explanatory, so I won't be going in to any detail about them.
Under the Store Settings heading (within the General tab) you have the option to change how products are ordered within your store. The default is Product Published Date/Time descending - this will suit some stores just fine but won't make much sense for other products.
Luckily, Exchange gives us a number of good options to choose from here:
- Product ID
- Product Title
- Product Slug
- Product Published Date/Time (default)
- Product Modified Date/Time
- Random
- Product Order #
All of the above can either be ascending or descending. The "Product Order #" setting is essentially a manual order. When you edit a product you can assign it a number in which to order the product. A great tip here is to use multiples of 10 for your product numbers. If you simply numbered your products 1 - 10 and had to go back and insert a new product at number five then you would need to change all of the numbers from five onwards. By doing this in multiples of 10 it gives you some space to add new products. So in the case of 10 products, you would number them 10 - 100. If you want to insert a new product at number five, then you could number the new product 41.
Next, we have the customer registration settings, which has just two options:
- Customer Registration. You can either use the Exchange registration system or the WordPress registration system. I would recommend using the Exchange registration system (this is the default) as this allows users a seamless experience of signing up from the front-end of the website. Using the WordPress registration system would mean that customers see your WordPress dashboard which could be off-putting for potential customers. If you do opt for the WordPress registration page then be sure to check the "anyone can register" setting on the main WordPress settings page.
- Default Checkout Form - this has two options; registration (default) or log in. If you have this set to registration, then when someone clicks to buy your product they will be prompted to input registration details and there is a link for existing users to log in. If this is set to log in then users will be displayed a log in box with a link for new users to register. There's no right answer as to which one is better here and it may depend on whether the majority of your customers are new or existing.
Lower down this page there is a section called Stylesheet Settings - this tells you where in your themes directory iThemes will look for custom styles. We will be looking into this more later in the series.
The next settings are for "Product Gallery", these affect how images on your product pages work.
- Enable Popup. The default value for this option is set to "Yes." If it's enabled then clicking on a product image will bring up a modal box.
- Enable Zoom. The default value for this option is also set to "Yes and Click." this has two settings; whether to enable zoom (yes/no) and if it is enabled, then is it activated by click or hover. It's important to remember for zoom to work you will need high definition images; if you are not using high definition images then it's a good choice to disable this feature.
The final setting on this page is to edit the message that appears on the customer account page. There's certainly nothing wrong with the default here but you may wish to change the language or make the copy better reflect your website.
This setting uses a standard WordPress editor where you can use the normal visual editor or the text editor if you want to add your own HTML. There's some shortcodes you can use here too - each shortcode has the following format:
[it_exchange_customer show="content_to_show"]
The available options are:
- first-name
- last-name
- username
- avatar (this also have a parameter of avatar_size, the default is 128px - see below for an example)
- sitename
Let's take a look at how you may use some of these, the below code is using the text editor:
<h3>Welcome to your account, [it_exchange_customer show="first-name"]!</h3> <div class="account-avatar">[it_exchange_customer show="avatar" avatar_size="150"]</div> <p>Here you can edit your profile and view your past orders with us.</p> <p>Once again, thanks for using our service.</p> <p><strong>The team at [it_exchange_customer show="sitename"]</strong></p>
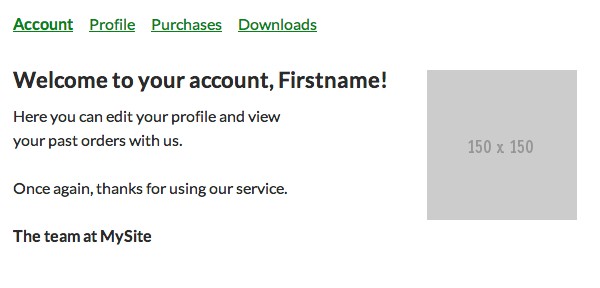
Note that by default avatars are taken from Gravatar.
Email Settings
On this page you can specify the email address in which you, the administrator, receive emails and the email address that the customer is sent an email from, you can also specify how those emails will read and look.
The email templates are edited in the same way as the account text explained above - in a defauly WordPress editor using shortcodes to drag in the relevant data. The shortcode for this section is [it_exchange_email show=option_name] and the available options are:
- download_list
- name
- fullname
- username
- order_table
- purchase_date
- total
- payment_id
- receipt_id
- payment_method
- sitename
- receipt_link
- login_link
- account_link
You don't need to worry too much about remembering these as they are all listed on the email settings page in Exchange along with a brief explanation.
The default customer email template is very basic and only shows the customers their receipt ID, a table of their order items, and a download list (if applicable). It's likely that some stores may want to make this part look more like an invoice. This can be easily achieved with the editor and it accepts HTML.
Exchange Pages
The Pages section lists all of the Exchange pages, such as profile page, account page and store page and allows you to select the page type, page title and page slug.
Page title and page slug may well be the same. The title is what is shown to your customers whereas the slug is what makes up the URL for the page.
Page type has three options:
- Exchange (default)
- WordPress
- Disabled
If you choose "Exchange" then this means that the pages are created and automatically populated with all of the page data in to your default WordPress template. This is the quickest and easiest way to get started. Pages assigned to the "Exchange" page type do not appear alongside your other WordPress pages.
The WordPress page type gives you more control as you can add your own content above or below the Exchange content and change your page template, but it slightly harder to set up. By selecting WordPress as the page type it will give you a shortcode to insert on a page and ask you to select the page which you are assigning this content to (e.g. the account page) - for this reason it's wise to create the page first in the normal WordPress way.
The basic method for using a WordPress page type is as follows:
- Create a new page in the WordPress dashboard. For example, you may create an "Account" page.
- Go to the Exchange settings and select the Pages tab
- Find the page you want to assign
- Change the page type to "WordPress"
- Choose the page you have just created from the dropdown that appears
- Copy the shortcode
- Go back to your page and paste in the shortcode
Choosing to disable a page removes the page from public view. The account and purchase confirmation pages can not be disabled.
Wrapping It Up
You should now have a good understanding of the main Exchange settings and what implications they have for your store and your users. There are two more sections to the settings: shipping and add-ons. These will both be covered in more detail in the next articles in this series.

Comments