Normally you install WordPress by downloading the ZIP file, uncompressing it on your PC, going into the wordpress subfolder, uploading and running the script and not to mention going to your host's control panel to get the database setup and everything. Others do it by using Fantastico or SimpleInstall utilities available via their host's control panel. There is nothing wrong with those methods except the first one takes quite some time and the second method is not foolproof to say the least.
Nowdays most hosting plans offer an SSH/command-line facility so you should definitely consider the SSH method to download and install WordPress on your server. The big advantage you get is that you don't need to visit different sites, don't need to do any download/upload or open any control panels. You do that all via a single command-line interface. For this you will need an SSH client. If you are running on Windows go for PuTTY and if you are on Mac you can use Mac's built-in Terminal or iTerm 2. Before we move ahead please make sure your host offers bash shell because our commands are configured for that.
Step 1 Connecting to Your Server
Using PuTTY
Open PuTTY and enter your domain name in the box named 'Host name(or IP address)' and enter the port number used to connect to SSH under 'Port' and now click Open. You can even save your site settings by entering a name in the Saved Sessions box and by pressing Save. Next time you can always load the session by selecting your site and clicking Load.
PuTTY will now ask for your username. Enter your username and press enter. Now you will be asked for your password. Note here that while you are typing your password, you won't see it being typed on the screen. It's hidden for security reasons. Press enter after you've typed your password and you will be logged on.
Using any other SSH client or Mac Terminal
Enter the following command in your Terminal client to connect to your site's command-line over SSH:
ssh [email protected] -p 22
The -p switch tells it to use the port number 22. If your host allows SSH over default port 22, you can omit -p and 22 in the above command, otherwise substitute 22 for your host's SSH port number. After logging in you will see something like this:
domain.com@username:-$
That is the shell command prompt where you will be typing all your commands from now on.
Step 2 Downloading WordPress
Now that we have logged in to our SSH server, we first need to go to the correct directory where we want to setup our blog and need to download the files and extract them there. Supposing the directory you want your blog to be installed under is blogdemo residing under the public_html directory, you will use the following command:
cd public_html/blogdemo/
Now that we have reached the correct directory we will download WordPress using the 'wget' command.
wget http://wordpress.org/latest.tar.gz
tar xfz latest.tar.gz
The above command downloads the latest WordPress install from their server and extracts the file from it into the blogdemo directory. x, f, and z are parameters which tell the tar command to extract the contents, tell that archive filename is given on the command-line and that gzip should be used for extraction respectively.
Now all archive files from WordPress have the installation files under a wordpress directory and after extraction you will find a wordpress directory under the blogdemo directory containing your install. So to shift the files back to where they should be use the following commands:
mv wordpress/* ./
This command moves the contents of the wordpress directory into the current directory. Anytime you want to check what the current directory consists of, type 'ls'.
You can delete both the wordpress directory and the archive file you downloaded if you want using the following commands:
rmdir ./wordpress/
rm -f latest.tar.gz
Step 3 Installing WordPress
In this step we will create the database and corresponding user and associate them together. Then we will use the famous 5 minute install of WordPress to finish it off.
Note: Before moving ahead you will need to check whether you have got the privileges to create a database or not. An easy way to check is to go to your phpMyAdmin and check whether you can create a database from there or not. If you can't that means you won't be able to follow this step. You should check with your web host if they allow you to do so or not. This happens mostly on shared web hosting.
First you need to login to the MySQL command-line using the following command:
mysql -u username -p
After entering this you will be asked for your MySQL password. Type your password and you will be shown a screen like this:
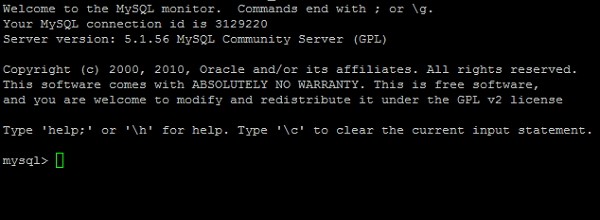
Now that we have logged in to the MySQL Server, we will first create a database and will grant access to the user to that database. Use the following commands now:
create database dbname;
grant usage on *.* to username@localhost identified by 'password';
grant all privileges on dbname.* to username@localhost;
Don't forget the semi-colon at the end of each MySQL command. The first command creates the database. The second command allows the user to connect to the database. The final command grants all privileges to the user for that database. You can test whether your database creation was successful by running this command:
use dbname;
It should say database changed. Now you can exit the MySQL command-line by typing 'exit'.
Now fire up the blog in your browser and run the usual WordPress install and use the database information we used in the third step to setup your wp-config.php and then setup your blog.
Things to Note
There are two things I would like everyone to take note of in the above tutorial:
-
New Database User – In our tutorial we are using an already existing database user to connect to the new database. But in case you want separate user for each database you need to create a new user to access that database. Here is how you should do it.
Once you are inside the MySQL shell, use the following commands to create a new user and set its password.
mysql> create user 'dbusername'@'localhost' identified by 'password';
Now go back to Step 3 and run all other commands with this username.
-
Editing
wp-config.php– In our tutorial I have told you that after doing everything on the shell you can directly proceed to the install. But some of you might want to edit wp-config.php to add special settings and code. You can only do that via the shell. While you are in your blog directory at the shell use the following command to fire up the Vim Editor (a command-line shell file editor)vi ./wp-config.php
Now you will see something like what's shown below:
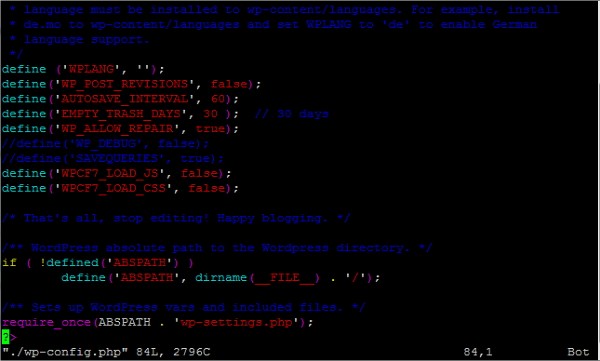
Press the 'I' key to enter into 'insert mode' and arrow keys to move around the file. Once you have made your edits, press the Esc key to exit 'insert mode'. To exit Vim type ':' (without the quotes) and then type "wq" and press enter, this will save your changes and quit Vim.

Comments