Even though we've already learned quite a bit in this series on iOS development, I'm sure you are eager to start building iOS applications that do something cool or useful. In this tutorial, your wish is granted. Using Xcode, you are going to create an iOS project from scratch, modify the project's source code, and run your application in the simulator or on a physical device.
Introducing Colorific
Colorific is the name of the application that you are about to build. The idea behind Colorific is simple, every time the user touches the screen of the device, the color of the screen changes. Even though the concept is basic, Colorific is perfect for getting started and exploring the ins and outs of iOS development.
1. Create a New Xcode Project
As we saw earlier in this series, every iOS application goes through life as an Xcode project. What is an Xcode project? An Xcode project is a container or repository that contains the files, assets, and information that are required to build one or more products.
Note that this isn't limited to a project's source code and assets, such as images and other media. A project also keeps track of the connections between its various elements and it knows how to build the final products from its elements.
Fire up Xcode and create a new Xcode project by choosing New > Project... from the File menu. You can accomplish the same by pressing Shift + Command + N.
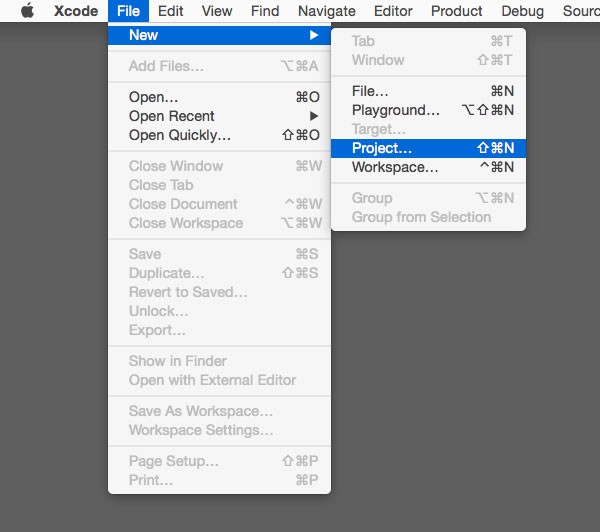
If Xcode's welcome window pops up when you launch Xcode, then I suggest you close it so you learn how to create a new project using Xcode's menu.
2. Choose an Application Template
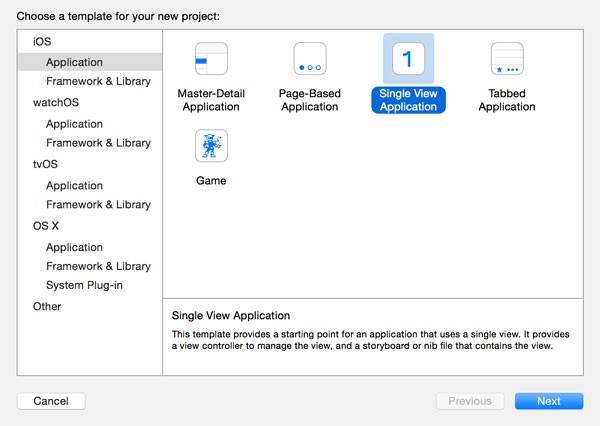
Getting started with a new application or project is easy in Xcode thanks to the application templates that are included. For the application that we're about to create, we need the Single View Application template. Feel free to take a look at the other application templates, but make sure to choose the Single View Application template for Colorific.
3. Configure the Project
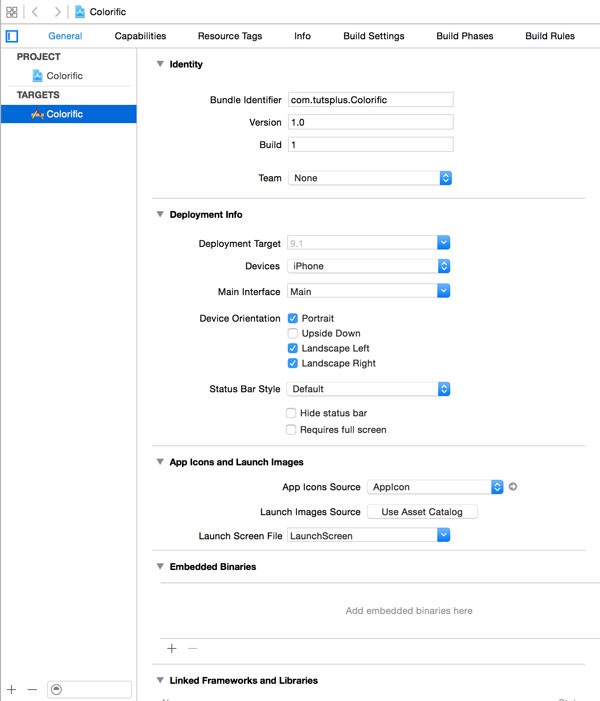
After selecting the Single View Application template and clicking the Next button, Xcode presents you with a list of options to configure your new project. Let's take a look at the various options.
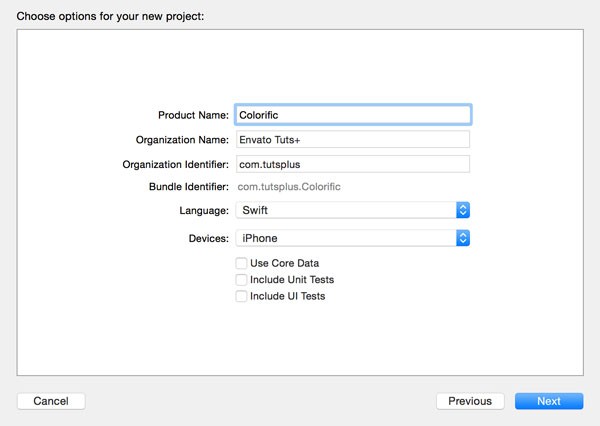
- Product Name: The product name will be the name of your application. I have named my application Colorific, but feel free to name your application whatever you like.
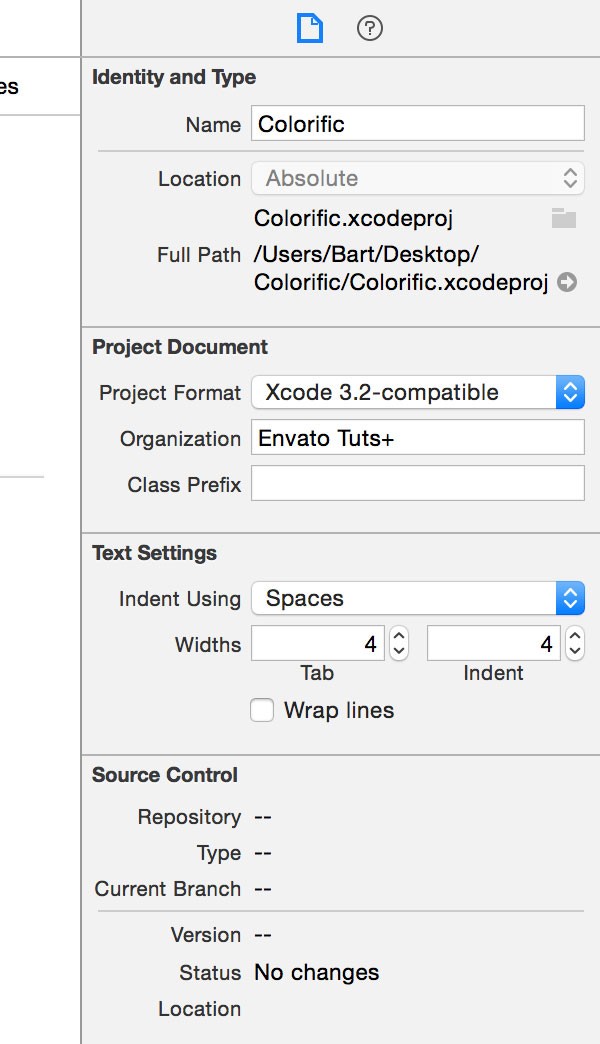
- Organization Name: The organization name can be your own name or the name of your company. Xcode uses the organization name for various purposes, such as adding a copyright notice to each source file.
- Organization Identifier: The organization identifier is a unique string that Xcode uses (together with the product name) to create the application's bundle identifier. Apple recommends adopting the reverse domain name notation to avoiding naming collisions. Note that the domain that you use has no ties to DNS (Domain Name System). For example, my company is named Code Foundry BVBA and is located in Belgium, which means that my company identifier is be.codefoundry. However, I could just as well use be.code-foundry or com.codefoundry. For the purpose of this tutorial, I've set the company identifier to com.tutsplus.
- Bundle Identifier: Even though you cannot specify the bundle identifier when creating a new Xcode project, you can change it once you've created your project. By default, the bundle identifier is the combination of the organization identifier and the product name. Keep in mind that spaces in the product name are replaced with dashes in the bundle identifier, because the bundle identifier cannot contain whitespace.
- Language: The current version of Xcode supports both Objective-C and Swift. This series is focused on iOS development using Swift 2.1 so that's the option I've taken for this project.
- Devices: In the current version of Xcode (7 at the time of writing), the devices drop down menu contains three options, Universal, iPhone, and iPad. This configuration option tells Xcode which devices your project targets. By selecting the first option, Universal, your project targets both the iPad and iPhone device families. The iPod Touch is a member of the iPhone device family as you might have guessed.
- Use Core Data: If you check this checkbox, Xcode will create a few additional files and add some boilerplate code to help you get started with Core Data, Apple's persistence framework for OS X and iOS. Because Core Data isn't a topic for beginners, we're going to leave this checkbox unchecked.
- Include Unit Tests: Testing is an important aspect of software development. Xcode has built-in support for unit testing. To keep things simple, however, we're going to ignore this option for now.
- Include UI Tests: Xcode 7 is the first version of Apple's IDE that has built-in support for user interface testing. This is a big deal for OS X and iOS developers. User interface testing is beyond the scope of this series, though.
You should now have a good grasp of the different configuration options when setting up a new Xcode project. For this project, I recommend that you use the options as shown in the above screenshot. Note that most options can easily be changed after you've created your project. Click Next when you're finished configuring your project.
4. Save the Project
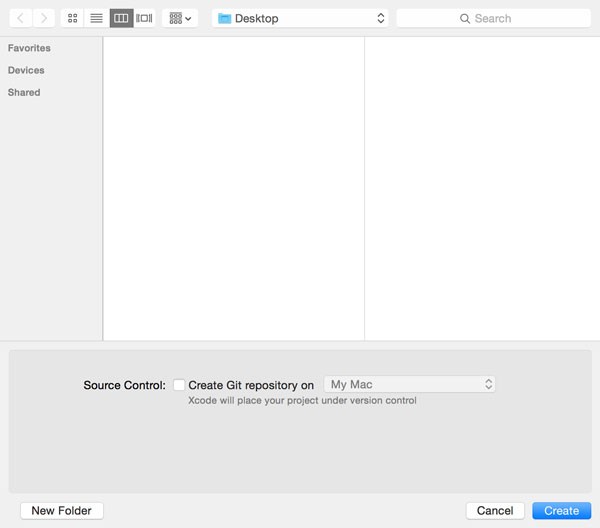
In the next step, Xcode asks you where you want to save your new project. You may have noticed the little checkbox at the bottom of the window labeled Create Git repository on My Mac. The gray text below the checkbox reads Xcode will place your project under version control.
As I mentioned earlier in this series, source control is indispensable in software development. This series will not cover this topic in detail, but if you're serious about software development, then I highly recommend reading up on source control.
Git is the most popular SCM (Source Code Management) system in the Cocoa community. However, it's perfectly possible to use a different SCM system, such as SVN or Mercurial.
Tell Xcode where you want to save your project, check the checkbox to authorize Xcode to create a Git repository for the project, and click Create at the bottom of the dialog.
5. Exploring Xcode's User Interface
Before we move on, I want to take a few minutes to explore Xcode's user interface. There are four distinct areas:
- a toolbar at the top
- a sidebar on the left
- a main view in the center
- a sidebar at the right
Toolbar
The toolbar at the top contains the buttons and menus that you'll find yourself using most often. As we saw earlier in this series, the buttons to run and stop an application also live in the toolbar.

The display in the center of the toolbar is similar to the display you find in iTunes. It displays information about your project's state or what Xcode is currently doing in the background. It will tell you, for example, when a build succeeds or fails.
The two segmented controls on the right of the toolbar can be used to customize Xcode's user interface. Play around with the various controls to find out how each of them changes the user interface of Xcode.
Navigator
The main purpose of the left sidebar is for navigation and it's often referred to as Xcode's navigator.
The navigator has different tabs with the Project Navigator at the far left. The selection in the left sidebar determines what is shown in Xcode's main view, the workspace.
Main View or Workspace
The main view or workspace is the area where you'll spend most of your time. It's Xcode's workhorse and displays whatever's selected in the navigator.
Inspector
While the left sidebar controls what's being displayed in Xcode's main view, the contents of the right sidebar reflect what's being displayed or selected in the main view.
The right sidebar, also known as the inspector, adapts itself to whatever the user selects in the main view.
6. Exploring the Project
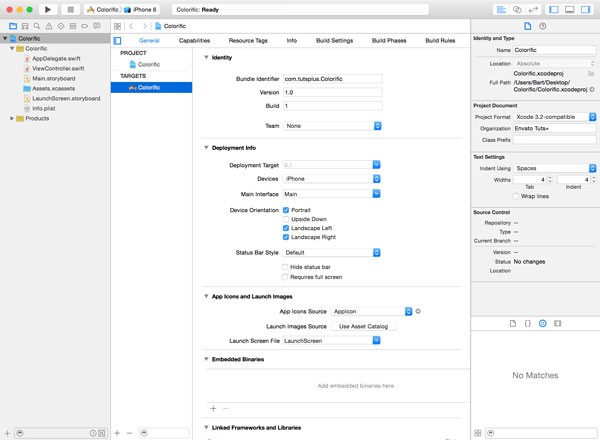
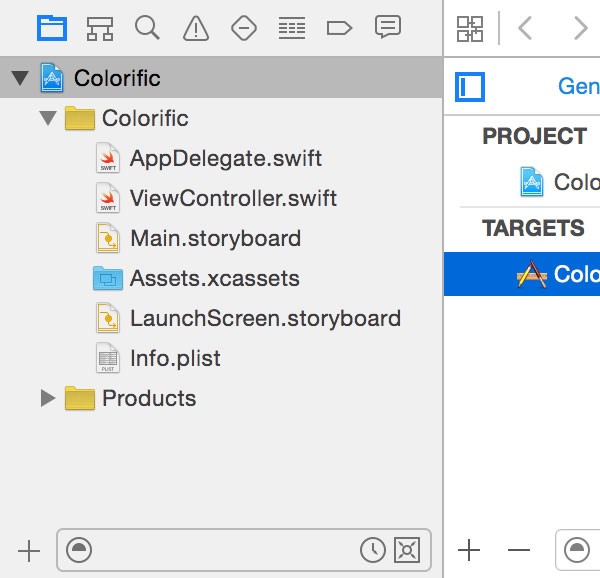
It's time to take a look at the project itself. The project's contents are displayed in the Project Navigator, the first tab in the left sidebar. Select the first item in the Project Navigator to see the project details in the main view.
The main view is composed of two sections, a sidebar on the left and a detail view on the right. In the sidebar, you see two items, your project with one item and targets with one item.
It's good to know early on what the difference is between a project and a target. Remember that a project is a repository for the files, assets, and data that are required to build one or more products. A target refers to one of those products. A target contains the necessary instructions to build a product with the project's resources. This means that a project can contain multiple targets to build multiple products. As you can see, an Xcode project is more than just a folder with a bunch of files in it.
7. Build & Run: Take 1
Before we start modifying the source code of the project, it may be interesting to build and run your new project to see what the application template has given us for free. Click the Run button in the top left and make sure that the active scheme is configured to run the application in the simulator by selecting iPhone 6 or another simulator for iPhone.

If all went well, the simulator should launch your application and display an empty, white view with the familiar status bar at the top.
8. Modify the User Interface
Let's get our hands dirty and modify the application's user interface. Open the Project Navigator and select the file named Main.storyboard. A file with a .storyboard extension is a user interface file. In this file, we create the user interface of the application.
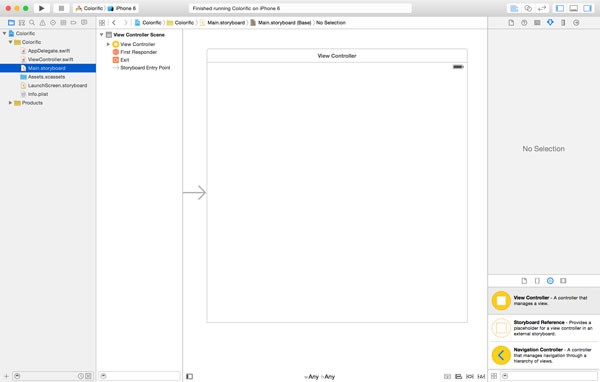
The storyboard contains one item, a view controller with the white view you saw in the simulator a few moments ago. The workspace is composed of a sidebar showing the object representation of the scenes of the storyboard. The largest part of the workspace contains the scenes or the user interface of the application.
Select the object named View in the View Controller Scene in the left sidebar and see how the workspace and the right sidebar update their contents. A bunch of tabs appear at the top of the right sidebar. Each tab contains a collection of attributes related to the object named View.
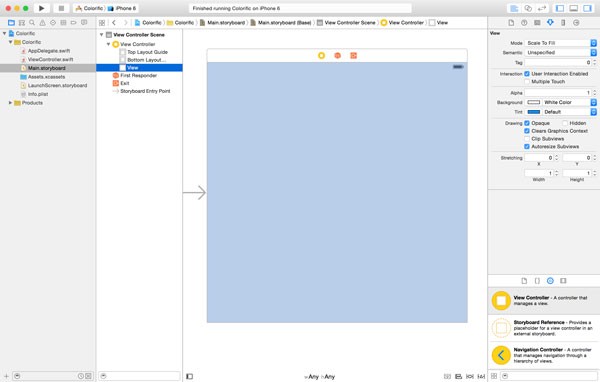
The lower half of the right sidebar contains a section with four tabs. The third tab is represented by an image of a three-dimensional box. This box is how objects are commonly displayed in Xcode.
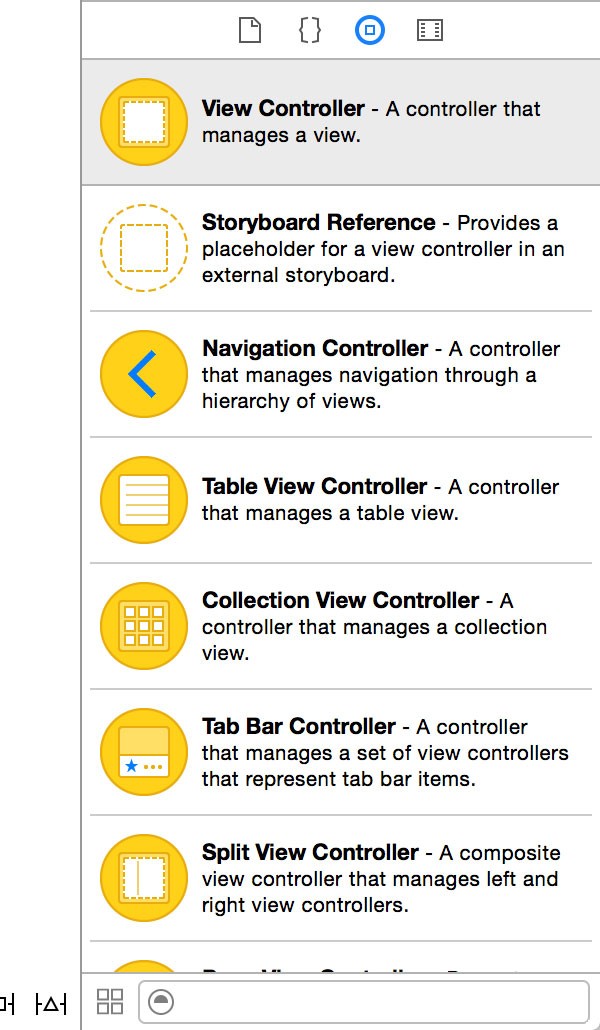
Select the tab with the box icon and scroll through the list that appears. The list is referred to as the Object Library and contains various user interface elements, such as buttons, sliders, and switches.
At the start of this tutorial, I told you we were going to create a functional application. The user should be able to touch the screen to change its color.
There are multiple approaches to detect touches in an iOS application. One solution is to use a button. In the Object Library, find the item named Button and drag it from the Object Library to the white view in Xcode's workspace.
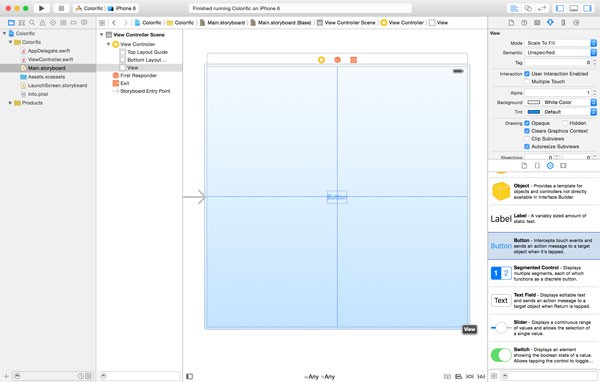
The user should be able to touch any part of the screen, which means the button should cover the entire screen. Have you noticed the six, tiny squares at the button's edges? By moving the tiny squares, you can modify the button's dimensions. Adjust the size of the button to make it cover the entire screen. Don't worry about the status bar at the top of the screen.

The view behind the button is the view that will change color when the user touches the screen. At the moment, the button is blocking the view from the user's view so we need to modify the button's attributes.
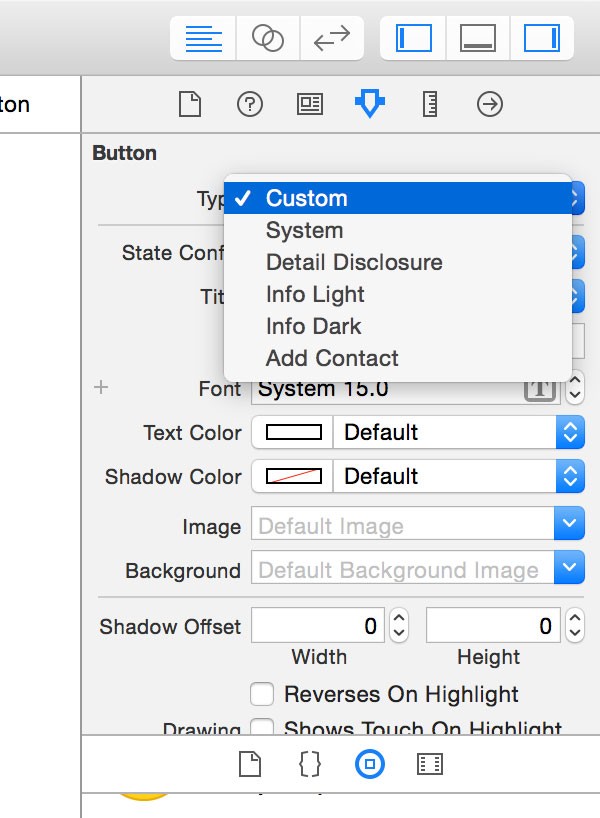
You may have noticed that the button has been added to the list of objects in the left sidebar, below the object named View. Select the button from the list of objects and select the Attributes Inspector in the right sidebar—the fourth tab from the left. We only need to make two adjustments.
Start by changing the type of the button from System to Custom. This will make the button transparent.
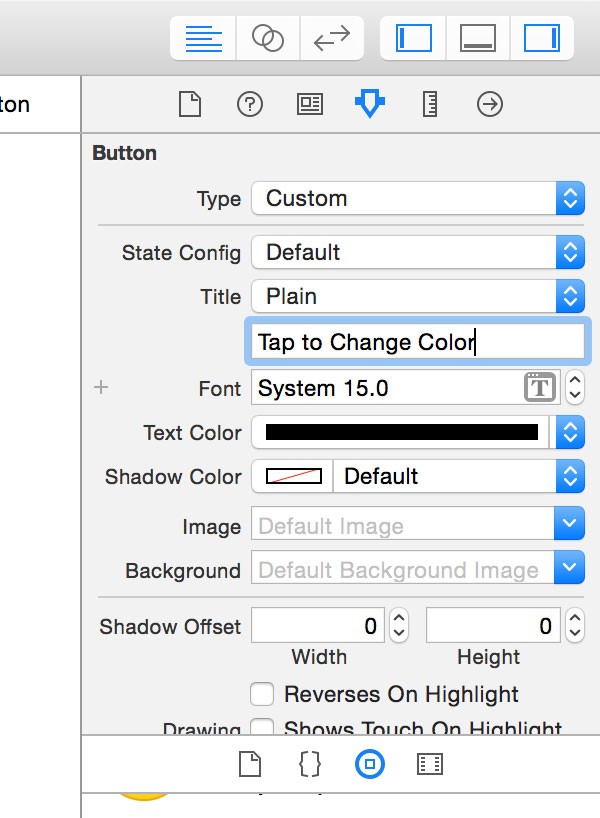
The second change we need to make is instructing the user what to do by changing the button's title. The text field next to the label Title currently reads Button. Change this to Tap to Change Color and set the Text Color to black to make it more readable.
9. Add an Action to the View Controller
If you're familiar with the MVC (Model-View-Controller) pattern, then you have a head start learning iOS development. The MVC pattern is a pattern found in many languages and frameworks, such as Laravel and Ruby on Rails.
The view in our user interface falls in the V category of the MVC pattern. A view is controlled by a controller. Take a look at the file names in the Project Navigator on the left. ViewController.swift represents a view controller that controls the view in our user interface.
What does a view controller do? A view controller can do whatever you want, but it's in the first place responsible for handling everything that happens in the view that it manages. This includes, for example, touches from the user. If the user taps the button in the view, it's the view controller's responsibility to handle the touch event.
How do we handle a touch event? In the case of our button, we add an action to the view controller. An action is a fancy name for a method. What is a method? A method is a Swift function. Wait. What? Don't worry about the terminology too much at this point. The next two posts will cover the Swift programming language in more detail. What you need to remember is that a method is like a method in Ruby and PHP, or a function in JavaScript.
If you invoke a method of a view controller, it does something in response. In other words, if a user taps the button and we connect a method to that touch event, the view controller will do something in response to the touch event.
To add an action to the view controller that manages the view in the application's user interface, we need to make some changes to the file named ViewController.swift. We only need to add a few lines of code to ViewController.swift. Take a look at how I modified the file's contents.
import UIKit

class ViewController: UIViewController {

    override func viewDidLoad() {
        super.viewDidLoad()
        // Do any additional setup after loading the view, typically from a nib.
    }

    override func didReceiveMemoryWarning() {
        super.didReceiveMemoryWarning()
        // Dispose of any resources that can be recreated.
    }

    @IBAction func changeColor(sender: UIButton) {

    }

}
Even though we won't focus on the syntax in this tutorial, it's fairly easy to understand what's going on. The name of the action or method is changeColor(_:) and it has one parameter, sender. The type of the parameter is UIButton. What is UIButton? Patience grasshopper.
10. Implement the Action
We've added an action to the view controller, but the action doesn't do much. The action doesn't have a body or implementation yet. To implement the changeColor(_:) action, we need to add one or more statements between the curly braces as shown in the code snippet below. I'm not going to explain each line of code in detail, but I'll give you the gist of what's happening.
@IBAction func changeColor(sender: UIButton) {
    // Generate Random Numbers
    let r = CGFloat(arc4random() % 255)
    let g = CGFloat(arc4random() % 255)
    let b = CGFloat(arc4random() % 255)

    // Create Color
    let color = UIColor(red: (r/255.0), green: (g/255.0), blue: (b/255.0), alpha: 1.0)

    // Update View
    view.backgroundColor = color
}
As you may know, it's possible to break a color down into the three primary colors, red, green, and blue. In our action, we generate three random numbers between 0 and 255, and use these numbers to create a random color.
The method we use to create the color is very descriptive, init(red:green:blue:alpha:). With the last line of our action, we set the background color of the view in our user interface to this new, randomly generated color.
Comments are important when writing code. Did you spot the comments I added to the implementation of changeColor(_:)? Single line comments start with two forward slashes , //, whereas multiline comments start with /* and end with */.
11. Connect the Action
The method is implemented, but nothing spectacular will happen if we build and run the application. Give it a try if you don't believe me.
What's missing is a connection between the button and the view controller's action. How should the view controller know that the changeColor(_:) action needs to be triggered when the button is tapped?
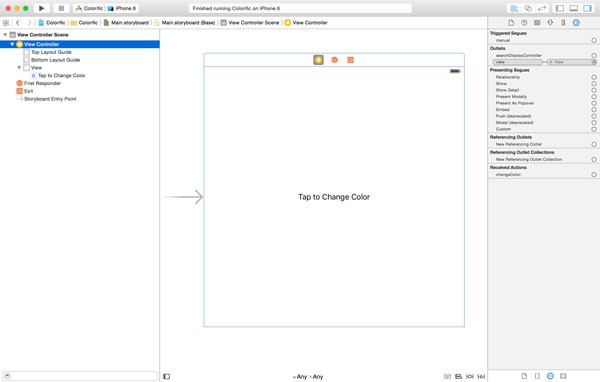
Making this connection is simple. Open the storyboard by selecting Main.storyboard and select the View Controller object in the View Controller Scene.
With the View Controller object selected, open the Connections Inspector in the right sidebar—the first tab from the right. If you've followed the steps correctly, you should see the action we created in the Received Actions section.
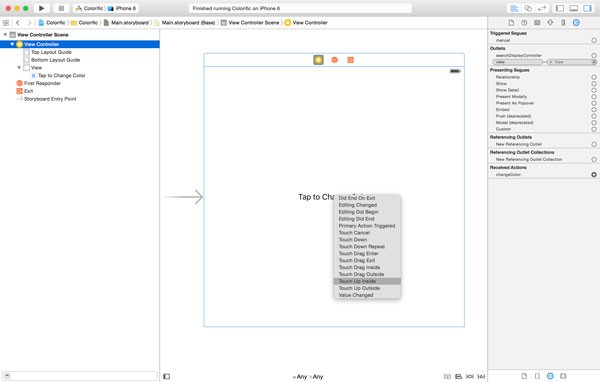
You should see an empty circle on the right of the changeColor(_:) action. Click and drag from the circle to the button in the view controller's view.
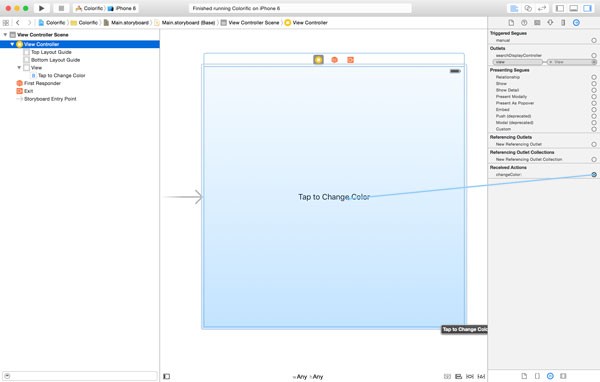
A menu pops up when you release the mouse. The menu contains a list of touch event types. The touch event that we're interested in is named Touch Up Inside. This event is triggered when a user touches the button and lifts her finger. This is the most common behavior for buttons.
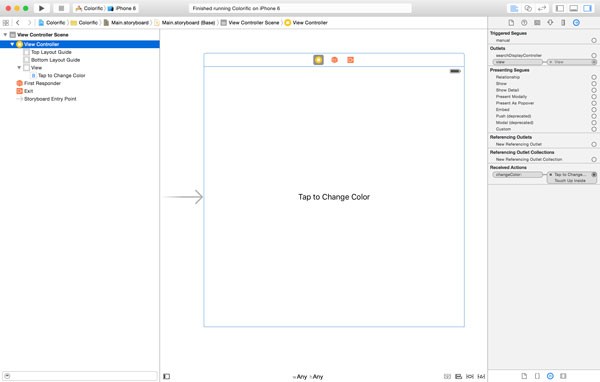
After connecting the button and the action, you should see that the right sidebar reflects the connection you just made. Great. You've successfully completed your first real application.
12. Build & Run: Take 2
Build and run your application in the simulator and start tapping the simulator's screen. Every time you tap the screen, its color should change to a new, random color. How cool is that?
Conclusion
We've covered a lot of ground in this tutorial. Even though this post was quite lengthy, we didn't actually do very much. If you know the theory, you can create Colorific in less than five minutes. If you ran into a problem during this tutorial, then make sure to download the source files from GitHub.
In the next two installments, we will explore the basics of the Swift programming language. This will prepare you for the interesting stuff in the rest of the series.
If you have any questions or comments, you can leave them in the comments below or reach out to me on Twitter.

Comments