One of the most popular new features introduced in iOS 8 is the ability to create several types of extensions. In this tutorial, I will guide you through the process of creating a custom widget for the Today section of the notification center. But first, let's briefly review some topics about extensions and understand the important concepts that underly widgets.
1. What Is an Extension?
An extension is a special purpose binary. It's not a complete app, it needs a containing app to be distributed. This could be your existing app, which can include one or more extensions, or a newly created one. Although the extension is not distributed separately, it does have its own container.
An extension is launched and controlled via its host app. It could be Safari, for example, if you're creating a share extension, or the Today system app that takes care of the notification center and other widgets. Each system area that supports being extended is called an extension point.
To create an extension, you need to add a target to the project of the containing app. The templates provided by Xcode already include the appropriate frameworks for each extension point, allowing the app to interact with and following the correct policies of the host app.
2. Today Extension Point
Extensions created for the today extension point, the so-called widgets, are meant to provide simple and quick access to information. Widgets link to the Notification Center framework. It's important that you design your widget with a simple and focused user interface, because too much interaction can be a problem. Note also that you don't have access to a keyboard.
Widgets are expected to perform well and keep their content updated. Performance is a big point to consider. Your widget needs to be ready quickly and use resources wisely. This will avoid slowing the whole experience down. The system terminates widgets that use too much memory, for example. Widgets need to be simple and focused on the content they are displaying.
That's enough theory for now. Let's start creating a custom today widget. The widget we're about to create will show information about disk usage, including a progress bar to provide a quick visual reference for the user. Along the way, we'll also cover other important concepts of iOS 8 extensions.
3. Target Setup
Step 1: Project Setup
If you want to build this widget as an extension to an existing app, go ahead and open your Xcode project, and jump to the second step. If you're starting from scratch just like me, then you first need to create a containing app.
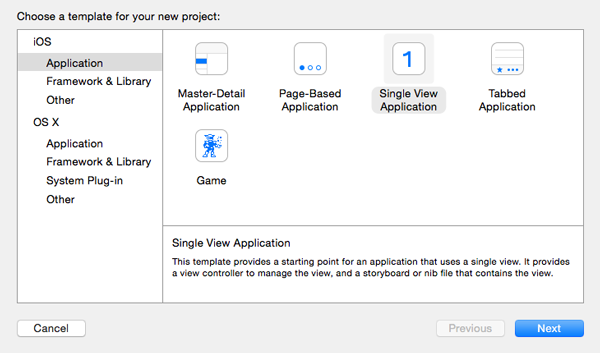
Open Xcode and in the File menu select New > Project.... We will be using Objective-C as the programming language and the the Single View Application template to start with.
Step 2: Add New Target
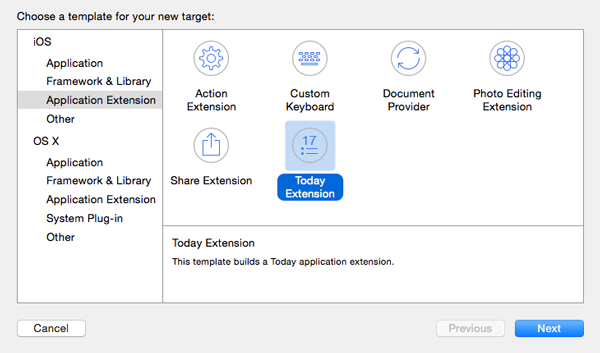
Open the File menu and choose New > Target.... In the Application Extension category, select the Today Extension template.
You'll notice that the Project to which the target will be added is the project we're currently working with and the extension will be embedded in the containing application. Also note that the extension has a distinct bundle identifier based on the one of the containing application, com.tutsplus.Today.Used-Space.
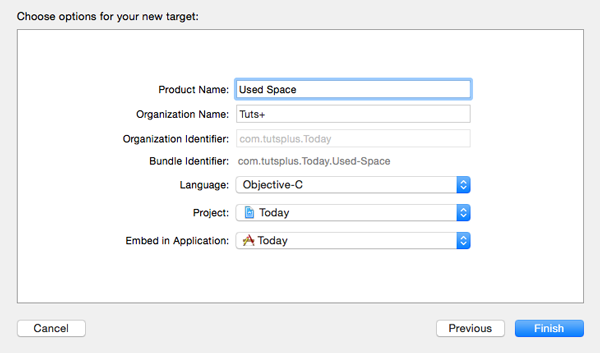
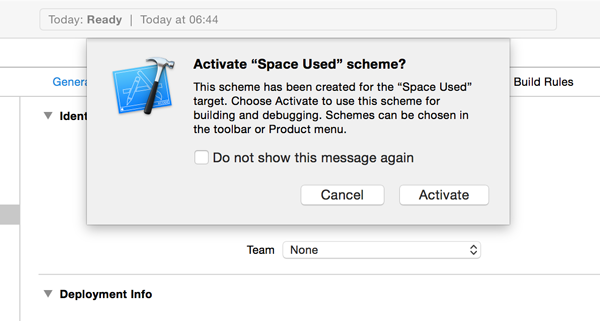
Click Next, give your widget a name, for example, Used Space, and click Finish to create the new target. Xcode has created a new scheme for you and it will ask you to activate it for you. Click Activate to continue.
Xcode has created a new group for the widget named Space Used and added a number of files to it, a UIViewController subclass and a storyboard. That's right, a widget is nothing more than a view controller and a storyboard. If you open the view controller's header in the code editor, you'll notice that it is indeed subclassing UIViewController.
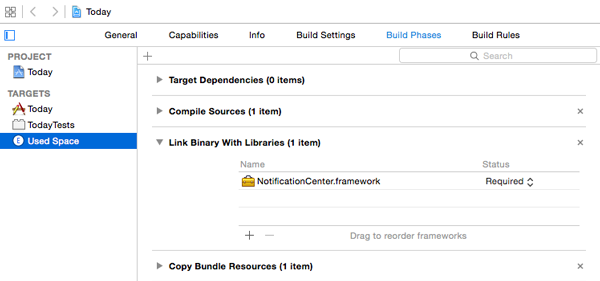
If you select the extension target from the list of targets, open the Build Phases tab, and expand the Link Binary With Libraries section, you'll see that the new target is linked to the Notification Center framework.
4. User Interface
We'll now build a basic user interface for our widget. Determining the widget size is important and there are two ways of telling the system the amount of space we need. One is using Auto Layout and the other is using the preferredContentSize property of the view controller.
The concept of adaptive layouts is also applicable to widgets. Not only do we now have iPhones with various widths (and iPads and future devices), but also remember that the widget might need to show its content in landscape orientation. If the user interface can be described with Auto Layout constraints, then that is a clear advantage for the developer. The height can be adjusted later with setPreferredContentSize: if needed.
Step 1: Adding Elements
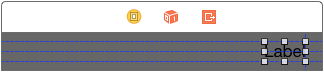
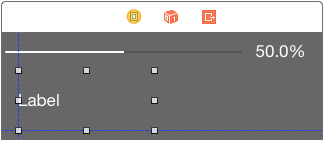
Open MainInterface.storyboard in the Xcode editor. You'll notice that a label displaying "Hello World" is already present in the view controller's view. Select it and delete it from the view as we won't be using it. Add a new label to the view and align it to the right margin as shown below.
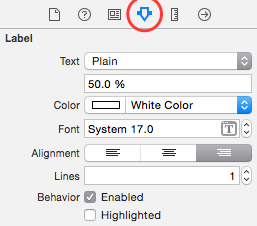
In the Attributes Inspector, set text color to white, text alignment to right, and the label's text to 50.0%.
Select Size to Fit Content from Xcode's Editor menu to resize the label properly if it's too small to fit its contents.
Next, add a UIProgressView instance to the left of the label and position it as shown below.

With the progress view selected, change the Progress Tint attribute in the Attributes Inspector to white and the Track Tint color to dark grey. This will make it more visible. This is looking good so far. It's time to apply some constraints.
Step 2: Adding Constraints
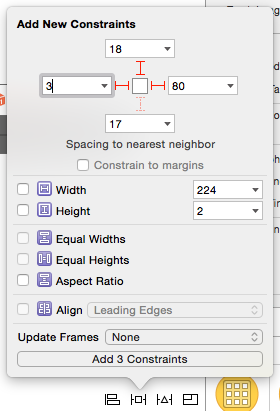
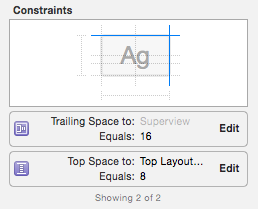
Select the percentage label and add a top, bottom, and trailing constraint as shown below. Be sure to uncheck the Constrain to margins checkbox.
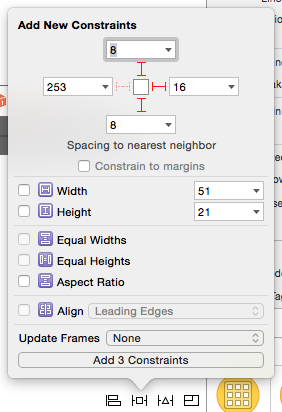
Select the progress view and add a top, leading, and trailing constraint. Use this opportunity to change the leading space to 3 and don't forget to uncheck Constrain to margins.
Because we changed the value of the leading constraint of the progress view, we have a small problem that we need to fix. The frame of the progress view doesn't reflect the constraints of the progress view. With the progress view selected, click the Resolve Auto Layout Issues button at the bottom and choose Update Frames from the Selected Views section. This will update the frame of the progress view based on the constraints we set earlier.

Step 3: Build and Run
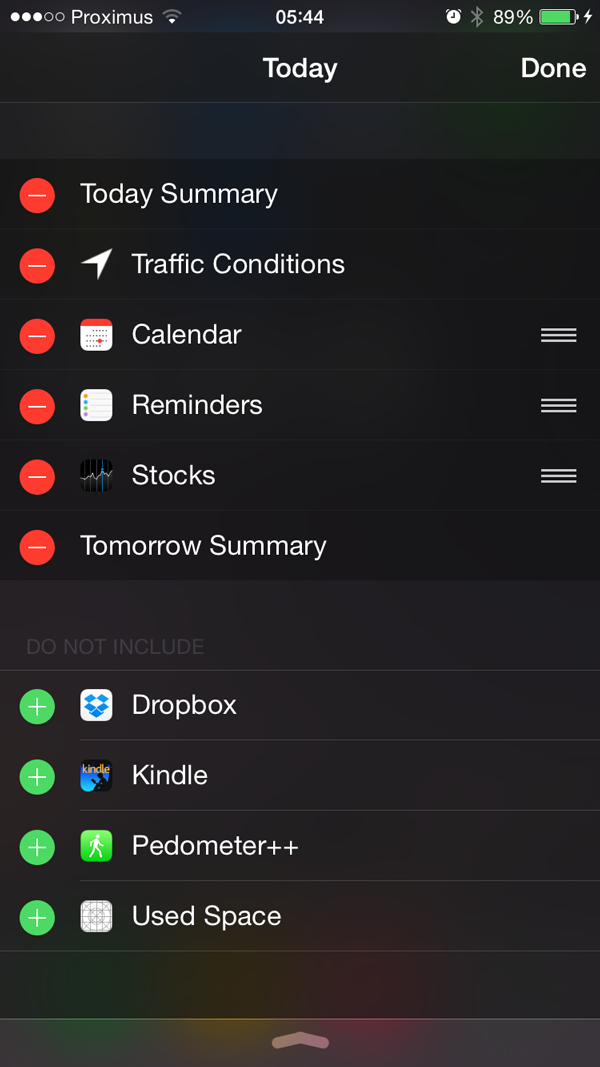
It's time to see the widget in action. With the Used Space scheme selected, select Run from the Product menu or hit Command-R. Reveal the notification center by swiping from the top of the screen to the bottom and tap the Edit button at the bottom of the notification center. Your widget should be available to add to the Today section. Add it to the Today section by tapping the add button on its left.
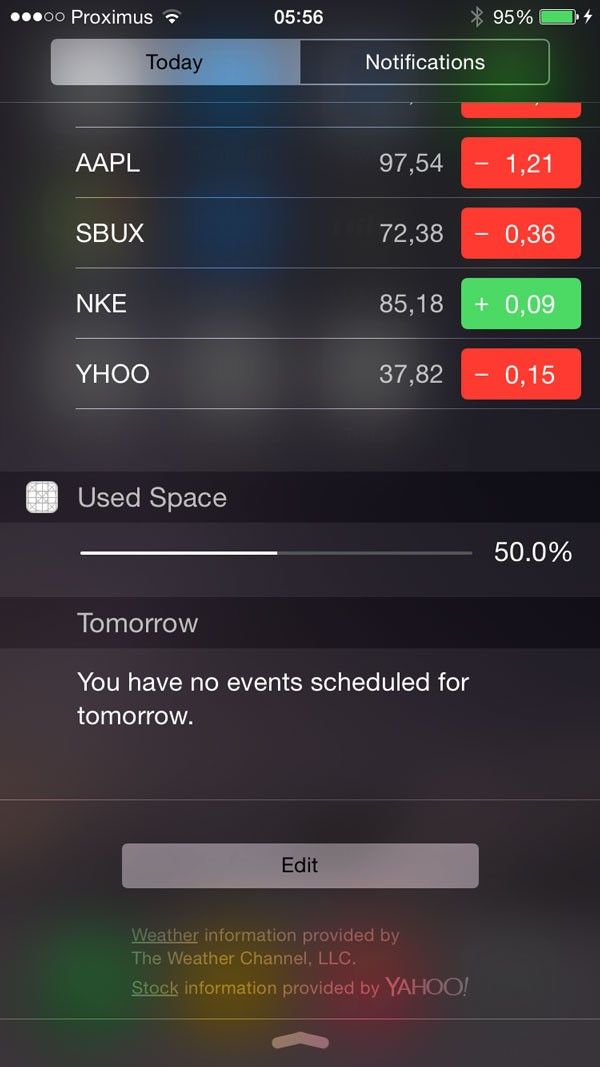
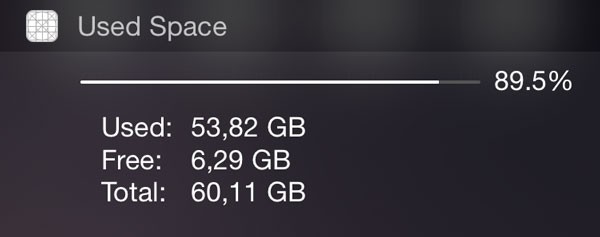
This is what our extension should look like.

That looks good, but why is there so much space below the progress view and label? Also, why didn't the operating system respect the leading constraint of the progress view?
Both issues are standard margins set by the operating system. We will change this in the next step. Note, however, that the left margin is desirable since it aligns the progress view with the widget's name.
If you rotate your device or run the application on a different device, you'll notice that the widget adjusts it size properly. That's thanks to Auto Layout.
Step 4: Fixing the Bottom Margin
Open TodayViewController.m in Xcode's editor. You'll notice that the view controller conforms to the NCWidgetProviding protocol. This means we need to implement the widgetMarginInsetsForProposedMarginInsets: method and return a custom margin by returning a UIEdgeInsets structure. Update the method's implementation as shown below.
- (UIEdgeInsets)widgetMarginInsetsForProposedMarginInsets:(UIEdgeInsets)margins
{
    margins.bottom = 10.0;
    return margins;
}
Run the application again to see the result. The widget should be smaller with less margin at the bottom. You can customize these margins to get the result you're after.
Step 5: Connecting Outlets
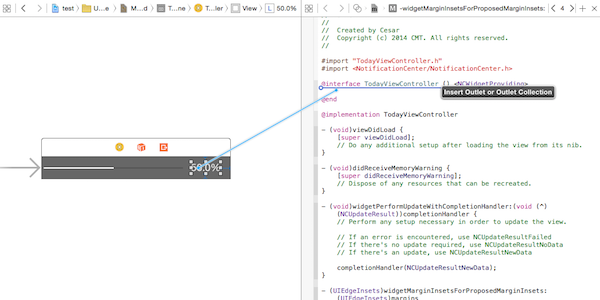
Before moving on, let's finish the user interface by adding two outlets. With the storyboard file opened, switch to the assistant editor and make sure that it displays TodayViewController.m.
Hold Control and drag from the label to the view controller's interface to create an outlet for the label. Name the outlet percentLabel. Repeat this step and create an outlet named barView for the UIProgressView instance.
5. Displaying Real Data
We will use the NSFileManager class to calculate the device's available space. But how do we update the widget with that data?
This is where another method from the NCWidgetProviding protocol comes into play. The operating system invokes the widgetPerformUpdateWithCompletionHandler: method when the widget is loaded and it can also be called in the background. In the latter case, even if the widget is not visible, the system may launch it and ask for updates to save a snapshot. This snapshot will be displayed the next time the widget appears, usually for a short period of time until the widget is displayed.
The argument passed in this method is a completion handler that needs to be called when the content or data is updated. The block takes a parameter of type NCUpdateResult to describe if we have new content to show. If not, the operating system will know that there is no need to save a new snapshot.
Step 1: Properties
We first need to create some properties to hold the free, used, and total sizes. We will also add a property to hold the used space on the device. This allows us greater flexibility later. Add these properties to the class extension in TodayViewController.m.
@property (nonatomic, assign) unsigned long long fileSystemSize;
@property (nonatomic, assign) unsigned long long freeSize;
@property (nonatomic, assign) unsigned long long usedSize;
@property (nonatomic, assign) double usedRate;
Step 2: Implementing updateSizes
Next, create and implement a helper method, updateSizes, to fetch the necessary data and calculate the device's used space.
- (void)updateSizes
{
    // Retrieve the attributes from NSFileManager
    NSDictionary *dict = [[NSFileManager defaultManager]
                attributesOfFileSystemForPath:NSHomeDirectory()
                                        error:nil];

    // Set the values
    self.fileSystemSize = [[dict valueForKey:NSFileSystemSize]
                              unsignedLongLongValue];
    self.freeSize       = [[dict valueForKey:NSFileSystemFreeSize]
                              unsignedLongLongValue];
    self.usedSize       = self.fileSystemSize - self.freeSize;
}
Step 3: Caching
We can take advantage of NSUserDefaults to save the calculated used space between launches. The lifecycle of a widget is short so if we cache this value, we can set up the user interface with an initial value and then calculate the actual value.
This is also helpful to determine if we need to update the widget snapshot or not. Let's create two convenience methods to access the user defaults database.
// @implementation
- (double)usedRate
{
    return [[[NSUserDefaults standardUserDefaults]
                   valueForKey:RATE_KEY] doubleValue];
}

- (void)setUsedRate:(double)usedRate
{
    NSUserDefaults *defaults =
                       [NSUserDefaults standardUserDefaults];
    [defaults setValue:[NSNumber numberWithDouble:usedRate]
                forKey:RATE_KEY];
    [defaults synchronize];
}
Note that we use a macro RATE_KEY so don't forget to add this one at the top of TodayViewController.m.
// Macro for NSUserDefaults key
#define RATE_KEY @"kUDRateUsed"
Step 4: Updating the User Interface
Because our widget is a view controller, the viewDidLoad method is a good place to update the user interface. We make use of a helper method, updateInterface to do so.
- (void)updateInterface
{
    double rate = self.usedRate; // retrieve the cached value
    self.percentLabel.text =
            [NSString stringWithFormat:@"%.1f%%", (rate * 100)];
    self.barView.progress = rate;
}

- (void)viewDidLoad {
    [super viewDidLoad];
    [self updateInterface];
}
Step 5: Invoking the Completion Handler
The number of free bytes tends to change quite frequently. To check if we really need to update the widget, we check the calculated used space and apply a threshold of 0.01% instead of the exact number of free bytes. Change the implementation widgetPerformUpdateWithCompletionHandler: as shown below.
- (void)widgetPerformUpdateWithCompletionHandler:(void (^)(NCUpdateResult))completionHandler
{

    [self updateSizes];

    double newRate = (double)self.usedSize / (double)self.fileSystemSize;

    if (newRate - self.usedRate < 0.0001) {
        completionHandler(NCUpdateResultNoData);
    } else {
        [self setUsedRate:newRate];
        [self updateInterface];
        completionHandler(NCUpdateResultNewData);
    }
}
We recalculate the used space and, if it's significantly different from the previous value, save the value and update the interface. We then tell the operating system that something changed. If not, then there's no need for a new snapshot. While we don't use it in this example, there is also a NCUpdateResultFailed value to indicate that an error occurred.
Step 6: Build & Run
Run your application once more. It should now display the correct value of how much space is used by your device.
6. Recap
Let's review the lifecycle of your new widget. When you open the Today panel, the system may display a previous snapshot until it is ready. The view is loaded and your widget will retrieve a value cached in NSUserDefaults and use it to update the user interface.
Next, widgetPerformUpdateWithCompletionHandler: is called and it will recalculate the actual value. If the cached and new value are not significantly different, then we don't do anything. If the new value is substantially different, we cache it and update the user interface accordingly.
While in the background, the widget may be launched by the operating system and the same process is repeated. If NCUpdateResultNewData is returned, a new snapshot is created to display for the next appearance.
7. Adding More Information and Animation
Although we are already showing the used space, it would be interesting to have a precise number. To avoid cluttering the user interface, we will make our widget more interactive. If the user taps the percentage label, the widget expands, showing a new label with absolute numbers. This is also a great opportunity to learn how to use animation in widgets.
Step 1: Changing the User Interface
Open MainInterface.storyboard and select the percent label. In the Attributes Inspector, under the View section, find the User Interaction Enabled option and enable it.
Next, we need to remove the bottom constraint of the label. The distance of the label to the bottom of the view will change programmatically, which means the constraint would become invalid.
Select the label, open the Size area in the Size Inspector, select the bottom space constraint, and hit delete. You can also manually select the constraint guide in the view and delete it. The label now only has a top and trailing space constraint as shown below.
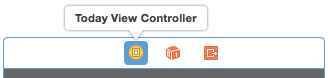
Select the view controller by clicking the first of the three icons at the top of the scene. In the Size area of the Size Inspector, set the height to 106.
Add a new label to the view and, as we did before, set its color to white in the Attributes Inspector. In addition, set the number of lines to 3, the height to 61, and the width 200. This should be enough to accommodate three lines of information. You also want it aligned to the bottom and left margins.
The last step is to open the assistant editor and create an outlet for the label named detailsLabel.
Step 2: Setup
The widget will only be expanded for a brief moment. We could save a boolean in NSUserDefaults and load it remembering the previous state, but, to keep it simple, every time the widget is loaded it will be closed. When tapping the percentage label, the extra information appears.
Let's first define two macros at the top of TodayViewController.m to help with the sizes.
#define kWClosedHeight   37.0
#define kWExpandedHeight 106.0
In viewDidLoad, add two lines of code to set the initial height of the widget and to make the details label transparent. We will fade in the details label when the percentage label is tapped.
- (void)viewDidLoad {
    [super viewDidLoad];
    [self updateInterface];
    // new
    [self setPreferredContentSize:CGSizeMake(0.0, kWClosedHeight)];
    [self.detailsLabel setAlpha:0.0];
}
Note that we set the width of the widget to 0.0, because the width will be set by the operating system.
Step 3: Updating the Details Label
In the detail label, we show values for free, used, and total space available with the help of NSByteCountFormatter. Add the following implementation to the view controller.
-(void)updateDetailsLabel
{
    NSByteCountFormatter *formatter =
                           [[NSByteCountFormatter alloc] init];
    [formatter setCountStyle:NSByteCountFormatterCountStyleFile];

    self.detailsLabel.text =
      [NSString stringWithFormat:
          @"Used:\t%@\nFree:\t%@\nTotal:\t%@",
           [formatter stringFromByteCount:self.usedSize],
           [formatter stringFromByteCount:self.freeSize],
           [formatter stringFromByteCount:self.fileSystemSize]];
}
Step 4: Capturing Touches
To detect touches, we override the touchesBegan:withEvent: method. The idea is simple, whenever a touch is detected, the widget is expanded and the details label is updated. Note that the size of the widget is updated by calling setPreferredContentSize: on the view controller.
-(void)touchesBegan:(NSSet *)touches withEvent:(UIEvent *)event
{
    [self updateDetailsLabel];
    [self setPreferredContentSize:
                CGSizeMake(0.0, kWExpandedHeight)];
}
Step 5: Adding Animation
Even though the widget works fines, we can improve the user experience by fading the details label in while the widget expands. This is possible if we implement viewWillTransitionToSize:withTransitionCoordinator:. This method is called when the widget's height changes. Because a transition coordinator object is passed in, we can include additional animations.
As you can see, we change the alpha value of the details label, but you can add any type of animate that you feel enhances the user experience.
-(void)viewWillTransitionToSize:(CGSize)size
      withTransitionCoordinator:
       (id<UIViewControllerTransitionCoordinator>)coordinator
{
    [coordinator animateAlongsideTransition:
       ^(id<UIViewControllerTransitionCoordinatorContext> context)
       {
          [self.detailsLabel setAlpha:1.0];
       } completion:nil];
}
Step 6: Build & Run
We are ready to run the application one more time. Give it a try and tap the percentage label to reveal the new details.
Conclusion
While all this logic might seem overly complex for such a simple task, you will now be familiar with the complete process to create a today extension. Keep these principles in mind when designing and building your widget. Remember to keep it simple and direct, and don't forget performance.
Caching here wouldn't be needed at all with these fast operations, but it is especially important if you have expensive processing to do. Use your knowledge of view controllers and check that it works for various screen sizes. It's also recommended that you avoid scroll views or complex touch recognition.
Although the extension will have a separate container, as we saw earlier, it is possible to enable data sharing between the extension and the containing app. You can also use NSExtensionContext's openURL:completionHandler: with a custom URL scheme to launch your app from the widget. And if code is what you need to share with your extension, go ahead and create a framework to use in your app and extension.
I hope the knowledge presented here comes in useful when building your next great today widget.

Comments