Introduction
Game Center is Apple's social gaming network. It enables users to track their high scores on a leaderboard, compare achievements, invite friends to play a game, and to start a multiplayer game through auto-matching. So if you have built an iOS game and want users to be able to post their scores to a Game Center leaderboard, this is the right tutorial for you!
For more info about apps and the Game Center, visit its Apple Developer page.
The Xcode Project
For the sake of this tutorial, I've created a basic Xcode project that you can download from GitHub. I'll explain all the necessary steps to create a leaderboard on iTunes Connect and the needed code to submit a score to it, along with a button to open the leaderboard from within the app.
Here's how the app's Storyboard looks:

This project has a UILabel with red text I've called scoreLabel and a couple of UIButtons. The red one will add 10 points to the score and submit it to a Game Center leaderboard, and the blue one will open the GKGameCenterViewController and show that leaderboard.
The very first thing to do is to enable Game Center in the Capabilities tab in Xcode.

Then you must import GameKit at the top of your ViewController.swift file and add the GKGameCenterControllerDelegate protocol to the class declaration.
import GameKit


class ViewController: UIViewController,
GKGameCenterControllerDelegate
{
Let's add a few variables now. You can paste this code right into your ViewController class:
/* Variables */
var gcEnabled = Bool() // Check if the user has Game Center enabled
var gcDefaultLeaderBoard = String() // Check the default leaderboardID

var score = 0

// IMPORTANT: replace the red string below with your own Leaderboard ID (the one you've set in iTunes Connect)
let LEADERBOARD_ID = "com.score.mygamename"
The first variable indicates if you have Game Center enabled, and the second one will be used later by the local player authentication code to enable GameKit to identify the default leaderboard.
score will initially be 0, of course.
LEADERBOARD_ID is a String that you must set in order to make Game Center submit your score to the server through the default leaderboard identifier. Choose the name you want, but keep in mind that it has to have a web-reversed syntax. That's why I've identified this leaderboard as com.score.mygamename, where mygamename should be replaced by your app's name in lowercase characters, with no spaces.
Before enabling Game Center in the iTunes Connect page of your app, let's finish the basic code. Add this line into viewDidLoad():
 // Call the GC authentication controller
authenticateLocalPlayer()
And add the following function right below viewDidLoad():
// MARK: - AUTHENTICATE LOCAL PLAYER
func authenticateLocalPlayer() {
    let localPlayer: GKLocalPlayer = GKLocalPlayer.localPlayer()

    localPlayer.authenticateHandler = {(ViewController, error) -> Void in
        if((ViewController) != nil) {
            // 1. Show login if player is not logged in
            self.present(ViewController!, animated: true, completion: nil)
        } else if (localPlayer.isAuthenticated) {
            // 2. Player is already authenticated & logged in, load game center
            self.gcEnabled = true

            // Get the default leaderboard ID
            localPlayer.loadDefaultLeaderboardIdentifier(completionHandler: { (leaderboardIdentifer, error) in
                if error != nil { print(error)
                } else { self.gcDefaultLeaderBoard = leaderboardIdentifer! }
            })

        } else {
            // 3. Game center is not enabled on the users device
            self.gcEnabled = false
            print("Local player could not be authenticated!")
            print(error)
        }
    }
}
In case a user has not logged into Game Center from Settings on their device, the method above will show the Game Center login screen as soon as it connects to the GC server. Once the player is logged in, the app gets the default leaderboard id.
In the next method we'll make the app grab the LEADERBOARD_ID string you've previously created and pass it as the default leaderboard id of the Game Center server.
// MARK: - ADD 10 POINTS TO THE SCORE AND SUBMIT THE UPDATED SCORE TO GAME CENTER
@IBAction func addScoreAndSubmitToGC(_ sender: AnyObject) {
    // Add 10 points to current score
    score += 10
    scoreLabel.text = "\(score)"

    // Submit score to GC leaderboard
    let bestScoreInt = GKScore(leaderboardIdentifier: LEADERBOARD_ID)
    bestScoreInt.value = Int64(score)
    GKScore.report([bestScoreInt]) { (error) in
        if error != nil {
            print(error!.localizedDescription)
        } else {
            print("Best Score submitted to your Leaderboard!")
        }
    }
}
The code above also adds 10 points to the current score, so every time you click the Add Score and Submit To GC button, you'll see the red score label changing, and the app will submit that updated score to your GC leaderboard.
You need now to add a GameKit delegate method that will dismiss the GC Controller.
// Delegate to dismiss the GC controller
func gameCenterViewControllerDidFinish(_ gameCenterViewController: GKGameCenterViewController) {
    gameCenterViewController.dismiss(animated: true, completion: nil)
}
There's only one method left to code before creating your leaderboard on iTunes Connect, which is the action for the button that will open the Game Center ViewController.
// MARK: - OPEN GAME CENTER LEADERBOARD
@IBAction func checkGCLeaderboard(_ sender: AnyObject) {
    let gcVC = GKGameCenterViewController()
    gcVC.gameCenterDelegate = self
    gcVC.viewState = .leaderboards
    gcVC.leaderboardIdentifier = LEADERBOARD_ID
    present(gcVC, animated: true, completion: nil)
}
As you can see above, this code instantiates the GC controller, assigns its delegate to that controller, sets the controller's view state to show leaderboards, and passes along your LEADERBOARD_ID before presenting the controller.
Now we're done coding, but you can't run the app yet. If you do, you'll get an error from Xcode since you haven't created your own leaderboard in the iTunes Connect page of your app.
Set Up Game Center on iTunes Connect
You should already have created an iOS app in iTunes Connect with your own Bundle Identifier. Now enter your App from your iTunes Connect dashboard, and click Features and then Game Center.
Then click the + icon next to Leaderboards.

Choose Single Leaderboard on the next screen.

Here you have to type the name you want to give your leaderboard. In the screenshot below, I've used My Leaderboard Name just as an example. You may call yours Best Score Leaderboard or anything you wish.
In the Leaderboard ID field, paste the string of the LEADERBOARD_ID we've previously created in the Xcode project.
Since the score is a number, select Integer in the Score Format Type field. You may choose the option you want for Submission Type and Sort Order. Leave Score Range (Optional) blank.
Lastly, click the Add Language button.

In the popup window, you must select the language of your leaderboard. The default is always English. Type the English name of your leaderboard again, and select a Score Format (I chose commas to separate groups of digits).
The Score Format Suffix fields are optional; you can leave both fields blank or type the desired suffix. For instance, if your game has score points, you can type "point" and "points" for plural, so the Game Center controller will add that suffix to the end of scores displayed on your leaderboard, like "1 point" or "100 points".
You can also add an icon. The image must be a .jpeg, .jpg, or .png file that is 512x512 or 1024x1024 pixels, at least 72 DPI, and in the RGB color space without a transparent background. Click Choose File to upload your image.
Lastly click Save, and you're done. You can repeat the steps above to add more languages—just make sure to type the leaderboard names according to the selected language.

Once you've added a window, you can check over your leaderboard's details. If everything is fine, click Save, and you'll be redirected to the Features page, with your brand new leaderboard.


Now it's time to enable Game Center in the App Store section of your app. Click App Store and Prepare for Submission.

Scroll down until you find Game Center with a switch next to it. Enable this, and it will turn green. Then click on the + sign next to Leaderboards, select your leaderboard from the list, and click Done.

Click Save in the top-right corner of the window, and you'll be all done setting up Game Center on iTunes Connect.

You can now go back to your Xcode project and run the app on a real device or even on the iOS Simulator. If you're not already logged into Game Center, the Sign In controller will show up. It looks like this:

Sign in with your credentials, and you can start testing the app!
In our addScoreAndSubmitToGC() method, we added the following print() call:
print("Best Score submitted to your Leaderboard!")
So if you tap the red button, the scoreLabel will display "10", and the Xcode console will print Best Score submitted to your Leaderboard!

Tap the red button three more times, and then tap the blue one to open your leaderboard, and check that the submitted score is 40. You should see something like this:

Conclusion
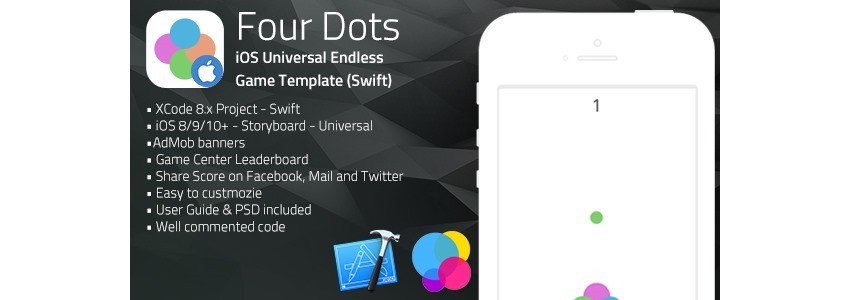
If you want to see Game Center in action with a fully functional game app, you might like to check out my CodeCanyon game template Four Dots. It's a template for a minimal endless game that saves best scores and submits them to the Game Center.

Game templates like this are a great way to get a head start on your next game. CodeCanyon has hundreds of iOS game templates that you can use to jump-start development—letting you build the next killer game that much faster!
Thanks for reading, and I'll see you next time! Please check out some of our other tutorials on Swift and iOS app development.


Comments