Welcome to part two of the How to Blow Stuff up With the Corona SDK tutorial series. In this tutorial, we will be enhancing our demo app from part I by allowing the user to place an actual bomb graphic on the screen with a time-delayed explosion. We will aslo modify the explosion effect to occasionally cause crates to actually explode rather than just fly off the screen.
In part I of this series, we got a feel for how to setup a dynamic environment with Corona's easy to use Physics library. The environment included static objects, such as the floor, and programmatically generated dynamic objects like crates. A user touch event would then generate an explosive force that would send the crates flying. If you haven't read part I yet, I suggest you do so before continuing. The reader should have some understanding of the essential physics concepts explained in Part I to be able to understand Part II.
Refresher
Let's start with a little refresher on how we setup our physics environment in part I. We will include our programmatically generated set of crates that are stacked and sitting on our floor:
local physics = require("physics")

physics.start()

physics.setScale( 40 )

display.setStatusBar( display.HiddenStatusBar )

-- The final "true" parameter overrides Corona's auto-scaling of large images
local background = display.newImage( "bricks.png", 0, 0, true )
background.x = display.contentWidth / 2
background.y = display.contentHeight / 2

local floor = display.newImage( "floor.png", 0, 280, true )
physics.addBody( floor, "static", { friction=0.5 } )

local crates = {}

for i = 1, 5 do
	for j = 1, 5 do
		crates[i] = display.newImage( "crate.png", 140 + (i*50), 220 - (j*50) )
		physics.addBody( crates[i], { density=0.2, friction=0.1, bounce=0.5 } )
	end
end
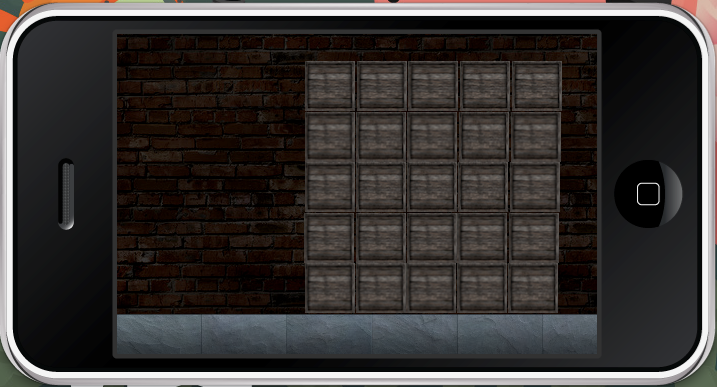
All the workings of the above code are fully explained in Part I of the tutorial so check it out if something seems confusing.
Set the bomb!
For our first step we are going to add a little graphical update to our setBomb method. Instead of a touch event immediately generating the explosion, we are going to place a bomb on the screen as its own physics object:
local function setBomb ( event )
	if(event.phase == "began") then
		local bomb = display.newImage( "bomb.png", event.x,event.y )
		physics.addBody( bomb, { density=0.2, friction=0.1, bounce=0.5 } )
	end
end
background:addEventListener("touch",setBomb)
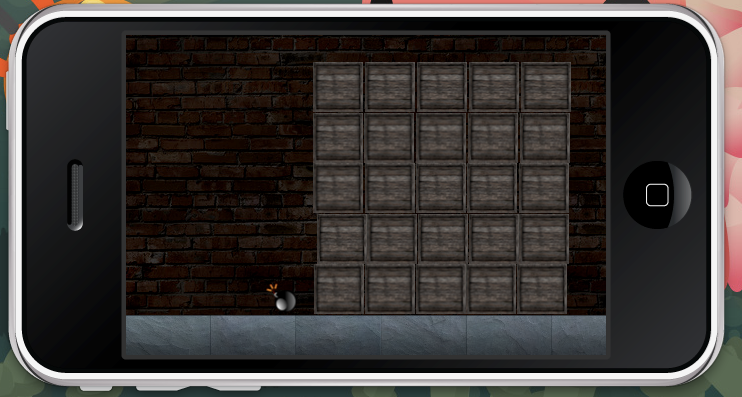
Just as before, we are adding an event listener to the background to watch for any touch events and fire the setBomb method when one occurs. Inside the method, we are isolating any activity to the "began" phase of the event. If we didn't isolate this phase, it would result in the code being executed multiple times as touch events have many phases.
The setBomb method as it stands now does very little. It loads a nice looking bomb graphic and adds it to the screen as a dynamic physics object. Now we'll integrate our explosion method back into the code as a local function called blast:
local circle = ""
local explosion = ""
local function blast( event )
    circle = display.newCircle( bomb.x, bomb.y, 80 )
	explosion = display.newImage( "explosion.png", bomb.x, bomb.y )
	circle:setFillColor(0,0,0, 0)
	physics.addBody( circle, "static", {isSensor = true} )
	circle.myName = "circle"
	circle.collision = onLocalCollision
	circle:addEventListener( "collision", circle )
 end
blast()
The circle object here helps us to calculate our blast radius. We are adding a collision event listener to detect which of the crates falls within the blast zone. In addition, we are also adding an explosion graphic to the screen in the same position as the bomb graphic once the blast goes off.
Timing the Blast
If you try the code out at this point, you'll notice that everything happens really quickly and some artifact graphics are left behind. To make it more suspenseful, we are going to replace our "blast()" function call with a timer that will delay the explosion of the bomb by 3 seconds:
timer.performWithDelay(3000, blast )
Simple as that! The timer class has a function called performWithDelay() with two parameters: the number of milliseconds to wait and the method to call. So, in this case, the 3,000 milliseconds equals 3 whole seconds of delay.
Removing Artifacts
Since the bomb will be exploding after the 3 second delay, we need to remove this object from the screen once the blast occurs. This can be done very easily. All objects that are present on the screen come with a handy removeSelf() function. Once an object removes itself from the screen, the Physics engine is smart enough to garbage collect and remove it from all physics calculations as well. We can add the following line to the bottom of the blast function:
bomb:removeSelf()
In addition to removing the bomb, we are going to remove our circle blast radius object as well as the explosion graphic we added for effect. Since we need to give our blast radius circle a little time to create collisions with our crates, we are going to remove it 1/10th of a second after we call the blast function. This can be accomplished by replacing our timed blast function call with the following code:
local function removeStuff( event )
	circle:removeSelf()
	explosion:removeSelf()
 end
 timer.performWithDelay(3000, blast )
 timer.performWithDelay(3100, removeStuff)
As you can see we are calling the blast function after a 3 second delay from touching the screen the same as we were before. We've now added another delayed call that is executed 3.1 seconds after touching the screen that cleans up our remnant objects with the removeSelf() function.
The entire function we created now looks like this:
local function setBomb ( event )
	if(event.phase == "began") then
		local bomb = display.newImage( "bomb.png", event.x,event.y )
		physics.addBody( bomb, { density=0.2, friction=0.1, bounce=0.5 } )

		local circle = ""
		local explosion = ""
		local function blast( event )
			media.playEventSound( explosionSound )
		    circle = display.newCircle( bomb.x, bomb.y, 80 )
			explosion = display.newImage( "explosion.png", bomb.x, bomb.y )
			bomb:removeSelf()
			circle:setFillColor(0,0,0, 0)
			physics.addBody( circle, "static", {isSensor = true} )
			circle.myName = "circle"
			circle.collision = onLocalCollision
			circle:addEventListener( "collision", circle )
		 end

		 local function removeStuff( event )
			circle:removeSelf()
			explosion:removeSelf()
		 end
		 timer.performWithDelay(3000, blast )
		 timer.performWithDelay(3100, removeStuff)
	end
end
background:addEventListener("touch",setBomb)
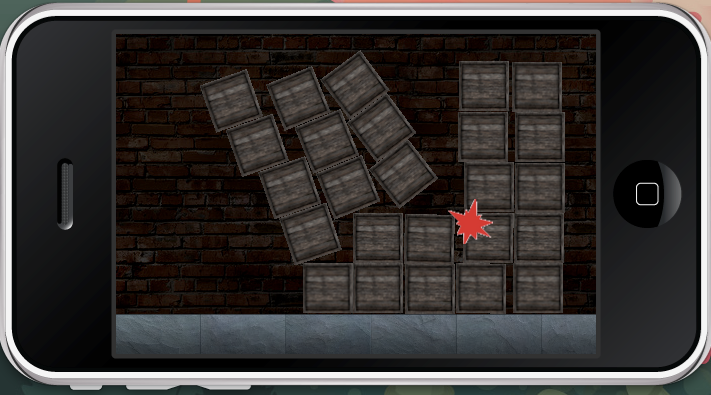
Creating a Destruction Threshold
In part I of our tutorial, our collision detection function looked like this:
local function onLocalCollision( self, event )
        if ( event.phase == "began" and self.myName == "circle" ) then
			local forcex = event.other.x-self.x
			local forcey = event.other.y-self.y
			if(forcex < 0) then
				forcex = 0-(80 + forcex)-12
			else
				forcex = 80 - forcex+12
			end
			event.other:applyForce( forcex, forcey, self.x, self.y )
        end
end
It simply found all the crates within our blast radius and applied a force to blast them away from the epicenter of the explosion. To make things more interesting, we are going to add a destruction threshold to the crates that will cause them to explode if the force applied to them is high enough. It can be done like this:
if(math.abs(forcex) > 60 or math.abs(forcey) > 60) then
	local explosion = display.newImage( "explosion.png", event.other.x, event.other.y )
	event.other:removeSelf()
	local function removeExplosion( event )
		explosion:removeSelf()
	end
	timer.performWithDelay( 100,  removeExplosion)
end
We need to observe the force that we applied to each of the crates to detect if it is higher than 60. 60 in this case in an arbitrary number based on our force calculation. We use the math.abs function to get the absolute value of the force. In our example, forces can be positive or negative depending on the direction of the applied force. We're not worried about direction in this case, we simply want to know if the force exceeds the threshold of 60. Feel free to play with this threshold number to change how weak or strong the crates are.
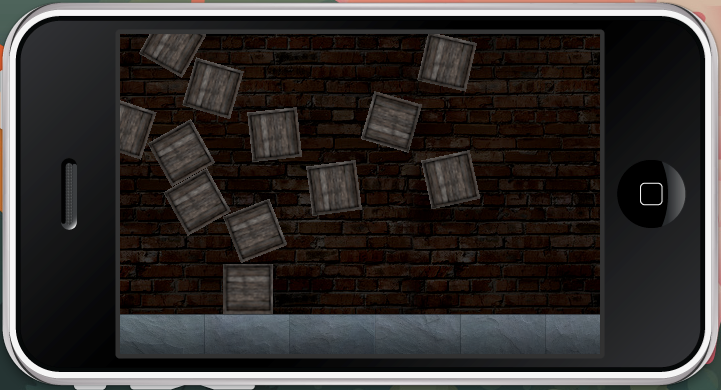
In Part I, our explosion force was calculated in a way that causesd it to diminish the further a crate is from the epicenter of the blast. So crates that are closer to the epicenter have a higher probability of being destroyed, and the others will simply fly off the screen. As we did before with our timer class, we are displaying an explosion graphic in the former position of a destroyed crate, and then we are removing it from the screen 1/10th of a second later. The final collision detection method will look like this:
local function onLocalCollision( self, event )
        if ( event.phase == "began" and self.myName == "circle" ) then
			local forcex = event.other.x-self.x
			local forcey = event.other.y-self.y
			if(forcex < 0) then
				forcex = 0-(80 + forcex)-12
			else
				forcex = 80 - forcex+12
			end
			event.other:applyForce( forcex, forcey, self.x, self.y )
			if(math.abs(forcex) > 60 or math.abs(forcey) > 60) then
				local explosion = display.newImage( "explosion.png", event.other.x, event.other.y )
				event.other:removeSelf()
				local function removeExplosion( event )
					explosion:removeSelf()
				end

				timer.performWithDelay( 50,  removeExplosion)
			end

        end
end
Sound On!
As a final step in our tutorial, we are going to play an explosion sound effect when our bomb explodes. Like everything else in Corona, it is surprisingly simple to do this. We'll start by including the media library at the top of our project and preloading our sound file:
local media = require("media")
local explosionSound = media.newEventSound( "explosion.mp3" )
To play the sound we'll add the following line to our blast() function that is inside our setBomb() function:
local function blast( event )
	media.playEventSound( explosionSound )
	...
end
Now anytime the blast() function is called, it will use the playEventSound function from the media library to play our "explosion.mp3" sound file. It couldn't be any easier if we tried!
And there we have it! We now have a more complete example of how easy it is to create explosions in the Corona platform. Feel free to download the zips for both Part I and II of the tutorial and play around!

Comments