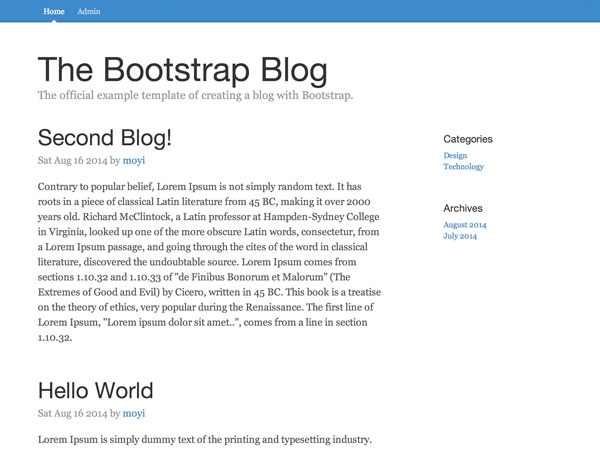
In the last session, we built an "Add a New Blog" function, and now users can post into the blog system. A natural extension would be to enable users to change and delete existing blogs. In this session, we are going to build some groundwork for those functions, making a list view of blogs in the admin page and adding a router (if you don't know what a router is, this session is for you).
1. Create and Render BlogsAdminView
Step 1: HTML Template
As usual, let's begin by adding an HTML template to admin.html. This should be fairly easy for you now—really similar to #blogs-tpl in index.html. The only difference is we are making a table this time:
<script id="blogs-admin-tpl" type="text/x-handlebars-template">
    <table>
		<thead>
			<tr>
				<th>Title</th>
				<th>Author</th>
				<th>Time</th>
				<th>Action</th>
			</tr>
		</thead>
		<tbody>
			{{#each blog}}
			<tr>
				<td><a class="app-link" href="#">{{title}}</a></td>
				<td>{{authorName}}</td>
				<td>{{time}}</td>
				<td>
					<a class="app-link" href="#">Edit</a> |
					<a class="app-link" href="#">Delete</a>
				</td>
			</tr>
			{{/each}}
		</tbody>
	</table>
</script>
Step 2: Create BlogsAdminView Class
Similarly, create a BlogsAdminView in admin.js. If you are not familiar with these, I highly recommend you check my earlier posts.
var Blogs = Parse.Collection.extend({
        model: Blog
	}),
	BlogsAdminView = Parse.View.extend({
		template: Handlebars.compile($('#blogs-admin-tpl').html()),
		render: function() {
			var collection = { blog: this.collection.toJSON() };
			this.$el.html(this.template(collection));
		}
	});
Step 3: Render BlogsAdminView
To actually see the list, we need to render it. Let's just add it to the render() function in WelcomeView for now:
render: function() {
    var attributes = this.model.toJSON();
	this.$el.html(this.template(attributes));
	var blogs = new Blogs();
	blogs.fetch({
		success: function(blogs) {
			var blogsAdminView = new BlogsAdminView({ collection: blogs });
			blogsAdminView.render();
			$('.main-container').append(blogsAdminView.el);
		},
		error: function(blogs, error) {
			console.log(error);
		}
	});
}
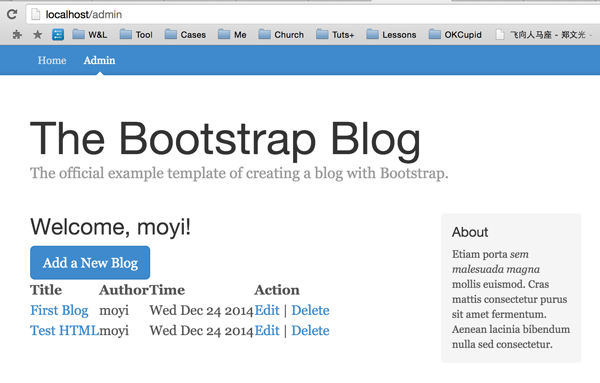
Check the admin page, and you will see a list view below the Add a New Blog button.

2. Router
If you are following along, I hope you now feel comfortable writing to and reading from the database. You should also find it easy to create and render views to present the data you get. However, you may start to feel that there could be too many View.render() functions here and there, and they could make your code hard to read and maintain. You may also feel bad seeing admin.html in the URL.
Thinking about the edit function we are going to build, we surely can build it by adding events and passing in the blog we want to edit as a object and then rendering it. But wouldn't it be great if we can have something like http://AnExampleDomain.net/edit/id? The idea of a router is going to help us achieve that. It's a way to map functions to URLs.
Step 1: Add the Structure of the Router
To help you learn this concept, why don't we just go ahead and start a new router in admin.js:
var BlogRouter = Parse.Router.extend({

		// Here you can define some shared variables
		initialize: function(options){
			this.blogs = new Blogs();
		},

		// This runs when we start the router. Just leave it for now.
		start: function(){
			Parse.history.start({pushState: true});		},

		// This is where you map functions to urls.
		// Just add '{{URL pattern}}': '{{function name}}'
		routes: {
			'admin': 'admin',
			'login': 'login',
			'add': 'add',
			'edit/:url': 'edit'
		},

		admin: function() {},
		login: function() {},
		add: function() {},
		edit: function(url) {}

	}),
	blogRouter = new BlogRouter();

blogRouter.start();
As you can see, it's easy to map URL patterns to functions in a router and start it. Now if a user visits /admin, it will trigger the admin() function.
Notice that you can even take in parameters in URLs by adding a colon before a variable name, like edit/:url in the code above.
Now, let's take a few steps to reorganize our existing code into the router.
Step 2: /login Page
The easiest one should be the /login page. Just move the rendering code into the login() function:
login: function() {
    var loginView = new LoginView();
	loginView.render();
	$('.main-container').html(loginView.el);
}
Step 3: /admin Page
Next, let's write a function for the /admin page. Previously, when users visited /admin.html, we sent them to the login screen by default. And if they logged in successfully, we then sent them to the welcome screen. The rendering function for welcomeView was in the success callback. That's not the best way to organize your code, and that's not convenient for your user.
So now, let's just do a check on the /admin page. If they are logged in, we show them the welcome page, and if they are not, we redirect them to /login.
admin: function() {
    // This is how you can current user in Parse
	var currentUser = Parse.User.current();

	if ( !currentUser ) {
		// This is how you can do url redirect in JS
		blogRouter.navigate('login', { trigger: true });

	} else {

		var welcomeView = new WelcomeView({ model: currentUser });
		welcomeView.render();
		$('.main-container').html(welcomeView.el);

		// We change it to this.blogs so it stores the content for other Views
		// Remember to define it in BlogRouter.initialize()
		this.blogs.fetch({
			success: function(blogs) {
				var blogsAdminView = new BlogsAdminView({ collection: blogs });
				blogsAdminView.render();
				$('.main-container').append(blogsAdminView.el);
			},
			error: function(blogs, error) {
				console.log(error);
			}
		});
	}
}
As you can see in the code, we use the blogRouter.navigate() function to redirect them to the /login page. Similarly, let's change the rendering function in /login view into a blogRouter.navigate() function as well:
Parse.User.logIn(username, password, {
    // If the username and password matches
	success: function(user) {
		blogRouter.navigate('admin', { trigger: true });
	},
	// If there is an error
	error: function(user, error) {
		console.log(error);
	}
});
Remember to take out the old rendering functions in the previous code.
Step 4: Test and Set Default Navigate as a Temporary Solution
Let's give those two functions a try. Test and... nothing! That's because we need to direct to /admin on start; admin.html by itself does not match any URL pattern we set in the router.
Let's add a default navigate to the start() function so that when the router starts, it automatically takes the user to the /admin page:
start: function(){
    Parse.history.start({pushState: true});
	this.navigate('admin', { trigger: true });
}
Now if you give it a try, everything should work correctly:
Notice that you still can't directly visit /admin or /login yet. And if you are putting your project under a directory, you will probably notice that your URL will redirect from http://localhost/directory/admin.html to http://localhost/admin, and it seems weird. We will cover and solve those issues in future sessions. Today our main goal is to understand how the router works once it gets started, and lay some groundwork.
Step 5: /add Page
Moving on, it's time to move the rendering of the "Add a New Blog" page from WelcomeView to the router.
BlogRouter = Parse.Router.extend({
    ...
	add: function() {
			var addBlogView = new AddBlogView();
			addBlogView.render();
			$('.main-container').html(addBlogView.el);
		},
	...
})
We can also rewrite the event in WelcomeView to just trigger a navigation:
WelcomeView = Parse.View.extend({
    template: Handlebars.compile($('#welcome-tpl').html()),
	events: {
		'click .add-blog': 'add'
	},
	add: function(){
		blogRouter.navigate('add', { trigger: true });
	},
	render: function(){
		var attributes = this.model.toJSON();
		this.$el.html(this.template(attributes));
	}
})
Now check and make sure everything works.
Conclusion
In this session, we made another list view of blogs in the admin panel, and you have learned about the important concept of a router. I hope now it feels natural for you to create and render views with Parse.js. And you've started to see how a router can help us organize and reuse our code.
We didn't dig into the details of the mechanics of the router, like understanding why we have to have {trigger: true}. As I mentioned before, the purpose of this tutorial is to show you how you can make things work. But if you are interested in learning more, definitely check out the documentation. We will also cover more router knowledge when we need it later in the series.
In the next session, we are going to create an /edit page, and put the router to real use. I hope you are excited to nail it. We will soon be pulling everything together, so stay tuned!

Comments