In this series, we're going to be taking a look at OpenCart developers who consider themselves beginners to can level-up their skills in order to become more advanced developers.
Specifically, this guide is written for the developers who are already familiar with PHP, Object-Oriented Programming and the Model-View-Controller design pattern.
In the first part you will be covering the following lessons
- What is OpenCart?
- Installing OpenCart on your Local PC
- Understanding the Basic File Structure
What is OpenCart?
In the modern age of Information Technology, nobody can deny how important the role that Internet and the web has in our lives; however, the trend of eCommerce is increasing day-by-day.
OpenCart is an open source, free, and powerful shopping cart system designed to give us reliability when building our own implementation of a web store.
Why OpenCart?
There are a lot of factors for to choose OpenCart, but some of the important factors are as below:
- OpenCart is extremely easy from the from the user and developer perspectives.
- There are a lot of articles available via the Internet which can help you out in nearly every situation.
- Solid documentation is available, so a developers easily can find information of each and every detail of the platform.
- Customization of code is quite easy such that a beginner level developer can also work on the code with minimal effort.
Of course, this is just a high-level overview. For now, let's discuss some of the powerful features that gives OpenCart superiority over other alternatives.
Note, however, there are a large number of features but we'll discussing a portion of them in this article.
Powerful Features:
- Multiple stores in a single systemm
- Powerful and automatic image resizing utlities
- Build-in error logging
- Backup and restore
- Multilingual support
- Support for a vast array of modules
Installing OpenCart on a Local PC
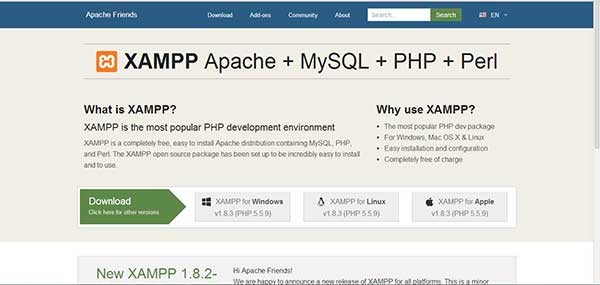
First of all download, and install latest version of XAMPP on your PC visiting the site Apache Friends and install the latest version of it depending upon your operating system requirements.
Note that in my examples, I'll be using Windows 7. Download and follow the installation steps.
After the installation, run XAMPP Server and start the Apache and MySQL services. Make sure that both Service labels are green, if not, try re-installing server again.
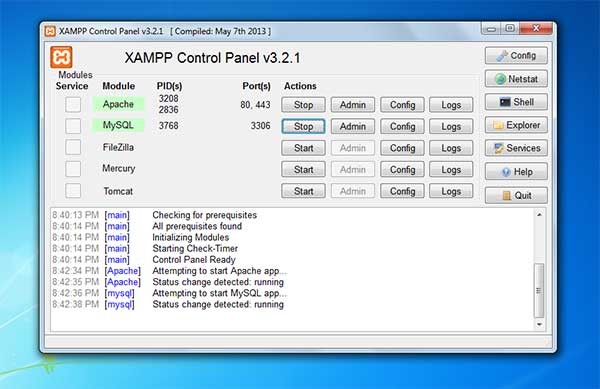
Sometimes Apache does not start because of Skype.If this problem occurs, try quitting Skype and start the service again.
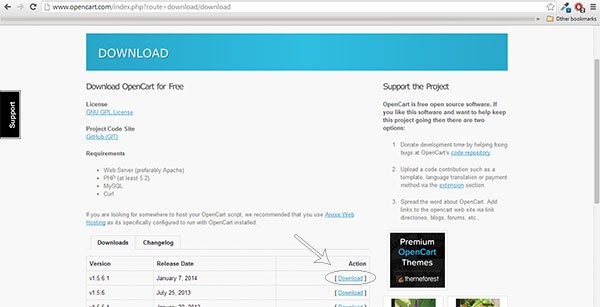
At this point, we should be ready to go. Let's download the latest version of OpenCart from the official site and download the latest release as per following screenshot.
Now open XAMPP and click on the Explorer Button located at on the right-side. This will open a explorer window where XAMPP is installed. There you'll see htdocs directory, just open it.
Extract the OpenCart zip and copy uploads directory inside htdocs and rename it something. (I have named my unzipped OpenCart directory as OpencartStore. Secondly, create an empty file named config.php inside admin directory.
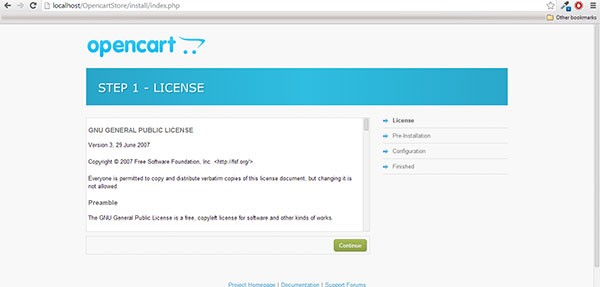
Now open your favorite browser and enter url. http://localhost/OpencartStore
An installation page will be shown over browser which you will have the License Agreement. Just click on Continue button.
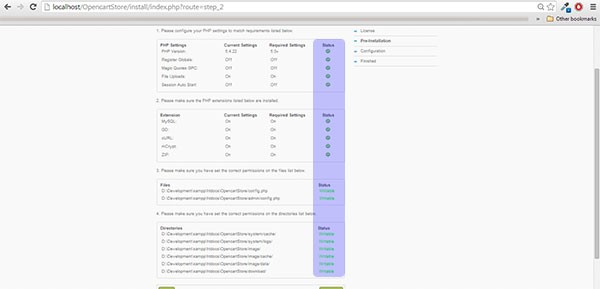
On the Pre-Installation page, make sure that you'll meet all the requirement of PHP Settings and Extensions.
Mac & Linux Users set the Permission of listed files & directories to writable (chmod 775)
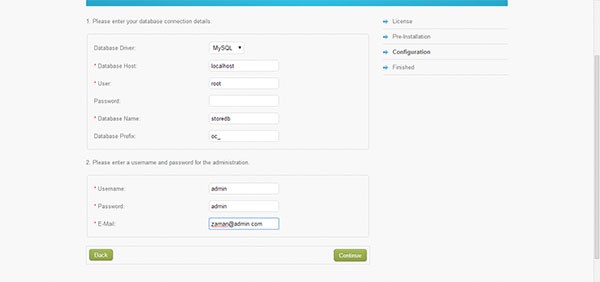
Go to phpMyAdmin and create a database. For Example, I've created a database named storedb. Now populate the configuration form labeled "Configuration" similar to what we have below:
- Database Driver: MySQL
- Database Host: localhost
- User: root
- Password: (Password of your database user)
- Database Name: storedb (What you've created on phpMyAdmin)
- Database Prefix: (leave it default i.e., oc_)
Provide administrator fields on very last page. I've filled form with following details:
- Username: admin
- Password: admin
- Email: (store admin email address)
Clicking on the Continue button will take some time as OpenCart copies Database tables and PHP files, don't worry about the time, wait for a few seconds and you're store is ready!
Don't forget to Delete "OpencartStore/install" folder after successful installation.
Navigation to http://localhost/OpencartStore again and you can see the front-end of your store with a set of dummy data. You can login to the back-end by visiting http://localhost/OpencartStore/admin
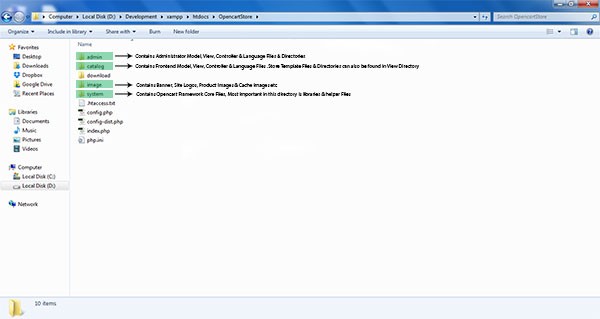
Understanding the Basic File Structure
OpenCart has a simple file structure. Users will likely find no difficulty after learning the basic details of the directory.
This is where we'll pickup in the next part of the series.
But for now, review, and let me know of any feedback, questions, or comments that you have for the article and the series below!

Comments