In this series, we've been looking at how to create custom administration pages in WordPress without the use of the Settings API. This isn't to say the Settings API isn't useful (because it is!), but there may be times when we need to implement some custom functionality or more specialized implementations of features that the available APIs don't afford.
Additionally, we're looking at some of the most important software development principles, such as the single responsibility principle, and applying them to our work.
If you're just now joining the series, I recommend reading the previous posts so that you're familiar with what we've done up to this point and so you can understand why we're making some of the decisions that we're making when writing our code.
A Quick Review
Though I can't summarize everything we've covered thus far in the series, I can make sure that I highlight the important points.
- We've introduced the core plugin and added a submenu item and options page for the plugin in the WordPress dashboard.
- We've discussed the single responsibility principle and the role it plays in our development.
- A single
inputelement has been added that will accept users' input. - We've added a nonce value to the page, but we haven't actually done anything with it.
With all of that said, I'm assuming that you have the latest version of the source code (which is available as an attachment in the previous article) and you're ready to move forward.
Before We Start
As with the other articles, I assume that you have a local WordPress development environment set up on your machine.
Furthermore, I assume that you have the latest version of the source code and you're ready to continue building on top of it or you're comfortable reading through the code that we have here and implementing it when you have more time.
Finally, we'll be stepping through each bit of code incrementally. First, I'll talk about what we're going to do, then I'll show the code, and then I'll explain whatever it is that the code is doing so there's nothing left that could be confusing.
If, however, you find yourself confused about anything in the code and the tutorial doesn't do a good job of explaining what's going on, then please leave a comment and I'll be sure to follow up with you.
Let's get started.
Implementing New Features
In the last article, we left off with a plugin that looks as if it does something but doesn't actually save anything to the database, let alone retrieve anything from the database.
In short, we have a plugin that looks functional but isn't. And that's where we're going to pick up with this tutorial.
Specifically, we're going to be tackling the following topics:
- We're going to verify the nonce value that we created and defined in the previous tutorial to gain an understanding as to how one component of WordPress security works.
- We'll verify that the existing user has permission to actually submit the information (and prevent them from doing so, if they don't).
- If the submission is secure and the user has permission, we'll then sanitize the information to make sure no malicious content gets into the database.
With that as our roadmap, we're ready to jump back into the code and continue working on the plugin.
Security
Recall from the previous post, we took advantage of the WordPress API function wp_nonce_field. This particular function does the following:
The nonce field is used to validate that the contents of the form request came from the current site and not somewhere else. A nonce does not offer absolute protection, but should protect against most cases. It is very important to use nonce fields in forms.
If you attempt to save the options page, you will likely be presented with a white screen. That's never good, but it's what we expect given the current state of our plugin.
We need to introduce a function that will hook into one of the available WordPress hooks, and will check if the nonce value is valid. If it is valid, then it will let us proceed with saving the information; otherwise, it should not let us proceed.
Since we're in the business of creating a custom administration page, we're going to need a different hook than what we may be used to using in situations like this. In this example, we're going to use the admin_post hook.
Fires on an authenticated admin post request where no action was supplied.
Recall from our previous discussions, though, that we don't want to overload our classes with more responsibility than necessary. Remember, the question that we must constantly ask ourselves is: "What reason would this class have to change?"
Right now, we don't have a class that can manage saving options. So let's introduce one. In the admin directory of the plugin, let's create a Serializer class. This will be responsible for saving the value of our options.
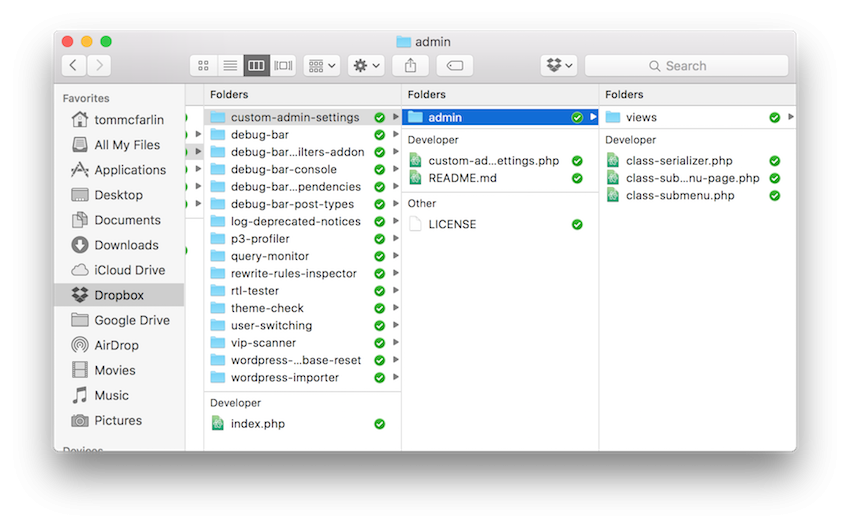
As you can see, I've named my file class-serializer.php. We know from experience and from the code above that it's going to need to hook into the admin_post hook mentioned above, and we know that we're going to need a function responsible for saving the information.
Let's define those now.
<?php
/**
 * Performs all sanitization functions required to save the option values to
 * the database.
 *
 * @package Custom_Admin_Settings
 */

/**
 * Performs all sanitization functions required to save the option values to
 * the database.
 *
 * This will also check the specified nonce and verify that the current user has
 * permission to save the data.
 *
 * @package Custom_Admin_Settings
 */
class Serializer {

    public function init() {
        add_action( 'admin_post', array( $this, 'save' ) );
    }

    public function save() {

        // First, validate the nonce.
        // Secondly, verify the user has permission to save.
        // If the above are valid, save the option.

    }
}
Obviously, there's still work to do (in fact, we haven't even instantiated this class!) but the above code could be enough to see where we're heading.
A Quick Conversation About Dependencies
Before we add any functionality, let's go ahead and set this up when our plugin first loads. First, return the custom-admin-settings.php. Now, at this point, we need to ask ourselves if any of our existing classes should have the Serializer as a dependency.
I think that a case can be made that the Submenu_Page should have a reference to the serializer since the page has the options to save.
Alternatively, it's also possible to leave this file completely separate and have it available for another pattern. If we were to do that, we'd be diverging from the topic at hand. Although I think it's important, it's outside the scope of what we're aiming to do.
So let's instantiate the Serializer class, initialize it, and then pass it into the constructor of the submenu page. The code in the plugin's bootstrap file should now look like this:
<?php

add_action( 'plugins_loaded', 'tutsplus_custom_admin_settings' );
/**
 * Starts the plugin.
 *
 * @since 1.0.0
 */
function tutsplus_custom_admin_settings() {

    $serializer = new Serializer();
    $serializer->init();

    $plugin = new Submenu( new Submenu_Page( $serializer ) );
    $plugin->init();

}
With that, we're ready to continue saving our options.
Back to Development
Let's return to the Serializer. Now that we've got it wired up to the rest of the plugin, it's time actually to write some code so, as per the comment suggests, let's verify the nonce value that we've created on the front-end.
Luckily, WordPress make this easy through a built-in API function: wp_verify_nonce. This function accepts two arguments:
- The action
- The name
If you recall from the previous article, we used acme-settings-save as our action and acme-custom-message as our nonce value. To validate it, we need to check that it exists in the $_POST collection and that it passes WordPress's native checks.
To do this, I like to create a private method that allows me to encapsulate this logic into a function that I can use in the save function we've defined above.
<?php

/**
 * Determines if the nonce variable associated with the options page is set
 * and is valid.
 *
 * @access private
 *
 * @return boolean False if the field isn't set or the nonce value is invalid;
 *                 otherwise, true.
 */
private function has_valid_nonce() {

    // If the field isn't even in the $_POST, then it's invalid.
    if ( ! isset( $_POST['acme-custom-message'] ) ) { // Input var okay.
        return false;
    }

    $field  = wp_unslash( $_POST['acme-custom-message'] );
    $action = 'acme-settings-save';

    return wp_verify_nonce( $field, $action );

}
Once done, I can incorporate a call to this function that will allow us to check the validity of the submission and either exit from the routine or proceed to the next check (which we'll get to momentarily).
Note that simply returning false in this conditional is not a suitable way to handle this. Instead, it would be cleaner to introduce an error message that displays on the WordPress dashboard. This is something that we'll be revisiting in a future tutorial.
For now, though, we're primarily concerned with making sure that we're able to submit data successfully. This brings us to the next portion of our code.
Permission
Even though the number used once (or the nonce) validation checked out, there's still one more thing we need to check: we need to make sure the current user has permission to save the data.
For our purposes, we want to make sure the current user is an administrator. To do this, we can look at the capabilities of the current user (you can see this page provides a reference for each role and its associated capabilities).
Notice that one of the capabilities of the administration is to manage options. We can now use the WordPress API function current_user_can to check to see if the current user can save the options on this page.
But first, this raises a question: If the user can't save options, why should they be allowed actually to see the page in the first place?
If you recall from earlier in the series, we wrote the following bit of code:
<?php

public function add_options_page() {

    add_options_page(
        'Tuts+ Custom Administration Page',
        'Custom Administration Page',
        'manage_options',
        'custom-admin-page',
        array( $this->submenu_page, 'render' )
    );
}
This ensures that the options page is only available to administrators; however, we want to be extra careful and place a check for this during our serialization process, as well.
Now we can update the conditional where we're also checking the nonce value also to check the current user's permission:
<?php

/**
 * Validates the incoming nonce value, verifies the current user has
 * permission to save the value from the options page and saves the
 * option to the database.
 */
public function save() {

    // First, validate the nonce and verify the user as permission to save.
    if ( ! ( $this->has_valid_nonce() && current_user_can( 'manage_options' ) ) ) {
        // TODO: Display an error message.
    }

    // If the above are valid, save the option.

}
Now that we have code in place to make sure the nonce value is set and that the current user can save the value, we can move forward with sanitization.
Remember, we will return to the place where it says we need to display an error message. But that's not in this tutorial.
Sanitization
"But wait," you say. "I thought we were getting ready to save the option!" We are, but before we can do that we have to go through a process of sanitization. In short, sanitization is the idea of making sure the data is clean, safe, and, ahem, sanitary for the database.
Simply put, it prevents malicious users from inserting information into the database that could ultimately negatively affect our site.
Thankfully, WordPress provides a nice helper function that allows us to make sure this is as easy as possible. For those who are interested, you can read all about validation and sanitizing data (though we'll be looking at validation in the next tutorial).
In our code, we're going to be using sanitize_text_field (as linked above). This function will do the following:
- Checks for invalid UTF-8
- Converts single `<` characters to entities
- Strips all tags
- Removes line breaks, tabs, and extra whitespace
- Strips octets
Pretty nice to have this available, isn't it? Let's put this to work. To do so, locate the save function that we've been working with and update it so that it looks like this:
<?php
/**
 * Validates the incoming nonce value, verifies the current user has
 * permission to save the value from the options page and saves the
 * option to the database.
 */
public function save() {

    // First, validate the nonce and verify the user as permission to save.
    if ( ! ( $this->has_valid_nonce() && current_user_can( 'manage_options' ) ) ) {
        // TODO: Display an error message.
    }

    // If the above are valid, sanitize and save the option.
    if ( null !== wp_unslash( $_POST['acme-message'] ) ) {

        $value = sanitize_text_field( $_POST['acme-message'] );
        update_option( 'tutsplus-custom-data', $value );

    }
}
Notice that we're reading the input from the $_POST collection, sanitizing it, and then saving the result in a separate variable. Next, that variable is being written to the database using the update_option function.
For this article, I'm opting to use the key tutsplus-custom-data. Whatever you use, it's important that it's prefixed with something unique so that another plugin or theme doesn't overwrite the option and you don't overwrite an existing option.
Finally, we need to redirect back to the options page. Since we're not using a built-in API, we'll need to write a function to do this for us. Luckily, it's very easy.
First, create a function called redirect, and make sure it looks like this:
<?php
/**
 * Redirect to the page from which we came (which should always be the
 * admin page. If the referred isn't set, then we redirect the user to
 * the login page.
 *
 * @access private
 */
private function redirect() {

    // To make the Coding Standards happy, we have to initialize this.
    if ( ! isset( $_POST['_wp_http_referer'] ) ) { // Input var okay.
        $_POST['_wp_http_referer'] = wp_login_url();
    }

    // Sanitize the value of the $_POST collection for the Coding Standards.
    $url = sanitize_text_field(
        wp_unslash( $_POST['_wp_http_referer'] ) // Input var okay.
    );

    // Finally, redirect back to the admin page.
    wp_safe_redirect( urldecode( $url ) );
    exit;

}
The code above should be self-explanatory, but to make sure it's clear, it's doing the following:
- It checks to make sure a private WordPress value is present in the
$_POSTcollection. If it's not set, then it will set it equal to the WordPress login URL. This will force people to the login page if the referral URL is not set; however, there's no reason why it shouldn't be. - Next, we take the referrer and sanitize the data. This is something that the coding standards call for, and it makes sure that the data is clean.
- Finally, we initialize a
wp_safe_redirectto the URL so that we are returned to the options page.
Once all this is done, add this as the last line in the save function above. The final version of the code should look like this:
<?php
/**
 * Performs all sanitization functions required to save the option values to
 * the database.
 *
 * @package Custom_Admin_Settings
 */

/**
 * Performs all sanitization functions required to save the option values to
 * the database.
 *
 * This will also check the specified nonce and verify that the current user has
 * permission to save the data.
 *
 * @package Custom_Admin_Settings
 */
class Serializer {

    /**
	 * Initializes the function by registering the save function with the
	 * admin_post hook so that we can save our options to the database.
	 */
	public function init() {
		add_action( 'admin_post', array( $this, 'save' ) );
	}

	/**
	 * Validates the incoming nonce value, verifies the current user has
	 * permission to save the value from the options page and saves the
	 * option to the database.
	 */
	public function save() {

		// First, validate the nonce and verify the user as permission to save.
		if ( ! ( $this->has_valid_nonce() && current_user_can( 'manage_options' ) ) ) {
			// TODO: Display an error message.
		}

		// If the above are valid, sanitize and save the option.
		if ( null !== wp_unslash( $_POST['acme-message'] ) ) {

			$value = sanitize_text_field( $_POST['acme-message'] );
			update_option( 'tutsplus-custom-data', $value );

		}

		$this->redirect();

	}

	/**
	 * Determines if the nonce variable associated with the options page is set
	 * and is valid.
	 *
	 * @access private
	 *
	 * @return boolean False if the field isn't set or the nonce value is invalid;
	 *                 otherwise, true.
	 */
	private function has_valid_nonce() {

		// If the field isn't even in the $_POST, then it's invalid.
		if ( ! isset( $_POST['acme-custom-message'] ) ) { // Input var okay.
			return false;
		}

		$field  = wp_unslash( $_POST['acme-custom-message'] );
		$action = 'acme-settings-save';

		return wp_verify_nonce( $field, $action );

	}

	/**
	 * Redirect to the page from which we came (which should always be the
	 * admin page. If the referred isn't set, then we redirect the user to
	 * the login page.
	 *
	 * @access private
	 */
	private function redirect() {

		// To make the Coding Standards happy, we have to initialize this.
		if ( ! isset( $_POST['_wp_http_referer'] ) ) { // Input var okay.
			$_POST['_wp_http_referer'] = wp_login_url();
		}

		// Sanitize the value of the $_POST collection for the Coding Standards.
		$url = sanitize_text_field(
				wp_unslash( $_POST['_wp_http_referer'] ) // Input var okay.
		);

		// Finally, redirect back to the admin page.
		wp_safe_redirect( urldecode( $url ) );
		exit;

	}
}
Here's the thing: We've got security, sanitization, serialization, and redirection in place. But we're not showing error messages, and we aren't retrieving the data.
That's where we will pick up with the next tutorial.
Conclusion
At this point, we've got a semi-functional plugin, but there's still more work to do. Obviously, the information that we're submitting to the database isn't displayed anywhere, and that's not a good thing.
But just as with saving information, there are important things to consider when retrieving information. In the next tutorial, we'll look at retrieving the information, displaying it on the front-end, displaying it on the options page, and also updating the information as a user changes the value of the input element.
In the meantime, if you're looking for other utilities to help you build out your growing set of tools for WordPress or for code to study and become more well-versed in WordPress, don't forget to see what we have available in Envato Market.
Remember, you can catch all of my courses and tutorials on my profile page, and you can follow me on my blog and/or Twitter at @tommcfarlin where I talk about various software development practices and how we can employ them in WordPress.
Finally, don't hesitate to leave any questions or comments in the feed below. I do my best to participate and answer every question or critique you offer as it relates to this project.

Comments