In the previous tutorial in this series, we began working on our custom administration page.
Ultimately, the goals we're working towards will demonstrate how we can use our own custom code as well as the WordPress API to create pages that are a bit more flexible than what may naturally be available via one of the standard APIs.
This is not to say that we should sidestep or avoid the APIs that WordPress provides. In fact, I'm a fan of using them as much as possible. But when a project arises in which you need to introduce additional functionality or customize the way something performs, then the development of said functionality will be left up to you.
Secondly, we're also using principles such as the single responsibility principle to demonstrate how we can tell a well-organized, object-oriented approach to the code that we're writing.
Before we go any further, though, let's review what we've covered thus far.
For the First Post...
Recall that we provided a working definition of the single responsibility principle:
Gather together the things that change for the same reasons. Separate those things that change for different reasons.
And we used that to help guide the organization of the creation of our current submenu and submenu page.
We also looked at the code for the first version of the plugin, made it available for download, and laid the foundation for the work that we're going to be doing in this tutorial.
If you haven't reviewed the previous tutorial or at least reviewed the code, I highly recommend doing so; otherwise, you may be left wondering why we're making some of the decisions that we're making or why some of the code is organized in the way that it is.
With that said, let's continue.
Before We Start
As with many of my tutorials, I like to make sure that you have everything up and running before we proceed. For this tutorial, you'll need the following:
- a local development environment
- a copy of WordPress installed and ready to be used
- a copy of our plugin from the previous tutorial installed and activated
- an IDE with the plugin loaded and ready for additional editing
If any of the above doesn't make sense, please review the previous tutorial or this series for how to set up a local development environment.
As for the code that's to come, we'll be walking through it step by step. I'll explain exactly what we're doing and will be providing both code comments and commentary in the tutorial to make sure you understand everything that's happening along the way.
Creating the Administration Page
As we continue with the plugin in this article, this is what we're going to be doing:
- Create the markup for the administration page that inherits the native WordPress styles.
- Introduce an option with which the user can interact.
- Sanitize the option before saving it.
- Retrieve the value of the option and set it equal to the value in the page.
In this tutorial, we're going to focus on the next two points. In the next article, we'll focus on points three and four.
For those who are familiar with the Settings API, this seems like overkill. But as you'll see through the remainder of this tutorial and this series, there's a reason why we're going to be breaking it down into smaller pieces like this.
With that laid out as our plan of action, let's get started.
Marking Up the Page
When we last left this particular function, the code looked like this:
<?php
class Submenu_Page {

    /**
     * This function renders the contents of the page associated with the Submenu
     * that invokes the render method. In the context of this plugin, this is the
     * Submenu class.
     */
    public function render() {
        echo 'This is the basic submenu page.';
    }
}
Now we're ready to actually begin creating the layout of the page. Whenever I'm working on plugins for clients, I call these "views."
This isn't meant to be confused with the model-view-controller paradigm. But I don't call them templates either because in WordPress, templates are what are used to display the content of a page on the front-end.
So views it is.
The first thing we want to do is to create a views directory inside the admin directory of our plugin.
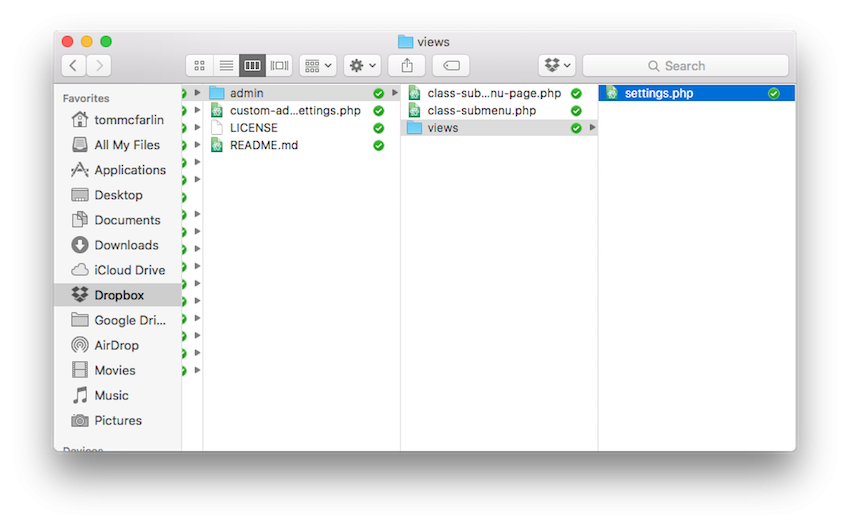
Once that's done, we can name this something as simple as settings.php or something more descriptive. It's really up to you and the complexity of what you're building. Since this is a simple plugin, I'm sticking with a simple name.
Next, let's begin creating the basic markup that will provide the standard WordPress wrapper element along with the page's title:
<div class="wrap">

    <h1><?php echo esc_html( get_admin_page_title() ); ?></h1>

    <form method="post" action="<?php echo esc_html( admin_url( 'admin-post.php' ) ); ?>">
    </form>

</div><!-- .wrap -->
Note here that the title is being derived from a function that uses the values passed into the add_options_page function from when we first started working on the plugin. Next, we're also using the admin_url function to denote where we'll be posting the options (which we'll talk about a little bit later).
And in both cases, we're using the esc_html sanitization function to make sure no malicious strings can be rendered on the page.
These are two examples of, when possible, using whatever API functions are available for their intended purpose. Assuming all has gone correctly, your page should look like this:
Now, in order to wire this up to your plugin, we need to revisit the function from above. This means that the function should now look like this:
<?php
public function render() {
    include_once( 'views/settings.php' );
}
Easy enough, right? Assuming everything is set up correctly, this is what you should see:
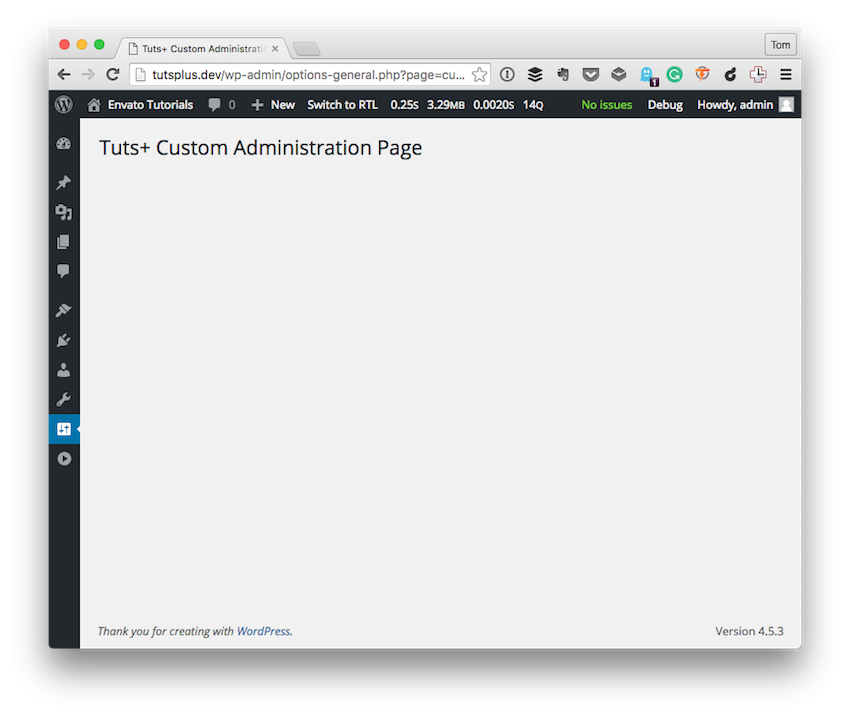
No, it's not much to look at, but we're going to change that.
Add an Option
At this point, we're ready to add an option. For the purposes of this post, we're going to allow the user to input something into an input text element. This will allow us to take a look at how to sanitize information and eventually show it on the front-end.
To do this, we need to have a key piece of information. Namely we need to know the name attribute we're going to call the input element. This is so that we can save it to the database properly.
So, for the purposes of this example, let's say that this message will be used to unconditionally display at the top of each post. We won't get to the point in this article, but we'll revisit that in the next article.
In your settings.php view, add the following code.
<div class="wrap">

    <h1><?php echo esc_html( get_admin_page_title() ); ?></h1>

	<form method="post" action="<?php echo esc_html( admin_url( 'admin-post.php' ) ); ?>">

		<div id="universal-message-container">
			<h2>Universal Message</h2>

			<div class="options">
				<p>
					<label>What message would you like to display above each post?</label>
					<br />
					<input type="text" name="acme-message" value="" />
				</p>
		</div><!-- #universal-message-container -->
	</form>

</div><!-- .wrap -->
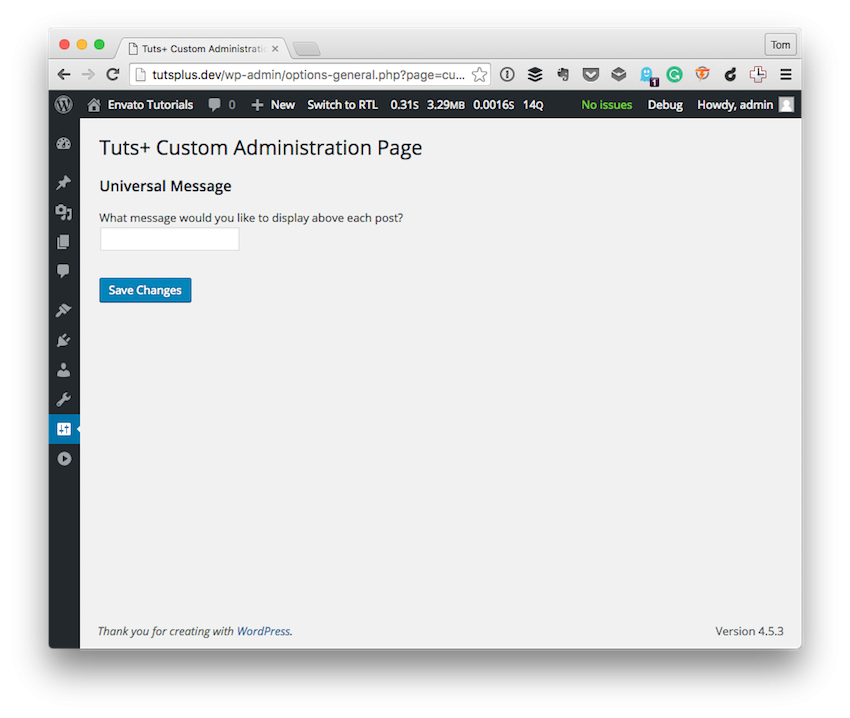
If you were to view the page at this point, you should see exactly what you expect: a label and an input box.
Secure the Option
Normally I'd show a screenshot here, but we're not done yet. We need to introduce two more things.
- A WordPress nonce
- The submit button
Let's do that now. If you're not familiar with nonce values, I recommend reading this article. The short of it is this:
A nonce is a "number used once" to help protect URLs and forms from certain types of misuse, malicious or otherwise.
In our settings.php file, let's add the following block of code:
<?php
    wp_nonce_field( 'acme-settings-save', 'acme-custom-message' );
    submit_button();
?>
Ultimately, the final version of our code should look like this:
<div class="wrap">

    <h1><?php echo esc_html( get_admin_page_title() ); ?></h1>

	<form method="post" action="<?php echo esc_html( admin_url( 'admin-post.php' ) ); ?>">

		<div id="universal-message-container">
			<h2>Universal Message</h2>

			<div class="options">
				<p>
					<label>What message would you like to display above each post?</label>
					<br />
					<input type="text" name="acme-message" value="" />
				</p>
		</div><!-- #universal-message-container -->

		<?php
			wp_nonce_field( 'acme-settings-save', 'acme-custom-message' );
			submit_button();
		?>

	</form>

</div><!-- .wrap -->
And the final version of the page should look like this:
At this point, we're ready to save the options. Now in order to do this, we need to verify a couple of things:
- Does the user have permission to save options?
- Is there a valid nonce being passed from the form?
Furthermore, we need to:
- Sanitize the information to make sure no malicious data gets into the database.
- We need to be able to pull this information out of the database and populate it in the form.
And lastly, we need to display this on the front-end of the website.
Conclusion
So in the next two articles, we're going to focus on doing exactly that.
Don't forget that you can download the plugin in its current state from this post. As we progress through the series, I'll make the latest version available on each post so you will be able to follow along with the code covered in each tutorial, tinker with it, and prepare questions that you may want to ask in the comments.
As a side note, if you're looking for other utilities to help you build out your growing set of tools for WordPress or for code to study and become more well-versed in WordPress, don't forget to see what we have available in Envato Market.
Remember, you can catch all of my courses and tutorials on my profile page, and you can follow me on my blog and/or Twitter at @tommcfarlin where I talk about various software development practices and how we can employ them in WordPress.
Finally, don't hesitate to leave any questions or comments in the feed below. I do my best to participate and answer every question or critique you offer as it relates to this project.

Comments