Out-of-the-box, WordPress provides a custom registration form that can be used to setup a new user, or to add a new user when adding them to an existing WordPress installation. But what if you want to implement a custom registration form that does not render the options in the WordPress Dashboard?
In this tutorial, we'll learn how to create a custom registration form in WordPress using a combination of template tags and shortcodes.
The default registration form consist of just two form fields - username and email.
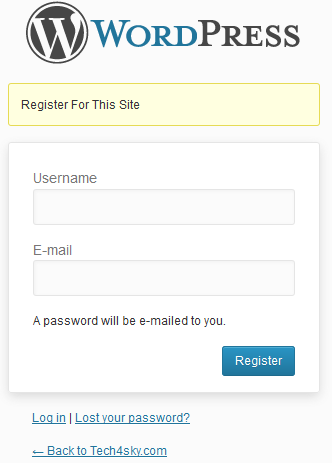
The presence of only the username and email form field make the registration process incredibly easy. First, you enter your username and email after which a password will be mailed to you. Next, you login to the site with the password and then complete your profile and change the password to something memorable.
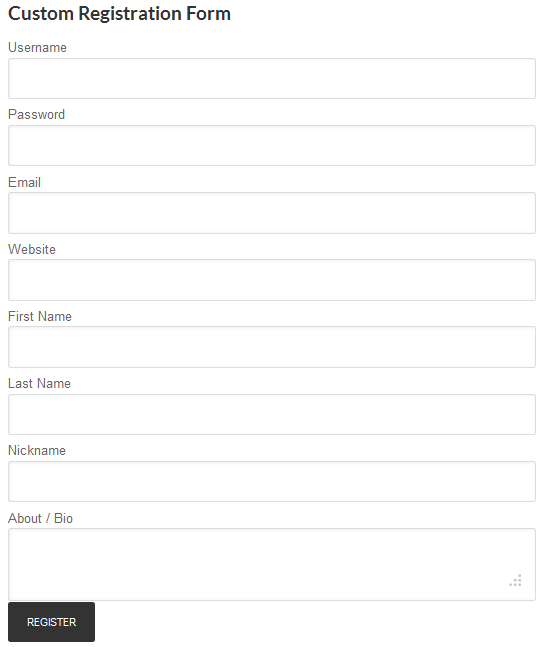
Instead of making a user to go through the above stress just to register in your site, why not provide a straight-to-the-point registration form with consisting of some important extra form fields in addition to the default username and email such as a password, a URL to their website, a biography, a nickname, and their first and last name.
This is particularly useful in a multi-author website like Tuts+.
In this article, we will be building a custom registration form plugin with the following form fields:
- username
- password
- website URL
- first name
- last name
- nickname
- biography (or an about section)
The custom registration form can then be integrated into WordPress using the plugin shortcode and associated template tag.
With the shortcode, you can create a page and make it the official registration page of your site. You can also use the shortcode within a post so user can signup to your site after reading one of your articles.
If you want to add the registration form to the sidebar or a specific location in your website, then you can edit the WordPress theme but placing the template tag in the desired location.
Before we start building the registration form plugin, it is worth noting that the username, password, and email field are required.
We will be enforcing this rule when writing our validation function.
Premium Option
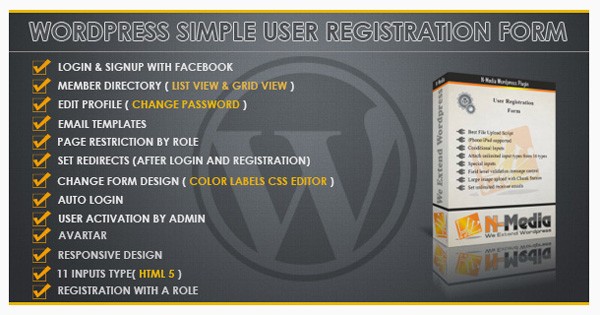
This tutorial will teach you to build the plugin from scratch, but if you're looking for a quick, plug-and-play solution, try the WordPress Registration Form plugin on Envato Market. You can set a wide range of registration fields with validation control. Once registration is completed, an email is sent to the new member with their login details. Email templates can be modified for registration, password change, etc.
Another option is simply to place an order on Envato Studio. You can choose the right person from a wide range of experienced WordPress plugin developers. Then you send your brief, and let the developer create your plugin within the agreed timeframe.
For example, Alisaleem252 will develop a customized WordPress plugin which will be compatible with latest WordPress version and other plugins in the WordPress Repository according to your requirements.
You'll get:
- custom widget if it is needed
- custom shortcode if it is needed
- custom post type if it is needed
- reliable service

The full service costs just $300, and your plugin will be ready in 10 days. Alisaleem252 has a 98% approval rating from previous clients. So why not try out his popular Custom WordPress Plugin Development service!
Building the Plugin
With that said, let's get started with coding of the plugin. First, include the plugin header.
<?php
/*
  Plugin Name: Custom Registration
  Plugin URI: http://code.tutsplus.com
  Description: Updates user rating based on number of posts.
  Version: 1.0
  Author: Agbonghama Collins
  Author URI: http://tech4sky.com
 */
Next, we create a PHP function that contains the HTML code of the registration form.
function registration_form( $username, $password, $email, $website, $first_name, $last_name, $nickname, $bio ) {
    echo '
    <style>
    div {
    	margin-bottom:2px;
	}

	input{
		margin-bottom:4px;
	}
	</style>
	';

    echo '
    <form action="' . $_SERVER['REQUEST_URI'] . '" method="post">
	<div>
	<label for="username">Username <strong>*</strong></label>
	<input type="text" name="username" value="' . ( isset( $_POST['username'] ) ? $username : null ) . '">
	</div>

	<div>
	<label for="password">Password <strong>*</strong></label>
	<input type="password" name="password" value="' . ( isset( $_POST['password'] ) ? $password : null ) . '">
	</div>

	<div>
	<label for="email">Email <strong>*</strong></label>
	<input type="text" name="email" value="' . ( isset( $_POST['email']) ? $email : null ) . '">
	</div>

	<div>
	<label for="website">Website</label>
	<input type="text" name="website" value="' . ( isset( $_POST['website']) ? $website : null ) . '">
	</div>

	<div>
	<label for="firstname">First Name</label>
	<input type="text" name="fname" value="' . ( isset( $_POST['fname']) ? $first_name : null ) . '">
	</div>

	<div>
	<label for="website">Last Name</label>
	<input type="text" name="lname" value="' . ( isset( $_POST['lname']) ? $last_name : null ) . '">
	</div>

	<div>
	<label for="nickname">Nickname</label>
	<input type="text" name="nickname" value="' . ( isset( $_POST['nickname']) ? $nickname : null ) . '">
	</div>

	<div>
	<label for="bio">About / Bio</label>
	<textarea name="bio">' . ( isset( $_POST['bio']) ? $bio : null ) . '</textarea>
	</div>
	<input type="submit" name="submit" value="Register"/>
	</form>
	';
}
Notice the registration field being passed to the above function as variable? In the function code, you will see instances of the following code, for example:
( isset( $_POST['lname'] ) ? $last_name : null )
The ternary operator is checking the contents of the global $_POST array to see if the form contains a value. If it does contain a value, it populates the form fields with the value in order to save the user from re-entering the field input.
A registration form is never complete until you validate and sanitize the user input. As a result, we will create a validation function with name registration_validation.
To ease the validation pain, we will be using WordPress WP_Error class. Follow me as we code the validation function:
- Create the function and pass the registration field as the function argument.
function registration_validation( $username, $password, $email, $website, $first_name, $last_name, $nickname, $bio ) { - Instantiate the
WP_Errorclass and make the instance variable global so it can be access outside the scope of the function.global $reg_errors; $reg_errors = new WP_Error;
- Remember: We said the username, password and email are required and must not be left out. To enforce the rule, we need to check if any of the field is empty. If empty, we append the error message to the global
WP_Errorclass.if ( empty( $username ) || empty( $password ) || empty( $email ) ) { $reg_errors->add('field', 'Required form field is missing'); } - We also check to make sure the number of username characters is not less than 4.
if ( 4 > strlen( $username ) ) { $reg_errors->add( 'username_length', 'Username too short. At least 4 characters is required' ); } - Check if the username is already registered.
if ( username_exists( $username ) ) $reg_errors->add('user_name', 'Sorry, that username already exists!'); - Employ the services of WordPress validate_username function to make sure the username is valid.
if ( ! validate_username( $username ) ) { $reg_errors->add( 'username_invalid', 'Sorry, the username you entered is not valid' ); } - Ensure the password entered by users is not less than 5 characters.
if ( 5 > strlen( $password ) ) { $reg_errors->add( 'password', 'Password length must be greater than 5' ); } - Check if the email is a valid email.
if ( !is_email( $email ) ) { $reg_errors->add( 'email_invalid', 'Email is not valid' ); } - Check if the email is already registered.
if ( email_exists( $email ) ) { $reg_errors->add( 'email', 'Email Already in use' ); } - If the website field is filled, check to see if it is valid.
if ( ! empty( $website ) ) { if ( ! filter_var( $website, FILTER_VALIDATE_URL ) ) { $reg_errors->add( 'website', 'Website is not a valid URL' ); } } - Finally, we loop through the errors in our
WP_Errorinstance and display the individual error.if ( is_wp_error( $reg_errors ) ) { foreach ( $reg_errors->get_error_messages() as $error ) { echo '<div>'; echo '<strong>ERROR</strong>:'; echo $error . '<br/>'; echo '</div>'; } }We are done coding the validation function.
Next is the plugin complete_registration() function that handles the user registration.
The user registration is actually done by the wp_insert_user function which accepts an array of user data.
function complete_registration() {
    global $reg_errors, $username, $password, $email, $website, $first_name, $last_name, $nickname, $bio;
    if ( 1 > count( $reg_errors->get_error_messages() ) ) {
        $userdata = array(
        'user_login'    => 	$username,
        'user_email' 	=> 	$email,
        'user_pass' 	=> 	$password,
        'user_url' 		=> 	$website,
        'first_name' 	=> 	$first_name,
        'last_name' 	=> 	$last_name,
        'nickname' 		=> 	$nickname,
        'description' 	=> 	$bio,
		);
        $user = wp_insert_user( $userdata );
        echo 'Registration complete. Goto <a href="' . get_site_url() . '/wp-login.php">login page</a>.';
	}
}
In the complete_registration() function above, we made the $reg_errors WP_Error instance and the form fields variable global so we can access the variable in the global scope.
We then check if the $reg_errors error handling instance contains any error. If no error is found, we proceed to populating the $userdata array and insert the user registration details to WordPress database and display a Registration Complete message with a link to the login page.
Up next, is the super custom_registration_function() function that puts all the functions we've created above into use.
function custom_registration_function() {
    if ( isset($_POST['submit'] ) ) {
        registration_validation(
        $_POST['username'],
        $_POST['password'],
        $_POST['email'],
        $_POST['website'],
        $_POST['fname'],
        $_POST['lname'],
        $_POST['nickname'],
        $_POST['bio']
    	);

		// sanitize user form input
        global $username, $password, $email, $website, $first_name, $last_name, $nickname, $bio;
        $username	= 	sanitize_user( $_POST['username'] );
        $password 	= 	esc_attr( $_POST['password'] );
        $email 		= 	sanitize_email( $_POST['email'] );
        $website 	= 	esc_url( $_POST['website'] );
        $first_name = 	sanitize_text_field( $_POST['fname'] );
        $last_name 	= 	sanitize_text_field( $_POST['lname'] );
        $nickname 	= 	sanitize_text_field( $_POST['nickname'] );
        $bio 		= 	esc_textarea( $_POST['bio'] );

		// call @function complete_registration to create the user
		// only when no WP_error is found
        complete_registration(
        $username,
        $password,
        $email,
        $website,
        $first_name,
        $last_name,
        $nickname,
        $bio
		);
    }

    registration_form(
    	$username,
        $password,
        $email,
        $website,
        $first_name,
        $last_name,
        $nickname,
        $bio
		);
}
Let me explain what the code in the custom_registration_function() function.
First, we determine if the form has been submitted by checking if the $_POST['submit'] is set. If the form has been submitted, we call the registration_validation function to validate the user submitted form.
We then sanitize the form data and set the sanitize data to a variable named after the form field. Finally, we call the complete_registration to register the user.
We need to call the registration_form function to display the registration form.
Remember I mentioned that we are going to be providing shortcode support for the registration plugin? Below is the shortcode support code.
// Register a new shortcode: [cr_custom_registration]
add_shortcode( 'cr_custom_registration', 'custom_registration_shortcode' );

// The callback function that will replace [book]
function custom_registration_shortcode() {
    ob_start();
    custom_registration_function();
    return ob_get_clean();
}
At this point, we are done coding the plugin. Below is an image showing how the registration form look like.
Note that you might not get the exact same look on your WordPress site as a result of vary CSS styling.
Plugin Usage
To implement the plugin in a WordPress post or page, use the shortcode [cr_custom_registration].
To implement the registration form in a specific aspect of your theme, add the following template tag - <?php custom_registration_function(); ?>.
You can get the plugin file from the attachment in this article.
Summary
In this article, we walked through the process of creating a plugin that adds a custom registration form to WordPress. You can further extend the registration form to include extra fields such as user role, AOL IM account, but make sure the form field is a valid meta data for wp_insert_user.
If you have any questions and suggestions, let me know in the comments!
Remember that if you struggled to follow this tutorial and you want a simple solution, try the WordPress Registration Form plugin on Envato Market.

Comments