In the previous part of this series, we made the invaders move, the player and invaders fire bullets, and implemented collision detection. In the fourth and final part of this series, we will add the ability to move the player using the accelerometer, manage the levels, and ensure the player dies when hit by a bullet. Let's get started.
1. Finishing the Player Class
Step 1: Adding Properties
Add the following properties to the Player class below the canFire property.
private var invincible = false
private var lives:Int = 3 {
    didSet {
        if(lives < 0){
            kill()
        }else{
            respawn()
         }
    }
}
The invincible property will be used to make the player temporarily invincible when it loses a life. The lives property is the number of of lives the player has before being killed.
We are using a property observer on the lives property, which will be called each time its value is set. The didSet observer is called immediately after the new value of the property is set. By doing this, each time we decrement the lives property it automatically checks if lives is less than zero, calling the kill method if it is. If the player has lives left, the respawn method is invoked. Property observers are very handy and can save a lot of extra code.
Step 2: respawn
The respawn method makes the player invincible for a short amount of time and fades the player in and out to indicate that it is temporarily invincible. The implementation of the respawn method looks like this:
func respawn(){
    invincible = true
    let fadeOutAction = SKAction.fadeOutWithDuration(0.4)
    let fadeInAction = SKAction.fadeInWithDuration(0.4)
    let fadeOutIn = SKAction.sequence([fadeOutAction,fadeInAction])
    let fadeOutInAction = SKAction.repeatAction(fadeOutIn, count: 5)
    let setInvicibleFalse = SKAction.runBlock(){
        self.invincible = false
    }
    runAction(SKAction.sequence([fadeOutInAction,setInvicibleFalse]))

}
We set invincible to true and create a number of SKAction objects. By now, you should be familiar with how the SKAction class works.
Step 3: die
The die method is fairly simple. It checks whether invincible is false and, if it is, decrements the lives variable.
 func die (){
    if(invincible == false){
        lives -= 1
    }
}
Step 4: kill
The kill method resets invaderNum to 1 and takes the user back to the StartGameScene so they can begin a new game.
func kill(){
    invaderNum = 1
    let gameOverScene = StartGameScene(size: self.scene!.size)
    gameOverScene.scaleMode = self.scene!.scaleMode
    let transitionType = SKTransition.flipHorizontalWithDuration(0.5)
    self.scene!.view!.presentScene(gameOverScene,transition: transitionType)
}
This code should be familiar to you as it is nearly identical to the code we used to move to the GameScene from the StartGameScene. Note that we force unwrap the scene to access the scene's size and scaleMode properties.
This completes the Player class. We now need to call the die and kill methods in the didBeginContact(_:) method.
func didBeginContact(contact: SKPhysicsContact) {
    ...
    if ((firstBody.categoryBitMask & CollisionCategories.Player != 0) &&
            (secondBody.categoryBitMask & CollisionCategories.InvaderBullet != 0)) {
        player.die()
    }

    if ((firstBody.categoryBitMask & CollisionCategories.Invader != 0) &&
            (secondBody.categoryBitMask & CollisionCategories.Player != 0)) {
         player.kill()
    }

}
We can now test everything. A quick way to test the die method is by commenting out the moveInvaders call in the update(_:) method. After the player dies and respawns three times, you should be taken back to the StartGameScene.
To test the kill method, make sure the moveInvaders call is not commented out. Set the invaderSpeed property to a high value, for example, 200. The invaders should reach the player very quickly, which results in an instant kill. Change invaderSpeed back to 2 once you're finished testing.
2. Finishing Firing Invaders
As the game stands right now, only the bottom row of invaders can fire bullets. We already have the collision detection for when a player bullet hits an invader. In this step, we will remove an invader that is hit by a bullet and add the invader one row up to the array of invaders that can fire. Add the following to the didBeginContact(_:) method.
func didBeginContact(contact: SKPhysicsContact) {
    ...
    if ((firstBody.categoryBitMask & CollisionCategories.Invader != 0) &&
        (secondBody.categoryBitMask & CollisionCategories.PlayerBullet != 0)){
        if (contact.bodyA.node?.parent == nil || contact.bodyB.node?.parent == nil) {
            return
        }

    let invadersPerRow = invaderNum * 2 + 1
    let theInvader = firstBody.node as! Invader
    let newInvaderRow = theInvader.invaderRow - 1
    let newInvaderColumn = theInvader.invaderColumn
    if(newInvaderRow >= 1){
    self.enumerateChildNodesWithName("invader") { node, stop in
        let invader = node as! Invader
            if invader.invaderRow == newInvaderRow && invader.invaderColumn == newInvaderColumn{
                self.invadersWhoCanFire.append(invader)
                    stop.memory = true
                }
            }
        }
    let invaderIndex = findIndex(invadersWhoCanFire,valueToFind: firstBody.node? as Invader)
        if(invaderIndex != nil){
            invadersWhoCanFire.removeAtIndex(invaderIndex!)
    }
    theInvader.removeFromParent()
    secondBody.node?.removeFromParent()

    }
}
We've removed the NSLog statement and first check if contact.bodyA.node?.parent and contact.bodyB.node?.parent are not nil. They will be nil if we have already processed this contact. In that case, we return from the function.
We calculate the invadersPerRow as we have done before and set theInvader to firstBody.node, casting it to an Invader. Next, we get the newInvaderRow by subtracting 1 and the newInvaderColumn, which stays the same.
We only want to enable invaders to fire if the newInvaderRow is greater than or equal to 1, otherwise we would be trying to set an invader in row 0 to be able to fire. There is no row 0 so this would cause an error.
Next, we enumerate through the invaders, looking for the invader that has the correct row and column. Once it is found, we append it to the invadersWhoCanFire array and call stop.memory to true so the enumeration will stop early.
We need to find the invader that was hit with a bullet in the invadersWhoCanFire array so we can remove it. Normally, arrays have some kind of functionality like an indexOf method or something similar to accomplish this. At the time of writing, there is no such method for arrays in the Swift language. The Swift Standard Library defines a find function that we could use, but I found a method in the sections on generics in the Swift Programming Language Guide that will accomplish what we need. The function is aptly named findIndex. Add the following to the bottom of GameScene.swift.
func findIndex<T: Equatable>(array: [T], valueToFind: T) -> Int? {
    for (index, value) in enumerate(array) {
        if value == valueToFind {
            return index
        }
    }
        return nil
}
If you are curious about how it this function works, then I recommend you read more about generics in the Swift Programming Language Guide.
Now that we have a method we can use to find the invader, we invoke it, passing in the invadersWhoCanFire array and theInvader. We check if invaderIndex isn't equal to nil and remove the invader from the invadersWhoCanFire array using the removeAtIndex(index: Int) method.
You can now test whether it works as it should. An easy way would be to comment out where the call to player.die in the didBeginContact(_:) method. Make sure you remove the comment when you are done testing. Notice that the program crashes if you kill all the invaders. We will fix this in the next step.
The application crashes, because we have a SKAction repeatActionForever(_:) calling for invaders to fire bullets. At this point, there are no invaders left to fire bullets so the games crashes. We can fix this by checking the isEmpty property on the invadersWhoCanFire array. If the array is empty, the level is over. Enter the following in the fireInvaderBullet method.
func fireInvaderBullet(){
    if(invadersWhoCanFire.isEmpty){
        invaderNum += 1
        levelComplete()
    }else{
        let randomInvader = invadersWhoCanFire.randomElement()
        randomInvader.fireBullet(self)
    }
}
The level is complete, which means we increment invaderNum, which is used for the levels. We also invoke levelComplete, which we still need to create in the steps coming up.
3. Completing a Level
We need to have a set number of levels. If we don't, after several rounds we will have so many invaders they won't fit on the screen. Add a property maxLevels to the GameScene class.
class GameScene: SKScene, SKPhysicsContactDelegate{
    ...
    let player:Player = Player()
    let maxLevels = 3
Now add the levelComplete method at the bottom of GameScene.swift.
func levelComplete(){
    if(invaderNum <= maxLevels){
        let levelCompleteScene = LevelCompleteScene(size: size)
        levelCompleteScene.scaleMode = scaleMode
        let transitionType = SKTransition.flipHorizontalWithDuration(0.5)
        view?.presentScene(levelCompleteScene,transition: transitionType)
    }else{
        invaderNum = 1
        newGame()
    }
}
We first check to see if invaderNum is less than or equal to the maxLevels we have set. If so, we transition to the LevelCompletScene, otherwise we reset invaderNum to 1 and call newGame. LevelCompleteScene does not exist yet nor does the newGame method so let's tackle these one at a time over the next two steps.
4. Implementing the LevelCompleteScene Class
Create a new Cocoa Touch Class named LevelCompleteScene that is a sublclass of SKScene. The implementation of the class looks like this:
import Foundation
import SpriteKit

class LevelCompleteScene:SKScene{

    override func didMoveToView(view: SKView) {
        self.backgroundColor = SKColor.blackColor()
        let startGameButton = SKSpriteNode(imageNamed: "nextlevelbtn")
        startGameButton.position = CGPointMake(size.width/2,size.height/2 - 100)
        startGameButton.name = "nextlevel"
        addChild(startGameButton)
    }

    override func touchesBegan(touches: Set<NSObject>, withEvent event: UIEvent) {
        let touch = touches.first as! UITouch
        let touchLocation = touch.locationInNode(self)
        let touchedNode = self.nodeAtPoint(touchLocation)
        if(touchedNode.name == "nextlevel"){
            let gameOverScene = GameScene(size: size)
            gameOverScene.scaleMode = scaleMode
            let transitionType = SKTransition.flipHorizontalWithDuration(0.5)
            view?.presentScene(gameOverScene,transition: transitionType)            }
        }
}
The implementation is identical to the StartGameScreen class, except for we set the name property of startGameButton to "nextlevel". This code should be familiar. If not, then head back to the first part of this tutorial for a refresher.
5. newGame
The newGame method simply transitions back to the StartGameScene. Add the following to the bottom of GameScene.swift.
func newGame(){
    let gameOverScene = StartGameScene(size: size)
    gameOverScene.scaleMode = scaleMode
    let transitionType = SKTransition.flipHorizontalWithDuration(0.5)
    view?.presentScene(gameOverScene,transition: transitionType)
}
If you test the application, you can play a few levels or lose a few games, but the player has no way to move and this makes for a boring game. Let's fix that in the next step.
6. Moving the Player Using the Accelerometer
We will use the accelerometer to move the player. We first need to import the CoreMotion framework. Add an import statement for the framework at the top of GameScene.swift.
import SpriteKit
import CoreMotion
We also need a couple of new properties.
let maxLevels = 3
let motionManager: CMMotionManager = CMMotionManager()
var accelerationX: CGFloat = 0.0
Next, add a method setupAccelerometer at the bottom of GameScene.swift.
func setupAccelerometer(){
    motionManager.accelerometerUpdateInterval = 0.2
    motionManager.startAccelerometerUpdatesToQueue(NSOperationQueue.currentQueue(), withHandler: {
    (accelerometerData: CMAccelerometerData!, error: NSError!) in
    let acceleration = accelerometerData.acceleration
    self.accelerationX = CGFloat(acceleration.x)
    })
}
Here we set the accelerometerUpdateInterval, which is the interval in seconds for providing updates to the handler. I found 0.2 works well, you can try different values if you wish. Inside the handler; a closure, we get the accelerometerData.acceleration, which is a structure of type CMAcceleration.
struct CMAcceleration {
    var x: Double
    var y: Double
    var z: Double
    init()
    init(x x: Double, y y: Double, z z: Double)
}
We are only interested in the x property and we use numeric type conversion to cast it to a CGFloat for our accelerationX property.
Now that we have the accelerationX property set, we can move the player. We do this in the didSimulatePhysics method. Add the following to the bottom of GameScene.swift.
override func didSimulatePhysics() {
     player.physicsBody?.velocity = CGVector(dx: accelerationX * 600, dy: 0)
}
Invoke setupAccelerometer in didMoveToView(_:) and you should be able to move the player with the accelerometer. There's only one problem. The player can move off-screen to either side and it takes a few seconds to get him back. We can fix this by using the physics engine and collisions. We do this in the next step.
override func didMoveToView(view: SKView) {
    ...
    setupInvaders()
    setupPlayer()
    invokeInvaderFire()
    setupAccelerometer()
}
7. Restricting the Player's Movement
As mentioned in the previous step, the player can move off-screen. This is a simple fix using Sprite Kit's physics engine. First, add a new CollisionCategory named EdgeBody.
struct CollisionCategories{
    static let Invader : UInt32 = 0x1 << 0
    static let Player: UInt32 = 0x1 << 1
    static let InvaderBullet: UInt32 = 0x1 << 2
    static let PlayerBullet: UInt32 = 0x1 << 3
    static let EdgeBody: UInt32 = 0x1 << 4
}
Set this as the player's collisionBitMask in its init method.
override init() {
    ...
    self.physicsBody?.categoryBitMask = CollisionCategories.Player
    self.physicsBody?.contactTestBitMask = CollisionCategories.InvaderBullet | CollisionCategories.Invader
    self.physicsBody?.collisionBitMask = CollisionCategories.EdgeBody
    animate()
}
Lastly, we create a physicsBody on the scene itself. Add the following to the didMoveToView(view: SKView) method in GameScene.swift.
 override func didMoveToView(view: SKView) {
        self.physicsWorld.gravity=CGVectorMake(0, 0)
        self.physicsWorld.contactDelegate = self
        self.physicsBody = SKPhysicsBody(edgeLoopFromRect: frame)
        self.physicsBody?.categoryBitMask = CollisionCategories.EdgeBody
}
We initialize a physics body by invoking init(edgeLoopFromRect:), passing in the scene's frame. The initializer creates an edge loop from the scene's frame. It is important to note that an edge has no volume or mass and is always treated as if the dynamic property is equal to false. Edges may also only collide with volume-based physics bodies, which our player is.
We also set the categoryBitMask to CollisionCategories.EdgeBody. If you test the application, you might notice that your ship can no longer move off-screen, but sometimes it rotates. When a physics body collides with another physics body, it is possible that this results in a rotation. This is the default behavior. To remedy this, we set allowsRotation to false in Player.swift.
override init() {
    ...
    self.physicsBody?.collisionBitMask = CollisionCategories.EdgeBody
    self.physicsBody?.allowsRotation = false
    animate()
}
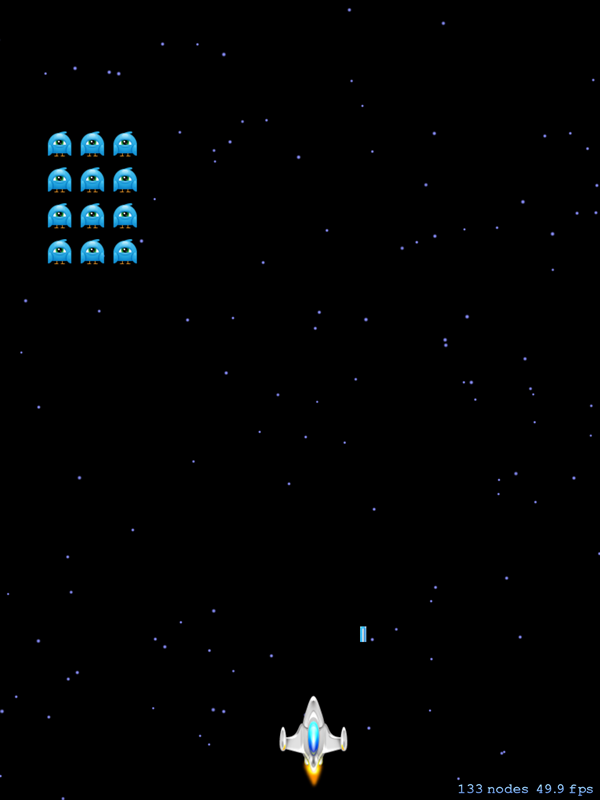
8. Star Field
Step 1: Creating the Star Field
The game has a moving star field in the background. We can create the start field using Sprite Kit's particle engine.
Create a new file and select Resource from the iOS section. Choose SpriteKit Particle File as the template and click Next. For the Particle template choose rain and save it as StarField. Click Create to open the file in the editor. To see the options, open the SKNode Inspector on the right right.
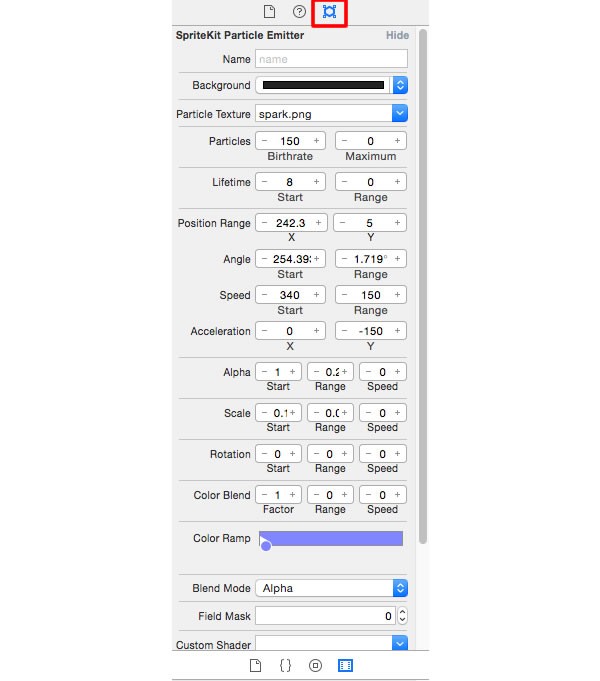
Instead of going through every setting here, which would take a long time, it would be better to read the documentation to learn about each individual setting. I won't go into detail about the settings of the start field either. If you are interested, open the file in Xcode and have a look at the settings I used.
Step 2: Adding the Star Field to the Scenes
Add the following to didMoveToView(_:) in StartGameScene.swift.
override func didMoveToView(view: SKView) {
    backgroundColor = SKColor.blackColor()
    let starField = SKEmitterNode(fileNamed: "StarField")
    starField.position = CGPointMake(size.width/2,size.height/2)
    starField.zPosition = -1000
    addChild(starField)
}
We use an SKEmitterNode to load the StarField.sks file, set its position and give it a low zPosition. The reason for the low zPosition is to make sure it doesn't prevent the user from tapping the start button. The particle system generates hundreds of particles so by setting it really low we overcome that problem. You should also know that you can manually configure all the particle properties on an SKEmitterNode, although it is much easier to use the editor to create an .sks file and load it at runtime.
Now add the star field to GameScene.swift and LevelCompleteScene.swift. The code is exactly the same as above.
9. Implementing the PulsatingText Class
Step 1: Create the PulsatingText Class
The StartGameScene and LevelCompleteScene have text that grows and shrinks repeatedly. We will subclass SKLabeNode and use a couple of SKAction instances to achieve this effect.
Create a New Cocoa Touch Class that is a subclass of SKLabelNode, name it PulsatingText, and add the following code to it.
import UIKit
import SpriteKit

class PulsatingText : SKLabelNode {

    func setTextFontSizeAndPulsate(theText: String, theFontSize: CGFloat){
        self.text = theText;
        self.fontSize = theFontSize
        let scaleSequence = SKAction.sequence([SKAction.scaleTo(2, duration: 1),SKAction.scaleTo(1.0, duration:1)])
        let scaleForever = SKAction.repeatActionForever(scaleSequence)
        self.runAction(scaleForever)
    }
}
One of the first things you may have noticed is that there is no initializer. If your subclass doesn't define a designated initializer, it automatically inherits all of its superclass designated initializers.
We have one method setTextFontSizeAndPulsate(theText:theFontSize:), which does exactly what it says. It sets the SKLabelNode's text and fontSize properties, and creates a number of SKAction instances to make the text scale up and then back down, creating a pulsating effect.
Step 2: Add PulsatingText to StartGameScene
Add the following code to StartGameScene.swift in didMoveToView(_:).
 override func didMoveToView(view: SKView) {
    backgroundColor = SKColor.blackColor()
    let invaderText = PulsatingText(fontNamed: "ChalkDuster")
    invaderText.setTextFontSizeAndPulsate("INVADERZ", theFontSize: 50)
    invaderText.position = CGPointMake(size.width/2,size.height/2 + 200)
    addChild(invaderText)
}
We initialize a PulsatingText instance, invaderText, and invoke setTextFontSizeAndPulsate(theText:theFontSize:) on it. We then set its position and add it to the scene.
Step 3: Add PulsatingText to LevelCompleteScene
Add the following code to LevelCompleteScene.swift in didMoveToView(_:).
 override func didMoveToView(view: SKView) {
    self.backgroundColor = SKColor.blackColor()
    let invaderText = PulsatingText(fontNamed: "ChalkDuster")
    invaderText.setTextFontSizeAndPulsate("LEVEL COMPLETE", theFontSize: 50)
    invaderText.position = CGPointMake(size.width/2,size.height/2 + 200)
    addChild(invaderText)
}
This is exactly the same as the previous step. Only the text we are passing in is different.
10. Taking the Game Further
This completes the game. I do have some suggestions for how you could further expand upon the game. Inside the images folder, there a three different invader images. When you are adding invaders to the scene, randomly choose one of these three images. You will need to update the invader's initializer to accept an image as a parameter. Refer to the Bullet class for a hint.
There is also a UFO image. Try to make this appear and move across the screen every fifteen seconds or so. If the player hits it, give them an extra life. You may want to limit the number of lives they can have if you do this. Lastly, try to make a HUD for the players lives.
These are just some suggestions. Try and make the game your own.
Conclusion
This brings this series to a close. You should have a game that closely resembles the original Space Invaders game. I hope you found this tutorial helpful and have learned something new. Thanks for reading.

Comments