With the recent release of Ionic 2, you might be one of those hybrid app developers who wants to try it out. But maybe you're overwhelmed by the amount of learning needed to get started.
That's why I want to give you a good start by walking you step by step through the creation of your first Ionic 2 app. If you're already familiar with Ionic then the concepts might easily "click" with you. But if you're a complete beginner, not to worry—I'll won't assume any prior knowledge of the framework.
App Overview
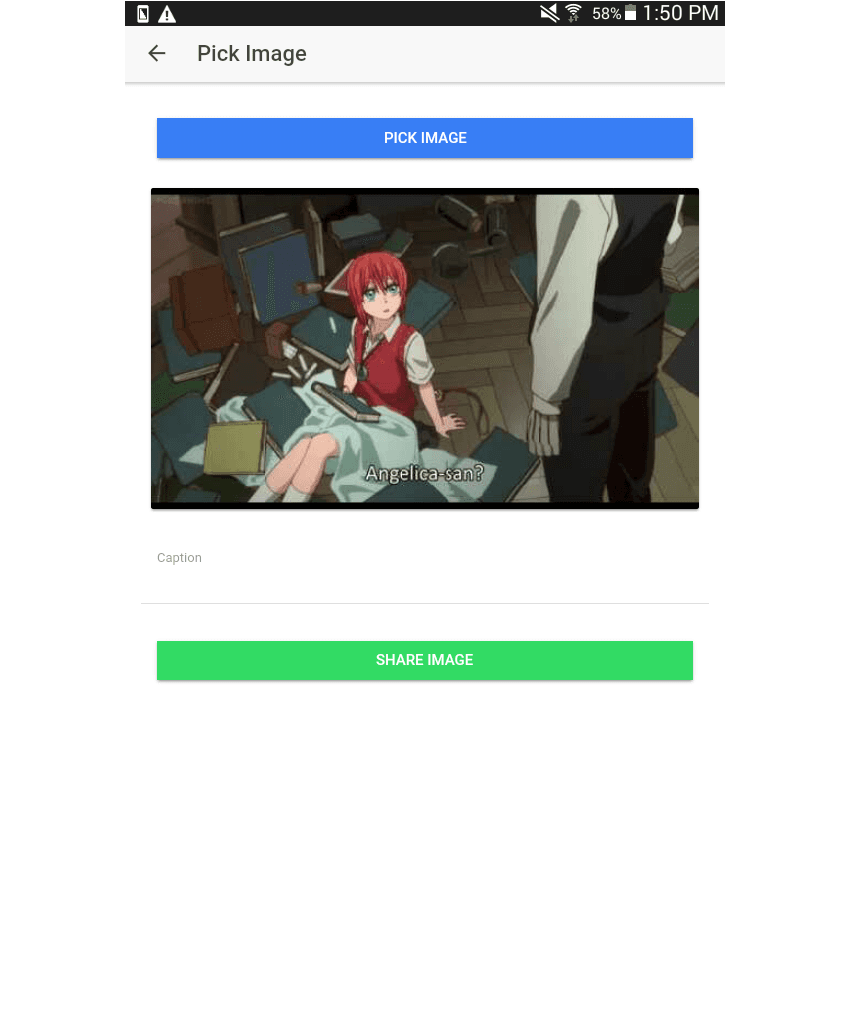
In this tutorial and the next one, you'll be creating a photo sharing app that lets users pick an image from their device and share it to Instagram. Here's what the app is going to look like:

Set Up Your Environment
Before you can start developing apps with Ionic 2, you first have to set up your development environment. This includes the following bits of software:
- Android SDK: apps built with Cordova and Ionic rely on the same developer tools used by native app developers.
- Node.js: this is mainly used by Ionic for tooling—things like compiling code and checking for errors.
- An Android device or emulator for testing. You can install the default Android emulator with the Android SDK installer.
I'm not going to show you how to set up your development environment. The Cordova platform guide already does a great job of that:
Those two pages will show you everything you need to know about setting up Cordova for iOS or Android. Once your dev environment is all set, we can move on to the next step.
Install Cordova and Ionic
Phew! Now you can actually install Cordova and Ionic. Use the following command:
npm install -g cordova ionic
Once they're done installing, assuming you didn't get any errors, you can verify if they were indeed installed with the following commands: cordova --version and ionic --version. That will show you the versions of the Cordova and Ionic frameworks installed on your system. For me, they return 6.4.0 and 2.2.1.
If you want to see more detailed version information such as the Ionic Framework version and Ionic CLI version, use the following instead:
ionic info | grep "Version"
Here's a sample output:
Ionic Framework Version: 2.2.0
Ionic CLI Version: 2.2.1
Ionic App Lib Version: 2.2.0
Ionic App Scripts Version: 1.1.4
Node Version: v6.7.0
Create a New Ionic Project
The Ionic CLI provides the ionic start command for easily creating a new project:
ionic start photoSharer blank --v2 --id com.tutsplus.photosharer
Here's a template to help you understand what each individual option does:
ionic start {name of the app} {starter template to use} --v2 --id {ID of the app when installed}
The starter template that was used here is blank. This contains only the bare minimum in order to get something shown on the screen. There are others, but they can be a little overwhelming.
Remember that the Ionic CLI caters to both Ionic 1 and Ionic 2 projects, so you still have to specify the --v2 option in order to bootstrap an Ionic 2 project since Ionic 1 is still the default. But once you're inside an Ionic 2 project, the Ionic CLI is smart enough to know which version to use.
Adding the Platform
By default, Ionic doesn't come with any platforms which you can deploy to. You can add one by using the ionic platform add command followed by the platform you want to deploy to:
ionic platform add android
If you want to deploy to another platform, just replace android with whatever platform you want.
Installing the Plugins
For this app, you'll need two plugins: one for selecting an image from the user's library, and one for sharing the image to the Instagram app.
First is the Image Picker plugin. This gives the app the ability to select images from the user's photo library.
ionic plugin add https://github.com/Telerik-Verified-Plugins/ImagePicker
Next is the Instagram plugin. This allows you to forward the image to the Instagram app for posting.
ionic plugin add cordova-instagram-plugin
Those two plugins that you've just installed are part of a curated set of ES6 and TypeScript wrappers for Cordova plugins called Ionic Native. Their main job is to make it easier to interact with Cordova plugins by wrapping plugin callbacks in Promises or Observables.
Development Workflow
Now you're ready to actually start coding the app. But before we get to that, let's first take a look at Ionic 2's development workflow and folder structure.
In Ionic 2, most of the development work is done inside the src folder. These files are recompiled every time you make changes to the files in this folder. Unlike in Ionic 1, compilation is necessary because the source files are written in TypeScript (compiled to ES5 code) and Sass (compiled to CSS code). Every time you make a change, the code is also checked for errors, which are reported back to the developer through the console or the app preview. Once compilation is done, the resulting files are copied to the www folder, and the changes are reflected in the app preview.
Folder Structure
To get comfortable working with an Ionic 2 project, you need to familiarize yourself with the folder structure. For starters, you need to know what each folder is used for so that you know where to put your source files and where to look for files that you need.
- node_modules: this is where the Ionic 2 dependencies are stored. Most of the time you don't need to touch this folder unless there's a problem with one of the dependencies and you have to re-install it.
- platforms: this is where platform-specific code is placed and where the app installer is put when you build the app for running on a device or emulator. That means all of the files in your www and plugins folders get copied here every time you build your app.
- plugins: this is where plugins are stored, obviously—both the default Ionic plugins and any other plugins you install.
- resources: this is where you'll put app resources such as the icon and splash screen.
- src: this is where you'll be coding most of the time. All the templates, stylesheets and TypeScript files that make up your app are stored here.
- www: this is where your compiled files go. The files in here are served in the app preview.
- hooks: this is where the Cordova development hook scripts are stored. These are used if you have custom scripts that you want to execute during some part of the development lifecycle (e.g. when a platform or plugin is added).
Running the Development Server
While developing an app, it's useful to see a live preview of the app that is updated while you make changes to the code. To launch the development server, use the following command:
ionic serve
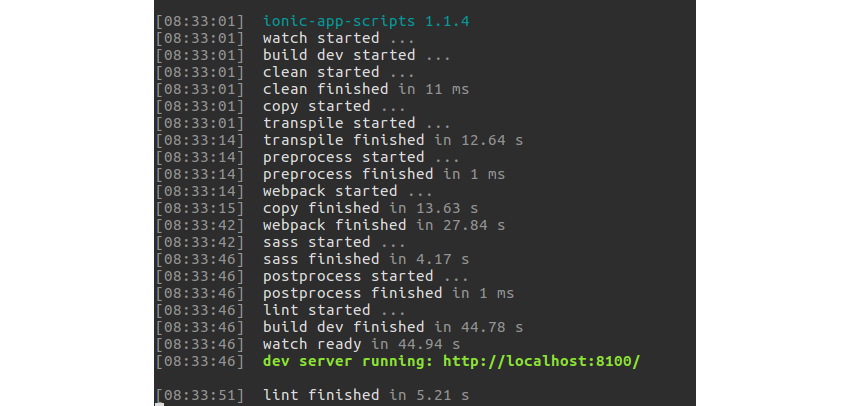
That will start the process of watching for changes in the source files and will begin compiling them in real time. By default, Ionic will serve the preview at http://localhost:8100/. You'll see something like the following, and then you can go ahead and preview your app in the browser at the reported URL.

Next Steps
Now that our development environment is set up, we're ready to jump into coding the app! Stay tuned tomorrow for the next post, where I'll show you how to actually code the app, building the UI and all the photo-sharing functionality. It's going to be fun!
In the meantime, check out some of our other tutorials on Ionic 2!
If you want an in-depth and practical introduction to the Ionic 2 framework, try our course Getting Started With Ionic 2.
In this course, Reggie Dawson will teach you all about the Ionic framework and will show you how to build a mobile app from scratch. Along the way, you'll learn about the Ionic component library, about programming statically-typed JavaScript with TypeScript, and about integrating an Ionic 2 app with a rich media API.


Comments