This is the second installment in our Corona SDK minigolf tutorial. In today's tutorial, we'll add to our interface and the game interaction. Read on!
Where We Left Off. . .
Please be sure to check part one of the series to fully understand and prepare for this tutorial.
1. Start Button Listeners
This function adds the necessary listeners to the TitleView buttons.
function startButtonListeners(action)
	if(action == 'add') then
		playBtn:addEventListener('tap', showGameView)
		creditsBtn:addEventListener('tap', showCredits)
	else
		playBtn:removeEventListener('tap', showGameView)
		creditsBtn:removeEventListener('tap', showCredits)
	end
end
2. Show Credits
The credits screen is shown when the user taps the about button, and a tap listener is added to the credits view to remove it.
function showCredits:tap(e)
	playBtn.isVisible = false
	creditsBtn.isVisible = false
	creditsView = display.newImage('credits.png', -130, display.contentHeight-140)
	transition.to(creditsView, {time = 300, x = 65, onComplete = function() creditsView:addEventListener('tap', hideCredits) end})
end
3. Hide Credits
When the credits screen is tapped, it'll be tweened out of the stage and removed.
function hideCredits:tap(e)
	playBtn.isVisible = true
	creditsBtn.isVisible = true
	transition.to(creditsView, {time = 300, y = display.contentHeight+creditsView.height, onComplete = function() creditsView:removeEventListener('tap', hideCredits) display.remove(creditsView) creditsView = nil end})
end
4. Show Game View
When the Play button is tapped the title view is tweened and removed, revealing the game view. There are many parts involved in this view, so we'll split them up in the next steps.
function showGameView:tap(e)
	transition.to(titleView, {time = 300, x = -titleView.height, onComplete = function() startButtonListeners('rmv') display.remove(titleView) titleView = nil end})
5. Game Background
First, we add the game background.
-- Game Bg

	gameBg = display.newImage('gameBg.png', 54, 14)
6. Instructions Message
The following lines add the instruction message. It will appear for two seconds and then fade it out.
-- Instructions Message

	local ins = display.newImage('ins.png', 260, 230)
	transition.from(ins, {time = 200, alpha = 0.1, onComplete = function() timer.performWithDelay(2000, function() transition.to(ins, {time = 200, alpha = 0.1, onComplete = function() display.remove(ins) ins = nil end}) end) end})
7. TextFields
This part creates the TextFields on the stage. These show information about the maximum shots allowable for a par score and the current amount already made.
-- TextFields

parTF = display.newText("3", 342, 296, native.systemFontBold, 16)
shotsTF = display.newText("0", 449, 296, native.systemFontBold, 16)
8. Ball
Add the ball to the level.
-- Ball

ball = display.newImage('ball.png', 351, 93)
ball.name = 'ball'
9. Hole
The next graphic will use physics to detect when the ball falls in the hole.
-- Hole

hole = display.newCircle(142, 251, 10)
hole.isVisible = false
end
10. Walls
The level walls are created using the next few lines of code. They are invisible by default since we only need them to detect collisions with the ball.
-- Walls

w1 = display.newLine(233, 43, 548, 43) w1.isVisible = false
w2 = display.newLine(398, 93, 398, 198) w2.isVisible = false
w3 = display.newLine(299, 158, 498, 158) w3.isVisible = false
w4 = display.newLine(199, 218, 199, 338) w4.isVisible = false
w5 = display.newLine(133, 278, 249, 278) w5.isVisible = false
w6 = display.newLine(83, 153, 83, 378) w6.isVisible = false
11. Physics
Next we add physics to the game objects.
-- Add Physics

	-- Walls
	physics.addBody(w1, 'static')
	physics.addBody(w2, 'static')
	physics.addBody(w3, 'static')
	physics.addBody(w4, 'static')
	physics.addBody(w5, 'static')
	physics.addBody(w6, 'static')

	-- Ball

	physics.addBody(ball, 'dynamic', {radius = 8})

	-- Hole

	physics.addBody(hole, 'static', {radius = 8})
	hole.isSensor = true

	gameListeners('add')
end
12. Game Listeners
This function adds the necessary listeners to start the game logic.
function gameListeners(action)
	if(action == 'add') then
		gameBg:addEventListener('touch', shoot)
		hole:addEventListener('collision', onCollision)
	else
		gameBg:removeEventListener('touch', shoot)
		hole:removeEventListener('collision', onCollision)
	end
end
13. Shoot Function
This next lines use the touch event and the physics applyForce method to shoot the ball.
function shoot(e)
	if(e.phase == 'moved') then
		display.remove(guide) -- Clears the previous line
		guide = display.newLine(ball.x, ball.y, e.x, e.y) -- Draw a line to serve as feedback
		guide:setColor(255, 255, 255, 80)
		guide.width = 6
	elseif(e.phase == 'ended') then
		display.remove(guide)
		ball:applyForce((ball.x - e.x) * 0.01, (ball.y - e.y) * 0.01, ball.x, ball.y)
		audio.play(ballHit)
		shotsTF.text = tostring(tonumber(shotsTF.text) + 1) -- Increases the shots counter

		-- Prevent Ball from being hit when moving

		gameBg:removeEventListener('touch', shoot)

		-- Stop Ball after a few seconds

		local stopBall = timer.performWithDelay(5000, function() ball:setLinearVelocity(0, 0, ball.x, ball.y) gameBg:addEventListener('touch', shoot) end, 1)
	end
end
14. Collisions
Now we'll check to see if the ball collides with the hole using the following code, and call an alert if true. This also checks the number of shots made and uses them to set the correct alert to display.
function onCollision(e)
	if(e.other.name == 'ball') then
		audio.play(ballHole)
		display.remove(ball)

		-- Check Scoring

		if(tonumber(parTF.text) > tonumber(shotsTF.text)) then
			scoring = 'birdie'
		elseif(tonumber(parTF.text) == tonumber(shotsTF.text)) then
			scoring = 'par'
		elseif(tonumber(parTF.text) < tonumber(shotsTF.text)) then
			scoring = 'bogey'
		end

		alert(scoring)
	end
end
15. Alert
The alert function creates an alert view, animates it, and ends the game.
function alert(img)
	gameListeners('rmv')
	alertView = display.newImage(scoring .. '.png', (display.contentWidth * 0.5) - 70, (display.contentHeight * 0.5) - 35)
	transition.from(alertView, {time = 300, xScale = 0.5, yScale = 0.5})

	-- Wait 1 second to stop physics
	timer.performWithDelay(1000, function() physics.stop() end, 1)
end
16. Call Main Function
In order to start the game, the Main function needs to be called. With the above code in place, we'll do that here.
Main()
17. Loading Screen

The Default.png file is an image displayed while the application loads. Add this image to your project source folder. It will automatically be added by the Corona compiler.
18. Icon

Using the graphics you created before, you can now create a nice and good looking icon. The icon size for the non-retina iPhone icon is 57x57px, but the retina version is 114x114px and the iTunes store requires a 512x512px version. I suggest creating the 512x512 version first and then scaling down for the other sizes.
It doesn't need to have the rounded corners or the transparent glare, iTunes and the iPhone will do that for you.
19. Testing in Simulator

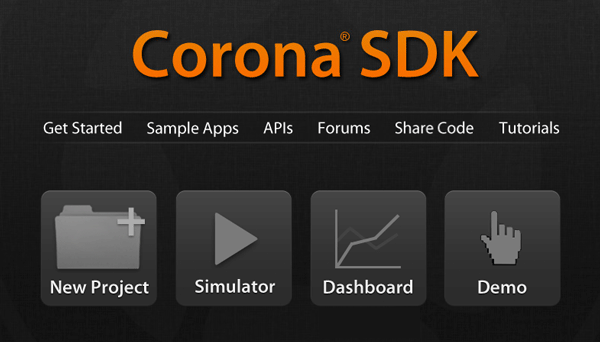
It's time to do the final test. Open the Corona Simulator, browse to your project folder, and then click open. If everything works as expected, you are ready for the final step!
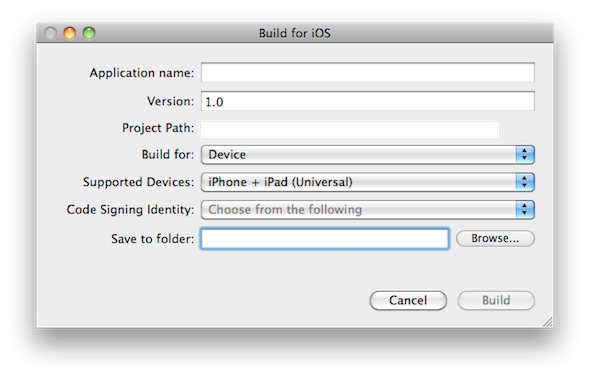
20. Build

In the Corona Simulator go to File > Build and select your target device. Fill the required data and click build. Wait a few seconds and your app will be ready for device testing and/or submission for distribution!
Conclusion
In this series, we've learned about physics behaviour, tap listeners, and collisions, skills that can be really useful in a wide number of games.
Experiment with the final result and try to make your custom version of the game!
I hope you liked this tutorial series and found it helpful. Thank you for reading!


Comments