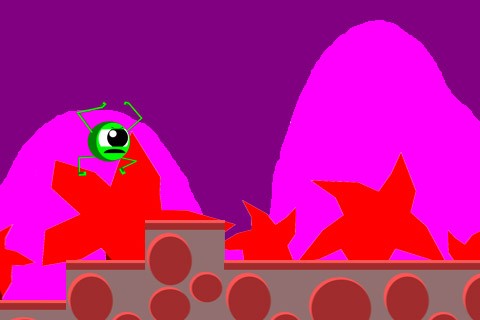
This series of tutorials will teach you how to make an endless running style game using the Corona SDK. An endless style running game would be a game like Monster Dash, Canabalt, or NinJump. By constantly scrolling sprites through a scene, it creates the appearance of a very large world that the user can interact with. This style of game has many benefits: levels can be dynamically and randomly created giving the users more replayability, games are able to keep their memory size small because assets can be reused, and gameplay is simple and quick giving gamers easy access to fast and enjoyable gameplay. By the end of this series, you will build the following game (be gentle on the graphics -get a designer and do better!):
However, before we get started on the gameplay we are going to start with the very basics. If you are familiar with general programming techniques, the Corona SDK, or the lua programming language then you should be comfortable enough to skim through the first tutorial. If not, don't worry as we are going to take you through the entire process of creating an app from scratch. We are going to keep the tutorials short, but thorough enough to make sure you understand what is going on. The basic structure of the tutorials will be as follows:
- Part 1: Getting Started: Introduction, Basics of the Corona SDK and Lua Language, Setting the Project Up, and Basic Project Debugging
- Part 2: Basic Scrolling: Adding Backgrounds to the Game, Adding the Ground, Moving the Ground, Adding Parallax Scrolling
- Part 3: Working with Sprite Sheets: Creating Sprite Sheets, Animating Objects with Sprite Sheets
- Part 4: Creating the Hero: Adding our Hero, Making our Hero Interact with the World
- Part 5: Creating an Event System: Event Basics, Changing the Ground Elevation Event, Adding a "Pit" Event
- Part 6: Implementing a Scoring System: Showing Distance Run, Adding Score Multipliers
- Part 7: Adding Obstacles: Adding Destroyable Obstacles (Monsters or Breakable Walls)
- Part 8: Adding a Boss Event: Adding a Boss Event to the Game
- Part 9: Adding a Menu System: Using the Director Class to Add a Menu System to the Game
- Part 10: Submitting the Game: Submitting our Game to the App Store
Does this look like a lot of work? Well it is, so let's get started! Here is a list of what you are going to need for this project:
- Corona SDK - A great cross-platform SDK to help you pump out mobile apps fast! A full license costs $200 USD and allows you to compile for both iOS and Android devices. A pro license costs $350 USD and allows you to make apps for both types of device. If you are a student at any accredited institution, you can get their student prices which will bring down the price down by $100 USD a piece. If you haven't purchased a subscription yet, you can still download the program and complete the tutorial with the trial version. If you are not a programmer, this is a great place to learn some of the basics and still quickly make great apps. If you are a programmer, you will be amazed at how quickly you can create quality content with the Corona SDK!
- Photoshop (commerical) or Gimp (free). In fact, any graphics editing program will work to make the images you will need to make your own game. Personally, I am most comfortable with Photoshop and Gimp, but use whatever you like the most. Other programs that you might want to consider using are vector graphics programs such as Adobe Illustrator (commercial) or Inkscape (free). The graphics for this series were made using a combination of Inkscape and Photoshop.
Corona SDK & Lua Basics
For those of you who don't have much experience programming, we will start by going over a few of the basics that you will see along the way. That way you don't have your mind blown away each time we add code to the project. The first thing you are going to want to do is open up the Corona SDK simulator and the Corona SDK console (command terminal). In Windows, if you open up the simulator it will automatically open up the console as well. On Mac OS, you will need to manually open the program called the Corona Terminal. Now that we have those running, open up your favorite text editor. In Windows, I use Notepad++ and on Mac OS I personally prefer Unipad. You can use whatever editor youwould like. Once you have your favorite editor open, create a file called main.lua. Every program that we make using the Corona SDK will have this as a starting point. Once you have the simulator, console, and text editor open, we are ready to start coding! Here is a quick run down of some of the basic things you will see over the course of the series.
Code Commenting
This is going to seem like a rather boring way to start, but it's important. Anything that comes after the characters -- on the same line will NOT be run by the simulator. This is significant because it allows you, the developer, to write "comments" into the code that will help you remember why you did something a certain way at a later time. Trust me when I say this is important. There will come a time when you will have to take a break (maybe you are tired of working on that project and want to work on something else for a couple days, weeks, or months!) and when you come back to it you realize that you have no idea what you were trying to do when you left. Or maybe you finish a project and a year later decide you want to update it. It also helps other people who look at your code to know exactly what you are trying to do. Also, well commented code makes it easy to pass code between developers. The moral of the story is that commenting code is as simple as adding -- to your project, so do it!
Print Statements & Debugging
The first thing we are going to do in our code is to learn how to print things out to the console (a.k.a the terminal). Why use the console when the app user will never see it? That's where we do our debugging. Debugging is the process developers go through when there is a "bug" (i.e. something wrong) in the their code and they need to find out where it is. Open up your main.lua file and copy the following:
--This is a comment, it will not do anything when run!
print("Hello, World!")
This is what you should see in your console:

And that is how you write things out to the terminal. Any value you want to watch can be displayed via the print command. Pretty easy, right? Notice how nothing shows up in the simulator, and the commented code does not show up in the terminal. Other commands will be visible in the simulator and on the devices, but print statements will only be visible from the console. We can use this to watch how the flow of the game is progressing and spot any problems we might be having. The next examples will go over more ways to use the print statement.
Variables
Next up on the chopping block are variables. Variables, just like in math, represent something other than itself. They are placeholders. For example, let's say that we have a set of information that represents a person. Rather than writing out the person's name or age, we can assign those values to variables so we can refer to them at later times. Go ahead and open up main.lua again and erase the previous lines of code that we had from the last example, and replace it with the following code.
--variables
name = "Bob"
age = 25
male = true
--print the variables
print(name)
print(age)
print(male)
When you run this in the simulator, you should see this output in the console:

There are 3 basic types of variables that we just used: strings (any text in quotation marks), integers (whole numbers), and booleans (true or false). There are definately more types of variables, but this is enough to get us going. One of the nice things about Lua is that variables are weak typed. That means that you don't have to explicity declare what type of variable it is, the compiler just knows. Variables will be used very often so get used to them. A couple more things that you will see and need to know about variables are whether they are local or global, a concept referred to as "scope". We'll touch on this a little bit later on.
Basic Math
I know what you're thinking: "Bluh! We don't need math to make games!". Sadly, however, you do. In fact, you need a lot of math to make games, so we will cover how to do some of the basics in lua. Head on back over to our main file, erase everything, and put this in its place:
--math with no variables
print(1 + 2)
--math using variables
a = 1
b = 2
c = a + b
print(c)
print(((a + b) * c) / 3)
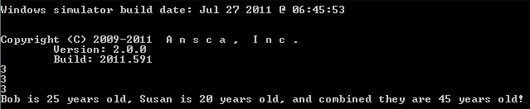
--print something useful with strings and variables
bob_age = 25
susan_age = 20
print("Bob is " .. bob_age .. " years old, Susan is " .. susan_age .. " years old, and combined they are " .. bob_age + susan_age .. " years old!")
Your screen should now show:
Most of what we saw there just builds off of what we have already done. One thing that is new is that we are now printing multiple things inside our print statements. Print statements can be as simple or complex as we need them to be. We can even do our math from right inside it! One thing to note when chaining large statements together is that each element must be combined with '..'. Math can be done purely with the different operatoring signs, however when you add strings in there you must use '..'.
On top of the basic math functions such as addition and subtraction, there are many more math functions that will be useful for us that are already built into Cocos2D. For a full list of the built in math functions, you can go here. Here are a few of the more common ones that you will see:
--prints out a random integer between 1 and 100
print(math.random(100))

--prints out the closest integer rounded up, in this case it will print out 2
print(math.ceil(1.5))

--prints out the closest integer rounded down, in this case it will print out 1
print(math.floor(1.5))
Any game that uses any kind of randomization will use the random function, and often times if a number is not an integer we will need to convert it to an integer before we print it out. Also, for the two rounding functions, it doesn't matter how close it is to one integer or another. For example: math.floor(1.99999) will still round down to 1. These are just a few examples for what they can do, and for anything that isn't built in, you can do yourself with the basic math operations and a little bit of practice.
If/Else Statements
If/Else statements are what are known as control statements. Control statements allow us to direct the program or app movement based on specific conditions. For example what if we had a game that had a door that could be either locked or unlocked, when the player tries to open the door, we need a way to check if it is locked or not. This is accomplished with if/else statements. Let's run this example and watch how it behaves. Clear main.lua and put this in instead:
 --create our variables
 --notice that there doesn't need to be spaces between the name of the variable and
 --the equals sign. Also the way you name the variables is based on your preference,
 --it is considered a good practice to pick one style and stick with it
 door1Locked=false
 door2_locked = true

 --run our if/else statements
 --In the first 'if' statement, notice how they can be by themselves and do not require an
 --else. If there is no attached else statement and the if statement is false, then nothing will
 --happen and the code will simply continue on. The lines of code between 'then' and 'end' will
 --only happen if what is in the parentheses is true.
 if(door1Locked == false) then
  print("Door 1 is unlocked!")
 end

--our second if statement, this time it has an attached else
--now, if the statement is not true we will jump into the else section
if(door2_locked == true) then
  --If the door is locked print out a locked statement and then set door2_locked to false.
  --Notice that when using variables '=' is used to set variables while '==' is
  --used to compare variables.
  print("Door 2 is locked...unlocking...")
  door2_locked = false
 else
  print("Door 2 is unlocked!")
end

if(door2_locked == true) then
  print("Door 2 is still locked... :p")
else
  print("Door 2 is finally unlocked!")
end
When you run it you will see this:

So, what happened there? In the first if statement, we checked to see if door1 was unlocked. It was, so we printed the message. In the second if statement, we checked to see if door2 was locked. It was, so we unlocked it (changed the variable) and checked it again. Using the if/else statements in this manner allows us to make some very interesting gameplay elements for all types of games. So again: the important thing to remember for if/else statements is the whatever is inside the parentheses must evaluate to true or false. If it is true, then it will run what comes after the "then", if not then it will run what comes after the "else" if there is an else (Do you see how I sneakily snuck an if statement into the example...Shameless I know!). Here are some more examples of how you can use if statements:
 --will always return true
 if(true) then

 --compares the first number to the second
 if(3 < 5) then

 --compare variables
 if(a == b) then

 --compare variables and strings
 name = "Bob"
 if(name == "Bob") then
There are always more ways to use if/else statements, but for now this should give you a good idea how to get started with them.
Functions
The next topic is something that is going to make your life a whole lot easier as a developer. Functions give you the ability to take a chuck of code; group it, name it, and call it from other places in your program. For example let's say you have a section of code that you know you are going to have to run more than once. A good example of this is going to be updating the score of a game. Instead of writing out the code that will be needed update the score the thousands of times that you will want to update it, you can simply write it once and then call it from the appropriate locations. Let's look at how to do that.
--create our function, all functions start with <i>function functionName ()</i>
--and end with the keyword <i>end</i>. You must declare the function before
--you can call it in the code!
 function updateScore()
  score = score + 1
 end

 score = 0
 print("Score before the function call: " .. score)
 --to call a function just type the functions name followed by <i>()</i>
 updateScore()
 print("Score after the function call: " .. score)
Go ahead and try that and make sure that you get this result:

Functions are also nice because you can group them all in a seperate file (outside of main.lua), include the file, then call them like normal. This
helps keep your code clean and organized, which is especially helpful on big projects.
Loops
Loops are helpful for the same reason that functions are nice: they let you accomplish a lot with minimal amounts of code. For this next example, let's
revisit the same code that we had before. Only delete the line where we call updateScore(), and replace it with the following section of code:
for a = 1, 10, 1 do
updateScore()
end
Save that off and run your code and for your results you should now have your output look like this:

So, why did we get 10 instead of 1 that time? The answer is that the for loop that we called ran everything inside of the do and the end 10 times. In this case, updateScore() was called 10 times. So, let's look at exactly what is happening, because there are several important things to notice.
When we create a for loop, there are 3 sections to the declaration, all of which have been seperated by commas. The first section is used to declare variables. We could just have easily said for monkey = 1, 10, 1 because the only thing this section does is initialize a variable. In this case we initialized the variable a and set it equal to 0. In the second section we tell the for loop how far to count, and in the third section we tell the for loop how much to count by. Let's look at another simple example. Get rid of the old code and replace it with this.
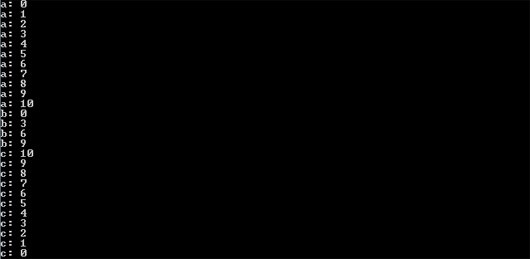
 --count to 10 by 1
 for a = 0, 10, 1 do
 print ("a: " .. a)
 end

 --count to 10 by the variable countByMe
 countByMe = 3
 for b = 0, 10, countByMe do
 print ("b: " .. b)
 end

 --count from 10 to 0 by 1
 for c = 10, 0, -1 do
 print ("c: " .. c)
 end
You should see something like this:
As you can see, the for loop simply does whatever is inside of it for as many times as you need it to. Something else to notice is that the variable does not get changed until after the contents of the for loop have been run. Hopefully you can see how loops are used in programming. There are more types of loops than just for loops, all of which are useful, but get comfortable with for loops and you will be able to accomplish most everything you need. Although the other loops (while and do-while) are just as easy to use.
Display Objects
Display Objects are exactly what they sound like: objects displayed on your screen. Almost everything that you see on your screen is a display object. Corona SDK makes it nice and easy for us to get stuff up on the screen. The only thing you have to do to get something out there is to do the following:
displayObject = display.newImage("imageName")
In order for this to actually show something on the screen you need to have an image named "imageName" in the same folder as your main.lua file. Here is a quick image I made in 4 seconds if you are too lazy to make a quick image for yourself. ;)

So in this next example, in the same folder as my main.lua file, I have a folder named images. In the images folder I have an image named "man.png". In order to access that file from main.lua I will use newImage("images/man.png") as shown here:
 --note that the name of the display Object can be anything
 --also be sure to include the file extension of the file image name
 --we can create basic shapes using this method, this will give us a white background
 background = display.newRect(0,0,320,480)
 hero = display.newImage("images/man.png")

 --next we need to tell the image where to be placed
 hero.x = display.contentWidth/2
 hero.y = display.contentHeight/2
Now our hero is ready to be displayed on the screen. Go ahead and run it and it should look like this:

When assigning x and y values to Objects, the top left corner of the screen is (x=0,y=0) regardless of the orientation of the game. Also note that the x and y coordinates of the object refer to the center of the object. So putting the coordinates of our object at (0,0) will put our image half off of the screen. Now because our hero is an object we can assign more variables to it that we can store all the information relating to our little hero in. A good example of this are the x and y coordinates for the hero. If you were to add a print statement after that you had assigned those 2 values and said print(hero.x) it would print out the value that was stored in hero.x. Let's go ahead and add some more variables to our hero that we might need later on. Put the following code under the existing code from the previous example:
--try to keep the variables to things that will makes sense later on as you make your game
hero.name = "Larry"
hero.level = 1
hero.score = 1500

--now let's print everything out
print("hero.x = " .. hero.x)
print("hero.y = " .. hero.y)
print("hero.name = " .. hero.name)
print("hero.level = " .. hero.level)
print("hero.score = " .. hero.score)
Run it and you should see this in your console:

Pretty straight forward, you can make member variables be just about anything that you need them to be. Just remember to use good and consistent naming conventions that will help you thoughout your project.
Groups
Another thing that you will see used several places in the code is called groups. Grouping similar items makes it easy to keep track of things. Let's say, for example, that we have 3 types of items on our screen: Good guys, bad guys, and bullet's. As we update the game we have to update each individual object, with groups we can simplify that by saying update everything in the group and our program will take care of everything for us. Let's take a look at how to do that. Go ahead and erase all of our previous code and replace it with this:
 --Make some heros and monsters, and give them some information
 --remember in order for newImage to work you would need to have an image name
 --man.png inside of a folder named images that is in the
 --same directory as your main.lua file. if you put the image directly
 --in the same folder as main.lua you can simply say man.png
 hero1 = display.newImage("images/man.png")
 hero1.name = "Homer"
 hero1.score = 0
 hero2 = display.newImage("images/man.png")
 hero2.name = "Bart"
 hero2.score = 0
 hero3 = display.newImage("images/man.png")
 hero3.name = "Lisa"
 hero3.score = 0
 monster1 = display.newImage("images/man.png")
 monster1.name = "Ned"
 monster1.score = 0
 monster2 = display.newImage("images/man.png")
 monster2.name = "Nelson"
 monster2.score = 0
 monster3 = display.newImage("images/man.png")
 monster3.name = "Milhouse"
 monster3.score = 0

 --create our groups
 heroGroup = display.newGroup()
 monsterGroup = display.newGroup()
 screenGroup = display.newGroup()

 --insert our heros and monsters into their respective groups
 --note that the order you put them in will determine their draw order
 --also note that we can put groups into other groups
 heroGroup:insert(hero1)
 heroGroup:insert(hero2)
 heroGroup:insert(hero3)
 monsterGroup:insert(monster1)
 monsterGroup:insert(monster2)
 monsterGroup:insert(monster3)
 screenGroup:insert(heroGroup)
 screenGroup:insert(monsterGroup)

 --cycle through our groups using for loops
 --groupname.numChildren is a variable that tells you how many items are in a group
 --this will update the heroGroup
 for a = 1, heroGroup.numChildren, 1 do
  --we are going to print out the information then change it, so even though they are
  --happening in the same loop we will not see the changes we made on this round
  print(heroGroup[a].name .. ": " .. heroGroup[a].score)
  heroGroup[a].score = heroGroup[a].score + 5
 end

 --give ourselves a clear seperation in the console
 print("")

 --now let's look at how display the everything inside of the screen group
 for a = 1, screenGroup.numChildren, 1 do
  for b = 1, screenGroup[a].numChildren, 1 do
   print ((screenGroup[a])[b].name .. ": " .. (screenGroup[a])[b].score)
  end
 end
Your ouput in your terminal should look like this:

In short, we went though each group, updated the groups we wanted, and printed the results. This process makes updating large sets of data very easy. Hopefully that gives you a little insight into why groups are beneficial. One important aspect of groups to keep in consideration is that how you put the items into the groups will determine what order they are drawn. For example, let's say on a screen you have a foreground, a middleground, and a background. You would want to put the background into the group first, then the middleground, and lastly put the foreground in. The last layers will always be drawn over the previous layers.
Timers
The last section that we will cover in this primer is "timers". Timers are pretty self explanatory. They allow us to do 2 basic things. The first is they will wait for a certain amount of time, then perform an action. The second is they will run a certain event for a specified amount of time. Both of which you will use in games all of the time. Clear everything out and then run this code.
 print("Waiting for the timer to finish...")

 function afterTimer()
 print("Timer is done!")
 end

 timer.performWithDelay(3000, afterTimer, 1)
When you run this code you should see the first print statement immediately in the terminal, the second print statement (i.e. the one found inside of the function afterTimer) shouldn't appear for 3 seconds. So, you can see that there are 3 parameters for this function. The first parameter is how long you
want there to be between each time the timer is run in milliseconds. The second is the name of the function that you want to be run when that first duration ends. The third is the number of times that you want the function to be run. So if we had entered 5 for the last parameter we would have had the afterTimer function run 5 times each with a 3 second pause in between. If you want something to keep running forever, simply put a -1 for the last parameter. This is useful for things like update functions that need to constantly be updating your game.
Wrap Up
The concepts presented in this tutorial are of course not everything that you will see in the series project, but hopefully this tutorial has been enough of a crash course that you will be comfortable with everything else that pops up in subsequent posts. So, keep practicing and learning and you will be ready for the next sections where we get into actual gameplay. If you have any questions about anything or suggestions sound off in the comments!

Comments