This is the second installment in our Corona SDK Frogger Inspired tutorial. In today's tutorial, we'll add to our interface and the game interaction. Read on!
Where We Left Off. . .
Please be sure to check part 1 of the series, Interface Creation, to fully understand and prepare for this tutorial.
1. Start Button Listeners
This function adds the necessary listeners to the TitleView buttons.
function startButtonListeners(action)
	if(action == 'add') then
		playBtn:addEventListener('tap', showGameView)
		creditsBtn:addEventListener('tap', showCredits)
	else
		playBtn:removeEventListener('tap', showGameView)
		creditsBtn:removeEventListener('tap', showCredits)
	end
end
2. Show Credits
The credits screen is shown when the user taps the About button; a tap listener is added to the credits view to remove it.
function showCredits:tap(e)
	playBtn.isVisible = false
	creditsBtn.isVisible = false
	creditsView = display.newImage('credits.png', 0, display.contentHeight)

	lastY = title.y
	transition.to(title, {time = 300, y = -20})
	transition.to(creditsView, {time = 300, y = 265, onComplete = function() creditsView:addEventListener('tap', hideCredits) end})
end
3. Hide Credits
When the credits screen is tapped, it'll be tweened out of the stage and removed.
function hideCredits:tap(e)
	transition.to(creditsView, {time = 300, y = display.contentHeight + 25, onComplete = function() creditsBtn.isVisible = true playBtn.isVisible = true creditsView:removeEventListener('tap', hideCredits) display.remove(creditsView) creditsView = nil end})
	transition.to(title, {time = 300, y = lastY});
end
4. Show Game View
When the Play button is tapped, the title view is tweened and removed, revealing the game view. There are many parts involved in this view so we'll split them in the next steps.
function showGameView:tap(e)
	transition.to(titleView, {time = 300, x = -titleView.height, onComplete = function() startButtonListeners('rmv') display.remove(titleView) titleView = nil end})
5. Game Background
This code places the background image in the stage.
-- Game Background

gameBg = display.newImage('gameBg.png')
6. Add Cars
The next lines of code handles the cars' placement on the stage. Each line represents a car, its position, the graphic, the rotation, the direction and the name. We'll create that function later in the tutorial.
-- Cars Part 1

obstacles = display.newGroup()
addObstacle(184, 353, 'car2', false, 'l', 'car')
addObstacle(184, 326, 'car', true, 'r', 'car')
addObstacle(124, 293, 'car2', false, 'l', 'car')
addObstacle(94, 386, 'car', true, 'r', 'car')
addObstacle(64, 326, 'car', true, 'r', 'car')
addObstacle(94, 293, 'car2', false, 'l', 'car')
addObstacle(34, 386, 'car', true, 'r', 'car')
addObstacle(4, 353, 'car2', false, 'l', 'car')
addObstacle(4, 293, 'car2', false, 'l', 'car')
addObstacle(274, 386, 'car', true, 'r', 'car')
addObstacle(234, 353, 'car2', false, 'l', 'car')
addObstacle(274, 326, 'car', true, 'r', 'car')

-- Cars Part 2

addObstacle(94, 226, 'car', true, 'r', 'car')
addObstacle(94, 197, 'car2', false, 'l', 'car')
addObstacle(94, 167, 'car', true, 'r', 'car')
addObstacle(94, 137, 'car2', false, 'l', 'car')
addObstacle(94, 107, 'car', true, 'r', 'car')
addObstacle(274, 197, 'car2', false, 'l', 'car')
addObstacle(94, 107, 'car', true, 'r', 'car')
addObstacle(34, 226, 'car', true, 'r', 'car')
addObstacle(34, 197, 'car2', false, 'l', 'car')
addObstacle(184, 167, 'car', true, 'r', 'car')
addObstacle(184, 137, 'car2', false, 'l', 'car')
addObstacle(4, 107, 'car', true, 'r', 'car')
addObstacle(274, 197, 'car2', false, 'l', 'car')
addObstacle(274, 107, 'car', true, 'r', 'car')
7. Add Pad
A pad is added to the stage in order to control the frog.
-- Pad

up = display.newImage('up.png', 33.5, 369.5)
left = display.newImage('left.png', 0, 402.5)
down = display.newImage('down.png', 33.5, 436.5)
right = display.newImage('right.png', 66.5, 402.5)

up.name = 'up'
down.name = 'down'
left.name = 'left'
right.name = 'right'
8. Frog
Next we add our player to the stage.
-- Frog

frog = display.newImage('frog.png', 148.5, 417.5)
9. Goals
Rectangles are drawn on the stage to represent the goals. These will be added later to the physics engine and hidden.
-- Goals

local g1 = display.newRect(68, 70, 15, 15)
g1.name = 'goal'
local g2 = display.newRect(153, 70, 15, 15)
g2.name = 'goal'
local g3 = display.newRect(238, 70, 15, 15)
g3.name = 'goal'
10. Physics
We will need physics to handle the collisions. This part of the code takes care of that.
	-- Physics

	physics.addBody(frog)
	frog.isSensor = true
	physics.addBody(g1, 'static')
	g1.isSensor = true
	g1.isVisible = false
	physics.addBody(g2, 'static')
	g2.isSensor = true
	g2.isVisible = false
	physics.addBody(g3, 'static')
	g3.isSensor = true
	g3.isVisible = false

	gameListeners('add')
end
11. Game Listeners
This function adds the necessary listeners to start the game logic.
function gameListeners(action)
	if(action == 'add') then
		Runtime:addEventListener('enterFrame', update)
		up:addEventListener('tap', movePlayer)
		left:addEventListener('tap', movePlayer)
		down:addEventListener('tap', movePlayer)
		right:addEventListener('tap', movePlayer)
		frog:addEventListener('collision', onCollision)
	else
		Runtime:removeEventListener('enterFrame', update)
		up:removeEventListener('tap', movePlayer)
		left:removeEventListener('tap', movePlayer)
		down:removeEventListener('tap', movePlayer)
		right:removeEventListener('tap', movePlayer)
		frog:removeEventListener('collision', onCollision)
	end
end
12. Add Obstacles Function
The following function creates an obstacle based on its parameters. It creates a physics object of the graphic and adds it to a group.
function addObstacle(X, Y, graphic, inverted, dir, name)
	local c = display.newImage(graphic .. '.png', X, Y)
	c.dir = dir
	c.name = name

	--Rotate graphic if going right

	if(inverted) then
		c.xScale = -1
	end

	-- Physics

	physics.addBody(c, 'static')
	c.isSensor = true

	obstacles:insert(c)
end
13. Move Player
Pressing the buttons in the pad will call this function. It will move the player thirty-one pixels in the pressed direction.
function movePlayer(e)
	audio.play(moveSnd)
	if(e.target.name == 'up') then
		frog.y = frog.y - 31
	elseif(e.target.name == 'left') then
		frog.x = frog.x - 31
	elseif(e.target.name == 'down') then
		frog.y = frog.y + 31
	elseif(e.target.name == 'right') then
		frog.x = frog.x + 31
	end
end
14. Update Function
The update function that runs every frame. It is in charge of moving the cars across the stage and restoring their position.
function update()
	-- Move Obstacles

	for i = 1, obstacles.numChildren do
		if(obstacles[i].dir == 'l') then
			obstacles[i].x = obstacles[i].x - 1
		else
			obstacles[i].x = obstacles[i].x + 1
		end

		-- Respawn obstacle when out of stage
		--Right
		if(obstacles[i].dir == 'r' and obstacles[i].x > display.contentWidth + (obstacles[i].width * 0.5)) then
			obstacles[i].x = -(obstacles[i].width * 0.5)
		end

		-- Respawn obstacle when out of stage
		--Left
		if(obstacles[i].dir == 'l' and obstacles[i].x < -(obstacles[i].width * 0.5)) then
			obstacles[i].x = display.contentWidth + (obstacles[i].width * 0.5)
		end
	end
end
15. Collisions
Finally, we check for collisions. If the frog is hit by a car, the graphics are removed and a You Lose message is shown. When the three frogs have reached their goal, a You Win message will appear, ending the game.
function onCollision(e)
	if(e.other.name == 'car') then
		display.remove(e.target)
		audio.play(loseSnd)
		alert('lose')
	elseif(e.other.name == 'goal') then
		display.remove(e.other)
		local f = display.newImage('frog.png', e.other.x - 12, e.other.y - 18)
		audio.play(goalSnd)
		timer.performWithDelay(10, function() frog.x = 160 frog.y = 426 end, 1)
		counter = counter + 1
	end
	--check if goals complete
	if(counter == 3) then
		alert()
	end
end
16. Alert
The alert function creates an alert view, animates it, and ends the game.
function alert(action)
	gameListeners('rmv')
	display.remove(obstacles)
	if(action == 'lose') then
		alertView = display.newImage('lose.png', 127.5, 345)
	else
		alertView = display.newImage('win.png', 132, 345)
	end

	transition.from(alertView, {time = 200, alpha = 0.1})
end
17. Call Main Function
In order to start the game, the Main function needs to be called. With the above code in place, we'll do that here:
Main()
18. Loading Screen
The Default.png file is an image that will be displayed while the iOS loads the basic data to show the Main Screen. Add this image to your project source folder; it will be automatically added by the Corona compliler.
19. Icon
Using the graphics you created before, you can now create a nice and good looking icon. The icon size for the non-retina iPhone icon is 57x57px, but the retina version is 114x114px, and the iTunes store requires a 512x512px version. I suggest creating the 512x512px version first and then scaling down for the other sizes. It doesn't need to have rounded corners or transparent glare; iTunes and the iPhone will do that for you.
20. Testing in Simulator

It's time to do the final test. Open the Corona Simulator, browse to your project folder, and then click open. If everything works as expected, you are ready for the final step!
21. Build
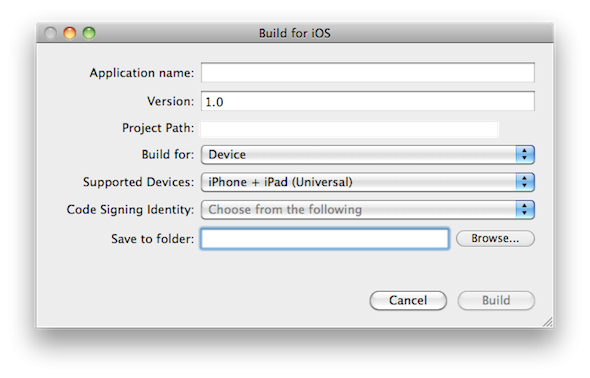
In the Corona Simulator, go to File > Build and select your target device. Fill the required data and click Build. Wait a few seconds and your app will be ready for device testing and/or submission for distribution!
Conclusion
In this series, we've learned about moving an object using an on-screen pad and collision detection using the physics engine, skills that can be really useful in a wide number of games. Experiment with the final result and try to make your own custom version of the game! I hope you liked this tutorial series and found it helpful. Thank you for reading!

Comments