In this tutorial I'll be showing you how to create a concentration puzzle game with the Corona SDK. You'll learn more about timers, touch controls, and sounds. The objective of the game is to quickly tap on the correct button before runnig out of time. Read on!
1. Application Overview
Using custom graphics we will code an entertaining game with Lua and the Corona SDK API's.
The player will be able to use the touch screen on the device to select the correct button, and you can modify the parameters in the code to customize the game.
2. Target Device

The first thing we have to do is select the platform we want to run our app within. This way we'll be able to choose the size for the images we will use.
The iOS platform has these characteristics:
- iPad 1/2/Mini: 1024x768px, 132 ppi
- iPad Retina: 2048x1536, 264 ppi
- iPhone/iPod Touch: 320x480px, 163 ppi
- iPhone/iPod Retina: 960x640px, 326 ppi
- iPhone 5/iPod Touch: 1136x640, 326 ppi
Because Android is an open platform, there are many different devices and resolutions. A few of the more common screen characteristics are:
- Asus Nexus 7 Tablet: 800x1280px, 216 ppi
- Motorola Droid X: 854x480px, 228 ppi
- Samsung Galaxy SIII: 720x1280px, 306 ppi
In this tutorial, we'll be focusing on the iOS platform with the graphic design, specifically developing for distribution to an iPhone/iPod touch, but the code presented here should apply to Android development with the Corona SDK as well.
3. Interface
A simple and friendly interface will be used. The interface will involve multiple shapes, buttons, bitmaps and more.
The interface graphic resources necessary for this tutorial can be found in the attached download.
4. Export Graphics
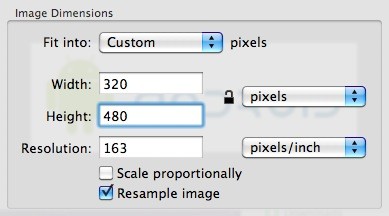
Depending on the device you have selected, you may need to export the graphics in the recommended PPI. You can do this with your favorite image editor.
I used the Adjust Size... function in the Preview app on Mac OS X.
Remember to give the images a descriptive name and to save them in your project folder.
5. App Configuration
An external file will be used to make the application go fullscreen across devices, the config.lua file. This file shows the original screen size and the method used to scale that content in case the app is run in a different screen resolution.
application =
{
    content =
    {
        width = 320,
        height = 480,
        scale = "letterbox"
    },
}
6. Main.lua
Let's write the application!
Open your prefered Lua editor (any Text Editor will work, but you won't have syntax highlighting), and prepare to write your awesome app. Remember to save the file as main.lua in your project folder.
7. Code Structure
We'll structure our code as if it were a Class. If you know ActionScript or Java, you should find the structure familiar.
Necessary Classes

Variables and Constants

Declare Functions

    contructor (Main function)

    class methods (other functions)

call Main function
8. Hide Status Bar
display.setStatusBar(display.HiddenStatusBar)
This code hides the status bar. The status bar is the bar on top of the device screen that shows the time, signal, and other indicators.
9. Background

A simple graphic is used as the background for the application interface. The next line of code stores it:
-- Graphics

-- [Background]

local bg = display.newImage('bg.png')
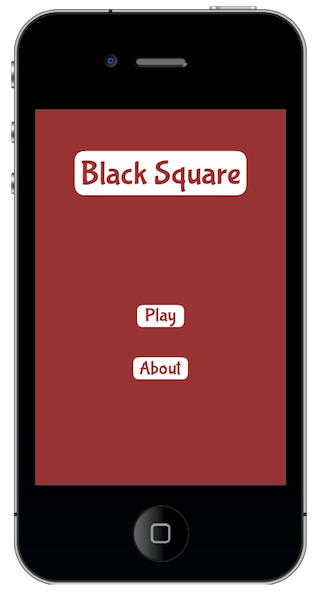
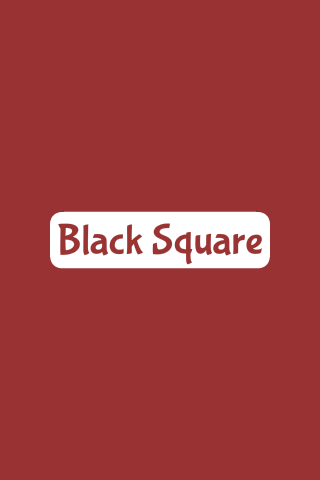
10. Title View
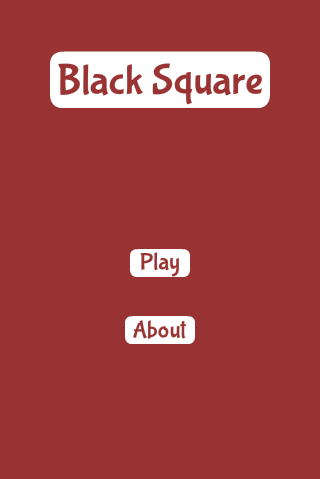
This is the Title View. It will be the first interactive screen to appear in our game, and these variables store the components.
-- [Title View]

local title
local playBtn
local creditsBtn
local titleView
11. Credits View
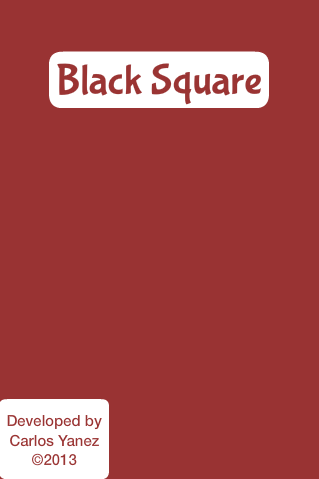
This view will show the credits and copyright of the game, this variable will be used to store it.
-- [CreditsView]

local creditsView
12. Game Background

The level background. This will also add the score textfield.
-- Game Background

local gameBg
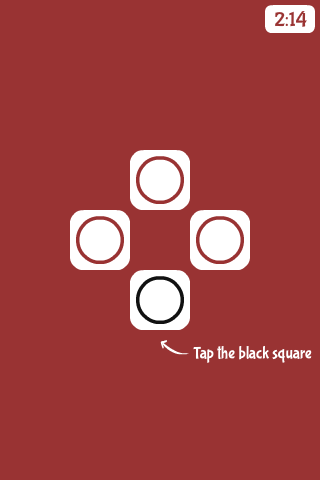
13. Instructions Message

An instructions message will appear at the start of the game, it will be tweened out after 2 seconds.
-- Instructions

local ins
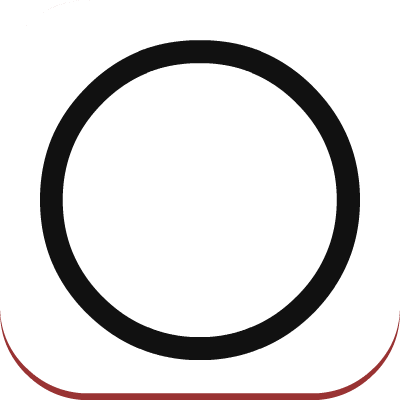
14. Buttons

The buttons. The objective of the game is to tap the black square before running out of time.
-- Color Squares

local r
local r2
local r3
local b
local squares
15. Alert

This is the alert that will be displayed when the time reaches zero. It will show the score and end the game.
-- Alert

local alertView
16. Sounds
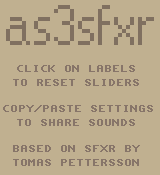
We'll use Sound Effects to enhance the feeling of the game. The sounds used in this game were created in as3sfxr.
-- Sounds

local tapSnd = audio.loadSound('tap.wav')
local wrongSnd = audio.loadSound('wrong.wav')
local loseSnd = audio.loadSound('lose.wav')
17. Variables
These are the variables we'll use. Read the comments in the code to learn more about them.
-- Variables

local leftTimer -- A timer for the remaining time
local bonusTimer -- A timer that reduces the score given
local score = 0
local bonus = 50 -- Initial score added
local rotations = {0, 90, 180, 270} -- Possible rotation for the buttons
18. Declare Functions
Declare all the functions as local at the start.
-- Functions

local Main = {}
local startButtonListeners = {}
local showCredits = {}
local hideCredits = {}
local showGameView = {}
local gameListeners = {}
local onTap = {}
local updateTime = {}
local updateBonus = {}
local alert = {}
19. Constructor
Next, we'll create the function that will initialize all the game logic:
function Main()
	-- code...
end
20. Add the Title View
Now we'll place the TitleView on the stage and call a function that will add the tap listeners to the buttons.
function Main()
    title = display.newImage('title.png')
    playBtn = display.newImage('playBtn.png', 130, 248)
    creditsBtn = display.newImage('creditsBtn.png', 125, 316)
    titleView = display.newGroup(title, playBtn, creditsBtn)

    startButtonListeners('add')
end
21. Start Button Listeners
This function adds the necesary listeners to the TitleView buttons.
function startButtonListeners(action)
	if(action == 'add') then
		playBtn:addEventListener('tap', showGameView)
		creditsBtn:addEventListener('tap', showCredits)
	else
		playBtn:removeEventListener('tap', showGameView)
		creditsBtn:removeEventListener('tap', showCredits)
	end
end
22. Show Credits
The credits screen is shown when the user taps the about button, a tap listener is added to the credits view to remove it.
function showCredits:tap(e)
	playBtn.isVisible = false
	creditsBtn.isVisible = false
	creditsView = display.newImage('credits.png', 0, display.contentHeight)

	transition.to(creditsView, {time = 300, y = display.contentHeight - (creditsView.height - 40), onComplete = function() creditsView:addEventListener('tap', hideCredits) end})
end
23. Hide Credits
When the credits screen is tapped, it'll be tweened out of the stage and removed.
function hideCredits:tap(e)
	transition.to(creditsView, {time = 300, y = display.contentHeight + 40, onComplete = function() creditsBtn.isVisible = true playBtn.isVisible = true creditsView:removeEventListener('tap', hideCredits) display.remove(creditsView) creditsView = nil end})
end
24. Show Game View
When the Play button is tapped, the title view is tweened and removed revealing the game view. There are many parts involved in this view, so we'll split them in the next steps.
function showGameView:tap(e)
	transition.to(titleView, {time = 300, x = -titleView.height, onComplete = function() startButtonListeners('rmv') display.remove(titleView) titleView = nil end})
25. Instructions Message
The following lines add the instructions message.
local ins = display.newImage('instructions.png', 160, 340)
	transition.from(ins, {time = 200, alpha = 0.1, onComplete = function() timer.performWithDelay(2000, function() transition.to(ins, {time = 200, alpha = 0.1, onComplete = function() display.remove(ins) ins = nil end}) end) end})
26. Add Buttons
This part places the buttons on the screen and groups them to handle them easier.
-- Add Squares

	r1 = display.newImage('red.png', 70, 210)
	r2 = display.newImage('red.png',130, 150)
	r3 = display.newImage('red.png',190, 210)
	b = display.newImage('black.png',130, 270)
	b.name = 'b'
	squares = display.newGroup(r1, r2, r3, b)
	squares:setReferencePoint(display.CenterReferencePoint)
27. Display Time
Now we create a TextField that will display the time remaining.
	-- Timer

	timeLeft = display.newText('0', 285, 7, 'Marker Felt', 16)
	timeLeft:setTextColor(153, 51, 51)

	gameListeners('add')
end
28. Game Listeners
This function adds the necessary listeners to start the game logic.
function gameListeners(action)
	if(action == 'add') then
		b:addEventListener('tap', onTap)
		r3:addEventListener('tap', onTap)
		r2:addEventListener('tap', onTap)
		r1:addEventListener('tap', onTap)
	else
		b:removeEventListener('tap', onTap)
		r3:removeEventListener('tap', onTap)
		r2:removeEventListener('tap', onTap)
		r1:removeEventListener('tap', onTap)
		timer.cancel(leftTimer)
		leftTimer = nil
		timer.cancel(bonusTimer)
		bonusTimer = nil
	end
end
29. Start Timers
Next we initiate the timers. They will handle the time left and the current bonus time that will be added when the correct button is pressed.
function onTap(e)
	-- Start Timers if not started
	if(leftTimer == nil) then leftTimer = timer.performWithDelay(1, updateTime, 0) end
	if(bonusTimer == nil) then bonusTimer = timer.performWithDelay(3000, updateBonus, 0) end
30. Add Bonus Time
If the Black button is selected the bonus time is added to the total.
- Get square tapped
	if(e.target.name == 'b') then
		-- Update timer
		timeLeft.text = tostring(tonumber(timeLeft.text) + bonus)
31. Change Squares Position
Then we move the buttons to a different position using the values set in the previously created Table. We also play a sound and add the score:
-- Change squares position
    local rnd = math.floor(math.random() * 4) + 1 --number from 1 to 4
    squares.rotation = rotations[rnd]
    audio.play(tapSnd)
    score = score + 50
32. Incorrect Button
If the button pressed is red, time is subtracted.
else
		-- Reduce Time
		timeLeft.text = tostring(tonumber(timeLeft.text) - 10)
		audio.play(wrongSnd)
	end
end
33. Check for Time Over
This function reduces the total time and checks if it reaches zero to call an alert.
function updateTime(e)
	timeLeft.text = tostring(tonumber(timeLeft.text) - 1)
	-- Time over
	if(tonumber(timeLeft.text) <= 0) then
		alert()
	end
end
34. Reduce Bonus
The following code decreases the bonus added when the correct button is pressed. It displays a message to alert the player.
function updateBonus(e)
	bonus = bonus - 10

	local msg = display.newText('LEVEL UP!', math.floor(math.random() * display.contentWidth), math.floor(math.random() * display.contentHeight), 'Marker Felt', 15)
	msg:setTextColor(255, 255, 255)
	transition.from(msg, {time = 200, alpha = 0.1, onComplete = function() timer.performWithDelay(800, function() transition.to(msg, {time = 200, alpha = 0.1, onComplete = function() display.remove(msg) msg = nil end}) end) end})
end
35. Alert
The alert function creates an alert view, animates it, and ends the game.
function alert(action)
	timeLeft.text = 0
	audio.play(loseSnd)
	gameListeners('rmv')
	alertView = display.newImage('alert.png', 90, 352)
	transition.from(alertView, {time = 200, alpha = 0.1})
	local scoreTF = display.newText(tostring(score), 185, 353, 'Marker Felt', 14)
	scoreTF:setTextColor(153, 51, 51)
end
36. Call Main Function
In order to start the game, the Main function needs to be called. With the above code in place, we'll do that here:
Main()
37. Loading Screen
The Default.png file is an image that will be displayed right when you start the application while iOS loads the basic data to show the Main Screen. Add this image to your project source folder, it will be automatically added by the Corona compiler.
38. Icon
Using the graphics you created before you can now create a nice and good looking icon. The icon size for the non-retina iPhone icon is 57x57px, but the retina version is 114x114px and the iTunes store requires a 512x512px version. I suggest creating the 512x512 version first and then scaling down for the other sizes.
It doesn't need to have the rounded corners or the transparent glare, iTunes and the iPhone will do that for you.
39. Testing in the Simulator

It's time to do the final test. Open the Corona Simulator, browse to your project folder, and then click open. If everything works as expected, you are ready for the final step!
40. Build
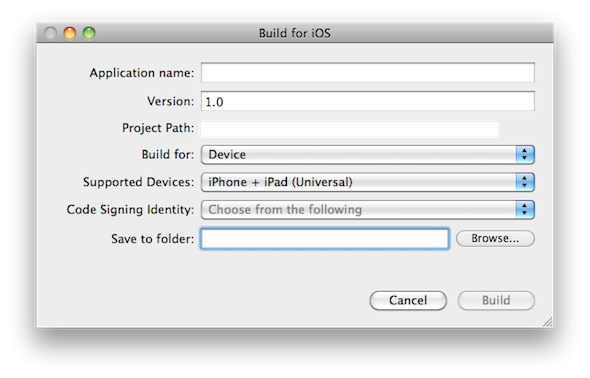
In the Corona Simulator, go to File > Build and select your target device. Fill the required data and click build. Wait a few seconds and your app will be ready for device testing and/or submission for distribution!
Conclusion
In this series, we've learned about timers, tap listeners, and other skills that can be really useful in a wide number of games.
Experiment with the final result and try to make your custom version of the game!
I hope you liked this tutorial series and found it helpful. Thank you for reading!

Comments