In this tutorial, you'll learn how to use Apple's Sprite Kit framework to recreate a Missile Command game for the iPad. Along the way, you'll learn more about several core concepts such as, sprites, touches, physics, collisions, and explosions. The goal of the second tutorial is to add physics, collisions, and explosions. The second tutorial also expands the game experience by adding a multi-player mode.
Memories
Do you remember Missile Command? Atari released the original game on March 8, 1981. It was an action game built for Arcade systems and became very popular around the world.
Since its release in 1981, several adaptations were made for various platforms. It's now time for you to recreate the original game using modern technologies, iOS, Objective-C, and, the iPad.
Final Preview
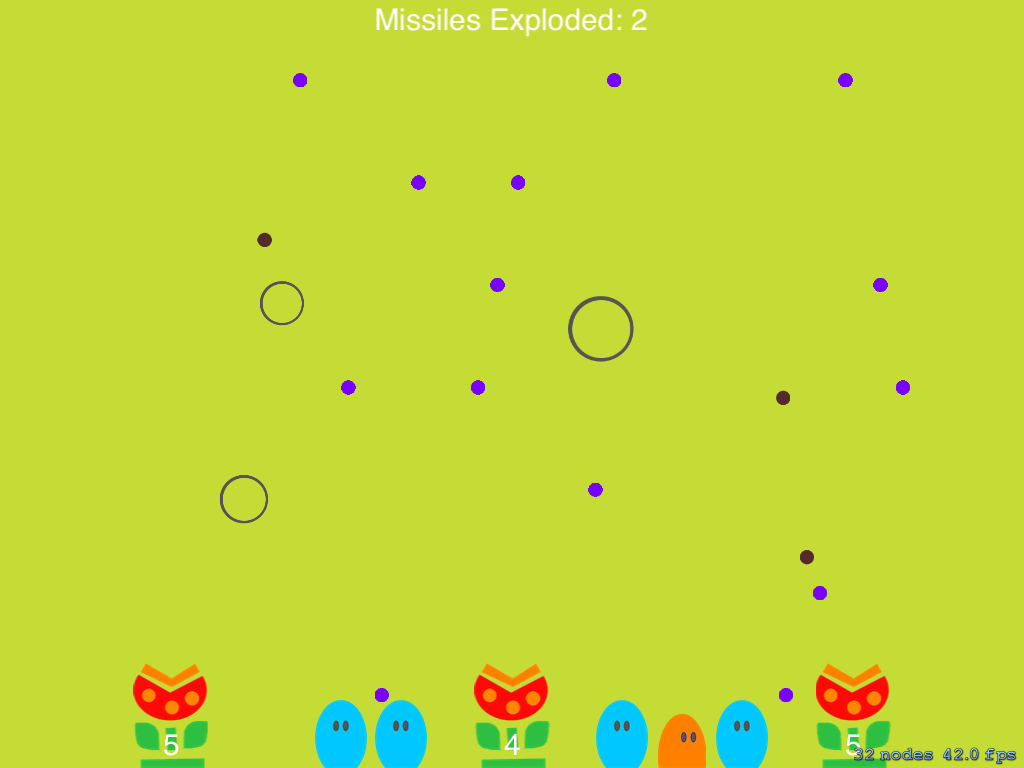
The below screenshot gives you an idea of what the final result will look like. If you like what you see, then let's get started.
Requirements
To complete this tutorial, you'll need Xcode 5 and the latest iOS 7 SDK. You can download Xcode 5 and the SDK from the iOS Dev Center.
At the end of each section, you'll find one or more challenges. The objective of these challenges is to help you learn the techniques and technologies used in this tutorial. Some are easy while others will be more challenging, requiring a good grasp of the Sprite Kit framework. With the exception of the last challenge, remember that the challenges are not required to complete the tutorial. However, we hope you give them a try.
If you have questions about the Sprite Kit framework, we suggest you take a look at our other Sprite Kit tutorials on Mobiletuts+.
1. Project Setup
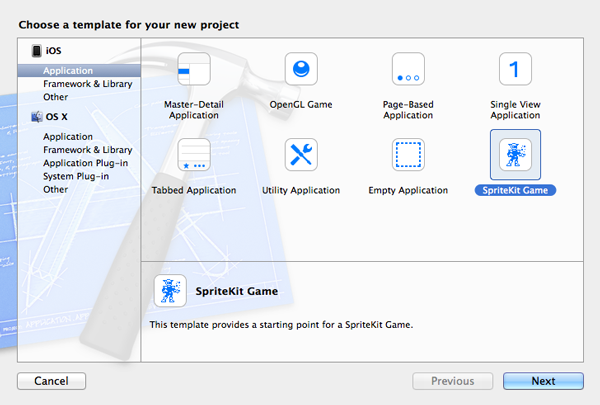
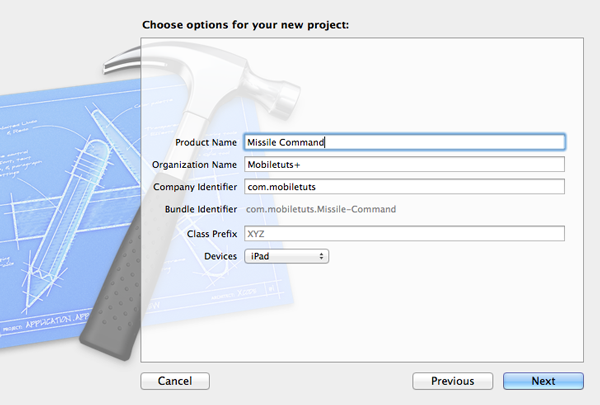
Launch Xcode 5 and create a new Sprite Kit project by selecting New > Project... from the File menu. Choose the SpriteKit Game template, name your project Missile Command, and select iPad from the Devices menu.
With the project set up, add the project's resources, which you can download using the link at the top of the page. We'll start by focusing on the MyScene class. Inside MyScene.m, you'll find two methods, initWithSize: and touchesBegan:withEvent:.
In initWithSize:, remove or comment out the code that is related to the SKLabelNode instance as we don't need it in this tutorial. Take a look at the updated implementation of initWithSize: below.
- (id)initWithSize:(CGSize)size {
    self = [super initWithSize:size];

    if (self) {
        self.backgroundColor = [SKColor colorWithRed:0.15 green:0.15 blue:0.3 alpha:1.0];
    }

    return self;
}
In touchesBegan:withEvent:, we do something similar. For now, the method should only contain the logic for touch detection and the location of the user's touch. These changes will give you a compiler warning, but we'll get rid of that later in this tutorial.
- (void)touchesBegan:(NSSet *)touches withEvent:(UIEvent *)event {
    for (UITouch *touch in touches) {
        CGPoint location = [touch locationInNode:self];
    }
}
Your next step is to create two new classes. The first class, MenuScene, will be used for the main menu and the second class, MultiScene, will be used for the multiplayer interface. Both classes are subclasses of SKScene. The MyScene class will be used to implement the single-player interface.
As we saw in the MyScene class, we need to implement an initializer for each class. For now, the initializer only sets the scene's background color as we saw in MyScene.m. The initializer of the MenuScene class also needs to set up the game title. To do that, we need to take care of a few things.
- Create a
SKSpriteNodeobject. - Set its
zPosition. - Set its
scale. - Set its
position. - Add the object as a child to the class.
Take a look at the implementation of initWithSize: of the MenuScene class for clarification.
- (id)initWithSize:(CGSize)size {
    self = [super initWithSize:size];

    if (self) {
        self.backgroundColor = [SKColor colorWithRed:(198.0/255.0) green:(220.0/255.0) blue:(54.0/255.0) alpha:1.0];

        SKSpriteNode *title = [SKSpriteNode spriteNodeWithImageNamed:@"title"];
        title.zPosition = 2;
        title.scale = 0.4;
        title.position = CGPointMake(size.width/2,size.height/2);
        [self addChild:title];
    }

    return self;
}
You should now have a main menu and a title. It's time to update the main view controller so that it displays the menu every time the application is launched. Open ViewController.m, locate the viewDidLoad method, and replace the SKScene instance with an instance of the MenuScene class as shown below.
- (void)viewDidLoad {
    [super viewDidLoad];

    // Configure the view.
    SKView * skView = (SKView *)self.view;
    skView.showsFPS = YES;
    skView.showsNodeCount = YES;

    // Create and configure the scene.
    SKScene * scene = [MenuScene sceneWithSize:skView.bounds.size];
    scene.scaleMode = SKSceneScaleModeAspectFill;

    // Present the scene.
    [skView presentScene:scene];
}
Don't forget to import the header file of the MenuScene class.
#import "ViewController.h"

#import "MenuScene.h"
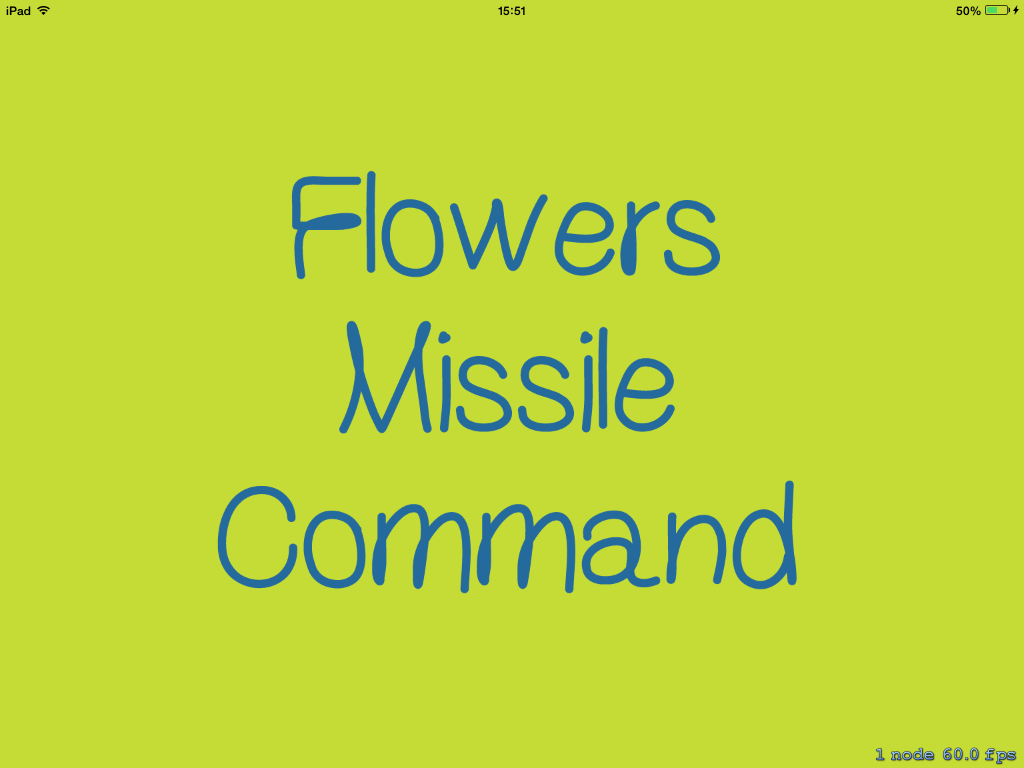
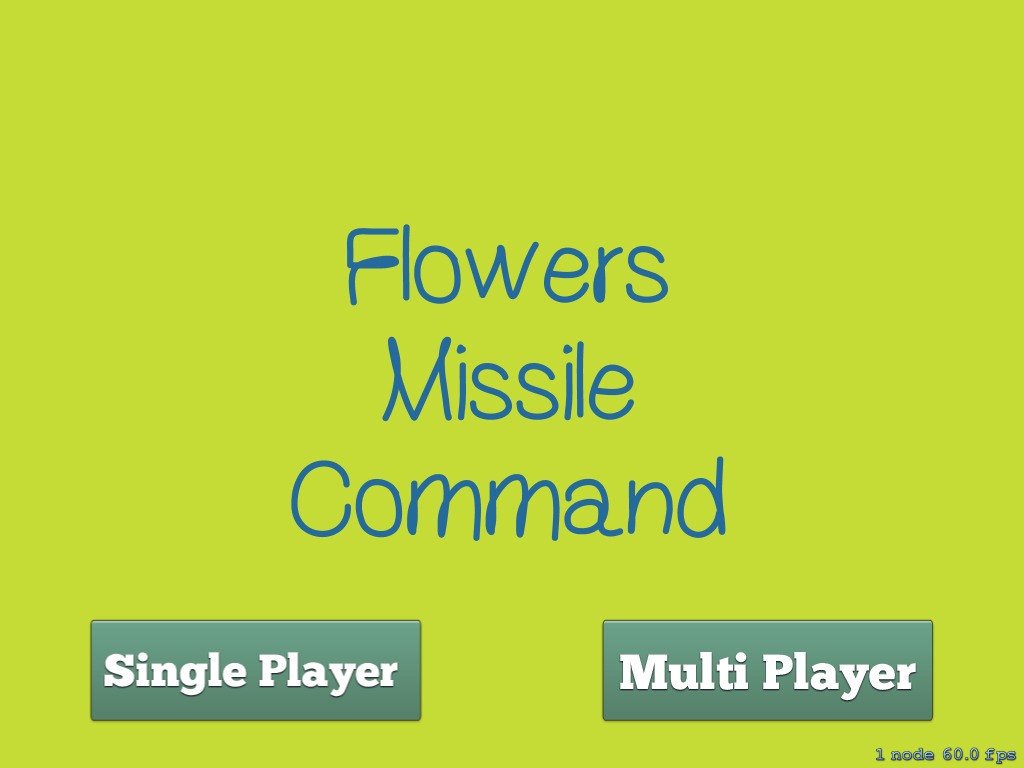
Great. It's time to build your project and run it to verify that everything is working correctly. You should see an interface similar to the screenshot below.
Challenge: To create a unique experience, we challenge you to do the following.
- Modify the background colors of each scene.
- Play with the properties of the
MenuScenetitle object.
2. Objects, Flowers, Monsters, and Missiles
Before adding objects to the game, we need to add the ability to navigate the game. Declare two UIButton instances in the MenuScene class and a variable, sizeGlobal, of type CGSize to store the size of the screen. The latter will help us with positioning the objects on the screen. Update MenuScene.m as shown below.
#import "MenuScene.h"

@interface MenuScene () {
    CGSize sizeGlobal;
    UIButton *singlePlayerButton;
    UIButton *multiPlayerButton;
}

@end
Set sizeGlobal to size in the class's initializer as shown in the code snippet below.
- (id)initWithSize:(CGSize)size {
    self = [super initWithSize:size];

    if (self) {
        self.backgroundColor = [SKColor colorWithRed:(198.0/255.0) green:(220.0/255.0) blue:(54.0/255.0) alpha:1.0];

        SKSpriteNode *title = [SKSpriteNode spriteNodeWithImageNamed:@"title"];
        title.zPosition = 2;
        title.scale = 0.4;
        title.position = CGPointMake(size.width/2,size.height/2);
        [self addChild:title];

        sizeGlobal = size;
    }

    return self;
}
Next, declare three methods in the MenuScene class.
-
didMoveToView:to present the buttons when the game transitions to the menu view. -
moveToSinglePlayerGamewhich transitions the game to theMyScenescene and removes the buttons. -
moveToMultiPlayerGamewhich transitions the game to theMultiScenescene and also removes the buttons.
In didMoveToView:, the application verifies if the scene transition took place without issues. If no issues popped up, the application loads the resources, displays them to the user, and instantiates the buttons.
- (void)didMoveToView:(SKView *)view {
    UIImage *buttonImageNormal = [UIImage imageNamed:@"singleBtn.png"];
    singlePlayerButton = [UIButton buttonWithType:UIButtonTypeRoundedRect];
    singlePlayerButton.frame = CGRectMake(sizeGlobal.height/8, sizeGlobal.width/2+250, buttonImageNormal.size.width, buttonImageNormal.size.height);
    singlePlayerButton.backgroundColor = [UIColor clearColor];
    [singlePlayerButton setTitleColor:[UIColor whiteColor] forState:UIControlStateNormal];

    UIImage *strechableButtonImageNormal = [buttonImageNormal stretchableImageWithLeftCapWidth:12 topCapHeight:0];
    [singlePlayerButton setBackgroundImage:strechableButtonImageNormal forState:UIControlStateNormal];
    [singlePlayerButton addTarget:self action:@selector(moveToSinglePlayerGame) forControlEvents:UIControlEventTouchUpInside];
    [self.view addSubview:singlePlayerButton];

    UIImage *buttonImageNormal2 = [UIImage imageNamed:@"multiBtn.png"];
    multiPlayerButton = [UIButton buttonWithType:UIButtonTypeRoundedRect];
    multiPlayerButton.frame = CGRectMake(sizeGlobal.height/2+100, sizeGlobal.width/2+250, buttonImageNormal2.size.width, buttonImageNormal2.size.height);
    multiPlayerButton.backgroundColor = [UIColor clearColor];
    [multiPlayerButton setTitleColor:[UIColor whiteColor] forState:UIControlStateNormal];

    UIImage *strechableButtonImageNormal2 = [buttonImageNormal2 stretchableImageWithLeftCapWidth:12 topCapHeight:0];
    [multiPlayerButton setBackgroundImage:strechableButtonImageNormal2 forState:UIControlStateNormal];
    [multiPlayerButton addTarget:self action:@selector(moveToMultiPlayerGame) forControlEvents:UIControlEventTouchUpInside];
    [self.view addSubview:multiPlayerButton];
}
In didMoveToView:, we call moveToSinglePlayerGame and moveToMultiPlayerGame. Let's implement these methods next. In each method, we need to do the following.
- Create an instance of either
MySceneorMultiScene. - Create a scene transition.
- Present the new scene.
- Remove the buttons.
Can you implement these methods on your own? If you're unsure, take a look at their implementations below.
- (void)moveToSinglePlayerGame {
    SKScene * scene = [MyScene sceneWithSize:self.view.bounds.size];
    scene.scaleMode = SKSceneScaleModeAspectFill;
    SKTransition* transition = [SKTransition revealWithDirection:SKTransitionDirectionLeft duration:1];
    SKView * skView = (SKView *)self.view;
    [skView presentScene:scene transition:transition];

    [singlePlayerButton removeFromSuperview];
    [multiPlayerButton removeFromSuperview];
}
- (void)moveToMultiPlayerGame {
    SKScene * scene = [MultiScene sceneWithSize:self.view.bounds.size];
    scene.scaleMode = SKSceneScaleModeAspectFill;
    SKTransition* transition = [SKTransition revealWithDirection:SKTransitionDirectionLeft duration:1];
    SKView * skView = (SKView *)self.view;
    [skView presentScene:scene transition:transition];

    [singlePlayerButton removeFromSuperview];
    [multiPlayerButton removeFromSuperview];
}
Don't forget to add an import statement for the header files of MyScene and MultiScene.
#import "MenuScene.h"

#import "MyScene.h"
#import "MultiScene.h"

@interface MenuScene () {
    CGSize sizeGlobal;
    UIButton *singlePlayerButton;
    UIButton *multiPlayerButton;
}

@end
Build your project and run the application in the iOS Simulator or on a physical device. The game should now look similar to the screenshot below.
The main menu is finished. It's time to focus on the game's single-player interface (MyScene). The MyScene class will contain most of the game's logic. The first step is to position the bullet-shooting flowers at the bottom of the screen. We'll create three flowers, each of which will have unique properties.
You will also track the number of exploded missiles and display that value in another SKLabelNode named labelMissilesExploded. As you can see below, we'll need a number of instance variables or ivars. The purpose of each ivar will become clear when we update the initWithSize: method in MyScene.
#import "MyScene.h"

@interface MyScene () {
    CGSize sizeGlobal;

    SKLabelNode *labelflowerBullets1;
    SKLabelNode *labelflowerBullets2;
    SKLabelNode *labelflowerBullets3;
    SKLabelNode *labelMissilesExploded;
    int position;
    int monstersDead;
    int missileExploded;

    int flowerBullets1;
    int flowerBullets2;
    int flowerBullets3;
}

@end
In initWithSize:, we instantiate and configure the various SKLabelNode instances.
- (id)initWithSize:(CGSize)size {
    if (self = [super initWithSize:size]) {
        self.backgroundColor = [SKColor colorWithRed:(198.0/255.0) green:(220.0/255.0) blue:(54.0/255.0) alpha:1.0];

        position = size.width/3;
        sizeGlobal = size;
        [self addFlowerCommand];

        //Label Informing Missiles Exploded
        labelMissilesExploded = [SKLabelNode labelNodeWithFontNamed:@"Hiragino-Kaku-Gothic-ProN"];
        labelMissilesExploded.text = [NSString stringWithFormat:@"Missiles Exploded: %d",missileExploded];
        labelMissilesExploded.fontSize = 30;
        labelMissilesExploded.position = CGPointMake(size.width/2,size.height-labelMissilesExploded.frame.size.height);
        labelMissilesExploded.zPosition = 3;
        [self addChild:labelMissilesExploded];

        flowerBullets1 = 10;
        flowerBullets2 = 10;
        flowerBullets3 = 10;

        labelflowerBullets1 = [SKLabelNode labelNodeWithFontNamed:@"Hiragino-Kaku-Gothic-ProN"];
        labelflowerBullets1.text = [NSString stringWithFormat:@"%d",flowerBullets1];
        labelflowerBullets1.fontSize = 30;
        labelflowerBullets1.position = CGPointMake(position-position/2,labelflowerBullets1.frame.size.height/2);
        labelflowerBullets1.zPosition = 3;
        [self addChild:labelflowerBullets1];

        labelflowerBullets2 = [SKLabelNode labelNodeWithFontNamed:@"Hiragino-Kaku-Gothic-ProN"];
        labelflowerBullets2.text = [NSString stringWithFormat:@"%d",flowerBullets2];
        labelflowerBullets2.fontSize = 30;
        labelflowerBullets2.position = CGPointMake(position*2-position/2,labelflowerBullets2.frame.size.height/2);
        labelflowerBullets2.zPosition = 3;
        [self addChild:labelflowerBullets2];

        labelflowerBullets3 = [SKLabelNode labelNodeWithFontNamed:@"Hiragino-Kaku-Gothic-ProN"];
        labelflowerBullets3.text = [NSString stringWithFormat:@"%d",flowerBullets3];
        labelflowerBullets3.fontSize = 30;
        labelflowerBullets3.position = CGPointMake(position*3-position/2,labelflowerBullets3.frame.size.height/2);
        labelflowerBullets3.zPosition = 3;
        [self addChild:labelflowerBullets3];
    }

    return self;
}
In initWithSize:, we also call addFlowerCommand, which we haven't covered yet. The implementation isn't difficult as you can see below. In addFlowerCommand, we instantiate three SKSpriteNode instances, one for each flower, and position them at the bottom of the screen with the help of position.
- (void)addFlowerCommand {
    for (int i = 1; i <= 3; i++) {
        SKSpriteNode *flower = [SKSpriteNode spriteNodeWithImageNamed:@"flower.png"];
        flower.zPosition = 2;
        flower.position = CGPointMake(position * i - position / 2, flower.size.height / 2);
        [self addChild:flower];
    }
}
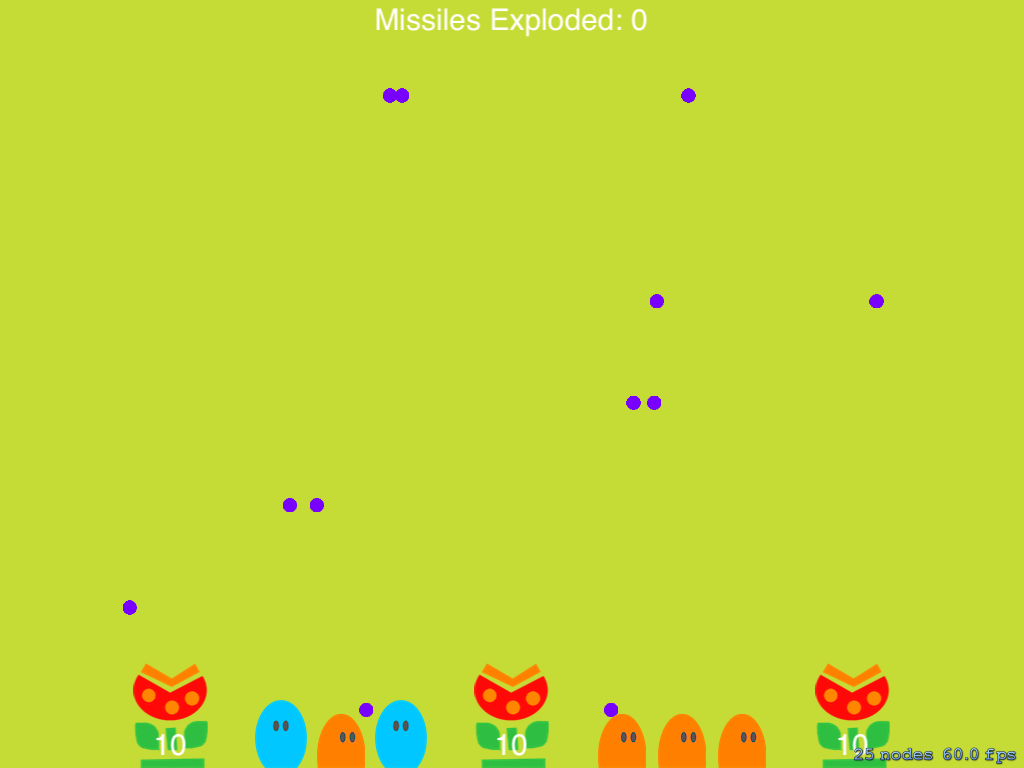
You can now build the project and run it in the iOS Simulator to see the game's single-player interface.
We've got flowers, but we still need some monsters. It's time to implement the addMonstersBetweenSpace: method. In this method, we create three monsters and position them between the flowers. The position of the monsters is determined by the spaceOrder variable. We randomly position the monsters by using getRandomNumberBetween:to:, which generates a random number between two given numbers.
- (void)addMonstersBetweenSpace:(int)spaceOrder {
    for (int i = 0; i< 3; i++) {
        int giveDistanceToMonsters = 60 * i -60;
        int randomMonster = [self getRandomNumberBetween:0 to:1];

        SKSpriteNode *monster;

        if (randomMonster == 0) {
            monster = [SKSpriteNode spriteNodeWithImageNamed:@"protectCreature4"];
        } else {
            monster = [SKSpriteNode spriteNodeWithImageNamed:@"protectCreature2"];
        }

        monster.zPosition = 2;
        monster.position = CGPointMake(position * spaceOrder - giveDistanceToMonsters, monster.size.height / 2);

        [self addChild:monster];
    }
}
The implementation of getRandomNumberBetween:to: is shown below.
- (int)getRandomNumberBetween:(int)from to:(int)to {
    return (int)from + arc4random() % (to - from + 1);
}
We invoke addMonstersBetweenSpace: twice in the initWithSize: method of the MyScene class.
- (id)initWithSize:(CGSize)size {
    if (self = [super initWithSize:size]) {
        self.backgroundColor = [SKColor colorWithRed:(198.0/255.0) green:(220.0/255.0) blue:(54.0/255.0) alpha:1.0];

        // ... //

        // Add Monsters
        [self addMonstersBetweenSpace:1];
        [self addMonstersBetweenSpace:2];
    }

    return self;
}
Now that we've got flowers and monsters, it's time to add the missiles. We need to do the following to accomplish this.
- Create an
SKActionto invoke a method. - Create an
SKActionto repeat that action. - Implement
addMissilesFromSky:, which will randomly generate three new missiles and add them to the scene.
We'll declare the SKAction instances in initWithSize:. Take a look at the updated implementation of initWithSize: below.
- (id)initWithSize:(CGSize)size {
    if (self = [super initWithSize:size]) {
        self.backgroundColor = [SKColor colorWithRed:(198.0/255.0) green:(220.0/255.0) blue:(54.0/255.0) alpha:1.0];

        // ... //

        // Create Actions
        SKAction *wait = [SKAction waitForDuration:2];
        SKAction *createMissiles = [SKAction runBlock:^{
            [self addMissilesFromSky:size];
        }];

        SKAction *updateMissiles = [SKAction sequence:@[wait, createMissiles]];
        [self runAction:[SKAction repeatActionForever:updateMissiles]];
    }

    return self;
}
The implementation of addMissilesFromSky: is shown below.
- (void)addMissilesFromSky:(CGSize)size {
    int numberMissiles = [self getRandomNumberBetween:0 to:3];

    for (int i = 0; i < numberMissiles; i++) {
        SKSpriteNode *missile;
        missile = [SKSpriteNode spriteNodeWithImageNamed:@"enemyMissile"];
        missile.scale = 0.6;
        missile.zPosition = 1;

        int startPoint = [self getRandomNumberBetween:0 to:size.width];
        missile.position = CGPointMake(startPoint, size.height);

        int endPoint = [self getRandomNumberBetween:0 to:size.width];

        SKAction *move =[SKAction moveTo:CGPointMake(endPoint, 0) duration:15];
        SKAction *remove = [SKAction removeFromParent];
        [missile runAction:[SKAction sequence:@[move,remove]]];

        [self addChild:missile];
    }
}
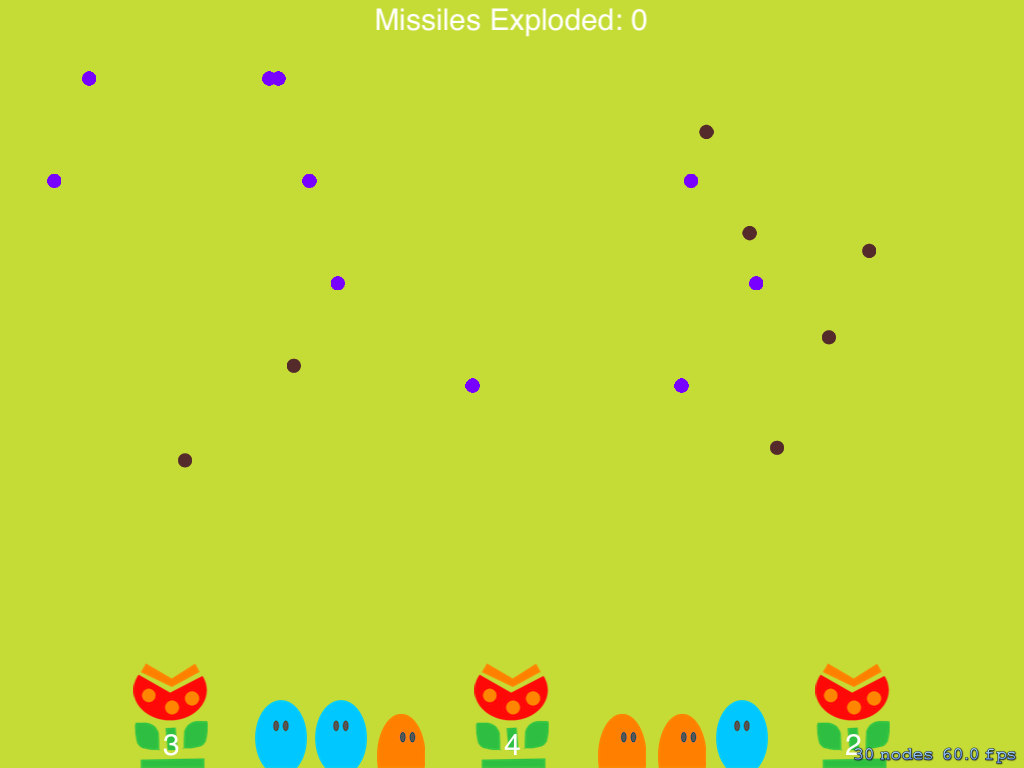
If you build and run your application, the result should look similar to the screenshot below.
Challenge: This is great, but we really need more monsters. We challenge you to do the following.
- Add more monsters.
- Add more flowers.
- Modify the movement of the missiles.
3. User Interaction
We can see some movement, but we need the key component of the game, user interaction. We add user interaction by leveraging two methods, touchesBegan:withEvent: and positionOfWhichFlowerShouldBegin:. To add user interaction we must take the following into account.
- Each flower can only shoot ten bullets.
- You must detect the location of the user's touch and use the closest flower to shoot the bullet.
- The bullet should move to the location of the user's touch.
- The bullet should explode at the location of the user's touch.
The updated implementation of touchesBegan:withEvent: is shown below.
- (void)touchesBegan:(NSSet *)touches withEvent:(UIEvent *)event {
    for (UITouch *touch in touches) {
        CGPoint location = [touch locationInNode:self];

        // Return if User Taps Below a Flower
        if (location.y < 120) return;

        int bulletBeginning = 0;

        if (location.x >= 0 && location.x < position) {
            bulletBeginning = position-position/2;

            if (flowerBullets1 > 0)
                flowerBullets1--;
            else{
                if(flowerBullets1 == 0 && flowerBullets2 > 0){
                    flowerBullets2--;
                    [labelflowerBullets2 setText:[NSString stringWithFormat:@"%d",flowerBullets2]];
                    bulletBeginning = [self positionOfWhichFlowerShouldBegin:2];
                }
                else if(flowerBullets3 > 0){
                    flowerBullets3--;
                    [labelflowerBullets3 setText:[NSString stringWithFormat:@"%d",flowerBullets3]];
                    bulletBeginning =[self positionOfWhichFlowerShouldBegin:3];
                }
                else{
                    return;
                }
            }
            [labelflowerBullets1 setText:[NSString stringWithFormat:@"%d",flowerBullets1]];
        }
        else if((location.x >= position && location.x < position*2)){
            bulletBeginning = position*2-position/2;
            if(flowerBullets2 > 0)
                flowerBullets2--;
            else{
                if(location.x < sizeGlobal.width/2){
                    if(flowerBullets1 > 0){
                        flowerBullets1--;
                        [labelflowerBullets1 setText:[NSString stringWithFormat:@"%d",flowerBullets1]];
                        bulletBeginning =[self positionOfWhichFlowerShouldBegin:1];
                    }
                    else if (flowerBullets3 > 0){
                        flowerBullets3--;
                        [labelflowerBullets3 setText:[NSString stringWithFormat:@"%d",flowerBullets3]];
                        bulletBeginning =[self positionOfWhichFlowerShouldBegin:3];
                    }
                    else{
                        return;
                    }
                }
                else{
                    if(flowerBullets3 > 0){
                        flowerBullets3--;
                        [labelflowerBullets3 setText:[NSString stringWithFormat:@"%d",flowerBullets3]];
                        bulletBeginning =[self positionOfWhichFlowerShouldBegin:3];
                    }
                    else if (flowerBullets1 > 0){
                        flowerBullets1--;
                        [labelflowerBullets1 setText:[NSString stringWithFormat:@"%d",flowerBullets1]];
                        bulletBeginning =[self positionOfWhichFlowerShouldBegin:1];
                    }
                    else{
                        return;
                    }
                }

            }
            [labelflowerBullets2 setText:[NSString stringWithFormat:@"%d",flowerBullets2]];
        }
        else{
            bulletBeginning = position*3-position/2;
            if(flowerBullets3 > 0)
                flowerBullets3--;
            else{
                if(flowerBullets3 == 0 && flowerBullets2 > 0){
                    flowerBullets2--;
                    [labelflowerBullets2 setText:[NSString stringWithFormat:@"%d",flowerBullets2]];
                    bulletBeginning =[self positionOfWhichFlowerShouldBegin:2];
                }
                else if(flowerBullets1 > 0){
                    flowerBullets1--;
                    [labelflowerBullets1 setText:[NSString stringWithFormat:@"%d",flowerBullets1]];
                    bulletBeginning =[self positionOfWhichFlowerShouldBegin:1];
                }
                else{
                    return;
                }
            }
            [labelflowerBullets3 setText:[NSString stringWithFormat:@"%d",flowerBullets3]];
        }
    }
}
Even though that's a lot of code to go through, it isn't that complicated. You check if there are any bullets left for each flower and detect the zone in which the user tapped by invoking positionOfWhichFlowerShouldBegin:, which we'll discuss in a moment. At the same time, we verify whether the user tapped below the flower, which prevents the flower from shooting a bullet.
if (location.y < 120) return;
The positionOfWhichFlowerShouldBegin: method returns the position that corresponds to a specific zone in which the user has tapped. Remember that you divided the screen into three parts to position the three flowers so you'll need to detect the zone in which the user has tapped and link it to one of the flowers. The flower that shoots the bullet will be the one closest to the user's tap. This is what the implementation of positionOfWhichFlowerShouldBegin: looks like.
- (int)positionOfWhichFlowerShouldBegin:(int)number {
    return position * number - position / 2;
}
To make the bullets move, we need to create another SKSpriteNode instance. Each bullet has a duration and an SKAction associated with it. This logic is also included in touchesBegan:withEvent:. Take a look at the updated implementation below.
- (void)touchesBegan:(NSSet *)touches withEvent:(UIEvent *)event {
    for (UITouch *touch in touches) {
        CGPoint location = [touch locationInNode:self];

        // ... //

        SKSpriteNode *bullet = [SKSpriteNode spriteNodeWithImageNamed:@"flowerBullet"];
        bullet.zPosition = 1;
        bullet.scale = 0.6;
        bullet.position = CGPointMake(bulletBeginning,110);
        bullet.color = [SKColor redColor];
        bullet.colorBlendFactor = 0.5;

        float duration = (2 * location.y)/sizeGlobal.width;

        SKAction *move =[SKAction moveTo:CGPointMake(location.x,location.y) duration:duration];
        SKAction *remove = [SKAction removeFromParent];

        [bullet runAction:[SKAction sequence:@[move,remove]]];
        [self addChild:bullet];
    }
}
If you build and run your application, the flowers should be able to shoot bullets. They don't explode yet, but we'll take care of that in the next tutorial.
Challenge: Are you up for another challenge? Take a look at these challenges.
- Create and define different bullet movements.
- Modify the duration of the movement of each bullet.
Conclusion
If you've followed the steps in this tutorial, you should now have the foundation of the Missile Command game using the Sprite Kit framework. If you have any questions or feedback, feel free to leave a comment below.

Comments