This tutorial will teach you how to use the Sprite Kit framework to create a simple Airplanes game. Along the way, you'll learn all the core concepts of Sprite Kit: animations, emitters, collision detection, and more!
Series Format
The Airplanes tutorial will be divided into three parts in order to completely cover each section. After reading the three part tutorial, the readers will be able to create an interesting 2D game using the new Sprite Kit framework provided with iOS 7.
- Build an Airplane Game with Sprite Kit - Project Setup
- Build an Airplane Game with Sprite Kit - Enemies & Emitters
- Build an Airplane Game with Sprite Kit - Explosions & Clouds
Each part will produce a practical result, and the sum of all parts will produce the final game. While each part of the series can be read independently, we recommend following along step-by-step for a complete understanding of the topic presented. The source code for the game is provided incrementally with each post.
Final Preview
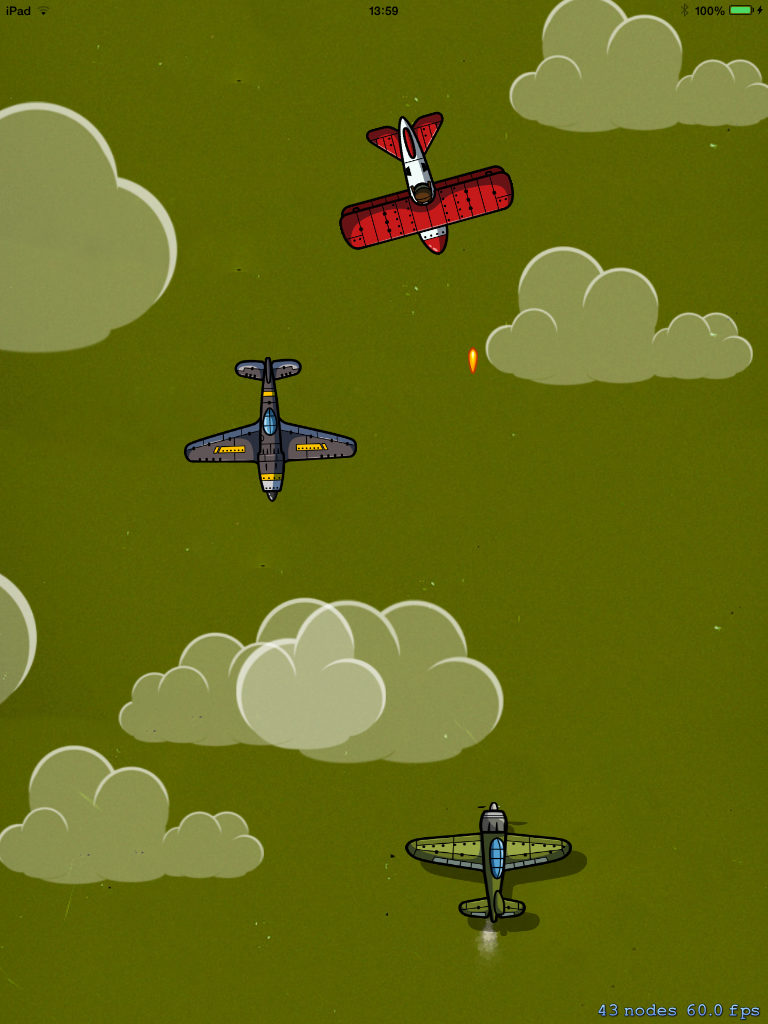
Acknowledgements & Recommendations
Before we start the tutorial, we would like to thank Daniel Ferenčak for providing us with the game art used to produce this tutorial series.
In order to fully appreciate the tutorial series, we advise that you test our code by deploying it to a real device running iOS 7. You will need Xcode 5 and the latest iOS 7 SDK. If you don't already have these tools, you can download them from the Apple Developer Center. Once downloaded, install the software and you'll be ready to begin.
1. Project Setup
Ladies and gentlemen, start your engines and launch Xcode 5!
Once Xcode opens, go to File Menu > New > Project and you will see something like the following image:
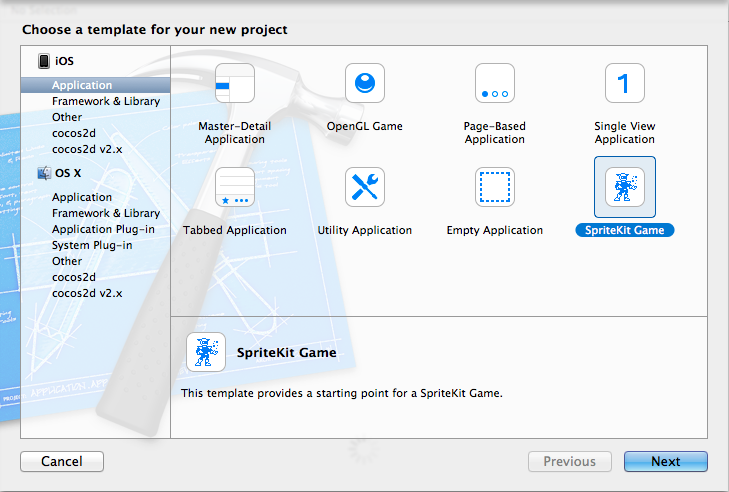
As you may have guessed, you need to choose the "Sprite Kit Game" template (from the iOS lateral list). This template creates what you need to start the project, and at the same time it includes the libraries required to run the Sprite Kit engine. Give the project whatever name you'd like, but be sure to select "iPad" as the targeted device.
The project is created with 3 classes (AppDelegate, ViewController, and MyScene). Today, you will be working with MyScene.
If you Build and Run the project, you'll see a "Hello, World!" interface. Every time you click on the screen a new Spaceship is presented with a rotation property:
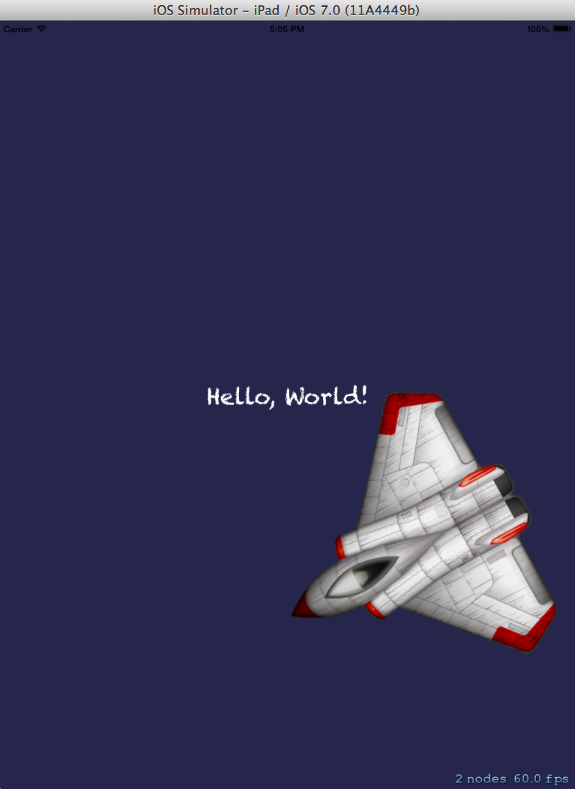
All visual objects are rendered by the SKView class. One SKView is needed to present the future Scenes as well. The Sprite Kit template does this work for you. Take a look at the ViewController.m file, and note how the viewDidLoad method configures the view and calls the default scene.
2. Creating the Game Board
In this step, we'll initialize the game board. The game board includes the background, the airplane, the propeller animations, and one airplane shadow.
Before you add a sprite, you need the artwork to be used by that sprite. You should place these sprites into the Supporting Files folder of your project.
Once you have downloaded the resources for this post, you'll find 7 images. Copy them to the Supporting Files folder of your project and make sure that the option "Copy items into destination group's folder (if needed)" is checked.
Now that you have your images, you can place them on the screen. Sprite Kit is similar to Cocos2D in that it also uses a coordinate orientation that starts from the bottom left corner of the screen (0,0), and the x and y values increase as you move up and to the right. This game will be configured to run in portrait orientation, so we won't focus on landscape orientation at this time. Configure this setting now by going to the Settings panel for your project, selecting the "General" tab, and unchecking all the options underneath "Deployment Info" except "Portrait."
Now, you'll want to put the airplane close to the bottom and in the middle of the x axis.
In MyScene.h, add the following code:
@interface MyScene : SKScene{
    CGRect screenRect;
    CGFloat screenHeight;
    CGFloat screenWidth;
}

@property SKSpriteNode *plane;
This just declares the variables we'll use in the implementation.
In the MyScene.m file, you can delete everything that is inside the if (self = [super initWithSize:size]) conditional as well as everything inside the -(void)touchesBegan:(NSSet *)touches withEvent:(UIEvent *)event method. This will remove the boilerplate code included with the project.
The sprite creation can be achieved using the following code snippet:
        //init several sizes used in all scene
        screenRect = [[UIScreen mainScreen] bounds];
        screenHeight = screenRect.size.height;
        screenWidth = screenRect.size.width;

        //adding the airplane
        _plane = [SKSpriteNode spriteNodeWithImageNamed:@"PLANE 8 N.png"];
        _plane.scale = 0.6;
        _plane.zPosition = 2;
        _plane.position = CGPointMake(screenWidth/2, 15+_plane.size.height/2);
        [self addChild:_plane];

        //adding the background
        SKSpriteNode *background = [SKSpriteNode spriteNodeWithImageNamed:@"airPlanesBackground"];
        background.position = CGPointMake(CGRectGetMidX(self.frame),CGRectGetMidY(self.frame));
        [self addChild:background];
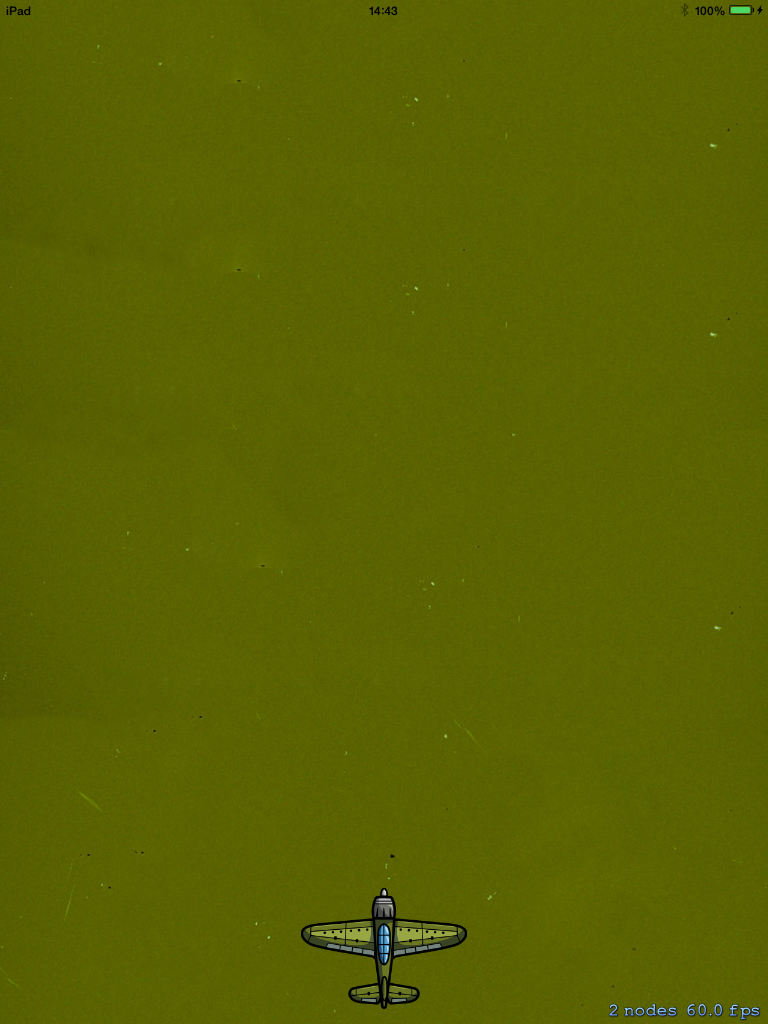
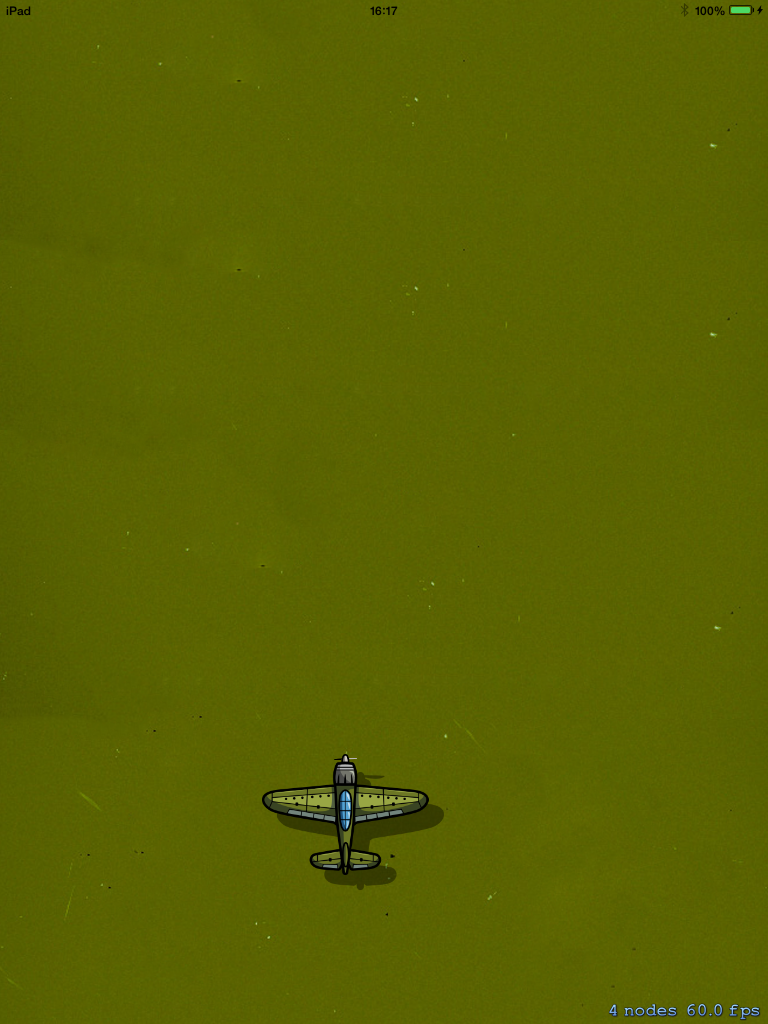
Now you can build and run the app. Your background and the airplane should appear just fine, similar to the next figure. The code provided begins with the initialization of the screen values to perform several calculations in this class (you will use these several times). Similar to Cocos2D, Sprite Kit comes with properties like scale, zPosition, and position, which are all really useful. Finally, to add the object to our Scene, we just need to use the addChild method. The third block of code will add the background to the center of the screen.
3. Adding Airplane Animations
If you looked at the resources, you see two propellers (i.e. left and right), and one airplane shadow.
The placement of the airplane shadow should be easy for you right now. To achieve the best animation, it should start 15 points to the right (x-axis) and 15 points below (y-axis) of the airplane.
Now, we'll go ahead and add the code to create a shadow:
In MyScene.h, add the following:
@property SKSpriteNode *planeShadow;
And in Scene.m, add the following just after [self addChild:_plane];:
    _planeShadow = [SKSpriteNode spriteNodeWithImageNamed:@"PLANE 8 SHADOW.png"];
    _planeShadow.scale = 0.6;
    _planeShadow.zPosition = 1;
    _planeShadow.position = CGPointMake(screenWidth/2+15, 0+_planeShadow.size.height/2);
    [self addChild:_planeShadow];
That was easy, right? We're just adding a shadow sprite to the scene and positioning it relative to the plane.
Now, lets move on to the propeller animation. To make the animation, we have two sprites (PLANE PROPELLER 1 and PLANE PROPELLER 2). The SKAction will allow you to create different animations and do several types of actions with them. In this tutorial, you need to change between just two images. To make this happen, you will need two methods: animateWithTextures:timePerFrame and repeatActionForever. As you can see, the method names are self explanatory. The first method will receive the textures (PLANE PROPELLER 1 and 2) and change the textures during the time defined (timePerFrame). The second method will repeat this action forever.
To achieve this, start by adding the following to your header file:
@property SKSpriteNode *propeller;
And back in the implementation file:
        _propeller = [SKSpriteNode spriteNodeWithImageNamed:@"PLANE PROPELLER 1.png"];
        _propeller.scale = 0.2;
        _propeller.position = CGPointMake(screenWidth/2, _plane.size.height+10);

        SKTexture *propeller1 = [SKTexture textureWithImageNamed:@"PLANE PROPELLER 1.png"];
        SKTexture *propeller2 = [SKTexture textureWithImageNamed:@"PLANE PROPELLER 2.png"];

        SKAction *spin = [SKAction animateWithTextures:@[propeller1,propeller2] timePerFrame:0.1];
        SKAction *spinForever = [SKAction repeatActionForever:spin];
        [_propeller runAction:spinForever];

        [self addChild:_propeller];
Build and run your code. Now is a good time to invest several minutes in code exploration in order to learn the basic structure of the project. Just have a look around and familiarize yourself with the basic organization.
Unfortunately, at this time the airplane is still static. To create the movement you will use the internal accelerometer data and the plane will react to the iPad's physical movement. Note that we will not deeply explain how the accelerometer works since this tutorial is not focused on that topic. However, if you want to learn more about the accelerometer specifically you can consult the official Apple documentation.
In the MyScene.h you need to make some changes. You need to add the UIAcelerometerDelegate, two double variables for both axis values (i.e. AccelX and AccelY), and one property to manage CoreMotion.
Your final MyScene.h file should resemble the following snippet:
#import <SpriteKit/SpriteKit.h>
#import <CoreMotion/CoreMotion.h>

@interface MyScene : SKScene<UIAccelerometerDelegate>{
    CGRect screenRect;
    CGFloat screenHeight;
    CGFloat screenWidth;
    double currentMaxAccelX;
    double currentMaxAccelY;
}

@property (strong, nonatomic) CMMotionManager *motionManager;
@property SKSpriteNode *plane;
@property SKSpriteNode *planeShadow;
@property SKSpriteNode *propeller;

@end
So, to obtain the accelerometer data you need to add some code to the end of the method -(id)initWithSize:(CGSize)size method. While still within the if (self = [super initWithSize:size]) conditional, add the following code where you left off before:
//CoreMotion
self.motionManager = [[CMMotionManager alloc] init];
self.motionManager.accelerometerUpdateInterval = .2;

[self.motionManager startAccelerometerUpdatesToQueue:[NSOperationQueue currentQueue]
                                         withHandler:^(CMAccelerometerData  *accelerometerData, NSError *error) {
                                         [self outputAccelertionData:accelerometerData.acceleration];
                                         if(error)
                                         {
                                             NSLog(@"%@", error);
                                         }
}];
Now add the following method to the implementation file:
-(void)outputAccelertionData:(CMAcceleration)acceleration
{
    currentMaxAccelX = 0;
    currentMaxAccelY = 0;

    if(fabs(acceleration.x) > fabs(currentMaxAccelX))
    {
        currentMaxAccelX = acceleration.x;
    }
    if(fabs(acceleration.y) > fabs(currentMaxAccelY))
    {
        currentMaxAccelY = acceleration.y;
    }
}
Now that you have the values of the iPad accelerometer we'll put them to use in the next step by moving the plane!
4. Moving the Airplane
With the values of the accelerometer set, you must actually apply them to move the airplane. Sprite Kit uses a method -(void)update:(NSTimeInterval)currentTime to update everything in your game. So, to move the airplane you just need to update the position of all sprites (airplane, shadow, and propellers). Replace or add the update method with the following code:
-(void)update:(NSTimeInterval)currentTime{
    //NSLog(@"one second");


    float maxY = screenWidth - _plane.size.width/2;
    float minY = _plane.size.width/2;


    float maxX = screenHeight - _plane.size.height/2;
    float minX = _plane.size.height/2;

    float newY = 0;
    float newX = 0;

    if(currentMaxAccelX > 0.05){
        newX = currentMaxAccelX * 10;
        _plane.texture = [SKTexture textureWithImageNamed:@"PLANE 8 R.png"];
    }
    else if(currentMaxAccelX < -0.05){
        newX = currentMaxAccelX*10;
        _plane.texture = [SKTexture textureWithImageNamed:@"PLANE 8 L.png"];
    }
    else{
        newX = currentMaxAccelX*10;
        _plane.texture = [SKTexture textureWithImageNamed:@"PLANE 8 N.png"];
    }

    newY = 6.0 + currentMaxAccelY *10;

    float newXshadow = newX+_planeShadow.position.x;
    float newYshadow = newY+_planeShadow.position.y;

    newXshadow = MIN(MAX(newXshadow,minY+15),maxY+15);
    newYshadow = MIN(MAX(newYshadow,minX-15),maxX-15);

    float newXpropeller = newX+_propeller.position.x;
    float newYpropeller = newY+_propeller.position.y;

    newXpropeller = MIN(MAX(newXpropeller,minY),maxY);
    newYpropeller = MIN(MAX(newYpropeller,minX+(_plane.size.height/2)-5),maxX+(_plane.size.height/2)-5);

    newX = MIN(MAX(newX+_plane.position.x,minY),maxY);
    newY = MIN(MAX(newY+_plane.position.y,minX),maxX);


    _plane.position = CGPointMake(newX, newY);
    _planeShadow.position = CGPointMake(newXshadow, newYshadow);
    _propeller.position = CGPointMake(newXpropeller, newYpropeller);
}
Two major things are happening in the update method: you update the position and swap the displayed sprite.
If the iPad is turning left, the airplane sprite will be changed for the "PLANE 8 L.png". Alternatively, if the iPad is turning right, the airplane sprite will be change for the "PLANE 8 R.png".
Finally, go ahead and test out the movement code. You should see something similar to the next image:
Conclusion
That's the end of the first tutorial! At this point, you should understand how to perform the following tasks:
- Start a Sprite Kit project
- Add a sprite to the Scene
- Implement simple animations
- Receive accelerometer data
- Update game and object data
If any of the above is still "fuzzy", take another look at the code we created above. Stay tuned for the next installment in this series where we will continue to build our airplane game!


Comments