
In this tutorial, you will learn how to create a basic 3D scene in SceneKit without the complexities of OpenGL. This includes basic geometry, cameras, lights, materials, and shadows.
Introduction
The SceneKit framework was first launched by Apple alongside OS X 10.8 Mountain Lion and was later made available on iOS with the release of iOS 8. The purpose of this framework is to allow developers to easily integrate 3D graphics into games and applications without the complexities of graphics APIs, such as OpenGL and Metal.
SceneKit allows you to simply provide a description of the assets you want in your scene, with the framework itself handling all of the OpenGL rendering code for you. In this first tutorial, I will teach you some of the fundamentals of working with 3D assets and the basics of the SceneKit framework.
This tutorial requires that you are running at Xcode 6 or higher. While not necessary, I recommend using a physical device running iOS 8 to test your SceneKit code on. You can use the iOS Simulator, but the performance isn't great if your scene becomes more complex. Note that testing on a physical iOS device requires that you have a registered iOS developer account.
1. Fundamentals
The first thing you need to know about SceneKit is that assets, represented by nodes, are arranged in a hierarchical tree called a scene graph. If you are familiar with iOS development, this tree works much like a regular view hierarchy in UIKit. Every scene you create has a single root node that you add subsequent nodes onto and that also provides a basis for the 3D coordinate system of that scene.
When you add a node to a scene, its position is specified by a set of three numbers, a three-component vector represented by the SCNVector3 structure in your code. Each of these three components defines the node's position on the x, y, and z axes as shown in the below image.
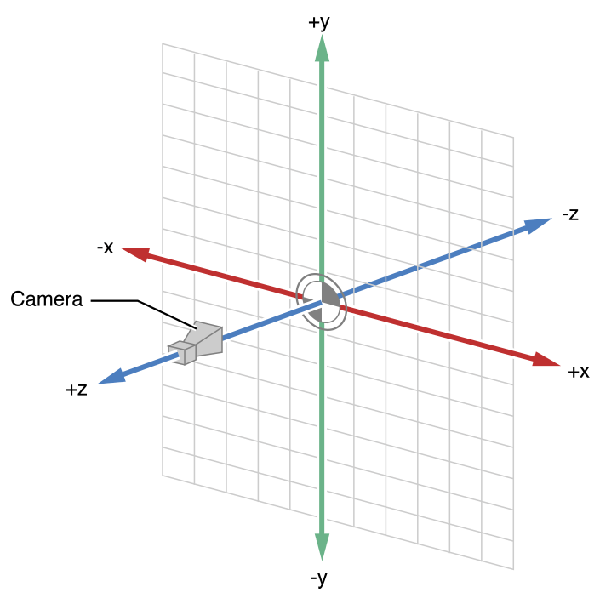
Your scene's root node position is defined as (0, 0, 0). In the above image, this is the position where the three axes intersect. The included camera in the image represents the default direction a camera points in when it is added to your scene.
Now that you know some of the basics of how objects are represented by SceneKit, you are ready to begin writing some code.
2. Project Setup
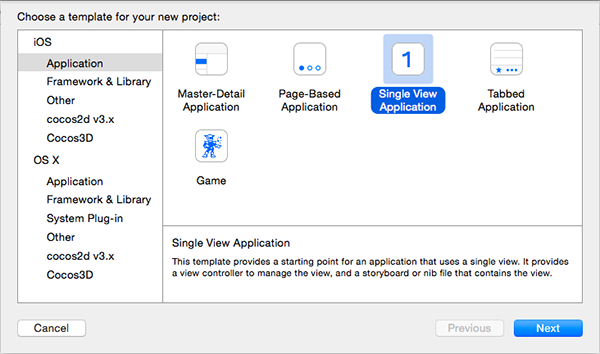
Open Xcode and create a new iOS Application based on the Single View Application template. While you could easily create an application from the Game template using SceneKit, for this tutorial I am going to show you how to start working with SceneKit from scratch.
Enter a Product Name, set Language to Swift, and Devices to Universal. Click Next to continue.

After creating your project, navigate to ViewController.swift and add the following import statement at the top to import the SceneKit framework:
import SceneKit
Next, add the following implementation of the viewDidLoad method in the ViewController class:
override func viewDidLoad() {
    super.viewDidLoad()

    let sceneView = SCNView(frame: self.view.frame)
    self.view.addSubview(sceneView)
}
In the viewDidLoad method, we create a SCNView object, passing in the frame of the view controller's view. We assign the SCNView instance to a constant, sceneView, and add it as a subview of the view controller's view.
The SCNView class is a subclass of UIView and provides an outlet for your SceneKit content. Aside from having the functionality of a regular view, an SCNView also has several properties and methods relating to the SceneKit content.
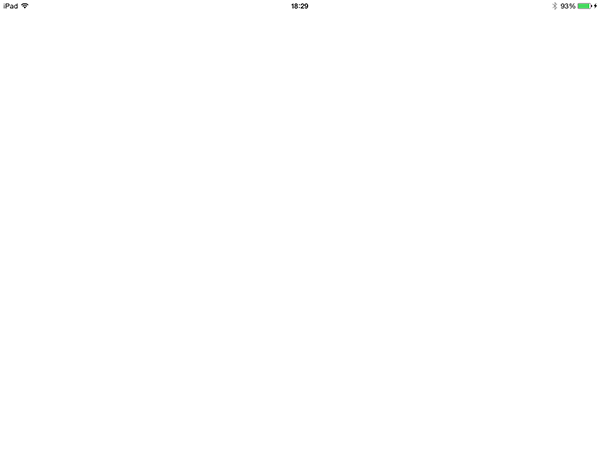
To check that everything is functioning correctly, build and run your app. You will see that you just have a blank white view.
3. Scene Setup
To render content in an SCNView, you first need to create an SCNScene and assign it to the view. In this scene, you then need to add a camera and at least one light. For this example, you are also going to add a cube for SceneKit to render. Add the following code to the viewDidLoad method:
override func viewDidLoad() {
    super.viewDidLoad()

    let sceneView = SCNView(frame: self.view.frame)
    self.view.addSubview(sceneView)

    let scene = SCNScene()
    sceneView.scene = scene

    let camera = SCNCamera()
    let cameraNode = SCNNode()
    cameraNode.camera = camera
    cameraNode.position = SCNVector3(x: 0.0, y: 0.0, z: 3.0)

    let light = SCNLight()
    light.type = SCNLightTypeOmni
    let lightNode = SCNNode()
    lightNode.light = light
    lightNode.position = SCNVector3(x: 1.5, y: 1.5, z: 1.5)

    let cubeGeometry = SCNBox(width: 1.0, height: 1.0, length: 1.0, chamferRadius: 0.0)
    let cubeNode = SCNNode(geometry: cubeGeometry)

    scene.rootNode.addChildNode(lightNode)
    scene.rootNode.addChildNode(cameraNode)
    scene.rootNode.addChildNode(cubeNode)
}
Let's go through the viewDidLoad method step by step:
- You first create the scene for your view by invoking the
initmethod. Unless you are loading a prepared scene from an external file, this is the initializer you will always use. - Next, you create an
SCNCameraobject and anSCNNodeinstance for the camera. You then assign theSCNCameraobject to thecameraproperty ofcameraNodeand move this node along the z axis to see the cube you will create a bit later. - In the next step, you create an
SCNLightobject and aSCNNodenamedlightNode. TheSCNLightinstance is assigned to thelightproperty of the light node. Thetypeproperty of theSCNLightis set toSCNLightTypeOmni. This light type distributes light evenly in all directions from a point in 3D space. You can think of this light type as a regular light bulb. - Finally, you create a cube by using the
SCNBoxclass, making the width, height, and length all the same size. TheSCNBoxclass is a subclass ofSCNGeometryand is one of the primitive shapes you can create. Other shapes include spheres, pyramids, and toruses. You also create a node passing in the cube for thegeometryparameter. - To set the scene up, you add the three nodes (camera, light, and cube) to the scene's scene graph. Additional setup isn't necessary as an
SCNSceneobject automatically detects when a node contains a camera or light object, rendering the scene accordingly.
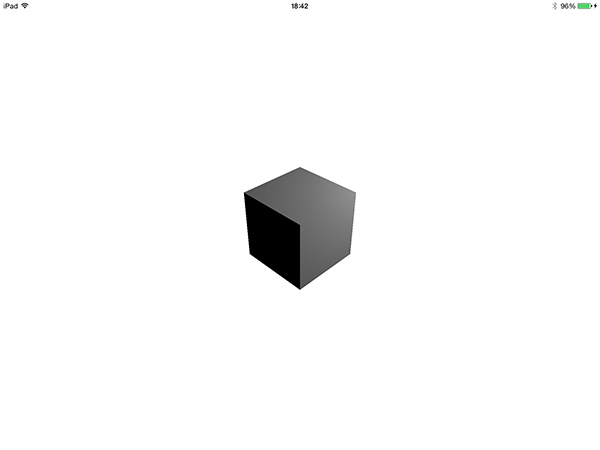
Build and run your app, and you will see that you now have a black cube being illuminated by your light from the top-right corner.
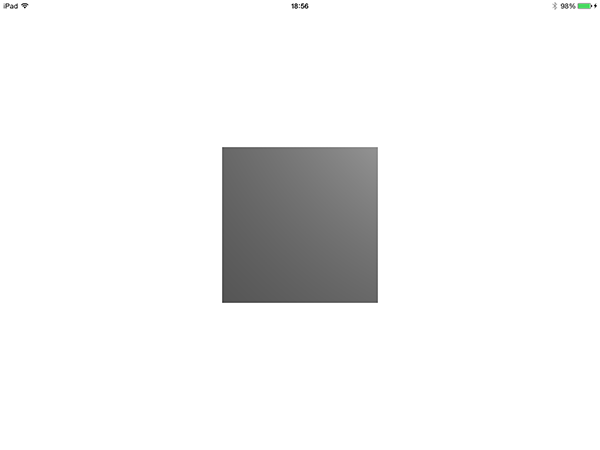
Unfortunately, the cube doesn't look three-dimensional at the moment. This is because the camera is positioned directly in front of it. What you are going to do now is change the position of the camera so that it has a better view of the cube.
To keep the camera pointed directly at the cube, however, you are also going to add an SCNLookAtConstraint to the camera. Start by updating the position of the camera as shown below.
cameraNode.position = SCNVector3(x: -3.0, y: 3.0, z: 3.0)
Next, add the following code snippet to the viewDidLoad method, after instantiating the node for the cube:
let constraint = SCNLookAtConstraint(target: cubeNode)
constraint.gimbalLockEnabled = true
cameraNode.constraints = [constraint]
The position change moves the camera to the left and up. By adding a constraint, with the cube as its target and gimbalLockEnabled set to true, you ensure that the camera will remain parallel with the horizon and viewport, your device's screen in this case. This is done by disabling rotation along the roll axis, the axis pointing from the camera to the constraint's target.
Build and run your app again, and you will see your cube in all of its 3D glory.
4. Materials and Shadows
It's time to add more realism to the scene with materials and shadows. You're first going to need another object to cast a shadow onto. Use the following code snippet to create a plane, a flat rectangle, and position it below the cube. Don't forget to add the new node as a child node to the scene's root node.
override func viewDidLoad() {
    ...
    let cubeGeometry = SCNBox(width: 1.0, height: 1.0, length: 1.0, chamferRadius: 0.0)
    let cubeNode = SCNNode(geometry: cubeGeometry)

    let planeGeometry = SCNPlane(width: 50.0, height: 50.0)
    let planeNode = SCNNode(geometry: planeGeometry)
    planeNode.eulerAngles = SCNVector3(x: GLKMathDegreesToRadians(-90), y: 0, z: 0)
    planeNode.position = SCNVector3(x: 0, y: -0.5, z: 0)
    ...
    scene.rootNode.addChildNode(lightNode)
    scene.rootNode.addChildNode(cameraNode)
    scene.rootNode.addChildNode(cubeNode)
    scene.rootNode.addChildNode(planeNode)
}
By changing the plane node's eulerAngles property, you rotate the plane backwards 90 degrees along the x axis. We need to do this, because planes are created vertically by default. In SceneKit, rotation angles are calculated in radians rather than degrees, but these values can be easily converted using the GLKMathDegreesToRadians(_:) and GLKMathsRadiansToDegrees(_:) functions. GLK stands for GLKit, Apple's OpenGL framework.
Next, add a material to the cube and the plane. For this example, you are going to give the cube and the plane a solid color, red and green respectively. Add the following lines to the viewDidLoad method to create these materials.
override func viewDidLoad() {
    ...
    planeNode.position = SCNVector3(x: 0, y: -0.5, z: 0)

    let redMaterial = SCNMaterial()
    redMaterial.diffuse.contents = UIColor.redColor()
    cubeGeometry.materials = [redMaterial]

    let greenMaterial = SCNMaterial()
    greenMaterial.diffuse.contents = UIColor.greenColor()
    planeGeometry.materials = [greenMaterial]

    let constraint = SCNLookAtConstraint(target: cubeNode)
    ...
}
For each SCNMaterial object, you assign its diffuse contents a UIColor value. The diffuse property of a material determines how it appears when under direct light. Note that the value assigned does not have to be a UIColor object. There are many other acceptable object types to assign to this property, such as UIImage, CALayer, and even a SpriteKit texture (SKTexture).
Build and run your app again to not only see the plane for the first time, but also the materials you created.
Now it's time to add some shadows to your scene. Of the four light types available in SceneKit, only spot lights can create shadows. For this example, you are going to turn your existing omni light into a spot light, targeted towards the cube. Add the following code to the viewDidLoad method:
override func viewDidLoad() {
    ...
    let light = SCNLight()
    light.type = SCNLightTypeSpot
    light.spotInnerAngle = 30.0
    light.spotOuterAngle = 80.0
    light.castsShadow = true
    let lightNode = SCNNode()
    lightNode.light = light
    lightNode.position = SCNVector3(x: 1.5, y: 1.5, z: 1.5)
    ...
    let constraint = SCNLookAtConstraint(target: cubeNode)
    constraint.gimbalLockEnabled = true
    cameraNode.constraints = [constraint]
    lightNode.constraints = [constraint]
    ...
}
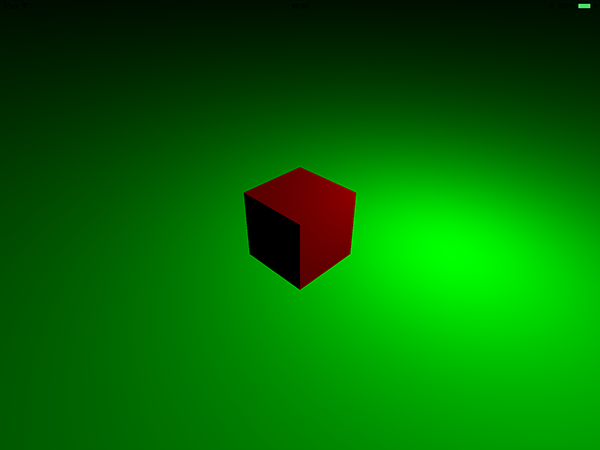
To create the spot light, you first set the light's type to SCNLightTypeSpot. You then specify the spot light's inner and outer angles in degrees. The default values are 0 and 45 respectively. The inner angle determines how much area the light covers in direct light while the outer angle decides how much area is partially lit. The difference between these angles will become clear once you see the resulting scene. You then explicitly tell the light to cast shadows and also add the same SCNLookAtConstraint that you created for your camera earlier.
Build and run your app to see the resulting scene. The inner angle you specified in your code is shown where the plane is a solid green, directly below the cube. The outer angle is shown by the gradient of light that fades to black as it moves away from the light's target.

You'll see that you have now got your cube casting a shadow correctly. The spot light, however, only illuminates part of the plane. This is because there is no ambient light in your scene.
An ambient light is a light source that illuminates everything with an equal distribution of light. Because an ambient light illuminates the entire scene, its position doesn't matter and you can add it to any node you want, even the same node as your camera. Use the following code snippet to create an ambient light for your scene.
override func viewDidLoad() {
    ...
    let camera = SCNCamera()
    let cameraNode = SCNNode()
    cameraNode.camera = camera
    cameraNode.position = SCNVector3(x: -3.0, y: 3.0, z: 3.0)

    let ambientLight = SCNLight()
    ambientLight.type = SCNLightTypeAmbient
    ambientLight.color = UIColor(red: 0.2, green: 0.2, blue: 0.2, alpha: 1.0)
    cameraNode.light = ambientLight
    ...
}
The code snippet creates an SCNLight, just as you did before. The main difference is the light's type property, which is set to SCNLightTypeAmbient. You also set its color to a dark grey so that it doesn't overpower your scene. The default color for a light is pure white (RGB value of 1, 1, 1) and having this color on an ambient light causes the entire scene to be fully illuminated as shown in the screenshot below.
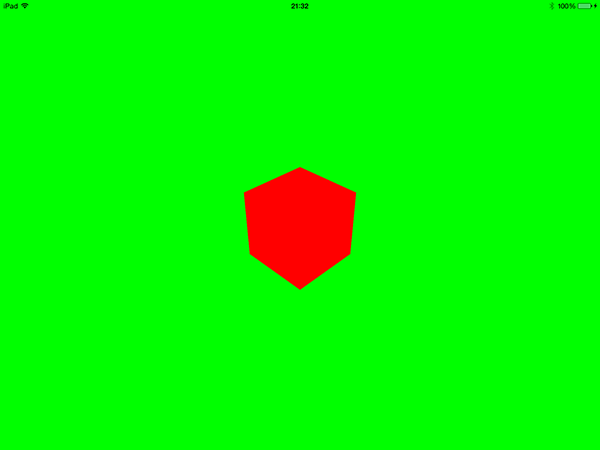
Build and run your app one last time to see the final result.

Conclusion
If you've made it to the end of this tutorial, you should now be comfortable with the following topics:
- the 3D coordinate system and scene graph used by SceneKit
- setting up an
SCNViewwith anSCNScene - adding cameras, lights, and nodes to a scene
- assigning materials to geometries
- working with lights to illuminate a scene and cast shadows
In the next tutorial of this series, you will learn about some more advanced concepts of the SceneKit framework, including animation, user interaction, particle systems, and simulating physics.

Comments