Titan Framework offers a broad range of options which you can add in a plugin or a theme to provide end users with dynamic settings. Today I am going to discuss cover two of the most basic options: a text type option and a textarea option. Let's see how to create a text type option in an admin panel, a metabox or a theme customizer section.
Text Type Options in Titan Framework
In Titan Framework there are several types of options, and today we going to review the one with type text. This is how it looks:

The text type option in Titan Framework carries a wide range of setting parameters:
- name: This controls the name with which the option is displayed.
- id: A unique name which is used to get the saved values.
- desc: It displays a brief description with the option name.
- default: This parameter specifies the default value of the option.
-
livepreview: (Optional) This parameter is only used when a
texttype option is being used inside the theme customizer section. It helps to display a live preview of changes in your theme. - css: (Optional) When a text field is added inside an admin page or a theme customizer section this parameter can help generate CSS. How?
- placeholder: (Optional) This displays dummy text each time the text field is empty.
- is_password: (Optional) An additional label, located immediately after the form field. Accepts alphanumerics and symbols. Potential applications include the indication of a unit, especially if the field is used with numbers. For example, if you use the field as input for numbers of pixels, you would enter the value as ‘px’. Or, if as a unit of percentage, you’d enter ‘%’ as value.
All of these parameters are of type string expect for the is_password parameter which is boolean. If you don't need the optional parameters, there is no need to include them.
Available Containers for the Text Type Option
Containers are basically your admin pages, tabs, meta boxes, and theme customizer sections. These are essentially the areas where you put your options. Not all option types can be placed in these containers. But the text type option can be used in any container, i.e.:
- Admin Panel
- Admin Tab
- Metabox
- Theme Customizer
Let's revise how to create options in Titan Framework:
- Call a unique instance via the
getInstance()function. - Create options via the
createOption()function inside a container. - Get the saved option's values via the
getOption()function.
So, let's review how a text type option is created inside each of these containers.
Creating a Text Type Option Inside an Admin Panel
Example Declaration
The following code is used while you're adding a text option inside an admin panel:
<?php
/**
 * Create the options
 *
 * Create options for our panel that we just created called $aa_panel
 *
 */
$aa_panel->createOption( array(

    'id'   => 'aa_txt', // The ID which will be used to get the value of this option
    'type' => 'text', // Type of option we are creating
    'name' => 'My Text Option', // Name of the option which will be displayed in the admin panel
    'desc' => 'This is our option' // Description of the option which will be displayed in the admin panel

) );
This code will add a text type option inside an Admin Panel $aa_panel. The createOption() function takes up an array of parameters which are supported by the text option.
In this case, I've used parameters like id, type, name and desc. Off all these, ID is most the important parameter and should always be unique. It will be used later to get the saved values.
So, a text option with ID aa_txt and name 'My Text Option' was created within the admin panel $aa_panel.
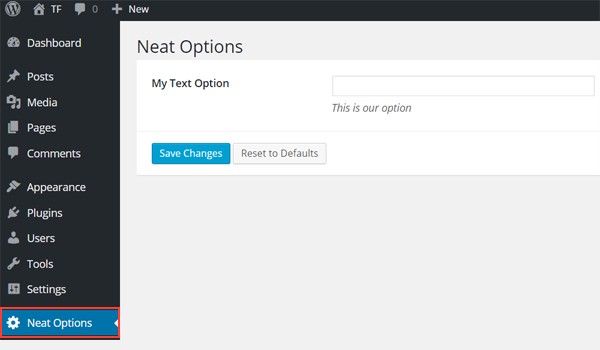
The screenshot above shows My Text Option inside the admin panel Neat Options.
This is a custom admin panel and has been created with Titan Framework. If you want to know how, then refer to the previous articles of this series.
Example Usage
Use the following code to retrieve the saved values from this text option.
<?php

// 1. Get the titan framework instance and save it to a variable
$titan = TitanFramework::getInstance( 'neat' );

/**
 *
 * Getting option value
 *
 */
$aa_txt_val = $titan->getOption( 'aa_txt' );

/**
 *
 * Print the option value
 *
 */
echo $aa_txt_val; // Print the value saved in aa_txt option
I used the ID of the text option as a parameter inside the getOption() function and saved the value in a variable $aa_txt_val. Voila! All that's left to do is to use this value, which I did by using the echo command.
Displaying the Result at the Front-End
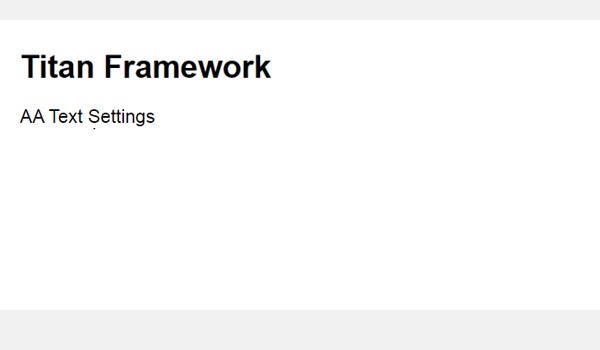
Let's suppose I entered the demo value 'AA Text Settings' and saved it. So here is the screenshot of the output of the code above.
Creating a Text Type Option Inside an Admin Tab
Example Declaration
Let's look at the code of a text option inside an admin tab.
<?php

    // Create options for $aa_panel2 inside the $aa_tab1
    $aa_tab1->createOption( array(

		'id'   => 'aa_txt_in_tab1_panel2', // IDs should always be unique. The ID which will be used to get the value of this option
		'type' => 'text', // Type of option we are creating
		'name' => 'My Text Option', // Name of the option which will be displayed in the admin panel
		'desc' => 'This is our option' // Description of the option which will be displayed in the admin panel

    ) );
This time I created a text type option with ID aa_txt_in_tab1_panel2 inside $aa_tab1. $aa_tab1 is an admin tab which exists inside a custom admin panel $aa_panel2. The process of creating an admin tab has been explained in my previous articles. So, you can refer to them for help.
Note that I've used the same name, which means that names can be the same, but IDs are always unique.
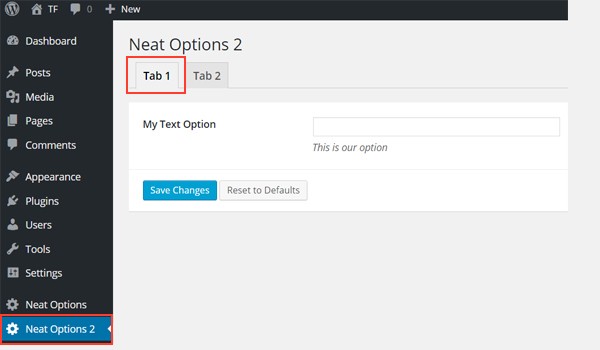
The above screenshot shows the My Text Option inside Tab 1 of panel Neat Options 2.
Example Usage
Let's retrieve the saved values from this text option.
<?php

// 1. Get the titan framework instance and save it to a variable
$titan = TitanFramework::getInstance( 'neat' );

// Value of first tab text box.
$aa_txt_in_tab1_panel2_val = $titan->getOption( 'aa_txt_in_tab1_panel2' );

/**
 *
 * Print the option value
 *
 */
?>
 <div>

    Value of first tab text box is : <?php echo $aa_txt_in_tab1_panel2_val; ?>

 </div>
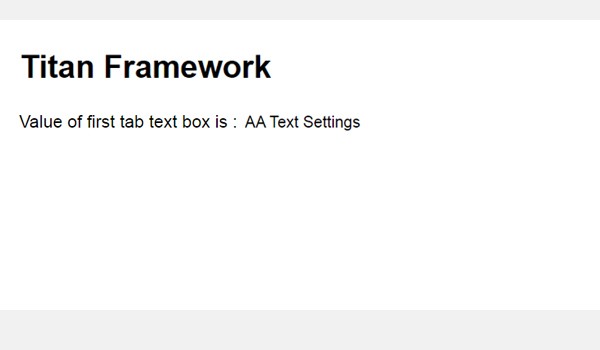
The getOption() function retrieves the saved value via ID aa_txt_in_tab1_panel2 and then I printed it via the echo command.
Displaying the Result at the Front-End
The value I entered was 'AA Text Settings' and its output at the front-end looks like this:
Creating a Text Type Option Inside a Metabox
Example Declaration
You can add a text type option inside a metabox through the following code:
<?php

    /**
     * Create the options for metabox
     *
     * Create options for our metabox that we just created called $aa_metbox
     *
     */
    $aa_metbox->createOption( array(

        'id'   => 'aa_mb_txt', // The ID which will be used to get the value of this option
        'type' => 'text', // Type of option we are creating
        'name' => 'My Text Option', // Name of the option which will be displayed in the admin panel
        'desc' => 'This is our option' // Description of the option which will be displayed in the admin panel

    ) );
Again the createOption() function adds a text option inside a metabox named $aa_metbox. Same parameters are used here and the ID is aa_mb_txt.
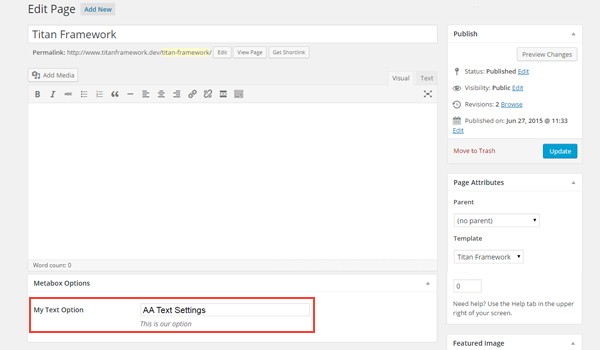
The above screenshot displays a page editing screen where you can find a new metabox with 'My Text Option' inside it. We created metaboxes in a previous article of this series, so refer to that if you need to revise your concepts.
Example Usage
So, here is the code to get the saved values.
<?php
// 1. Get the titan framework instance and save it to a variable
$titan = TitanFramework::getInstance( 'neat' );
/**
* Value of metabox.
*
* Notice the use of get_the_ID(). It is because metabox is created for all
* the post types we defined. To get the value of a metabox option for a specific page/post
* we need to give getOptions() function the ID of our post/page. Which is done like this.
*
*/
$aa_mb_txt_val = $titan->getOption( 'aa_mb_txt', get_the_ID() );
/**
*
* Print the option value
*
*/
?>
<div>
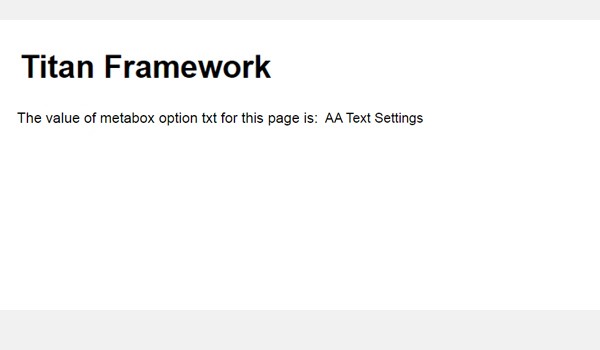
The value of metabox option txt for this page is: <?php echo $aa_mb_txt_val; ?>
</div>
Everything is pretty much the same except at line #15 where the getOption() function got two parameters:
-
aa_mb_txt, which is the ID of text type option we created
-
get_the_ID()function, which will return the ID of the current post/page/post_type.
After that, I just used the echo command and printed the value.
Displaying the Result at the Front-End
I saved 'AA Text Settings' as the value of this option and published the page. The code above was used to display that value at the front-end.
Creating a Text Type Option Inside Theme Customizer
Example Declaration
Finally, let's write the code for creating a text type option inside a theme customizer section.
<?php

// Header text
$aa_section1->createOption( array(

    'id'   => 'aa_sec_head_txt', // The ID which will be used to get the value of this option
    'type' => 'text', // Type of option we are creating
    'name' => 'Site Header Text',// Name of the option which will be displayed in the admin panel
    'desc' => 'This is the site header' // Default value of our option

) );
A text type option with ID aa_sec_head_txt is created inside a theme customizer section $aa_section1. Refer to my previous articles if you want to learn how to add customizer sections in Titan Framework.
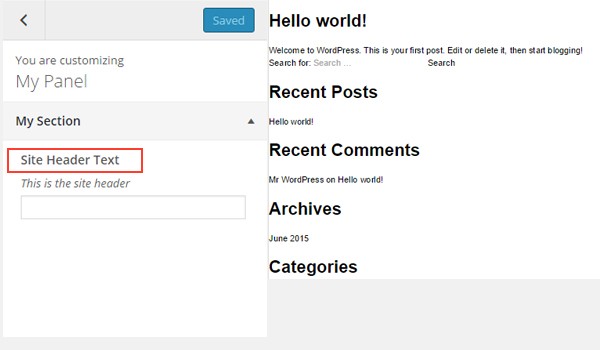
The above screenshot shows a theme customizer section named My Section in which a Site Header Text option is being displayed.
Example Usage
Here is the code to get the saved values.
<?php

// 1. Get the titan framework instance and save it to a variable
$titan = TitanFramework::getInstance( 'neat' );

// Header text
$aa_sec_head_txt_val = $titan->getOption( 'aa_sec_head_txt' );

/**
 *
 * Print the option value
 *
 */
?>


    <h1><?php echo  $aa_sec_head_txt_val; ?></h1>
    <!-- / Prints the value saved in aa_sec_head_txt option -->
aa_sec_head_txt is a text type option, and I retrieved its value again with the getOption() function. No rocket science here.
Displaying the Result at the Front-End
I entered 'My Text Option Header' and you can see the live preview result below:

Next, let's cover the textarea type option in Titan Framework. Let's review how you can leverage Titan Framework to create a textarea type option in admin panels, meta boxes and the customizer section with just a few lines of code.
The Textarea Type Option in Titan Framework
You must have seen the textarea type option in several WordPress plugins and themes. With Titan Framework, you can add this type of option with the createOption() function. Some parameters of this option are:
-
name: This parameter decides the display name of the
textarea. - id: This is a unique name which is used to retrieve the saved option values.
- desc: It displays a one-line description with the option name.
-
default: (Optional) It represents the default setting of the
textareaoption. - livepreview: (Optional) This parameter works exclusively with the theme customizer section and shows a live preview of changes which you make.
-
css: (Optional) It generates CSS each time a
textareaoption is created inside an admin page and/or theme customizer section. -
placeholder: (Optional) If you want some dummy text to appear inside your
textareaoption then use this parameter. - is_code: (Optional) This parameter performs a check for better-looking code input and if it is true, then the font of the code becomes monospaced.
All parameters are of the type string, except for the is_code which is boolean.
Available Containers for the Textarea Type Option
This option has type textarea and can be added in places like:
- Admin Page
- Admin Tab
- Metabox
- Theme Customizer
But before I explain how to add this option inside all these containers, let me summarize the basic steps which should be followed:
- Call the
getInstance()function at the beginning of every new file when Titan Framework is being used. - Use the
createOption()function to add any new option. - Get the saved option values by calling the
getOption()function.
Keeping things to the point, I'll only explain how to add this option inside these containers. If you want to know how to create these containers, then read previous articles of this series.
Creating a Textarea Type Option Inside an Admin Panel
Example Declaration
I will create a textarea option inside an admin panel with the following code.
<?php
    /**
     *
     * Create the Textarea option
     *
     */
    $aa_panel->createOption( array(

        'id'   => 'aa_txtarea', // The ID which will be used to get the value of this option
        'type' => 'textarea', // Type of option we are creating
        'name' => 'My Textarea Option', // Name of the option which will be displayed in the admin panel
        'desc' => 'This is our option' // Description of the option which will be displayed in the admin panel

    ) );
A textarea is created inside an admin panel $aa_panel via the createOption()function. This function takes up an array of parameters and I'll only use those which the option supports. I've used id, type, name and desc. The parameter type is what determines which kind of option it is.
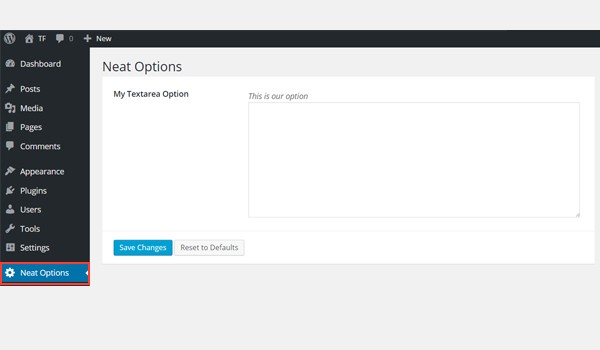
A textarea option with ID aa_txtarea and name My Textarea Option is shown in the above screenshot, which we just created.
Example Usage
Now I'll retrieve the saved value of whatever an end user enters inside this textarea.
<?php
// 1. Get the titan framework instance and save it to a variable

$titan = TitanFramework::getInstance( 'neat' );

// 2. Get the value via ID using getOption function
$aa_txtarea_val = $titan->getOption( 'aa_txtarea' );

/**
 *
 * Print the option value
 *
 */
echo $aa_txtarea_val; // Print the value saved in aa_txt option
To retrieve the saved values, first get a unique instance via the getInstance() function, followed by the getOption() function, within which we use the ID of textarea as a parameter.
Later, print the saved value at the front-end via the echo command.
Displaying the Result at the Front-End
Let's enter any dummy text inside our textarea and save it.
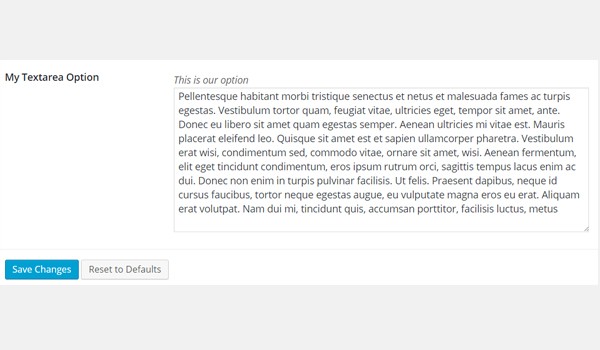
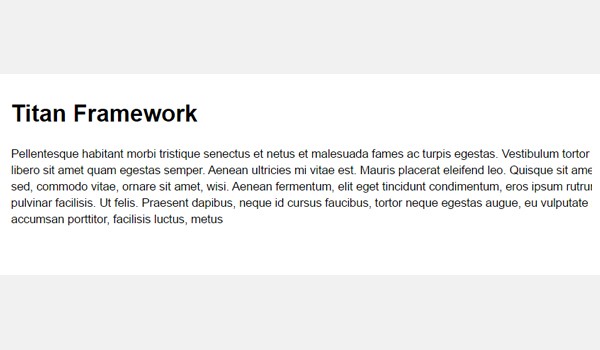
Here is the screenshot of the output at the front-end.
Now let's create this option inside an admin tab.
Creating a Textarea Type Option Inside an Admin Tab
Example Declaration
Here is the code:
<?php

    // Create textarea option
    $aa_tab1->createOption( array(

        'id'   => 'aa_txtarea_in_tab1_panel2', // IDs should always be unique. The ID which will be used to get the value of this option
        'type' => 'textarea', // Type of option we are creating
        'name' => 'My Textarea Option', // Name of the option which will be displayed in the admin panel
        'desc' => 'This is our option' // Description of the option which will be displayed in the admin panel

    ) );
I created a textarea option with ID aa_txtarea_in_tab1_panel2 inside an admin tab $aa_panel2. It appears against the name My Textarea Option.
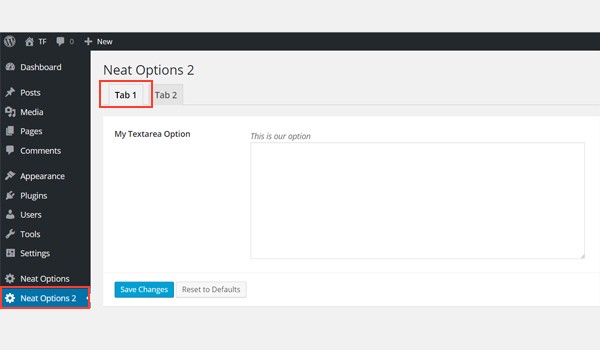
The above screenshot shows this option inside my second admin panel, i.e. Neat Options 2.
Example Usage
Let's get the saved values.
<?php

// 1. Get the titan framework instance and save it to a variable
$titan = TitanFramework::getInstance( 'neat' );
// Value of first tab text box.
$aa_txtarea_in_tab1_panel2_val = $titan->getOption( 'aa_txtarea_in_tab1_panel2' );

    /**
     *
     * Print the option value
     *
     */
     <div>
        <h2> Value of first tab textarea box is : </h2>
        <br/>
         <?php echo $aa_txtarea_in_tab1_panel2_val; ?>
     </div>
Again get an instance, then use the getOption() function and enter ID as its parameter. Next I'll print the output at the front-end using the echocommand inside a div tag.
Displaying the Result at the Front-End
I'm using the same dummy text once again as an example.

The final result is shown above.
Creating a Textarea Type Option Inside a Metabox
Example Declaration
Now, I'll create a textarea option inside a metabox.
<?php
    /**
     *
     * Create the options for metabox
     *
     */
    $aa_metbox->createOption( array(

        'id'   => 'aa_mb_txtarea', // The ID which will be used to get the value of this option
        'type' => 'textarea', // Type of option we are creating
        'name' => 'My Textarea Option', // Name of the option which will be displayed
        'desc' => 'This is our option' // Description of the option which will be displayed

    ) );
The createOption() function adds a textarea with ID aa_mb_txtarea inside a metabox $aa_metbox. This option appears on all page/post editing screens.
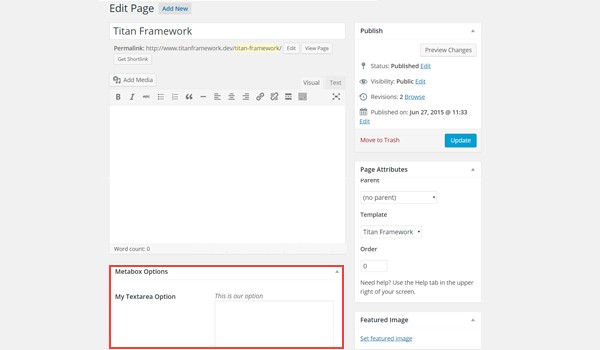
The screenshot above shows a textarea named My Textarea Option right at the end of a page editing screen. The same also appears inside the Add New Post section.
Example Usage
Now I'm going to write the code for retrieving its saved options values.
<?php
// 1. Get the titan framework instance and save it to a variable
$titan = TitanFramework::getInstance( 'neat' );
/**
*
* Notice the use of get_the_ID(). It is because metabox is created for all
* the post types we defined. TO get the value of a metabox option for a specific page/post
* we need to give getOptions() function the ID of our post/page. Which is done like this.
*
*/
$aa_mb_txtarea_val = $titan->getOption( 'aa_mb_txtarea', get_the_ID() );
/**
* Print the option value
*/
<div>
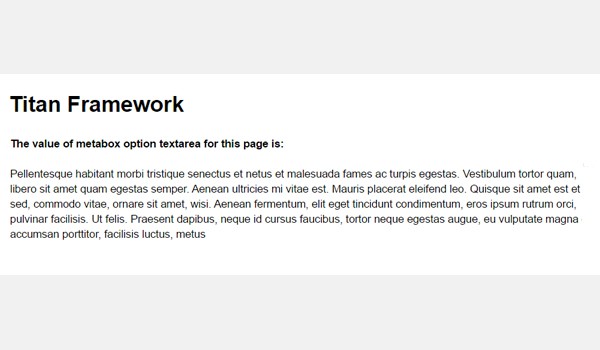
<h2>The value of metabox option textarea for this page is:</h2>
<br/>
<?php echo $aa_mb_txtarea_val; ?>
</div>
Repeat the process again, i.e. get an instance first, and then use the getOption() function and submit the ID of the textarea with the ID of our post_type. The result is saved in a variable called $aa_mb_txtarea_val. Finally, I echoed the output in a div tag.
Displaying the Result at the Front-End
Let's upload the final output at the front-end.
Let's move to the final part where I'll create a textarea option inside a theme customizer section.
Creating a Textarea Type Option Inside a Theme Customizer Section
Example Declaration
Use the following code.
<?php
    /**
     *
     * Create the options for $aa_section1
     *
     */
    $aa_section1->createOption( array(

        'id'   => 'aa_sec_desc_txtarea', // The ID which will be used to get the value of this option
        'type' => 'textarea', // Type of option we are creating
        'name' => 'Site Description Textarea',// Name of the option which will be displayed
        'desc' => 'This is the site description' // Default value of our option

    ) );
A textarea with ID aa_sec_desc_txtarea exists inside a theme customizer section $aa_section1.
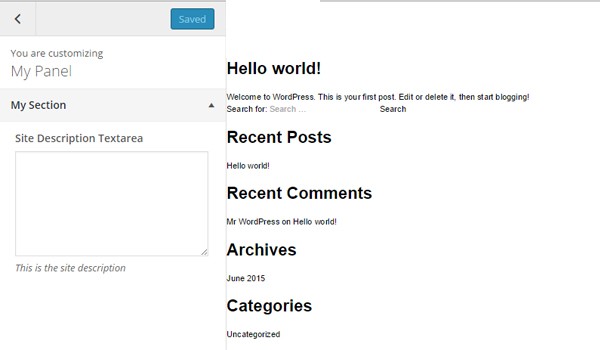
A textarea type option in the above figure is displayed against the name Site Description Textarea within the My Section theme customizer section.
Example Usage
Let's get the saved options values.
<?php
// 1. Get the titan framework instance and save it to a variable
$titan = TitanFramework::getInstance( 'neat' );

// Getting values
$aa_sec_desc_txtarea_val = $titan->getOption( 'aa_sec_desc_txtarea' );

    /**
     *
     * Print the option value
     *
     */
    <p> <?php echo  $aa_sec_head_txt_val; ?> </p>
    <!-- / Print the value saved in aa_sec_desc_txtarea option -->
This code retrieves and prints the value in pretty much the same way as discussed above.
Displaying the Result at the Front-End
Here is the live preview of my input.
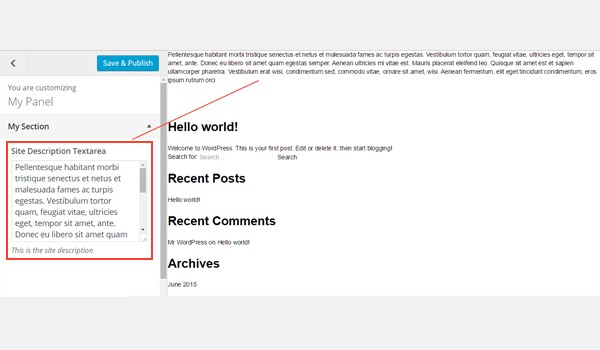
You can use this option, for example, to add a brief description on your landing page.
Conclusion
That's about it. Now you know where and how a text type option and the textarea type option can be added with Titan Framework.
I have seen people who build products abuse the text type option in places where an end user might want to add more data than just a few words. You should always use the textarea type option in such a case.
The entire process is pretty simple and easy. I hope you enjoyed reading this article. If you have any queries you can comment below or reach out to me on Twitter.

Comments