So, here we are at the eighth and final instalment of our quest into getting under the skin of a WordPress website. I hope that by now you feel a lot more comfortable playing around with your own sites. One of the great things I’ve found about WordPress is the sheer volume of things you can do with it once you start becoming familiar with how things fit together.
In today's tutorial we're going to tackle that last mysterious file in our theme that you'll often see mentioned around the traps; the one to which you may well have pasted snippets of code before without really knowing why or wherefore. Today we'll be messing with the functions template (functions.php).
For an in depth discussion about this mysterious document you can't go past what is discussed on the Codex, but in short, the Functions file is the means by which we can change the default functionality of some of our site. Using this file we can also extend the site's functionality further. It's pretty powerful, and today we'll go through just a couple of the ways we can use it to extend our test website.
Before We Start
You'll need:
- FTP access to your site
- Your text editing software
- A favicon image 32x32px saved in .ico format, named favicon.ico
What We'll Be Doing
- Adding in Google Analytics tracking code (you could use a plugin to do this, but we're using this as an example)
- Addng in a favicon to your site
Before we proceed any further, we should cover just a little about how the functions file behaves in the context of your child theme. It's a little different than the other templates we've been working with.
In a child theme, rather than replace the functionality of the corresponding file in the parent theme as we did in our last tutorial, the functions.php adds to or extends the parent's functionality. It doesn't replace it, which if you'll remember, is how the other templates behave in a child theme.
So, when our page is called on, and the server does its magic pulling all the templates together, it looks for the functions in the child theme, executes them, and then looks to the parent and executes those functions as well.
Secondly, the functions file is also a PHP file, and functions we're pasting/writing will include PHP code as well as potentially some HTML. So they're helping us notch up our geek cred! (high fives all round!)
Let's get into it.
Adding Google Analytics Tracking Code
I should say at the outset, there's nothing wrong with adding in analytics code using a plugin. In fact, most plugins that offer this functionality will (in essentials) not differ very much from this process, they just tuck the code out of the way in a plugin file. That said, it's a useful and not too challenging illustration for the purposes of this exercise. So, let's take a look.
1.Creating Our Functions File
Step 1. Open your FTP client and navigate to your child theme directory.
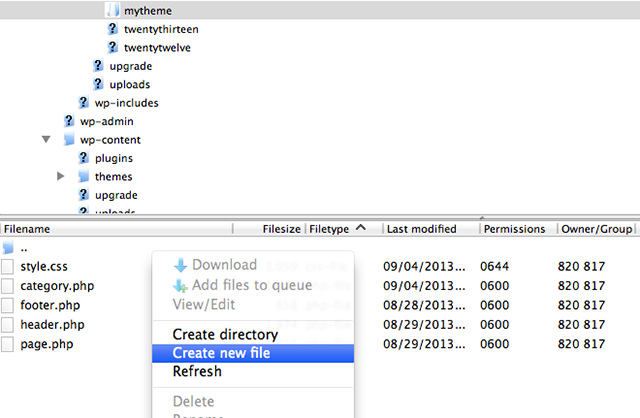
Step 2. In the file listing on your remote server, right click and select Create new file.
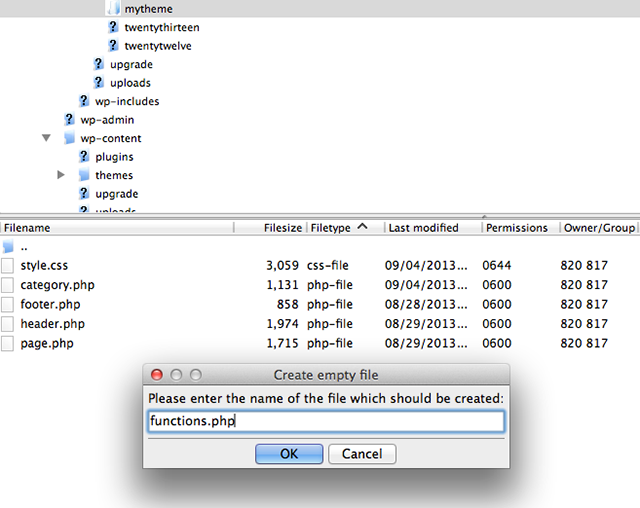
Step 3. Enter the name of your functions file as functions.php and hit OK.
Step 4. Open your new functions.php file in your Text Editor.
Step 5. At this point we need to set the file up so that our server regognizes it as a PHP file. So add in an opening PHP tag, like this <?php, at the beginning of your file.

Step 6. Now we're ready to paste some code into our functions.php.
Here's the code we'll paste in, and below that is an explanation of what we're looking at:
<?php

// Inserting Google Analytics Code to the Footer
add_action( 'wp_footer', 'mytheme_add_google_analytics' );
function mytheme_add_google_analytics() {
	?>
	<!-- Where we'll put the Google Analytics code that we get from google... -->
	<?php
}

?>
Ok, let's break it down.
// Inserting Google Analytics Code to the Footer
On line 1 we have a sentence starting with two // marks. This is a comment, which doesn't do anything programmatically, and is just there for the information of the person editing the file. Formatting it with the slash marks is a quick way of commenting out a single line of PHP code. If we're commenting out a whole block that crosses more than one line we'd use the usual /* comment here */ marks we also use in CSS. It's good practice to add comments as notes whenever you're coding so you can keep up with where you are and what you've done.
add_action( 'wp_footer', 'mytheme_add_googleanalytics' );
On line 4 we have some slightly complicated looking code starting with add_action.
add_action is a PHP function that connects actions with places in the code called hooks. We can find a whole bunch of code snippets around the web that are effectively PHP functions to add or remove functionality to different hooks in our code. In this case we're using this add action to add the mytheme_add_google_analytics function to the wp_footer hook.
function mytheme_add_googleanalytics() {
Line 5 actually defines and opens the mytheme_add_google_analytics function:
<!-- Where we'll put the Google Analytics code that we get from google... -->
and from line 7, that follows, is the heavy lifting part that is actually where we'll provide the functionality. At the moment this is just an HTML comment (<-- comment here -->), we'll fix that shortly.
Finally, on Line 9 we close the function with the curly brackets (notice how we had to restate the <?php tag. This is because the code we're pasting is in effect HTML so and the two languages work in tandem rather than mashed together. So, we had to close the PHP tag with the ?> after the { brackets on line 5, then paste our code (we'll do that in the next step) and then re-open the PHP tag on line 8 before we write any more functions to our file.
	<?php
}

?>
Step 7. Now it's time to log into your Google Analytics account and grab your embed code. I'll wait here while you do that...
...
Step 8. Now go head and paste that in at line 7 over the top of our HTML comment.
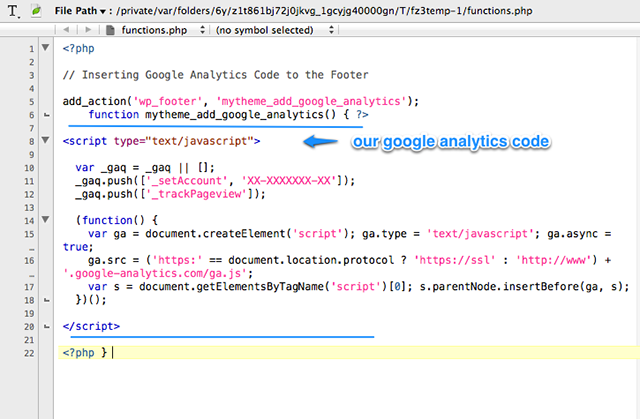
Step 9. Now save your file and upload it to your server.
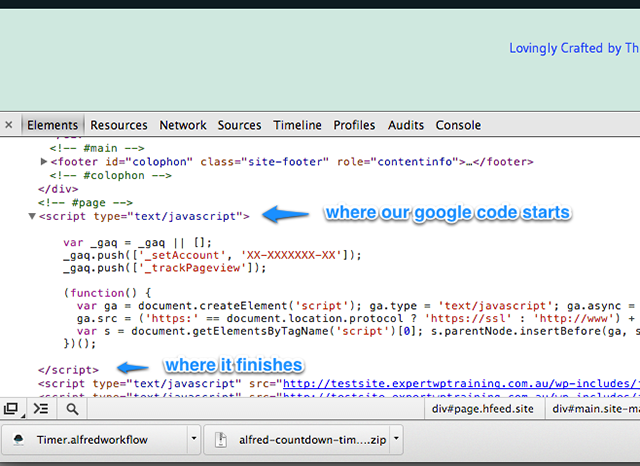
You should be able to inspect the code of your page and see the code sitting happily there in the bottom of your source code:
Add a Favicon to Your Site
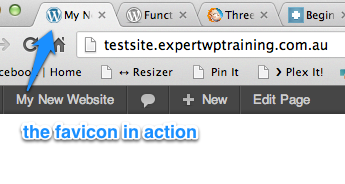
You know what a favicon is, right? If you need a refresher head over to the Codex for more information. But in short, it's the little icon you often see displaying a logo or custom image in the tabs of your browser, or when a link to your site is saved as a bookmark.
Step 1. Create your favicon.ico in your favourite image editing software.
Step 2. Upload your favicon to your theme directory (your child theme) via FTP.
Step 3. Paste the following code into your functions.php file:
// Add a Favicon to the Site

add_action( 'wp_head', 'mytheme_add_favicon' );

function mytheme_add_favicon() {

	echo '<link rel="Shortcut Icon" type="image/x-icon" href="' . get_stylesheet_directory_uri() . '/favicon.ico" />';

}
Step 4. Save the file and upload it back to your server.
Having described what's happening in a WordPress function earlier, you should find it pretty straightforward to understand what's going on in this next function. First, let's take a look at the code...
To start, on line 4 we can see we're creating another add_action function. The hook we're putting our code on is wp_head (so, contrary to the previous hook we're adding this to the header of our site, rather than the footer) and the name of our function is mytheme_add_favicon.
A note on naming functions:
You may have noticed that in both of these instances I've named the functions by beginning with our custom theme name mytheme_ and finishing with a description of what our function does e.g. add_favicon. The reason behind this is twofold:
- It makes it easy to see at a glance what it is our code is supposed to be achieving, and...
- It eliminates the risk of using function names that already exist in our parent theme, or in WordPress itself, and thus reduces the risk of our theme breaking things.
Anyway, assuming you have a favicon.ico file in your theme directory, the code above should work out of the box, but by way of explanation:
- On line 8 we're telling our theme to insert a string of HTML into the
headof our website. This tells the browser where to find the favicon.ico. - The little bit of PHP in that string (
get_stylesheet_directory_uri()inserts the path to our file in the theme directory.
Assuming all the code is correct and the file is in the theme directory, the browser will, in turn, display this icon for our site in the corner of our tabs and other such places a favicon is usually seen.
You may have noticed that in this example we didn't have to close and reopen the PHP tags like we did in steps 7 and 8 of the previous example. This is because in this second example, the code we've used is PHP from end to end, and while it does include bits of HTML, it isn't standalone HTML because there's PHP building part of the URL string. As you get familiar with functions like this, and as you learn to build functions yourself, you'll get clearer on the difference, but this thought just serves to let you know that the code is correct, just in case you were looking to add in <?php and/or ?> tags in this example around the curly brackets too!
Conclusion
Once you start getting an understanding of the power of the functions.php file you'll be unstoppable, it's the means to getting all sorts of things done and to adding some great and powerful functionality to your site. So the next time a tutorial you're following or a snippet you've found is required to be added to your functions.php file, you should now be able to confidently add and take control of all areas of your site!


Comments