Previously, we learned how you can permit users to enable multiple choices with the multicheck type option in Titan Framework. Now we'll discuss another option which works along the line of multicheck but can be used exclusively for existing posts. This is the multicheck-posts option. Let's explore its features and find out how to work with it.
The Multicheck-Posts Type Option in Titan Framework
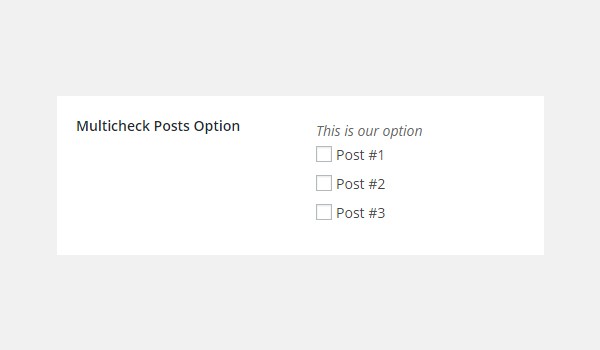
Titan Framework has made it possible to display your existing web posts as options via checkboxes. This is achieved by creating a multicheck-posts type option. With this option, you can enable multiple checkboxes at one time. Custom post types are also supported. In your dashboard it looks like this:
Let's list the parameter settings this option supports:
-
name: It displays the name of the
multicheck-poststype option. - id: This parameter assigns a unique name which retrieves the option values.
- desc: It adds a one-line description.
- default: (Optional) This parameter defines an array of default checked post IDs.
-
post_type: (Optional) It controls the type of posts which appear in the options list as checkboxes. The default is set to
post. -
post_status: (Optional) This parameter controls the status of the posts which are displayed in the options list. The default value is set to
any, but it can be set to publish, pending, draft, etc. Learn more! -
num: (Optional) It controls the number of posts to appear in the select box. The default is set to
-1which refers to all posts. -
orderby: (Optional) The display order of the listed posts is controlled by this parameter. The default setting lists them by
post_date. You can set it to author, id, title, type, etc. Learn more! -
order: (Optional) This parameter decides whether the display order of the options is ascending (
asc) or descending (desc). The default is set todesc.
The parameter num is int while the rest are string by type.
Available Containers for the Multicheck-Posts Type Option
You can create this option inside:
- Admin Panel
- Admin Tabs
- Metabox
- Theme Customizer Section
These containers are created in Titan Framework. Want to learn how? Go through the previous articles of this series.
So, let me list the steps to add this option inside every container:
- Get an instance via the
getInstance()function. - Add an option via the
createOption()function. - Get saved values via the
getOption()function.
Creating a Multicheck-Posts Type Option Inside an Admin Panel
Example Declaration
Let's create this option inside an admin panel first.
<?php
    /**
     *
     * Create multicheck-posts type option in an Admin Panel
     *
     */
    $aa_panel->createOption( array(

        'id'   => 'aa_multicheck_posts_opt', // The ID which will be used to get the value of this option
        'type' => 'multicheck-posts', // Type of option we are creating
        'name' => 'Multicheck Posts Option', // Name of the option which will be displayed in the admin panel
        'desc' => 'This is our option' // Description of the option which will be displayed in the admin panel

    ) );
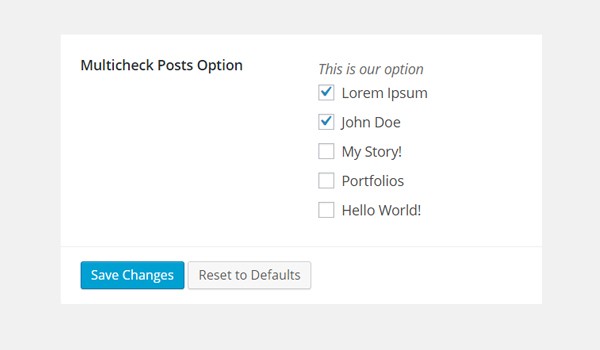
The createOption() function on line #8 adds a multicheck-posts type option in a custom admin panel $aa_panel. This function takes up an array and is where I've defined some of the parameters. These parameters, name, id, type and desc, add the most basic form of this option.
Later in this article, I'll be adding some complex parameters as well.
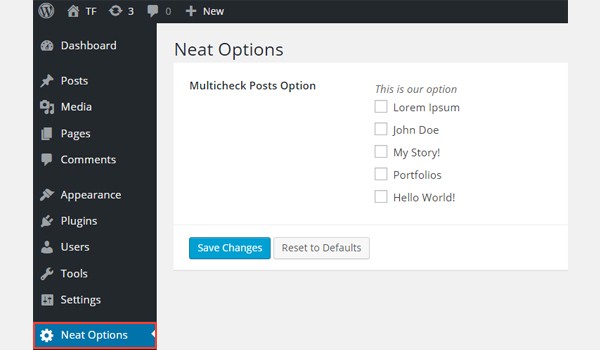
In the above screenshot, there is a custom admin panel page Neat Options inside which there is a list of checkboxes showing all the latest posts of WordPress.
Example Usage
Let's get values from this option.
<?php
// 1. Get the titan framework instance and save it to a variable
$titan = TitanFramework::getInstance( 'neat' ); // we will initialize $titan only once for every file where we use it.

// 2. Get the value via ID using getOption function
$aa_getpostid_array = $titan->getOption( 'aa_multicheck_posts_opt' );

    /**
     *
     * Printing array contents
     *
     */
    var_dump( $aa_getpostid_array );

 ?>
First, get a unique instance in line #3 via the getInstance() function. Then use the getOption() function in line #6. Register the option ID aa_multicheck_posts_opt as its parameter and save it in a variable, e.g. $aa_getpostid_array.
When a user enables multiple options, it means that inside the variable $aa_getpostid_array there exists an array containing selected post IDs by the user. So, first we'll check the existence of an array by printing its contents via the var_dump() command in line #15. As a test case, I'm enabling all five options.
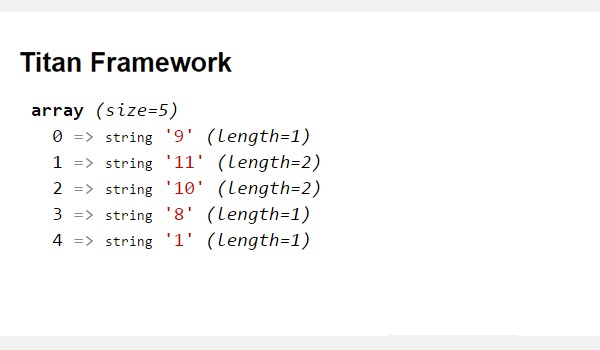
The above screenshot clearly prints an array which has five entries, each containing the post ID and its length, e.g. the first element of this array has "post ID = 9".
As a second case, let's print the selected post IDs separately.
<?php
// 1. Get the titan framework instance and save it to a variable
$titan = TitanFramework::getInstance( 'neat' ); // we will initialize $titan only once for every file where we use it.

// 2. Get the value via ID using getOption function
$aa_getpostid_array = $titan->getOption( 'aa_multicheck_posts_opt' );

    /**
     * Printing individual array elements
     *
     */
    echo $aa_getpostid_array[0];
    echo $aa_getpostid_array[1];

 ?>
The first part of this code is exactly the same. The lines which print post IDs are different. Lines 15 and 16 use an echo command, each containing the variable for array element '0' and '1'.
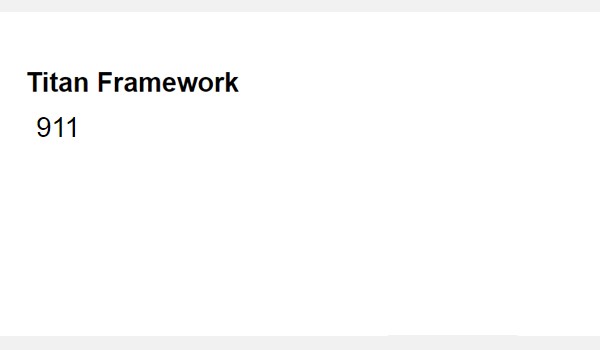
The screenshot displays the IDs of the mentioned array elements. The ID of the post from the first element is 9, while the ID from the second element of the array is 11.
By the way, it was not my intention to make it look as if I am calling 911 here!
Let's now adopt a more professional approach where I'll print the titles of the selected posts.
<?php
// 1. Get the titan framework instance and save it to a variable
$titan = TitanFramework::getInstance( 'neat' ); // we will initialize $titan only once for every file where we use it.

// 2. Get the value via ID using getOption function
$aa_getpostid_array = $titan->getOption( 'aa_multicheck_posts_opt' );

// Get selected post titles by array ID
$aa_panel_getpost_title0_val = get_post_field('post_title', $aa_getpostid_array[0]);
$aa_panel_getpost_title1_val = get_post_field('post_title', $aa_getpostid_array[1]);

    /**
     *
     * Printing selected post titles
     *
     */
    echo $aa_panel_getpost_title0_val;
    echo $aa_panel_getpost_title1_val;

?>
I added an instance and then the saved option values. In line #6, the variable $aa_getpostid_array contains an array of post IDs. Now to retrieve the titles, I'm using the get_post_field() function in line #9 which carries the parameters post_title and $aa_getpostid_array[0]. It means the post title for the first array element is being fetched and saved inside a new variable $aa_panel_getpost_title0_val.
The same explanation applies on line #10, except for the fact that it gets the post title for the second element of the array, i.e. $aa_getpostid_array[1].
So far the titles of the selected post titles are saved inside the variables $aa_panel_getpost_title0_val and $aa_panel_getpost_title1_val. To print these at the front-end, I'm using the echo commands (lines 19 and 20).
Displaying the Result at the Front-End
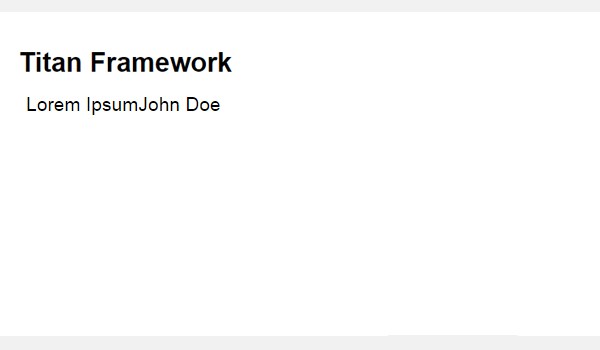
Suppose I select the following posts.
Here is the screenshot of post titles for the first and second element of the array (I didn't add any <br/>, so that's why these titles appear on the same line).
Creating a Multicheck-Posts Type Option Inside an Admin Tab
Example Declaration
Next create a multicheck-posts option in an admin tab.
<?php
    /**
     *
     * Create multicheck-posts type option in an Admin Tab
     *
     */
    $aa_tab1->createOption( array(

        'id'          => 'aa_multicheck_posts_opt_in_tab', // The ID which will be used to get the value of this option
        'type'        => 'multicheck-posts', // Type of option we are creating
        'name'        => 'Multicheck Posts Option', // Name of the option which will be displayed in the admin panel
        'desc'        => 'Posts which are pending for review.', // Description of the option which will be displayed in the admin panel
        'post_status' => 'pending' //Status of the displayed options

    ) );
Now I've added this option in an admin tab $aa_tab1 with the ID aa_multicheck_posts_opt_in_tab1. You can see that there is a new addition in the parameters list (line #14). This time, I've used the 'post_status' parameter whose value is pending. Now the list of options will show posts which are pending for review.
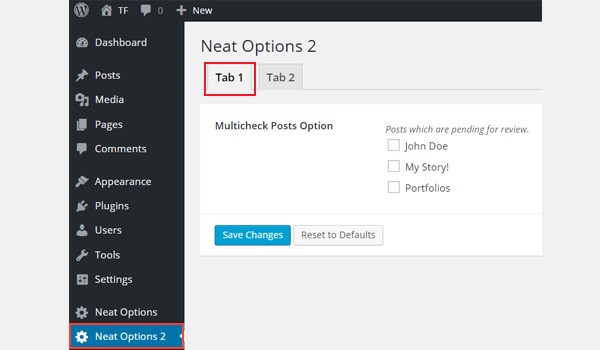
In the above screenshot, you'll find two major changes. First, the multicheck-posts type option now exists inside Tab 1 of panel Neat Options 2. Second, there are fewer options in the select list.
Example Usage
Let's write its code to get the values.
<?php
// 1. Get the titan framework instance and save it to a variable
$titan = TitanFramework::getInstance( 'neat' ); // we will initialize $titan only once for every file where we use it.

// 2. Get the value via ID using getOption function
$aa_tab_getpostid_array = $titan->getOption( 'aa_multicheck_posts_opt_in_tab' );

// Get selected post titles by array ID
$aa_tab_getpost_title0_val = get_post_field('post_title', $aa_tab_getpostid_array[0]);
$aa_tab_getpost_title1_val = get_post_field('post_title', $aa_tab_getpostid_array[1]);
$aa_tab_getpost_title2_val = get_post_field('post_title', $aa_tab_getpostid_array[2]);

    /**
     *
     * Printing selected post titles
     *
     */
    echo $aa_tab_getpost_title0_val;
    echo $aa_tab_getpost_title1_val;
    echo $aa_tab_getpost_title2_val;

 ?>
This code is pretty much similar to what I wrote in the case of an admin panel. The difference is that now I printed titles for the first three elements of the array at the front-end.
Displaying the Result at the Front-End
According to the code, I should enable all three post options from my dashboard like this:
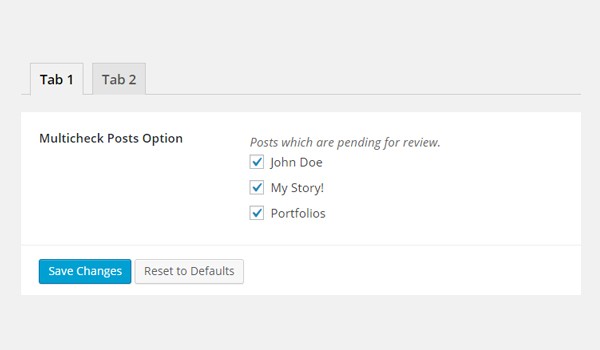
The titles are printed at the front-end like this (again I didn't add any <br/> element to avoid any confusion in the code).

Creating a Multicheck-Posts Type Option Inside a Metabox
Example Declaration
Next we'll add a multicheck-posts type option in a metabox.
<?php
    /**
     *
     * Create multicheck-posts type option in a Metabox
     *
     */
    $aa_metbox->createOption( array(

        'id'   => 'aa_multicheck_posts_opt_in_metabox', // The ID which will be used to get the value of this option
        'type' => 'multicheck-posts', // Type of option we are creating
        'name' => 'Multicheck Posts Option', // Name of the option which will be displayed
        'desc' => 'This is our option' // Description of the option which will be displayed

    ) );
A multicheck-posts type option with ID aa_multicheck_posts_opt_in_metabox is added in a metabox $aa_metbox. It appears on all page and post editing screens.
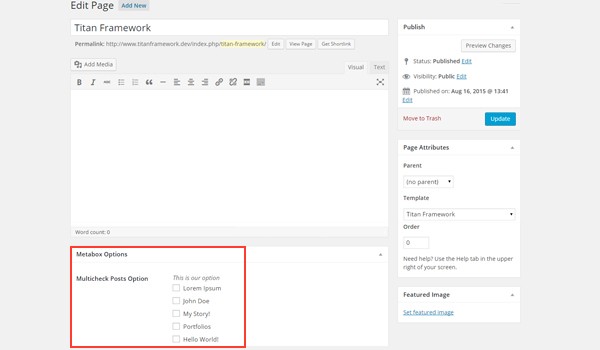
This image shows a page editing screen, and right at the end there is a metabox named Meta Box Options. Inside it, there is a list of web posts displayed as checkboxes.
Example Usage
Let's get the saved values.
<?php
// 1. Get the titan framework instance and save it to a variable
$titan = TitanFramework::getInstance( 'neat' ); // we will initialize $titan only once for every file where we use it.

// 2. Get the value via ID using getOption function
$aa_metabox_getpostid_array = $titan->getOption( 'aa_multicheck_posts_opt_in_metabox', get_the_ID() );

// Get selected post titles by array ID
$aa_metabox_getpost_title0_val = get_post_field('post_title', $aa_metabox_getpostid_array[0]);

    /**
     *
     * Printing selected post titles
     *
     */
    echo $aa_metabox_getpost_title0_val;

 ?>
This time, I wrote the code to print the post title for the first array element only. This routine is again the same except in line #6 where you'll find two parameters being registered inside the getOption() function. One is the option ID aa_multicheck_posts_opt_in_metabox and other is the get_the_ID() function which fetches the ID values for a specific page or post ID.
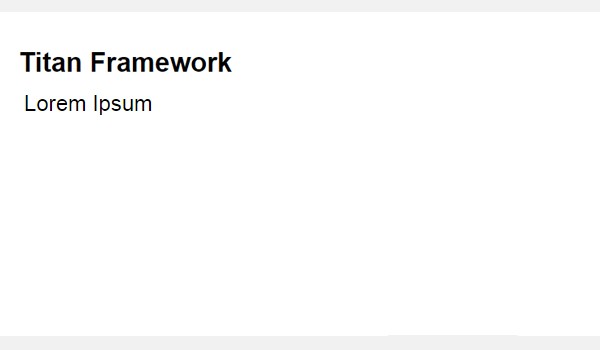
Displaying the Result at the Front-End
The title of the zeroth array element prints like this:
Creating a Multicheck-Posts Type Option Inside a Theme Customizer Section
Example Declaration
Finally, we'll add a multicheck-posts type option in a theme customizer section.
<?php
    /**
     *
     * Create multicheck-posts type option in a Theme Customizer Section
     *
     */
    $aa_section1->createOption( array(

        'id'   => 'aa_multicheck_posts_opt_in_sec', // The ID which will be used to get the value of this option
        'type' => 'multicheck-posts', // Type of option we are creating
        'name' => 'Multicheck Posts Option', // Name of the option which will be displayed
        'desc' => 'This is our option' // Description of the option which will be displayed

    ) );
So, I added a multicheck-posts type option inside a theme customizer section $aa_section1. Its unique ID is aa_multicheck_posts_opt_in_sec.
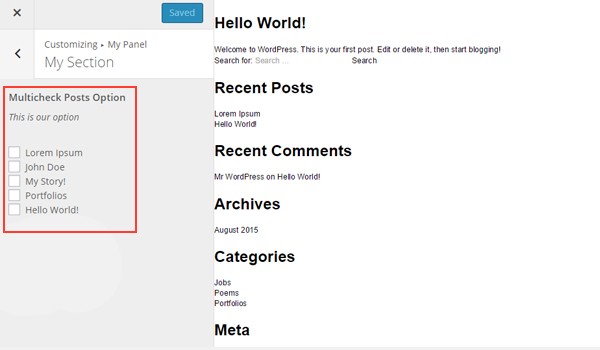
In the above screenshot, you can find this option named Multicheck Posts Option in a customizer section My Section.
Example Usage
Use the following code to get values.
<?php
// 1. Get the titan framework instance and save it to a variable
$titan = TitanFramework::getInstance( 'neat' ); // we will initialize $titan only once for every file where we use it.

// 2. Get the value via ID using getOption function
$aa_sec_getpostid_array = $titan->getOption( 'aa_multicheck_posts_opt_in_sec' );

// Get selected post titles by array ID
$aa_sec_getpost_title0_val = get_post_field('post_title', $aa_sec_getpostid_array[0]);
$aa_sec_getpost_title1_val = get_post_field('post_title', $aa_sec_getpostid_array[1]);
$aa_sec_getpost_title2_val = get_post_field('post_title', $aa_sec_getpostid_array[2]);
$aa_sec_getpost_title3_val = get_post_field('post_title', $aa_sec_getpostid_array[3]);
$aa_sec_getpost_title4_val = get_post_field('post_title', $aa_sec_getpostid_array[4]);

    /**
     *
     * Printing selected post titles
     *
     */
    echo $aa_sec_getpost_title0_val;
    echo $aa_sec_getpost_title1_val;
    echo $aa_sec_getpost_title2_val;
    echo $aa_sec_getpost_title3_val;
    echo $aa_sec_getpost_title4_val;

 ?>
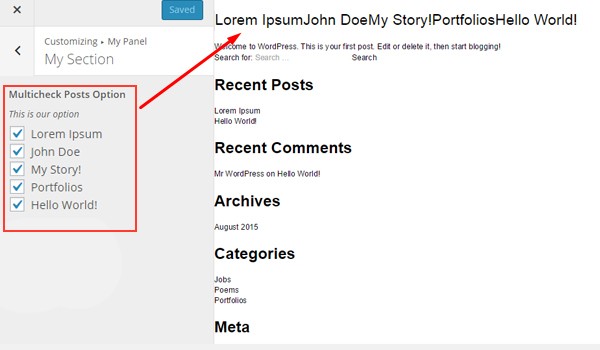
In this last container, I'm printing the titles of the entire array, i.e. all five post options. The details are the same—only the ID and variable names are different.
Displaying the Result at the Front-End
Here's a screenshot of the changes which were observed in the live preview mode.
We'll continue this article by discussing the multicheck-pages type option in Titan Framework, which functions quite similarly to multicheck-posts. Let's see how to create a multicheck list of available WordPress pages in a custom admin panel, a metabox or a customizer.
The Multicheck-Pages Type Option in Titan Framework
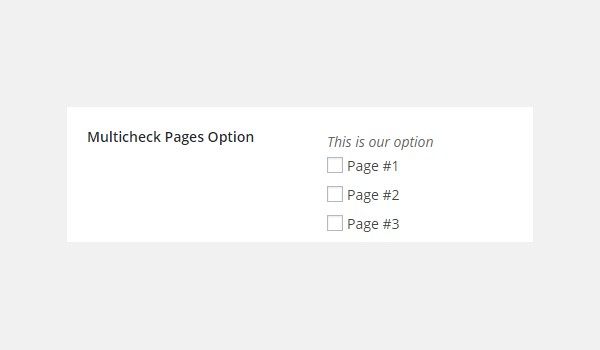
With the multicheck-pages type option in Titan Framework, you can display a set of checkboxes for all existing pages. This is what it looks like:
This parameter supports some setting parameters:
- name: It assigns the name of this option.
- id: This parameter specifies a unique name, which gets the saved option values.
- desc: It adds a brief description with the option name.
- default: (Optional) This parameter is an array containing the page IDs of enabled options as a default.
The parameter 'default' is array by type, while the rest are string in nature.
Available Containers for the Multicheck-Pages Type Option
This option can be added in:
- Admin Panel
- Admin Tabs
- Metabox
- Theme Customizer Section
Follow these steps whenever you create a multicheck-pages type option in any of these containers.
- First get an instance via the
getInstance()function. - Then add an option via the
createOption()function. - Finally, get the saved values via the
getOption()function.
If you don't know how these containers were created with Titan Framework, then you may refer to the previous articles of this series. You'll find all the relevant details.
Creating a Multicheck-Pages Type Option Inside an Admin Panel
Example Declaration
Let's create this option inside an admin panel first.
<?php
    /**
     *
     * Create multicheck-pages type option in an Admin Panel
     *
     */
    $aa_panel->createOption( array(

        'id'   => 'aa_multicheck_pages_opt', // The ID which will be used to get the value of this option
        'type' => 'multicheck-pages', // Type of option we are creating
        'name' => 'Multicheck Pages Option', // Name of the option which will be displayed in the admin panel
        'desc' => 'This is our option' // Description of the option which will be displayed in the admin panel

    ) );
In line #8, the createOption() function is adding a multicheck-pages type option in an admin panel $aa_panel. It takes up an array of parameters: name, id, type and desc. Off all these, ID (i.e. aa_multicheck_pages_opt) is quite important as it will be used to get the saved option's value. You should always add a unique value for ID.
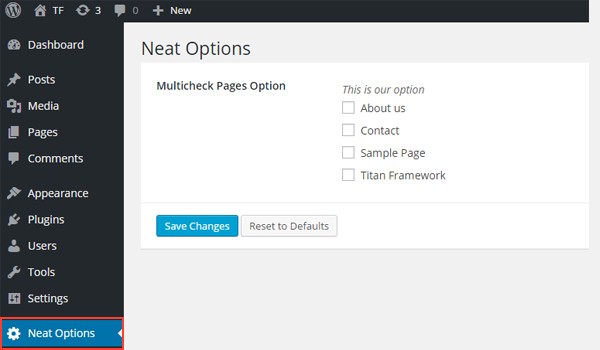
The above image displays a list of existing pages named Multicheck Pages Option in an admin panel Neat Options.
Example Usage
Let's get the saved options values.
<?php
// 1. Get the titan framework instance and save it to a variable
$titan = TitanFramework::getInstance( 'neat' ); // we will initialize $titan only once for every file where we use it.

// 2. Get the value via ID using getOption function
$aa_getpageid_array = $titan->getOption( 'aa_multicheck_pages_opt' );

    /**
     *
     * Printing array contents
     *
     */

    var_dump( $aa_getpageid_array );

?>
In line #3, I added a unique instance via the getInstance() function. It is preferred to register your theme name as its parameter (that's why I've used neat here). Next, I used the getOption() function in line #6 to retrieve saved values and registered the option ID aa_multicheck_pages_opt as its parameter. This is finally assigned to a new variable $aa_getpageid_array.
Each time a user makes multiple choices, an array consisting of the page IDs gets saved inside the variable $aa_getpageid_array.
To print the values, first we'll test whether an array is present or not. To do so, I'll enable all the checkboxes in the dashboard and print the array contents via the var_dump() command (line #15).
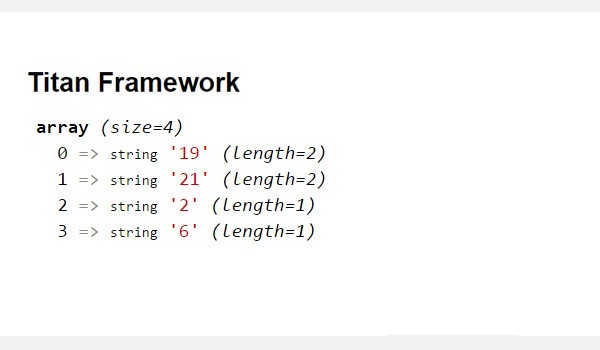
In the above image, you can see that the array contents were printed. It constitutes four elements (0 to 3), each containing the page ID and its length. For example, the first element has "page ID = 19". So, the presence of an array was verified.
So far, this coding routine was merely a safety test which avoids many future errors. Let's move to the next level where I'll print the selected page IDs.
<?php
// 1. Get the titan framework instance and save it to a variable
$titan = TitanFramework::getInstance( 'neat' ); // we will initialize $titan only once for every file where we use it.

// 2. Get the value via ID using getOption function
$aa_getpageid_array = $titan->getOption( 'aa_multicheck_pages_opt' );

/**
 *
 * Printing individual array elements
 *
 */
?>

<div>
    Page ID of zero'th array element is : <?php echo $aa_getpageid_array[0]; ?>
</div>


<div>
    Page ID of one'th array element is : <?php echo $aa_getpageid_array[1]; ?>
</div>
To print individual page IDs, I echoed the variables of the desired array elements separately in a div (lines 16-23). Therefore, $aa_getpageid_array[0] prints the page ID for the first element and $aa_getpageid_array[1] for the second array element.
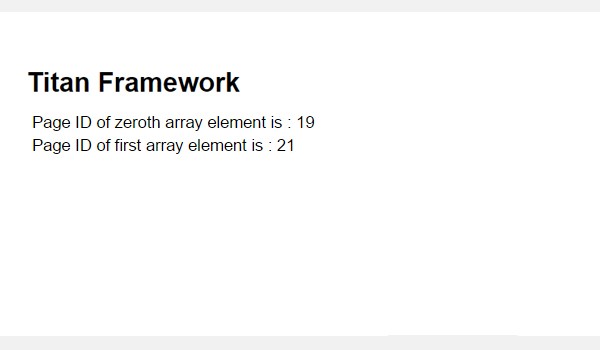
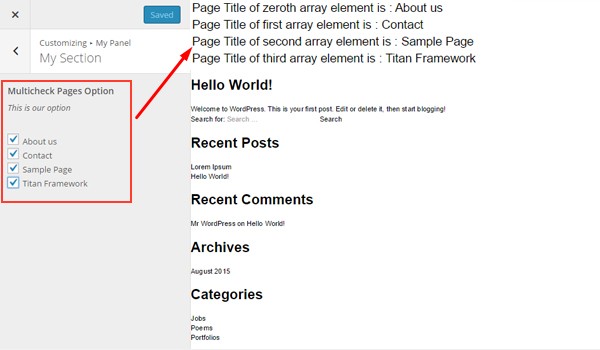
The above image displays the printed results at the front-end.
This was pretty much the basic stuff. How about exploring a slightly complex approach? Look at the following lines of code:
<?php
// 1. Get the titan framework instance and save it to a variable
$titan = TitanFramework::getInstance( 'neat' ); // we will initialize $titan only once for every file where we use it.

// 2. Get the value via ID using getOption function
$aa_getpageid_array = $titan->getOption( 'aa_multicheck_pages_opt' );

// Get selected page titles by array ID
$aa_panel_getpage_title0_val = get_post_field('post_title', $aa_getpageid_array[0]);
$aa_panel_getpage_title1_val = get_post_field('post_title', $aa_getpageid_array[1]);

/**
 *
 * Printing selected page titles
 *
 */
?>

<div>
    Page Title of zero'th array element is : <?php echo  $aa_panel_getpage_title0_val; ?>
</div>


<div>
    Page Title of one'th array element is : <?php echo  $aa_panel_getpage_title1_val; ?>
</div>
This time, I retrieved the titles of the selected pages and printed them at the front-end. At line #9, page titles are being fetched via the get_post_field() function. This function carries two parameters: post_title and $aa_getpageid_array[0]. Therefore, the page title for the first array element is retrieved and saved inside the variable $aa_panel_getpage_title0_val. Similarly at line #10, where I retrieved the page title for the second array element (i.e.$aa_getpageid_array[1]).
To print the saved page titles at the front-end, I created two divs (lines 21 to 28) which print results for the variables $aa_panel_getpost_title0_val and $aa_panel_getpost_title1_val.
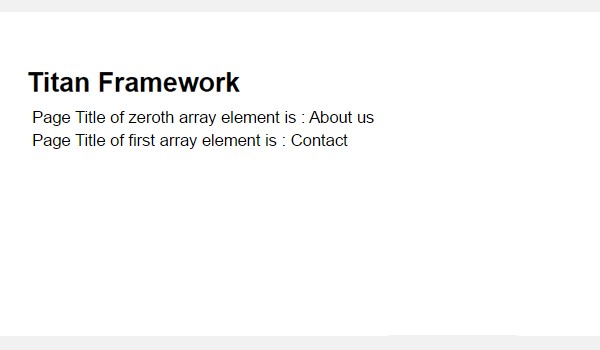
Displaying the Result at the Front-End
Suppose I enable the following pages.
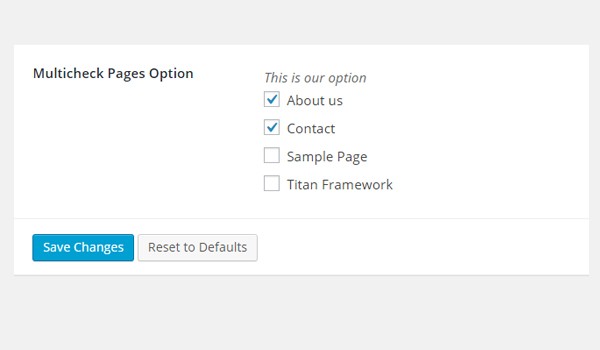
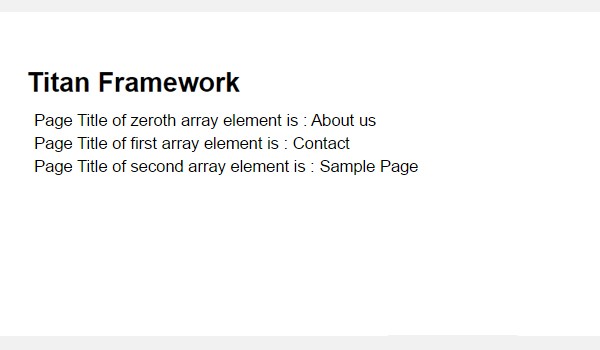
Here is a screenshot of the page titles for the first and second array elements.
Creating a Multicheck-Pages Type Option Inside an Admin Tab
Example Declaration
Next I'll add this option inside an admin tab.
<?php
    /**
     *
     * Create multicheck-pages type option in an Admin Tab
     *
     */
    $aa_tab1->createOption( array(

        'id'   => 'aa_multicheck_pages_opt_in_tab', // The ID which will be used to get the value of this option
        'type' => 'multicheck-pages', // Type of option we are creating
        'name' => 'Multicheck Pages Option', // Name of the option which will be displayed in the admin panel
        'desc' => 'This is our option' // Description of the option which will be displayed in the admin panel

    ) );
Now I added this option in an admin tab $aa_tab1. All the parameters are the same except for the ID, which is aa_multicheck_pages_opt_in_tab.
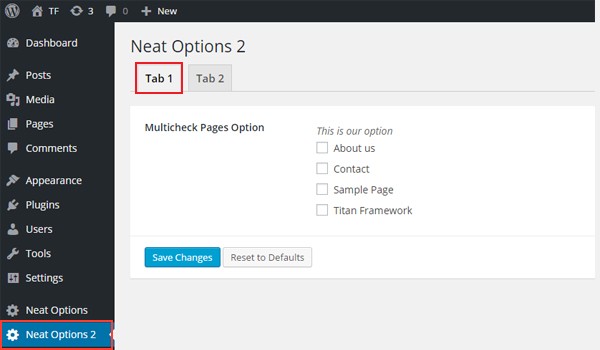
In the above screenshot, there exists a multicheck-pages type option in Tab 1 of panel Neat Options 2.
Example Usage
Let's get the saved values.
<?php
// 1. Get the titan framework instance and save it to a variable
$titan = TitanFramework::getInstance( 'neat' ); // we will initialize $titan only once for every file where we use it.

// 2. Get the value via ID using getOption function
$aa_tab_getpageid_array = $titan->getOption( 'aa_multicheck_pages_opt_in_tab' );

// Get selected page titles by array ID
$aa_tab_getpage_title0_val = get_post_field('post_title', $aa_tab_getpageid_array[0]);
$aa_tab_getpage_title1_val = get_post_field('post_title', $aa_tab_getpageid_array[1]);
$aa_tab_getpage_title2_val = get_post_field('post_title', $aa_tab_getpageid_array[2]);

/**
 *
 * Printing selected page titles
 *
 */
?>

 <div>
    Page Title of zero'th array element is : <?php echo  $aa_tab_getpage_title0_val; ?>
 </div>


 <div>
    Page Title of one'th array element is : <?php echo  $aa_tab_getpage_title1_val; ?>
 </div>


 <div>
    Page Title of two'th array element is : <?php echo  $aa_tab_getpage_title2_val; ?>
 </div>
In lines 3 to 6, I retrieved an instance and saved options values. Then I retrieved the selected page titles for the first three array elements (lines 9 to 11). In the end, I printed the titles at the front-end via an echo command inside the divs tags.
I have kept the code simple to help you understand how things work, but it is not a recommended practice to print array elements without verifying there is one.
Displaying the Result at the Front-End
I enabled the first three different page options from my dashboard like this:
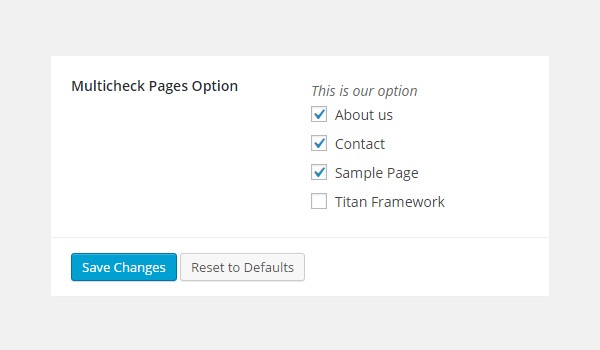
The front-end must display the title like this:
Creating a Multicheck-Pages Type Option Inside a Metabox
Example Declaration
Let's add a multicheck-pages type option in a metabox.
<?php
    /**
     *
     * Create multicheck-pages type option in a Metabox
     *
     */
    $aa_metbox->createOption( array(

        'id'   => 'aa_multicheck_pages_opt_in_metabox', // The ID which will be used to get the value of this option
        'type' => 'multicheck-pages', // Type of option we are creating
        'name' => 'Multicheck Pages Option', // Name of the option which will be displayed
        'desc' => 'This is our option' // Description of the option which will be displayed

    ) );
Now I added a multicheck-pages type option with ID aa_multicheck_pages_opt_in_metabox inside a metabox $aa_metbox.
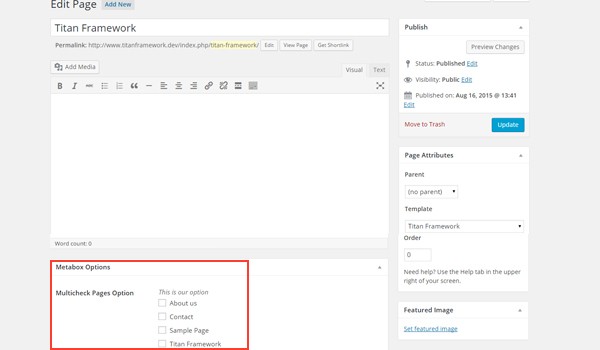
In the image, you can see Multicheck Pages Option inside a metabox named Metabox Options on the page editing screen.
Example Usage
Use the following code to get values.
<?php
// 1. Get the titan framework instance and save it to a variable
$titan = TitanFramework::getInstance( 'neat' ); // we will initialize $titan only once for every file where we use it.

// 2. Get the value via ID using getOption function
$aa_metabox_getpageid_array = $titan->getOption( 'aa_multicheck_pages_opt_in_metabox', get_the_ID() );

// Get selected page titles by array ID
$aa_metabox_getpage_title0_val = get_post_field('post_title', $aa_metabox_getpageid_array[0]);

/**
 *
 * Printing selected page titles
 *
 */
?>

 <div>
    Page Title of zero'th array element is : <?php echo  $aa_metabox_getpage_title0_val; ?>
 </div>
This code prints the page title for the zeroth array element only. All steps are the same, except in line #6 where you'll find a new parameter being registered inside the getOption() function. This is the get_the_ID() function which gets the value for a specific page or post ID.
Displaying the Result at the Front-End
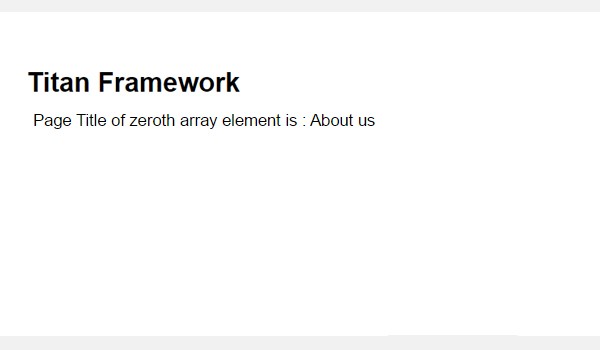
The page title of the zeroth array element prints like this:
Creating a Multicheck-Pages Type Option Inside a Theme Customizer Section
Example Declaration
In the end, I'll add a multicheck-pages type option in a customizer section.
<?php
    /**
     *
     * Create multicheck-pages type option in a Theme Customizer Section
     *
     */
    $aa_section1->createOption( array(

        'id'   => 'aa_multicheck_pages_opt_in_sec', // The ID which will be used to get the value of this option
        'type' => 'multicheck-pages', // Type of option we are creating
        'name' => 'Multicheck Pages Option', // Name of the option which will be displayed
        'desc' => 'This is our option' // Description of the option which will be displayed

    ) );
This code creates a multicheck-pages type option inside a theme customizer section $aa_section1. Its unique ID is aa_multicheck_pages_opt_in_sec.
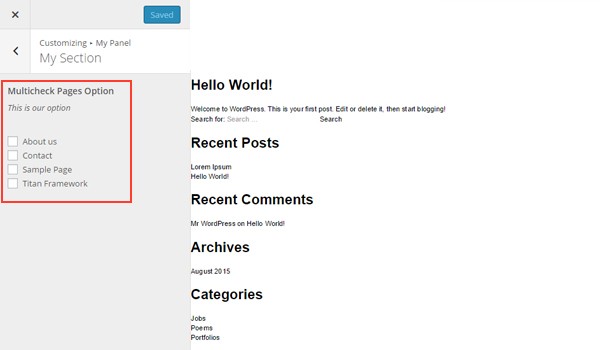
The image shows a list of existing pages inside a customizer section named My Section.
Example Usage
Use this code.
<?php
// 1. Get the titan framework instance and save it to a variable
$titan = TitanFramework::getInstance( 'neat' ); // we will initialize $titan only once for every file where we use it.

// 2. Get the value via ID using getOption function
$aa_sec_getpageid_array = $titan->getOption( 'aa_multicheck_pages_opt_in_sec' );

// Get selected page titles by array ID
$aa_sec_getpage_title0_val = get_post_field('post_title', $aa_sec_getpageid_array[0]);
$aa_sec_getpage_title1_val = get_post_field('post_title', $aa_sec_getpageid_array[1]);
$aa_sec_getpage_title2_val = get_post_field('post_title', $aa_sec_getpageid_array[2]);
$aa_sec_getpage_title3_val = get_post_field('post_title', $aa_sec_getpageid_array[3]);

/**
 *
 * Printing selected page titles
 *
 */
?>

<div>
    Page Title of 0'th array element is : <?php echo  $aa_sec_getpage_title0_val; ?>
</div>


<div>
    Page Title of 1'th array element is : <?php echo  $aa_sec_getpage_title1_val; ?>
</div>


<div>
    Page Title of 2'th array element is : <?php echo  $aa_sec_getpage_title2_val; ?>
</div>


<div>
    Page Title of 3'th array element is : <?php echo  $aa_sec_getpage_title3_val; ?>
</div>
This time I printed the titles of all the existing pages. The entire code is pretty much the same. Only the ID and variable names are different.
Displaying the Result at the Front-End
Here is a screenshot of the changes in live preview mode.
Conclusion
There are a number of ways in which you can implement this option. For example, what if you want an end user to be in full control of which page should be displayed to a particular user role and which page should be restricted?
The Multicheck-Categories Type Option in Titan Framework
Finally, let's discuss an option type which is directly related to the multicheck type option in Titan Framework. It allows you to display all the existing categories via checkboxes. I'm talking about the multicheck-categories option. Let's learn how this option works inside a custom admin panel, a metabox and a theme customizer section.
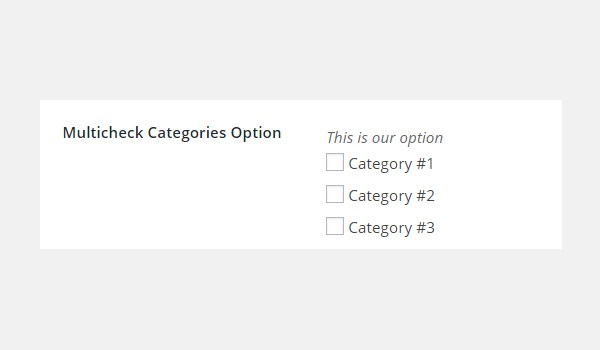
In Titan Framework, you can create and enable multiple checkboxes for all existing categories. This is possible with the multicheck-categories type option. It supports different taxonomies as well. In your dashboard, it appears like this:
Let's list the parameters this option supports:
- name: It specifies the display name of an option.
- id: This parameter defines a unique name which retrieves the saved values.
- desc: It adds a one-line description with the option name.
- default: (Optional) It takes up an array of category IDs which are enabled as a default.
-
orderby: (Optional) This parameter decides the order of categories in which they appear. The default is set to
name. You may change it accordingly. -
order: (Optional) It lists the categories in ascending or descending order. The default is set to
asc. -
taxonomy: (Optional) This parameter displays the type of taxonomy you want to show. Its default value is
category. -
hide_empty: (Optional) If this parameter is set to
true, then all categories and/or taxonomies which do not have posts will not appear. The default value isfalse. -
show_count: (Optional) This parameter displays the number of posts in each category if set to
true. The default setting isfalse.
The last two parameters, hide_empty and show_count, are boolean, default is array, and the rest are string by type.
Available Containers for the Multicheck-Categories Type Option
Let's list the containers in which you can add this option:
- Admin Panel
- Admin Tabs
- Metabox
- Theme Customizer Section
Irrespective of the container type, the multicheck-categories option is added by following these steps:
- First get an instance through the
getInstance()function. - Next add an option through the
createOption()function. - Then get saved options values through the
getOption()function.
Creating a Multicheck-Categories Type Option Inside an Admin Panel
Example Declaration
Let's create this option inside an admin panel first.
<?php
    /**
     *
     * Create multicheck-categories type option in an Admin Panel
     *
     */
    $aa_panel->createOption( array(

         'id' => 'aa_multicheck_categories_opt', // The ID which will be used to get the value of this option
         'type' => 'multicheck-categories', // Type of option we are creating
         'name' => 'Multicheck Categories Option', // Name of the option which will be displayed in the admin panel
         'desc' => 'This is our option' // Description of the option which will be displayed in the admin panel

    ) );
At line #8, the createOption() function adds a multicheck-categories type option in an admin panel $aa_panel. Inside this function, I've defined some of the basic parameters which are supported in this option. These parameters are name, id, type and desc. The value of ID (i.e. aa_multicheck_categories_opt) should always be unique.

The image shows this option inside an admin panel Neat Options.
Example Usage
Let's write the code to get saved options values.
<?php
// 1. Get the titan framework instance and save it to a variable
$titan = TitanFramework::getInstance( 'neat' ); // we will initialize $titan only once for every file where we use it.

// 2. Get the value via ID using getOption function
$aa_getcategoryid_array = $titan->getOption( 'aa_multicheck_categories_opt' );

    /**
     *
     * Printing array contents
     *
     */
    var_dump( $aa_getcategoryid_array );

?>
As this option allows end users to enable multiple categories, an array of category IDs will be returned by it. To print this array, I got an instance via the getInstance() function in line #3. Then I used the getOption() function in line #6 to get saved values. This function registers the ID aa_multicheck_categories_opt as its parameter and saves the result inside variable $aa_getcategoryid_array. Finally, we'll print its contents via thevar_dump() command.
An ideal case would be to enable all the checkboxes and save the settings.
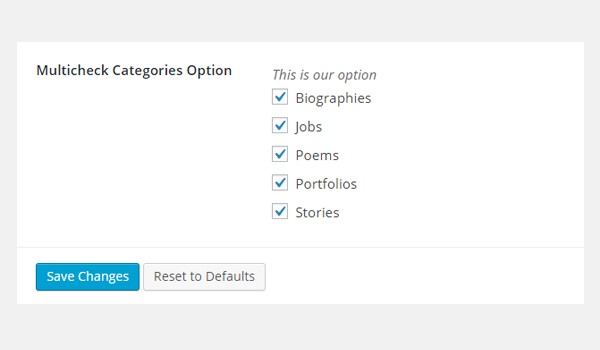
This is how the array gets printed.
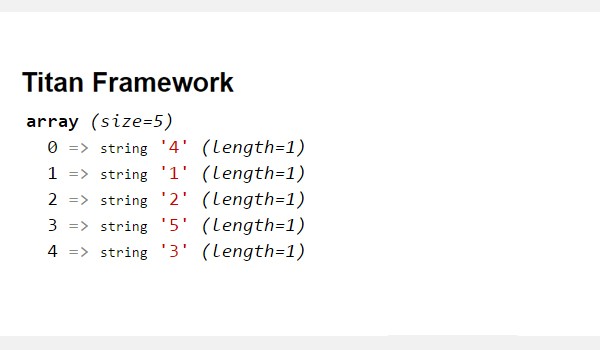
The above screenshot displays an array constituting five elements. Each element displays the category ID and its length (which is not relevant). For example, the zeroth array element has 'category ID=4'.
Let's print the category names now.
<?php
// 1. Get the titan framework instance and save it to a variable
$titan = TitanFramework::getInstance( 'neat' ); // we will initialize $titan only once for every file where we use it.

// 2. Get the value via ID using getOption function
$aa_getcategoryid_array = $titan->getOption( 'aa_multicheck_categories_opt' );

// Get selected categories titles by array ID
$aa_panel_getcategory_title0_val    = get_cat_name( $aa_getcategoryid_array[0] );
$aa_panel_getcategory_title1_val    = get_cat_name( $aa_getcategoryid_array[1] );

/**
 *
 * Print selected categories Names
 *
 */
?>

 <div>
    Category Title for the zero'th array element is: <?php echo $aa_panel_getcategory_title0_val; ?>
 </div>


 <div>
     Category Title for the one'th array element is: <?php echo $aa_panel_getcategory_title1_val; ?>
 </div>
In lines 3 to 6, I got an instance registered and retrieved the option's values. Till this point, the IDs of the selected categories are saved inside an array $aa_getcategoryid_array.
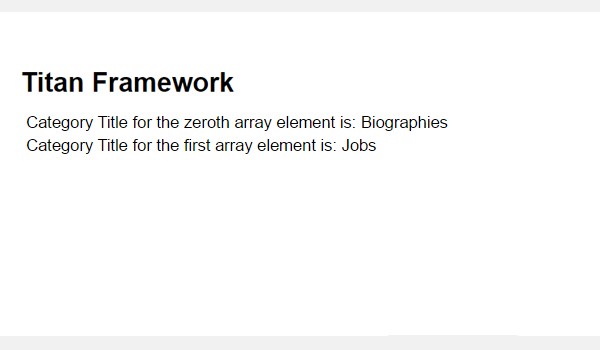
Suppose I want to print the names of the enabled categories at the front-end. To do so, I used the get_cat_name() function in line #9 which retrieves the category name for the ID at the zeroth array element from variable $aa_getcategoryid_array[0]. I repeated this process again on line #10, which gets the title for the first array element, i.e.$aa_getcategoryid_array[1].
Finally, to print the saved titles I created two divs, and there I echoed each name separately (lines 21 to 27).
Displaying the Result at the Front-End
To print titles for the zeroth and first array elements I must enable two such categories.
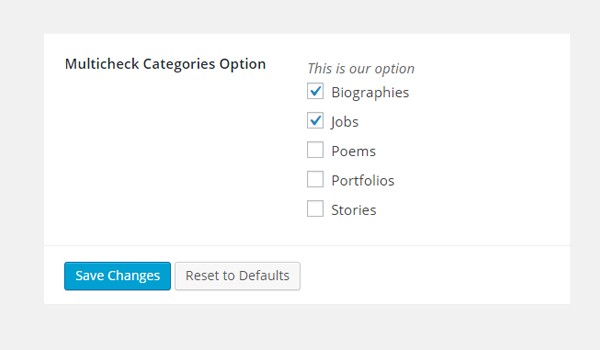
At the front-end, the category titles are printed like this:
Creating a Multicheck-Categories Type Option Inside an Admin Tab
Example Declaration
Now I'll create this option inside an admin tab.
<?php
    /**
     *
     * Create multicheck-categories type option in an Admin Tab
     *
     */
    $aa_tab1->createOption( array(

        'id'         => 'aa_multicheck_categories_opt_in_tab', // The ID which will be used to get the value of this option
        'type'       => 'multicheck-categories', // Type of option we are creating
        'name'       => 'Multicheck Categories Option', // Name of the option which will be displayed in the admin panel
        'desc'       => 'This is our option', // Description of the option which will be displayed in the admin panel
        'order'      => 'desc', // Display order of the categories
        'show_count' => 'true' // Display no. of posts with each category

    ) );
I added a multicheck-categories type option in an admin tab $aa_tab1. Its ID isaa_multicheck_categories_opt_in_tab. But this time I've added some new parameters, i.e. order and show_count parameters. I'm listing the categories in desc order withshow_count set to true, which will display the number of posts in each category.
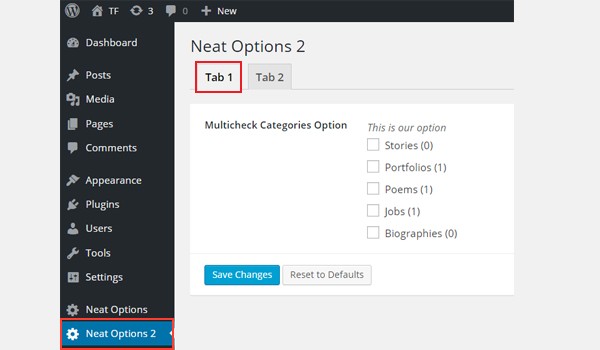
Now this option can be seen inside Tab 1 of panel Neat Options 2. The display order of categories is also different than before and the show_count parameter displays the number of posts in each category.
Example Usage
Use this code to get saved values.
<?php
// 1. Get the titan framework instance and save it to a variable
$titan = TitanFramework::getInstance( 'neat' ); // we will initialize $titan only once for every file where we use it.

// 2. Get the value via ID using getOption function
$aa_tab_getcategoryid_array = $titan->getOption( 'aa_multicheck_categories_opt_in_tab' );

// Get selected categories titles by array ID
$aa_tab_getcategory_title0_val     = get_cat_name( $aa_tab_getcategoryid_array[0] );
$aa_tab_getcategory_title1_val     = get_cat_name( $aa_tab_getcategoryid_array[1] );
$aa_tab_getcategory_title2_val     = get_cat_name( $aa_tab_getcategoryid_array[2] );

/**
 *
 * Print selected categories titles
 *
 */
?>

 <div>
     Category Title for the 0'th array element is: <?php echo $aa_tab_getcategory_title0_val; ?>
 </div>


 <div>
    Category Title for the 1'th array element is: <?php echo $aa_tab_getcategory_title1_val; ?>
 </div>


 <div>
    Category Title for the 2'th array element is: <?php echo $aa_tab_getcategory_title2_val; ?>
 </div>
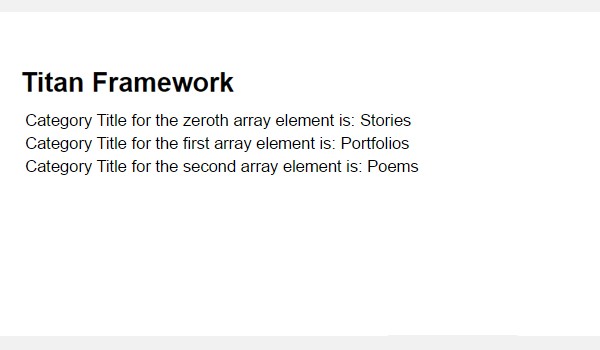
Using this code, I printed titles for three consecutive array elements. The major portion of the code is quite similar, so I'm writing a summary of the steps:
- Get an instance in line #3.
- Use the
getOption()function in line #6 to retrieve the saved values via ID. - Get the selected category names for array elements 0, 1 and 2 via the
get_cat_name()function in lines 9 to 11. - Print category names at the front-end via the
echocommand inside divs (lines 22 to 31).
Displaying the Result at the Front-End
The titles were printed like this:
Creating a Multicheck-Categories Type Option Inside a Metabox
Example Declaration
Next I'll create this option inside a metabox.
<?php
    /**
     *
     * Create multicheck-categories type option in a Metabox
     *
     */
    $aa_metbox->createOption( array(

        'id' => 'aa_multicheck_categories_opt_in_metabox', // The ID which will be used to get the value of this option
        'type' => 'multicheck-categories', // Type of option we are creating
        'name' => 'Multicheck Categories Option', // Name of the option which will be displayed
        'desc' => 'This is our option' // Description of the option which will be displayed

    ) );
Now I created this option in a metabox $aa_metbox. Its unique ID is aa_multicheck_categories_opt_in_metabox. The rest of the parameters are the same.
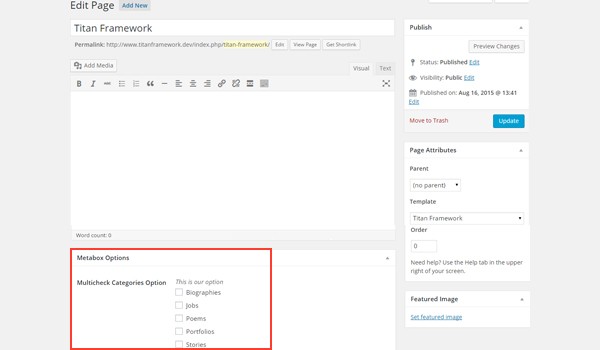
In the above screenshot, there is a page editing screen, and in the end there exists amulticheck-categories type option named Multicheck Categories Option.
Example Usage
Use the following code to get saved values.
<?php
// 1. Get the titan framework instance and save it to a variable
$titan = TitanFramework::getInstance( 'neat' ); // we will initialize $titan only once for every file where we use it.

// 2. Get the value via ID using getOption function
$aa_metabox_getcategoryid_array = $titan->getOption( 'aa_multicheck_categories_opt_in_metabox', get_the_ID() );

// Get selected categories titles by array ID
$aa_metabox_getcategory_title0_val = get_cat_name( $aa_metabox_getcategoryid_array[0] );

/**
 *
 * Print selected Category name
 *
 */
 ?>

 <div>
    Category Name for the zero'th array element is: <?php echo $aa_metabox_getcategory_title0_val; ?>
 </div>
This code prints a category name only for the zeroth array element. But you'll observe a change in line #6. There exists a new parameter inside the getOption() function. This is the get_the_ID() function, which is used to retrieve a specific page or post ID.
Displaying the Result at the Front-End
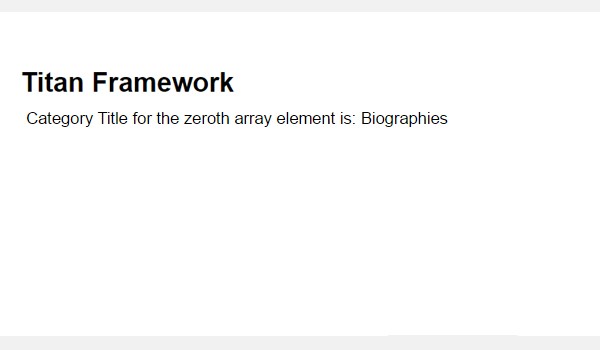
The front-end prints the title as follows:
Creating a Multicheck-Categories Type Option Inside a Theme Customizer Section
Example Declaration
Finally, let's create this option inside a theme customizer section.
<?php
    /**
     *
     * Create multicheck-categories type option in a Theme Customizer Section
     *
     */
    $aa_section1->createOption( array(

        'id'   => 'aa_multicheck_categories_opt_in_sec', // The ID which will be used to get the value of this option
        'type' => 'multicheck-categories', // Type of option we are creating
        'name' => 'Multicheck Categories Option', // Name of the option which will be displayed
        'desc' => 'This is our option' // Description of the option which will be displayed

    ) );
I created a multicheck-categories type option inside a theme customizer section $aa_section1. Its ID is aa_multicheck_categories_opt_in_sec.
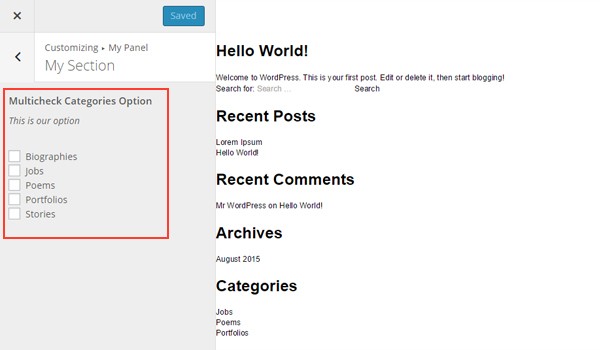
You can find a list of checkboxes displaying existing categories inside a customizer section named My Section.
Example Usage
Use this code.
<?php
// 1. Get the titan framework instance and save it to a variable
$titan = TitanFramework::getInstance( 'neat' ); // we will initialize $titan only once for every file where we use it.

// 2. Get the value via ID using getOption function
$aa_sec_getcategoryid_array = $titan->getOption( 'aa_multicheck_categories_opt_in_sec' );

// Get selected categories titles by array ID
$aa_sec_getcategory_title0_val = get_cat_name( $aa_sec_getcategoryid_array[0] );
$aa_sec_getcategory_title1_val = get_cat_name( $aa_sec_getcategoryid_array[1] );
$aa_sec_getcategory_title2_val = get_cat_name( $aa_sec_getcategoryid_array[2] );
$aa_sec_getcategory_title3_val = get_cat_name( $aa_sec_getcategoryid_array[3] );
$aa_sec_getcategory_title4_val = get_cat_name( $aa_sec_getcategoryid_array[4] );

/**
 *
 * Print selected categories titles
 *
 */
 ?>

 <div>
    Category Name for the zero'th array element is: <?php echo $aa_sec_getcategory_title0_val; ?>
 </div>


 <div>
    Category Title for the 1'th array element is: <?php echo $aa_sec_getcategory_title1_val; ?>
 </div>


 <div>
    Category Title for the 2'th array element is: <?php echo $aa_sec_getcategory_title2_val; ?>
 </div>


 <div>
     Category Title for the 3'th array element is: <?php echo $aa_sec_getcategory_title3_val; ?>
 </div>


 <div>
    Category Title for the 4'th array element is: <?php echo $aa_sec_getcategory_title4_val; ?>
 </div>
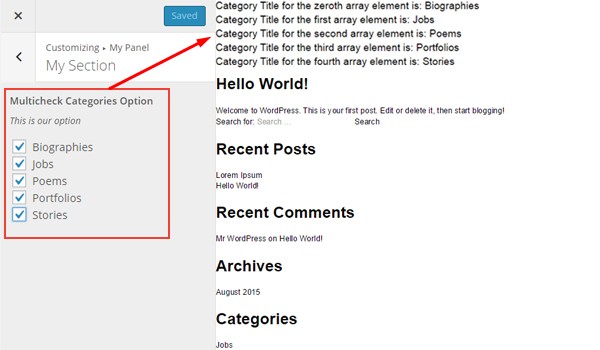
This time I am printing titles for all the five existing categories by following the same procedure which I've mentioned above.
Displaying the Result at the Front-End
Here is a screenshot of the changes which were observed in live preview mode.
This particular type can be used in all sorts of creative user cases. For example, let's suppose you want to build a theme which contains different sections on the home page. Now you want end users to be able to select posts from whichever categories in a particular section.
Some other practical examples are:
- allowing end users to choose posts from different categories to be displayed in a slider or a sidebar
- the ability to remove posts from all the selected categories or vice versa
Conclusion
So, this is how you can use the multicheck type option with Titan Framework. I've only mentioned the simplest ways to integrate this option in your project. However, there are other creative and much better ways to do this.
For example, you can code a cool widget with controls to enable/disable the display of a recent post in the sidebar. This is just one example. Let me know if you come up with a creative user case with this one.
If you have any queries, post in the comments or reach out on Twitter.

Comments